Here’s our step-by-step guide on creating cryptocurrency tokens in the Binance Smart Chain Network.
WARNING! Someone started spamming in Telegram on behalf of CPA.RIP suggesting investing in RipCoin and promising a good income. CPA.RIP editorial staff does not send anything like that, and the token was created as part of this tutorial.
The material is presented as in the case of a RipCoin token launching.
How to Create a MetaMask Wallet?
To manipulate tokens, you first have to create a crypto wallet. In this tutorial, we will use the MetaMask Wallet, which supports all kinds of Ethereum Tokens (including non-tangible NFT tokens). You can also acquire tokens from other users of the network or buy/exchange them using the built-in Coinbase and ShapeShift integration.
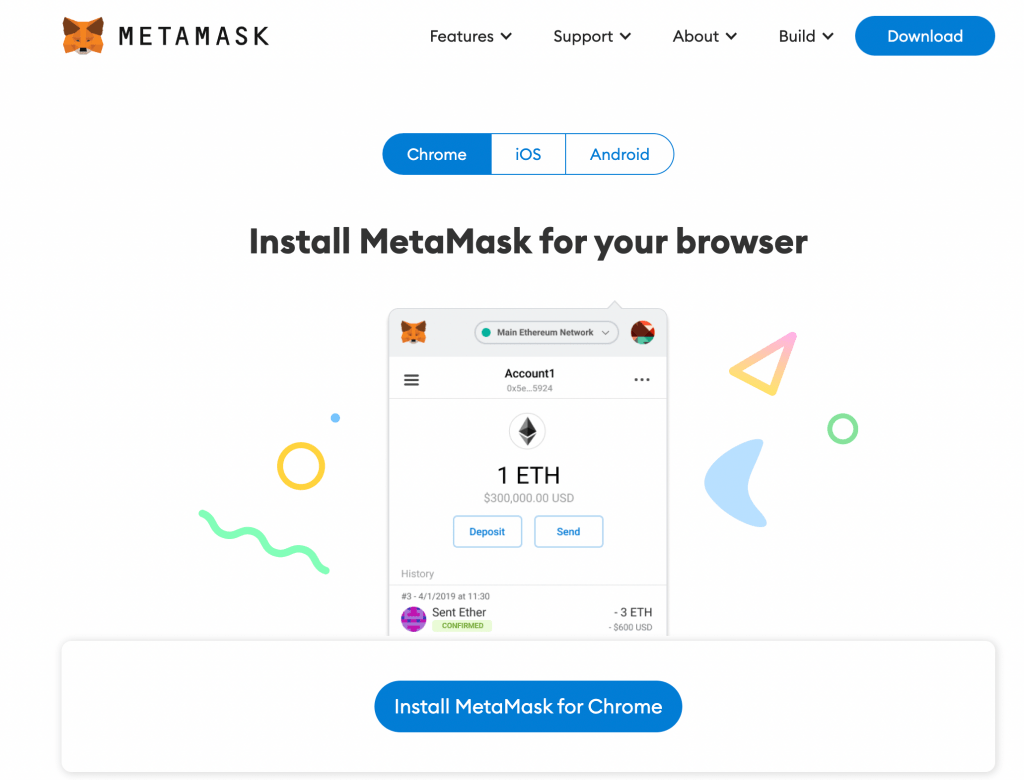
- Go to https://metamask.io
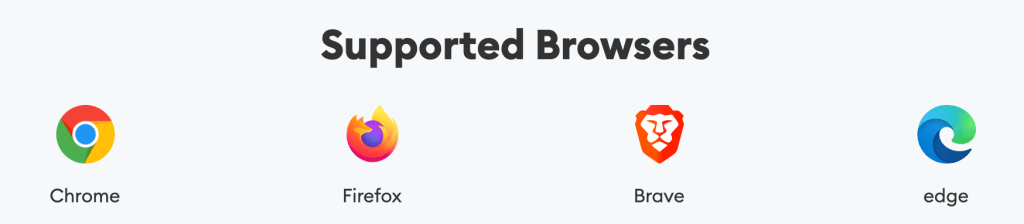
MetaMask supports the following browsers:
- Click Create Wallet and set a password.


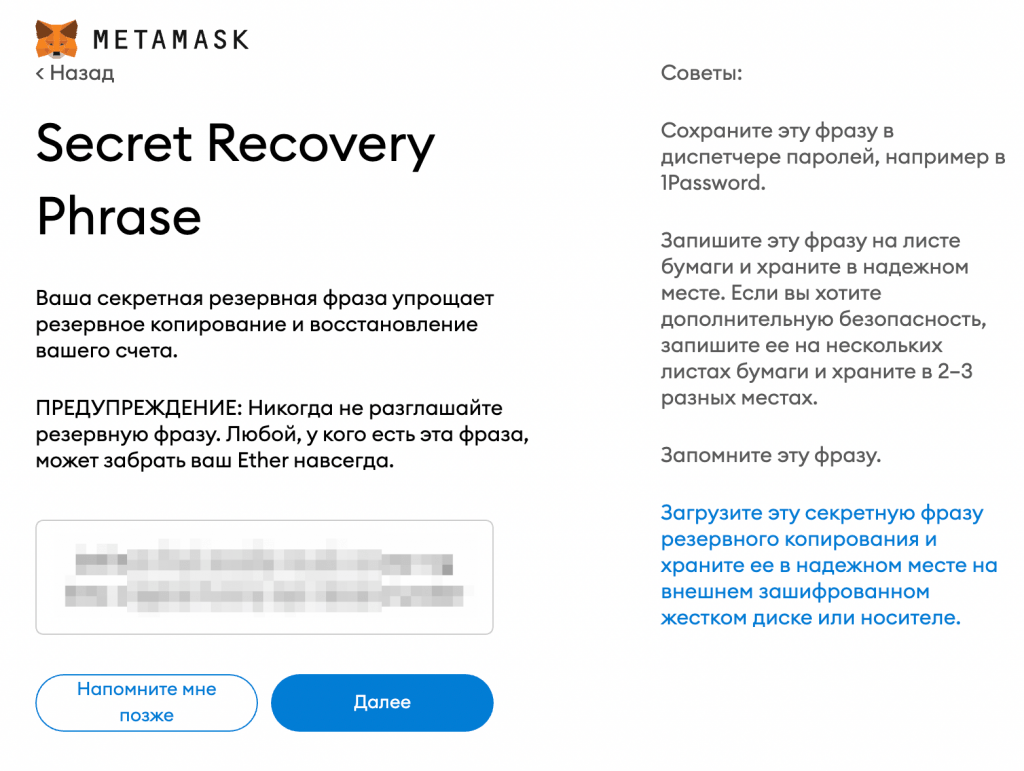
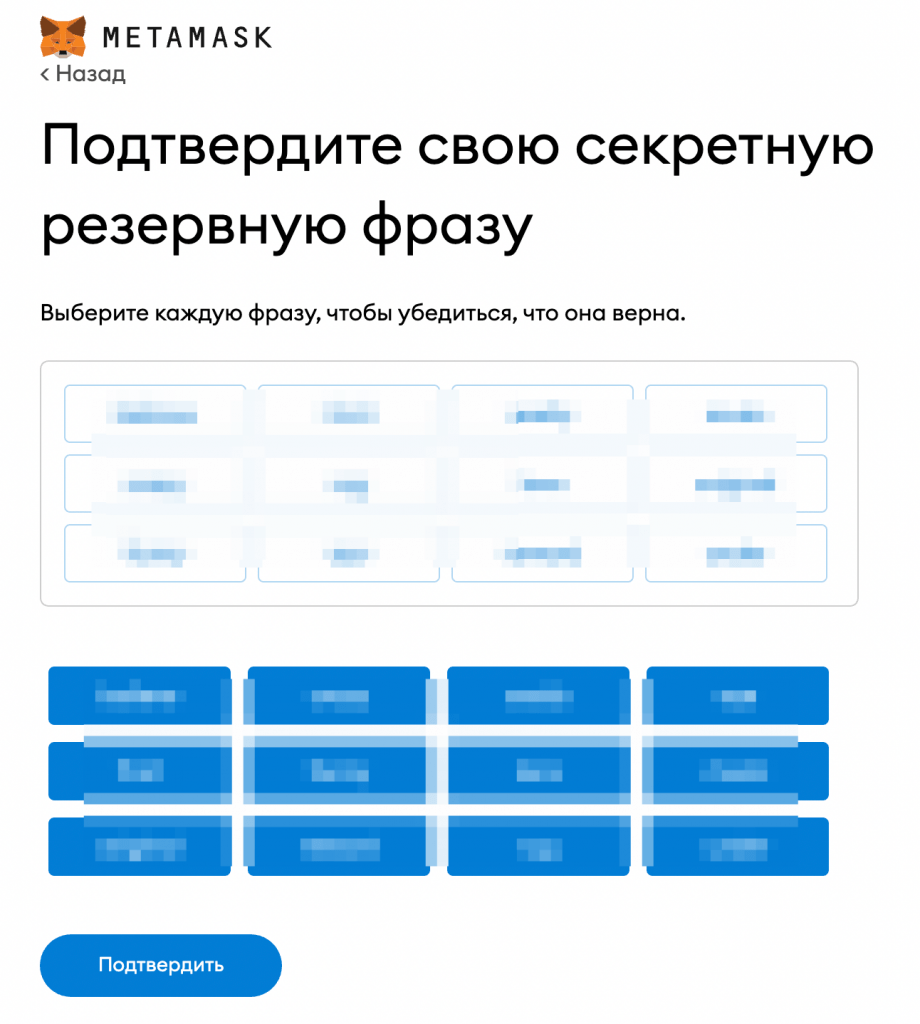
Seed Phrase Backup
The next step is to create the seed phrases and store them in a safe place as hard copies. Without seed phrases, you won’t be able to restore access to the wallet and your funds!
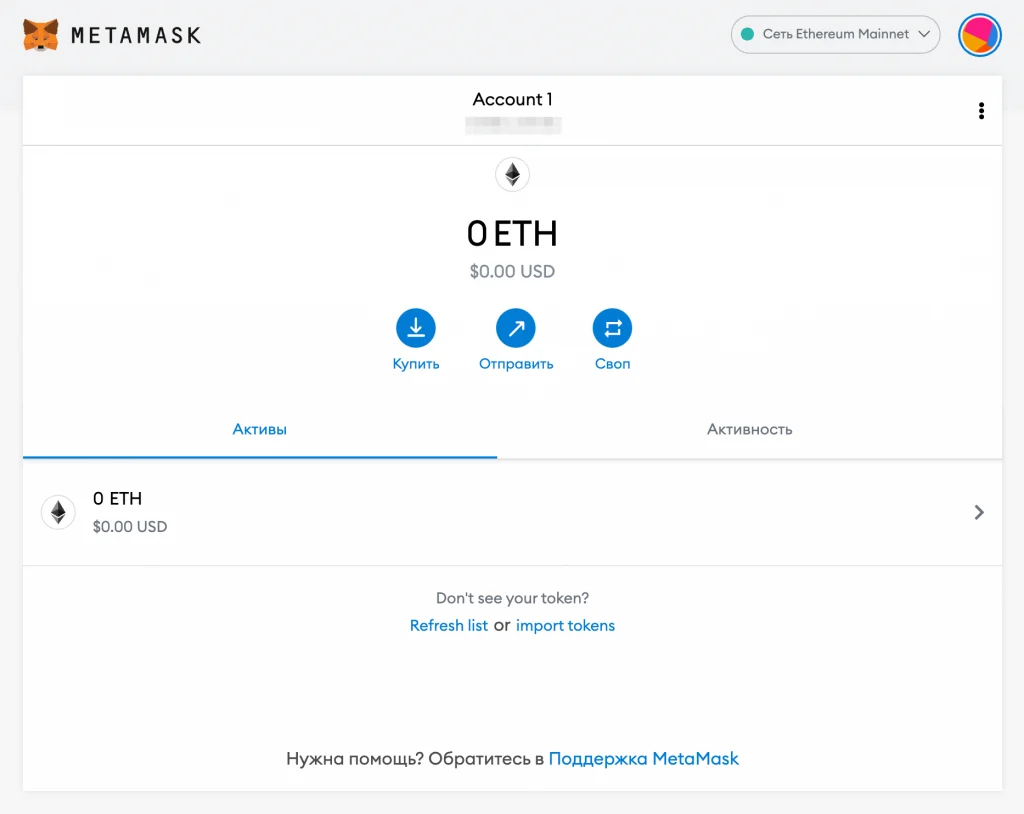
That’s it, the wallet is ready.
How to Add Binance Smart Chain to MetaMask Wallet?
By default, MetaMask Wallet is connected to the Ethereum Network. To work with the BEP20 token, you must add a Binance Smart Chain Network to the wallet.
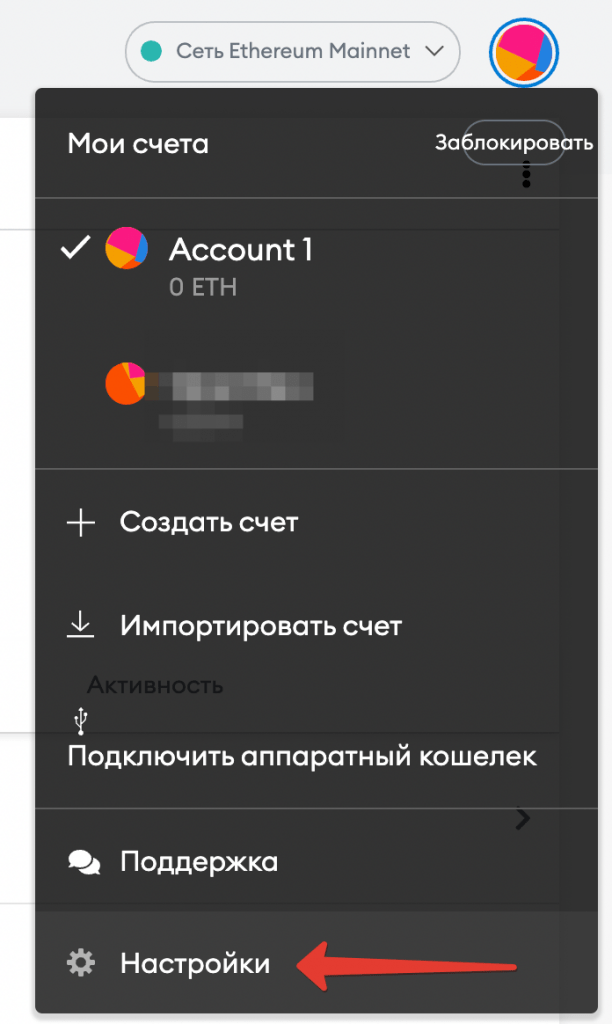
- Go to the settings
- Click Add a network -> Network
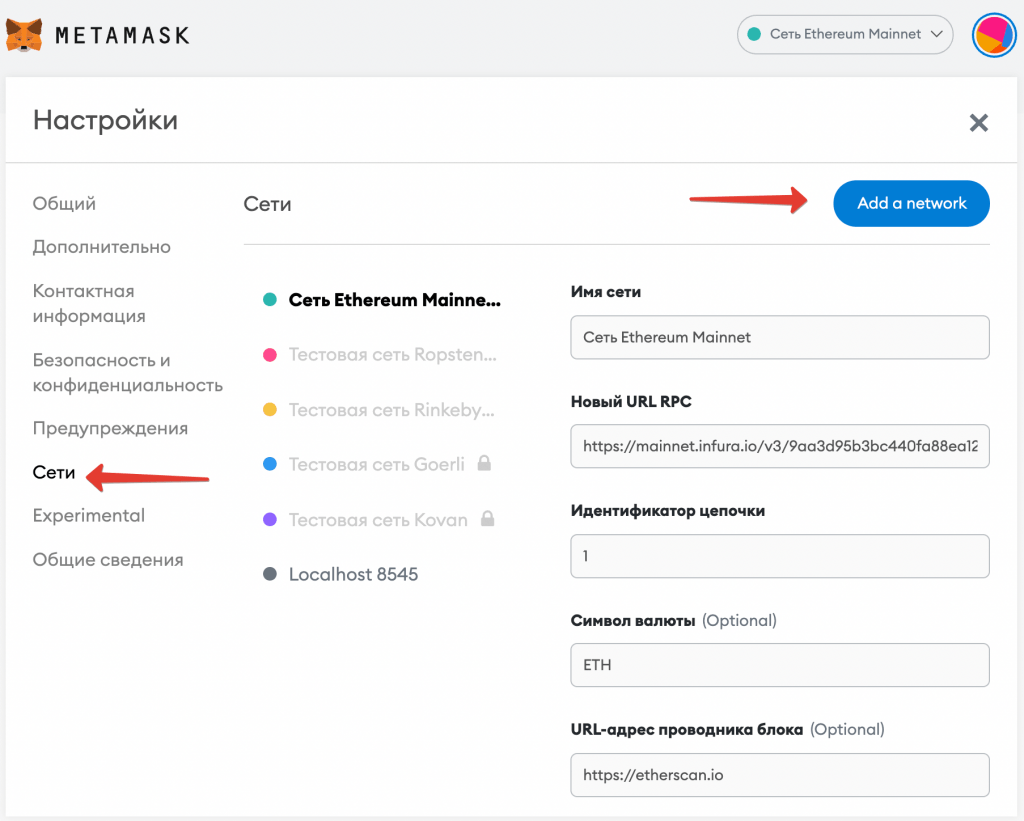
- Enter the following data:
- Network name: Smart Chain
- New RPC URL: https://bsc-dataseed.binance.org/
- Network ID: 56
- Symbol: BNB
- Block explorer URL: https://bscscan.com
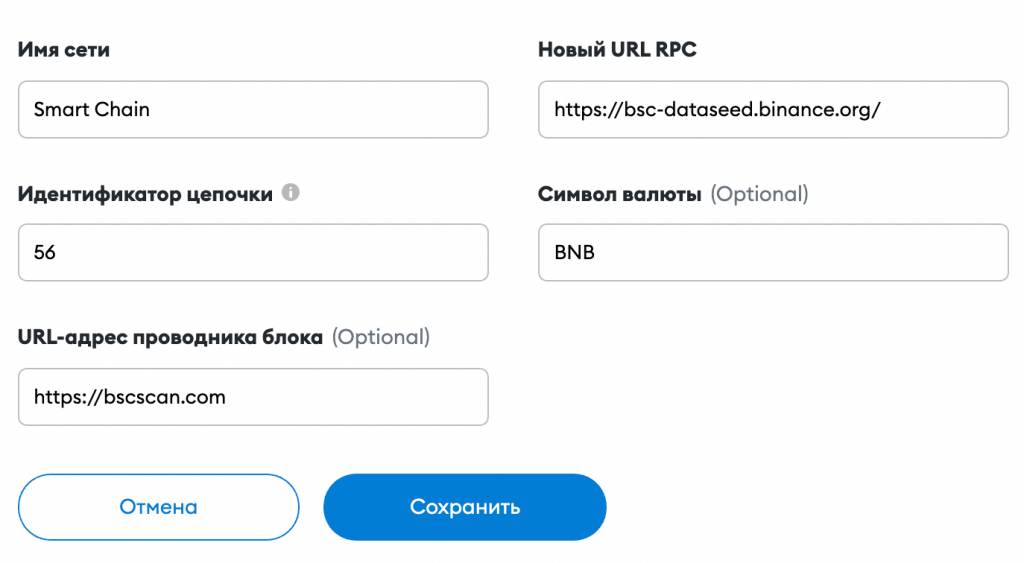
- Save and you’ll see that the network has been switched to Binance Smart Chain.

This completes the setup of the MetaMask Wallet.
How to Replenish a MetaMask Wallet?
You must have a BNB on account balance to pay the fee to issue and to buy/sell tokens.
How to Replenish MetaMask Wallet via the Binance Exchange?
Let’s consider buying cryptocurrency and wallet replenishment via the Binance Exchange.
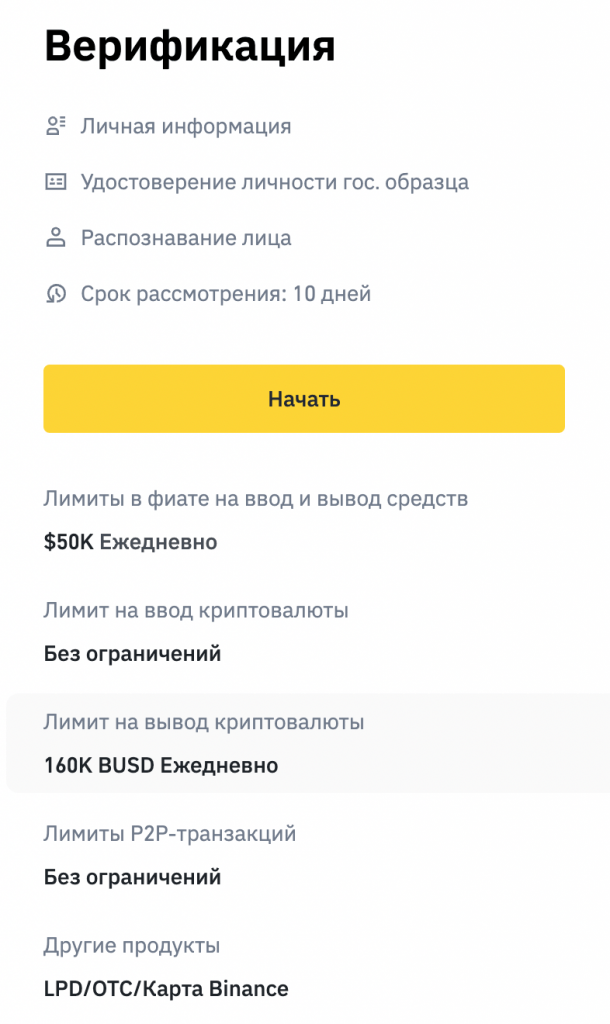
So that you can transfer fiduciary (real) money, your Binance account must be verified.
To buy the cryptocurrency you want, you can first replenish your fiduciary balance and then exchange it for crypto. Or you can buy the cryptocurrency by paying via your bank card.
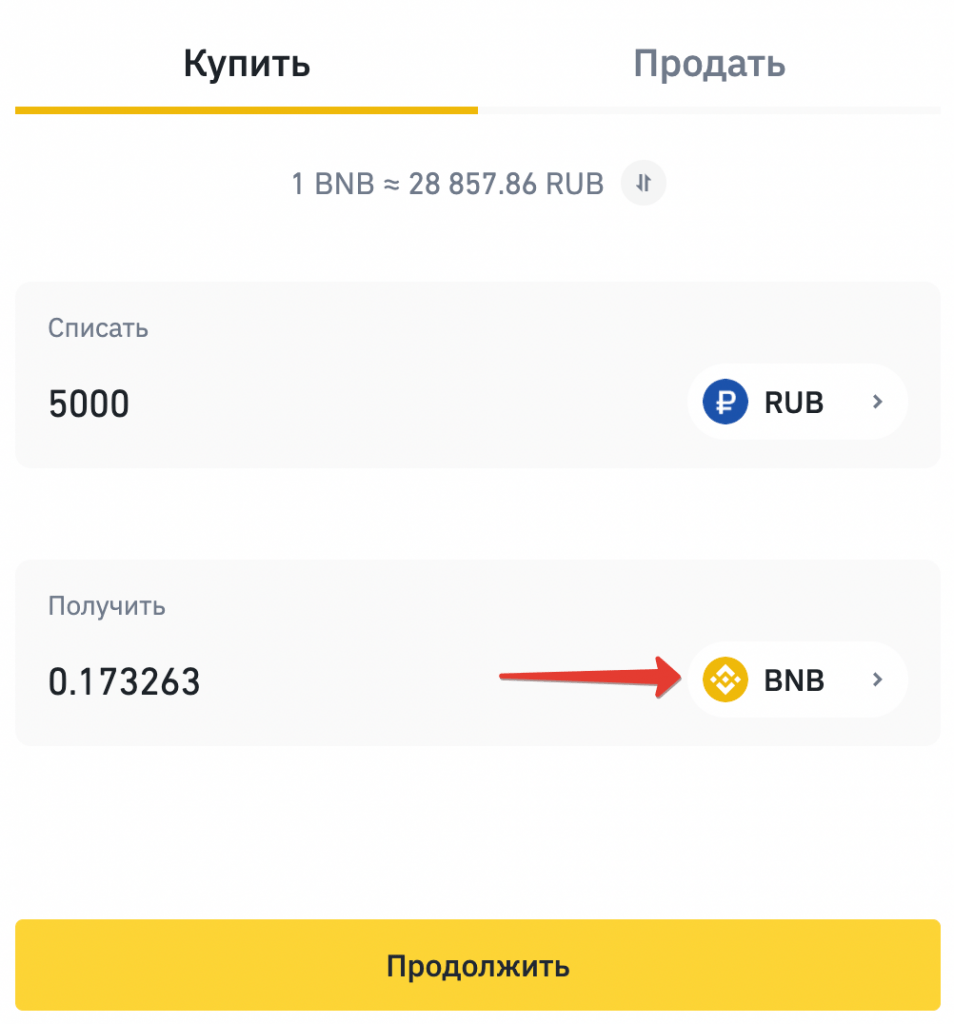
Click Buy Cryptocurrency -> Credit/Debit Card
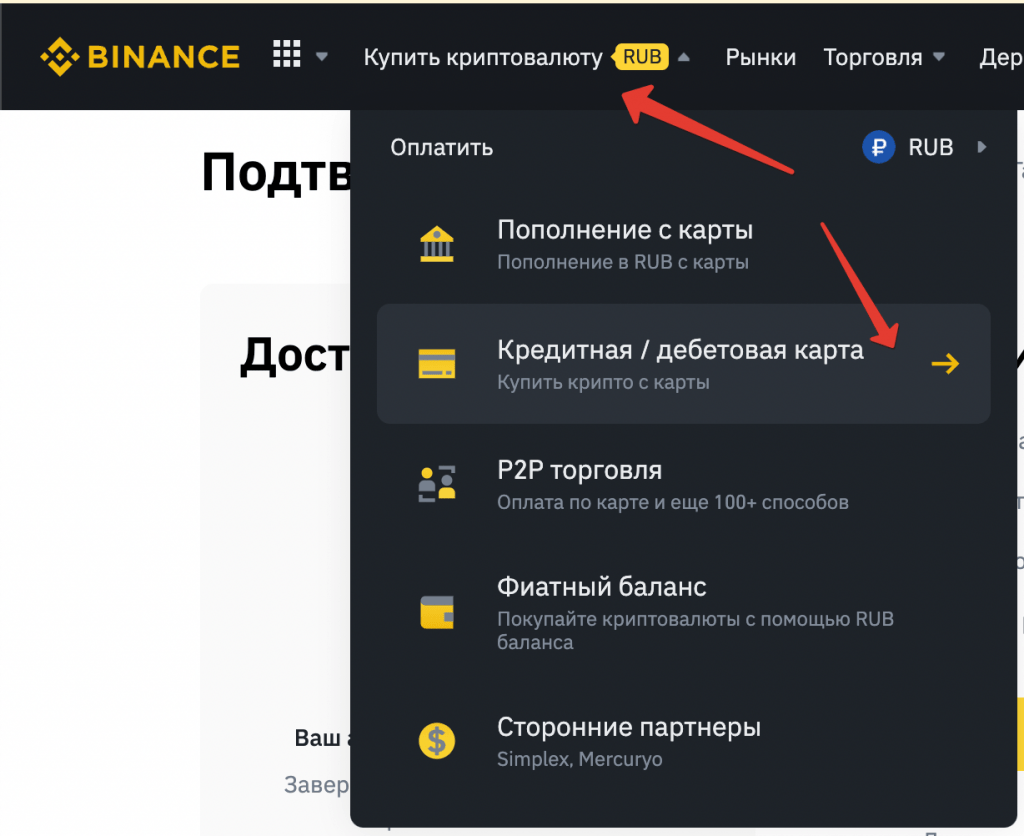
- Enter the required amount and select the cryptocurrency. In this case, we are buying BNB.
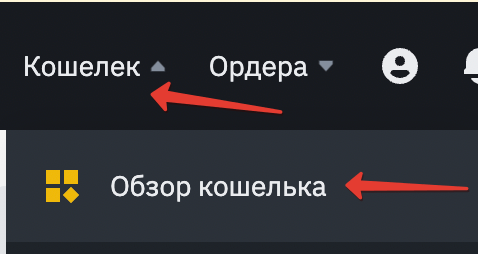
How to Withdraw Cryptocurrency from Binance to Your MetaMask Wallet?
- Click Wallet -> Wallet Overview
- Click Main Account

- Here, you’ll see your BNB balance
- Click Withdraw in the “Actions” column

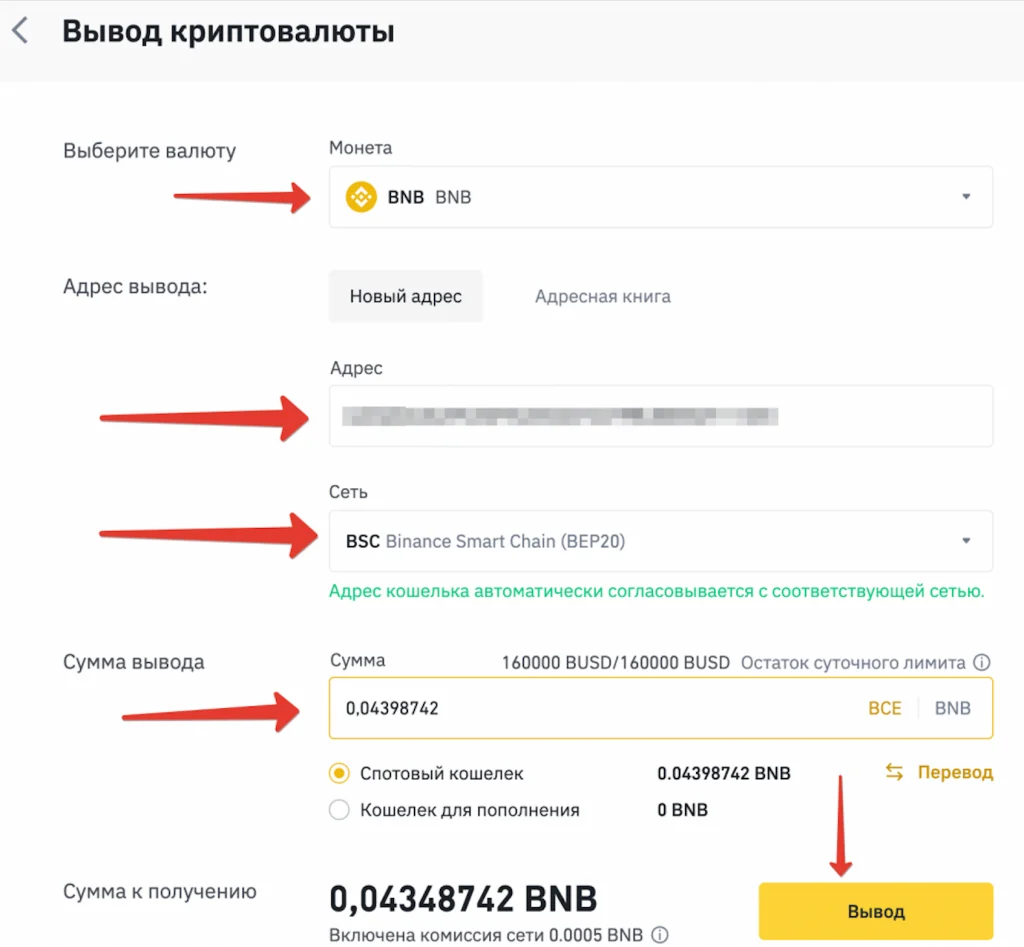
- Select BNB coin
- Specify the MetaMask Wallet ID

- The network must switch to BSC Binance Smart Chain (BEP20)
- Specify the withdrawal amount
- Click Withdraw
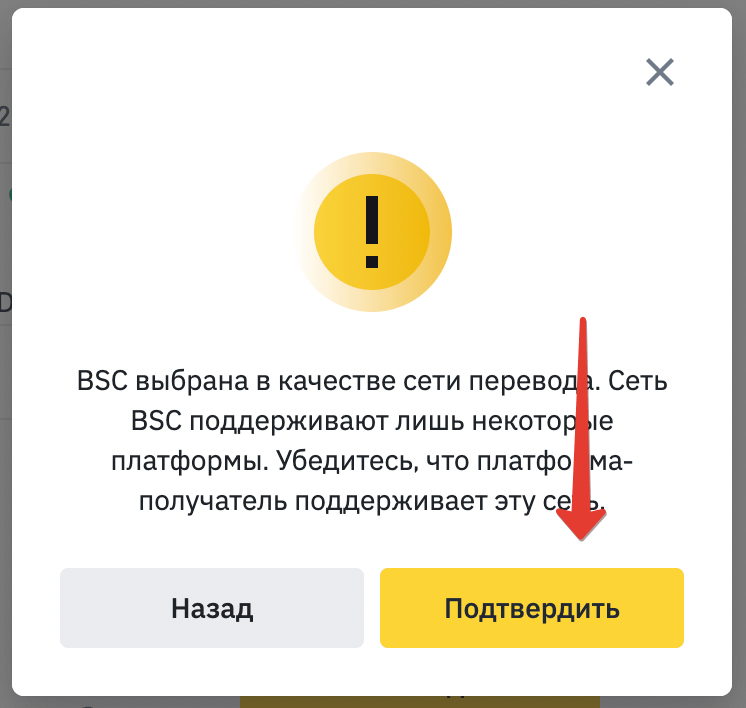
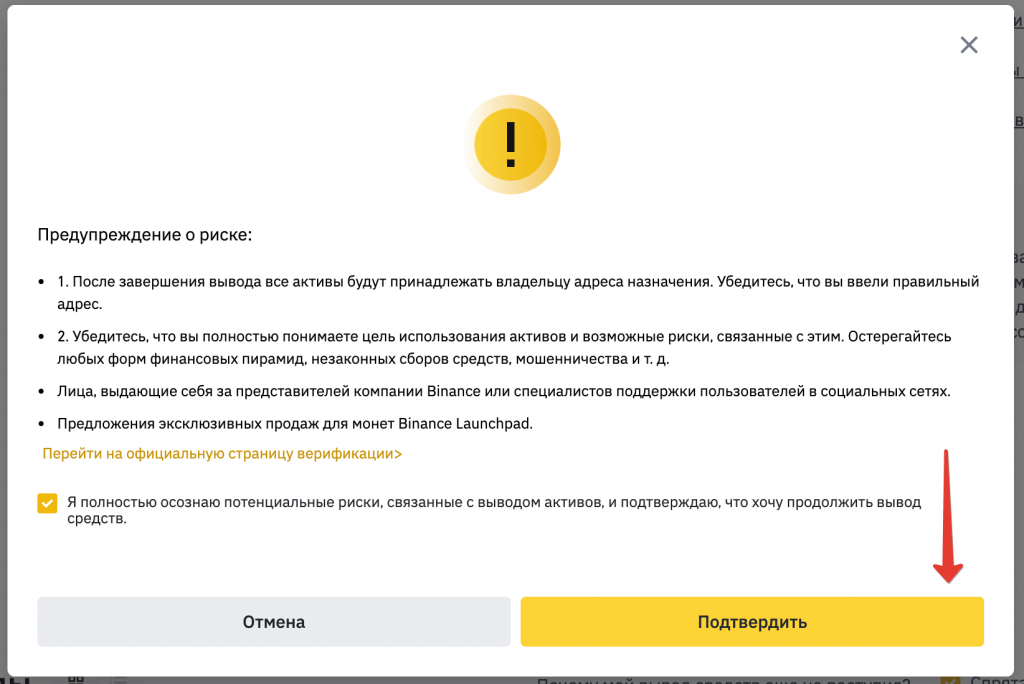
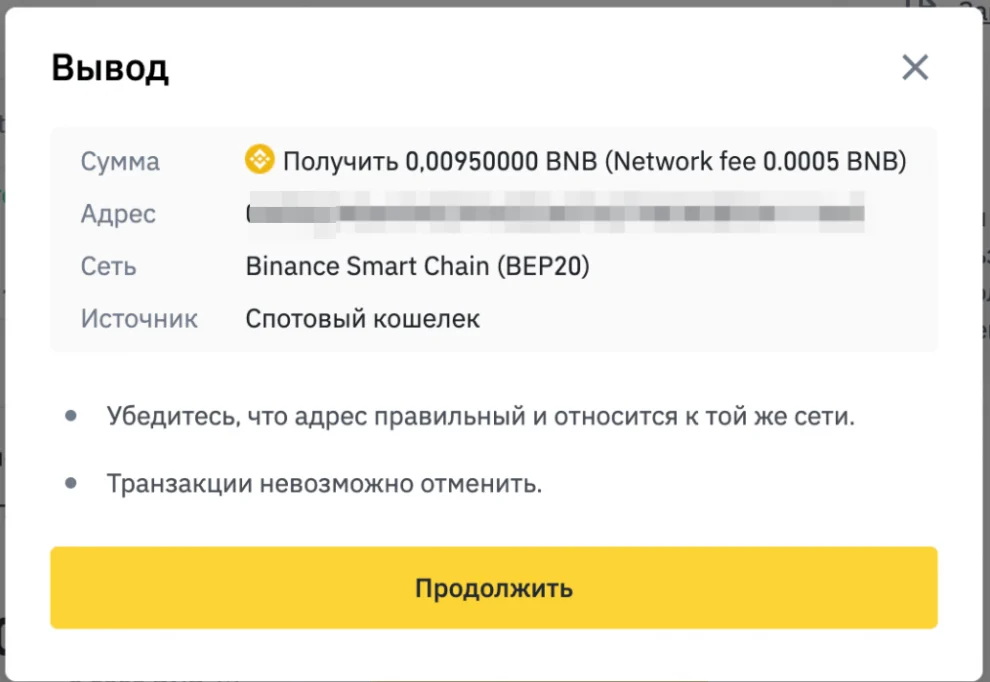
- Binance will ask you to confirm it several times. Confirm everything:
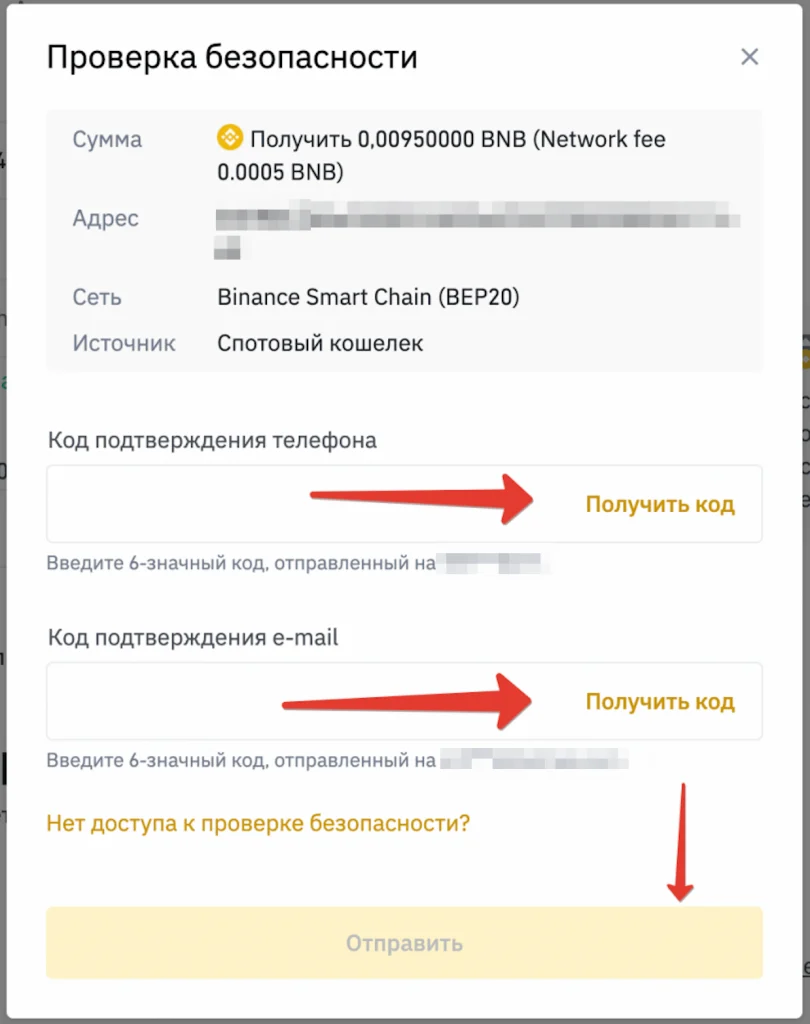
- Pass the security check by entering codes you received via SMS and email
- Click Withdraw
Binance Smart Chain confirms transfers rather quickly:
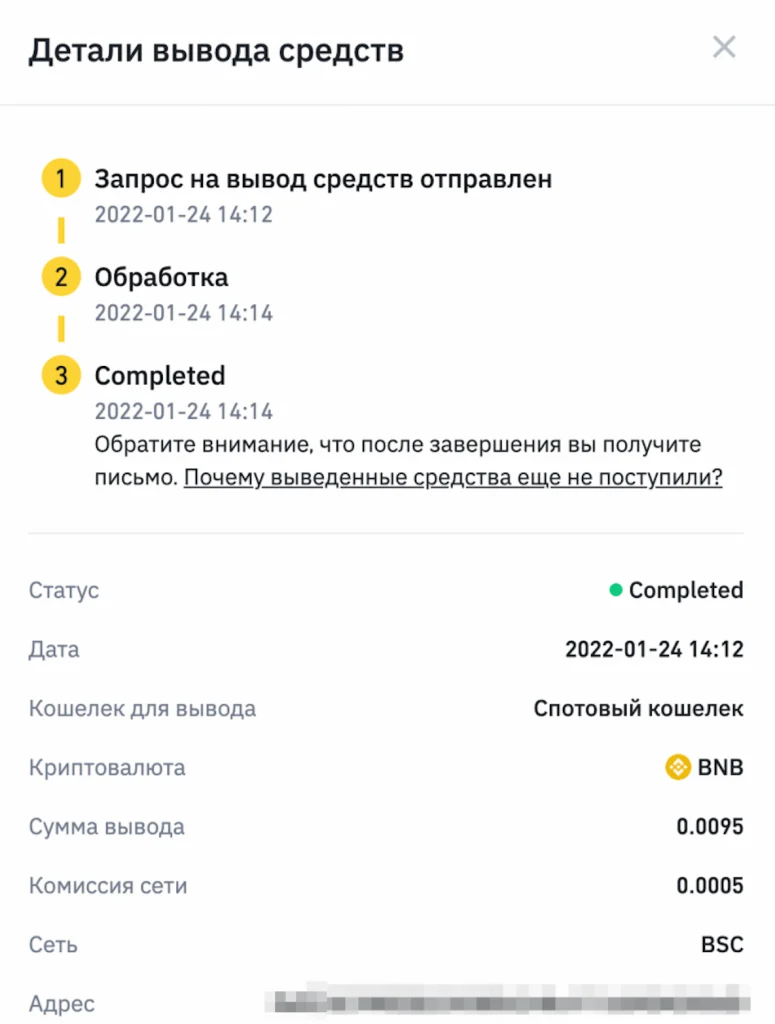
Coins will be transferred to MetaMask immediately. Now you can pay with it.

How to Replenish MetaMask Wallet via Various Exchanges?
You can also replenish MetaMask via exchangers. Here’s an exchange catalog: bestchange.ru
This option is faster and easier as long as you’ll find a reliable cryptocurrency exchanger which offers terms that work best for you.
- In this case, you can specify the MetaMask Wallet:
If the exchanger requires Tag, it can be omitted.
How Do I Issue a Token?
Token operations are based on a smart contract that specifies the terms of the deal, sanctions and contains e-signatures.
In the Remix Online Editor, you must create a Solidity Smart Contract.
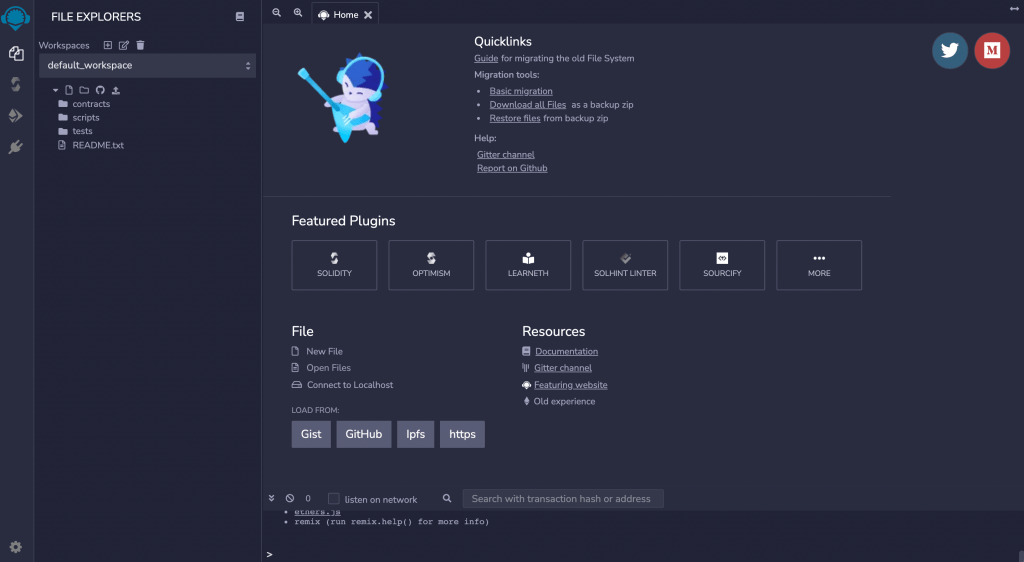
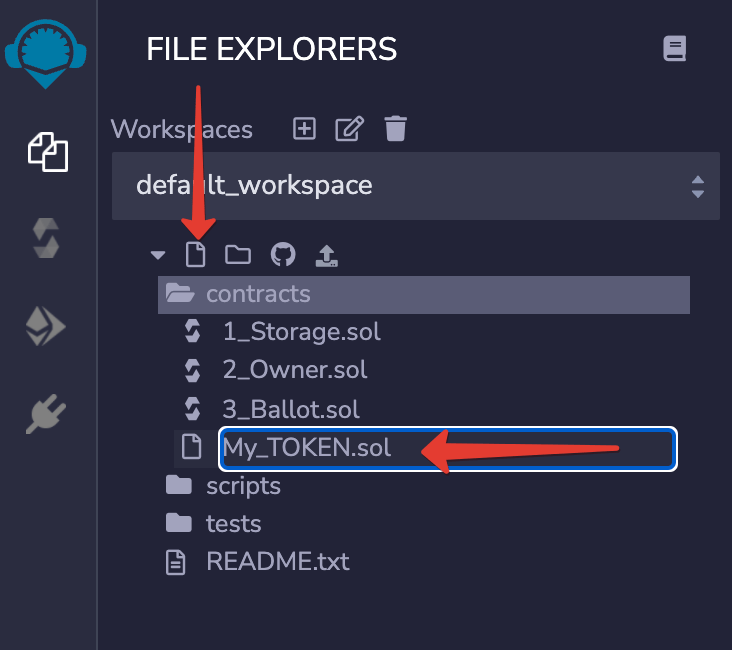
- Create a .sol file in the editor
If you don’t have Solidity programming skills, opt for ready-made contract code. Beware of untested templates from the web. They may contain a built-in backdoor that will be bad for you and your project.
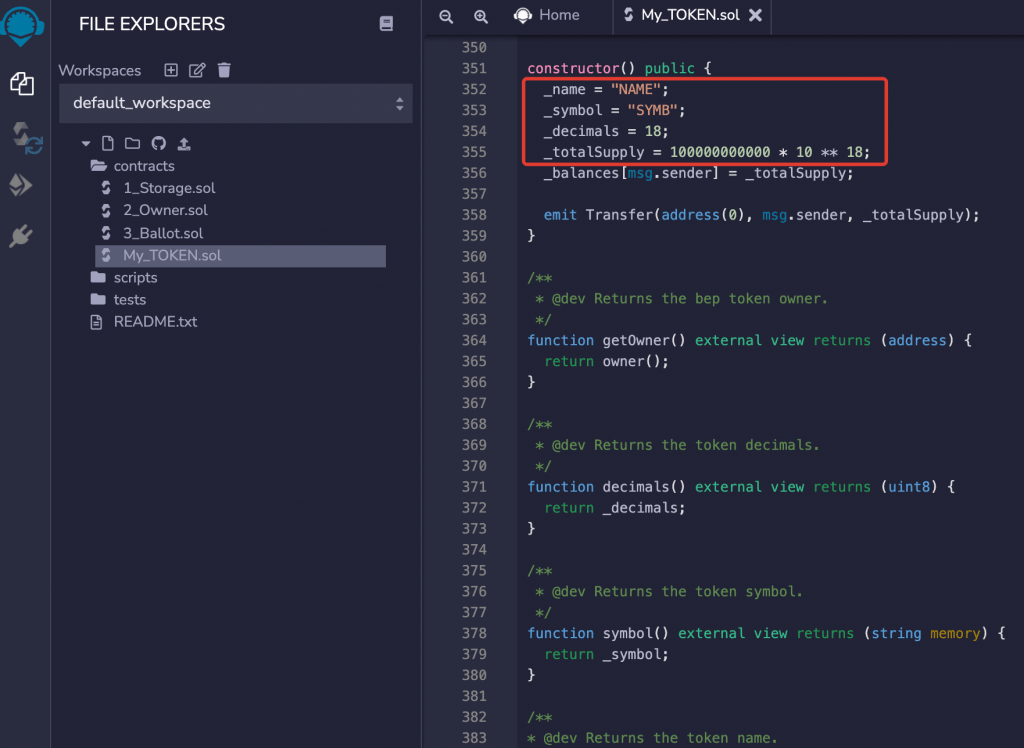
- We used the ready-made smart contract template and pasted it into the editor.
- In line 352, change the NAME to the desired token name
- In line 353, change the SYMB to the desired token symbol
- In line 355, specify the number of coins to be issued (up to the “*” symbol). In our case, the number is “100,000,000”.

- Save the changes by pressing Ctrl+S (command+S on Mac).
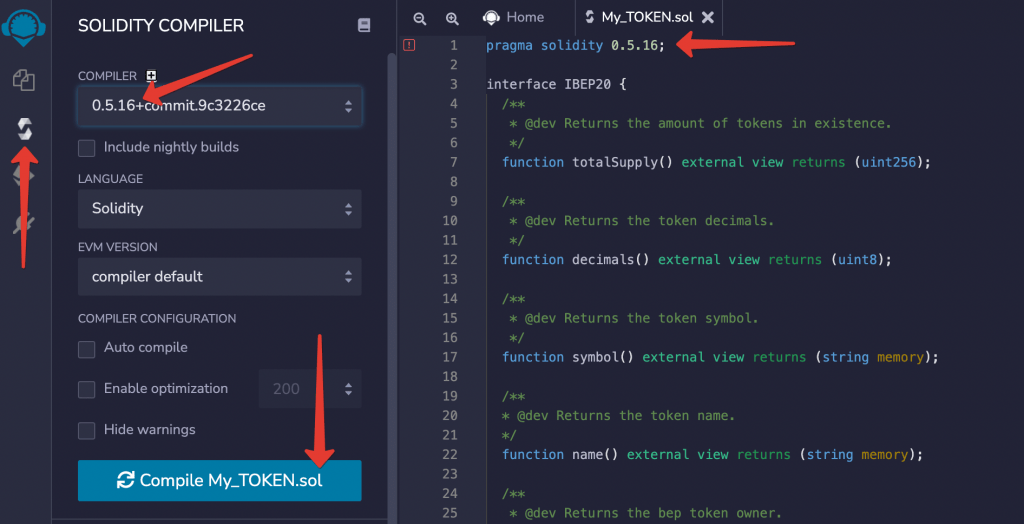
- Go to SOLIDITY COMPILER and be sure to enter the same compiler version as the one specified at the top of the template. In this case, it is 0.5.16
- Press Compile
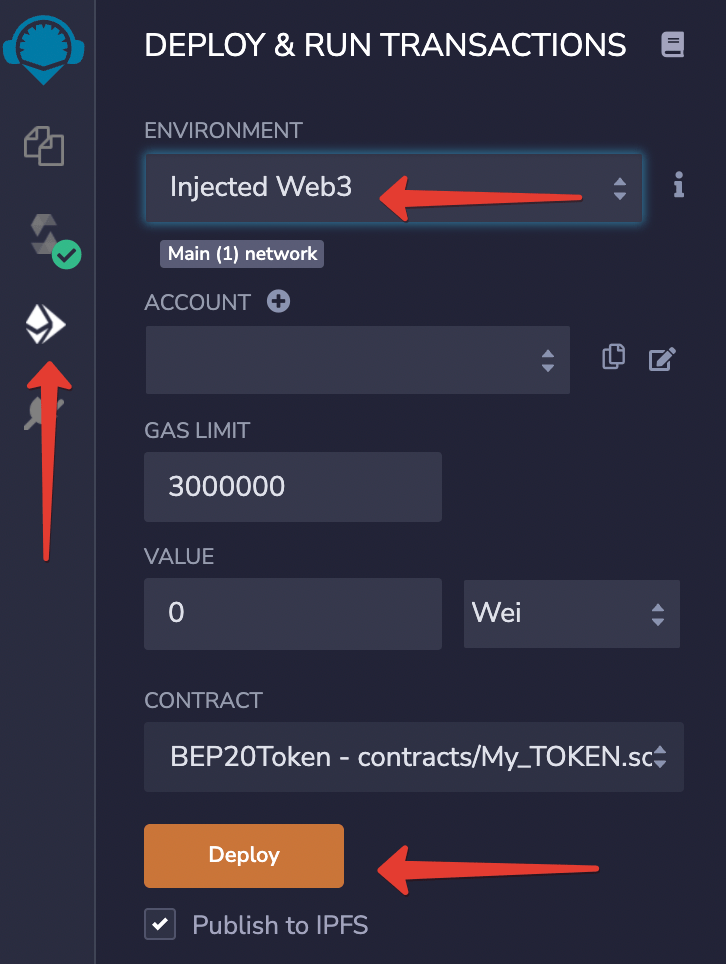
- Go to DEPLOY & RUN TRANSACTIONS
- Select Injected Web3 from the ENVIRONMENT drop-down list
- Bind your MetaMask Wallet
- Click Deploy
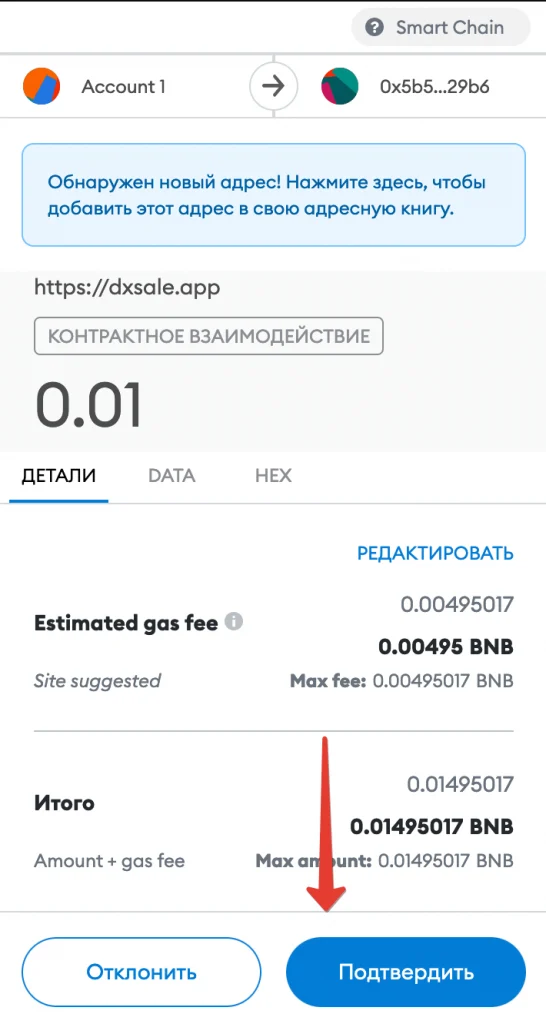
By this point, your wallet should have BNB to pay for the Gas. The Gas is the Binance Smart Chain Network’s fee.
- Confirm payment:
![]()
![]()
Your token has now hit the net!
How to Add a Token to a Wallet?
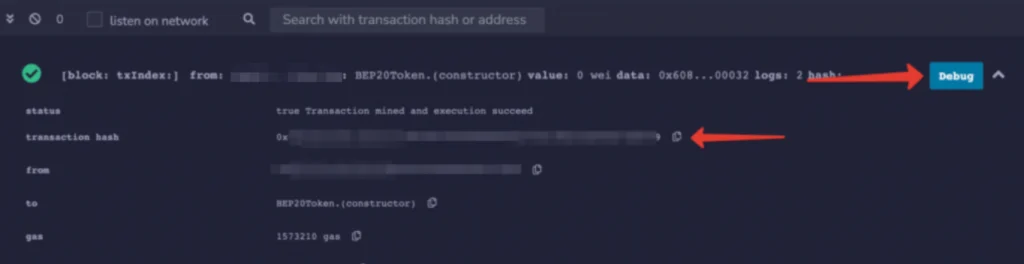
- In the compiler console, find and copy the value of the transaction hash:
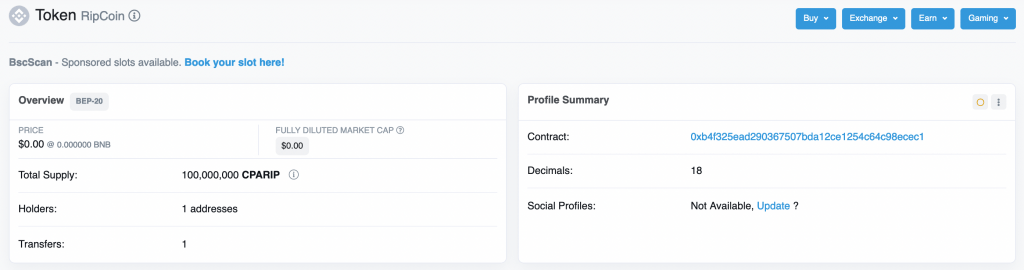
- To find your token on the network, go to BscScan – a Binance Smart Chain block browser used to search for BNB transactions, smart contracts, BEP-20 tokens, and more
- Paste the hash into the search box
- Click on the token name in the SERP:

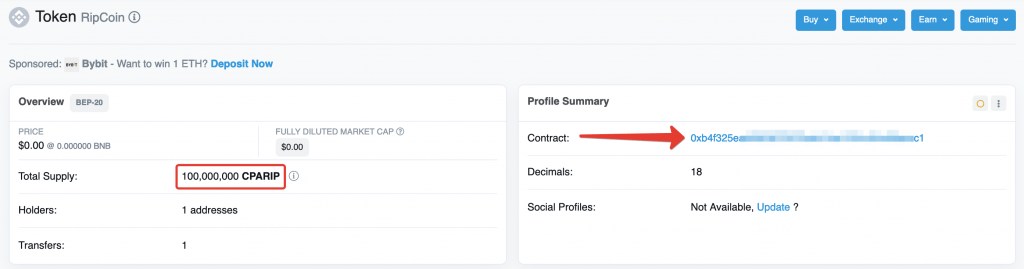
- Here, copy the contract ID. Our RipCoin token has an 0xb4f325ead290367507bda12ce1254c64c98ecec1 ID
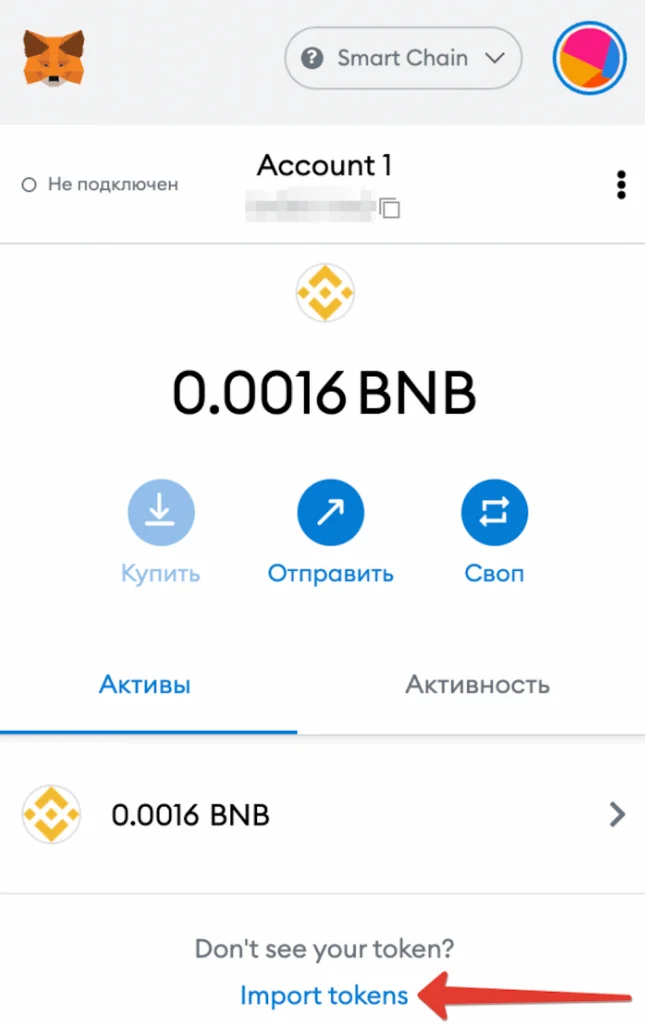
Add your new token to the MetaMask Wallet:
- Click Import tokens
- Enter the contract ID
- Click Add Custom Token
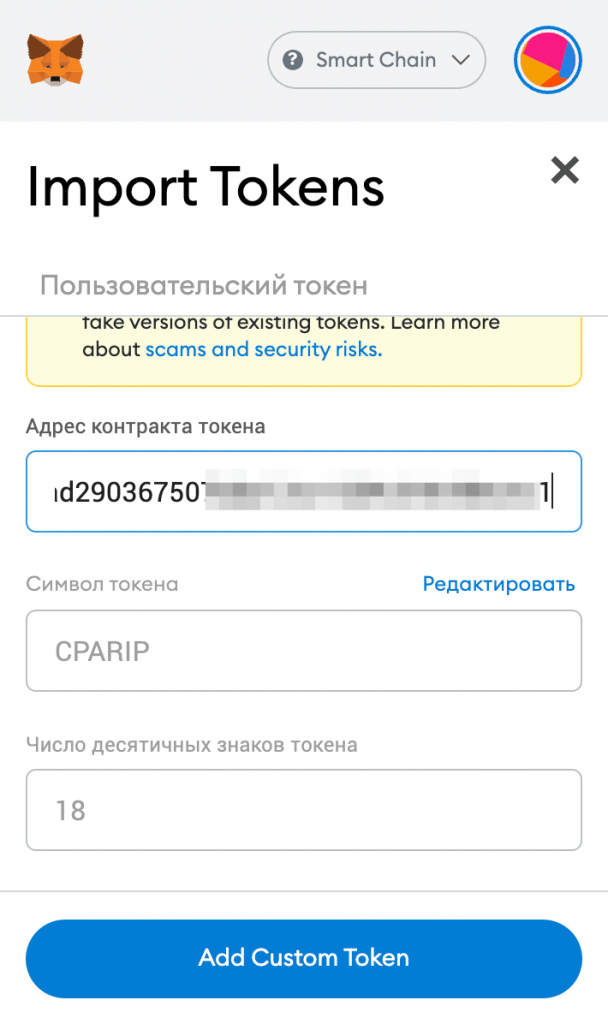
- Click Import tokens
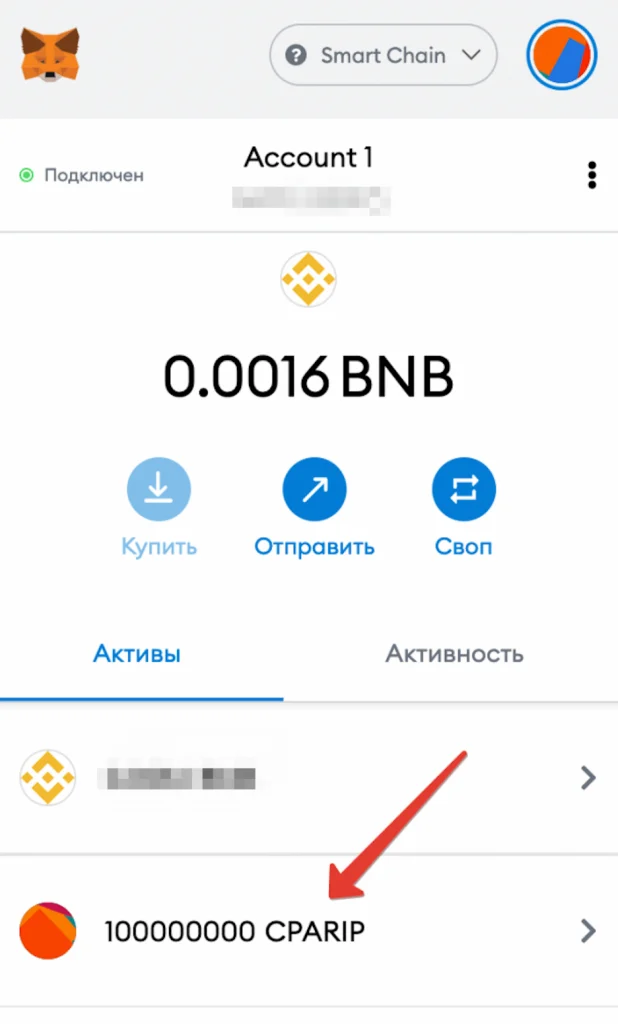
The token is now added to the MetaMask Wallet with its balance displayed on the dashboard:
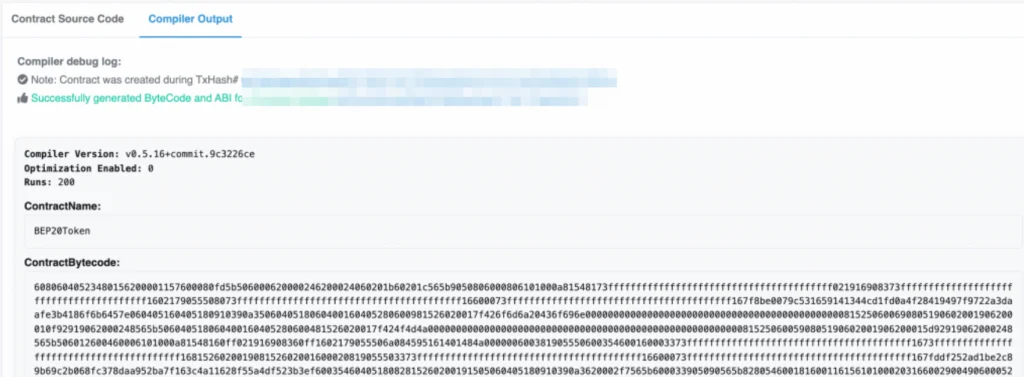
How to Publish the Contract?
You must publish the contract code so that investors have the opportunity to see it.
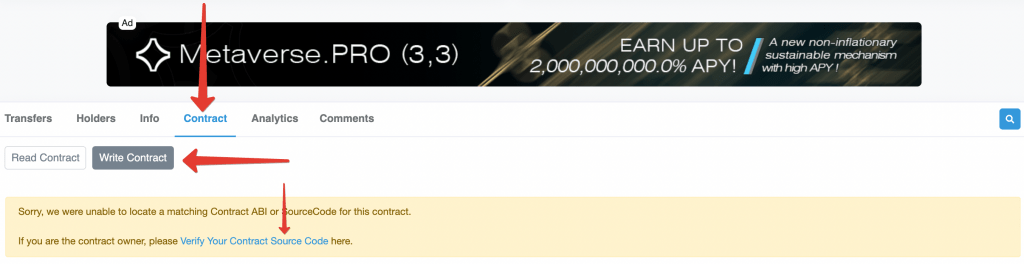
- On the token page at bscscan.com, go to the Contract tab, click Write Contract and Verify Your Contract Source Code.
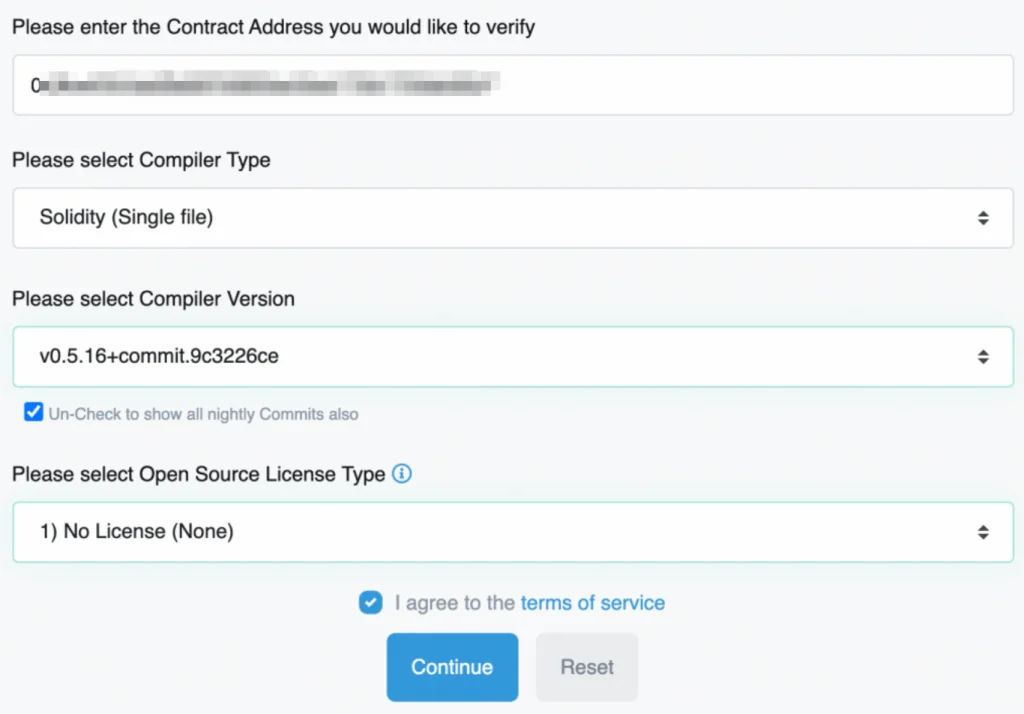
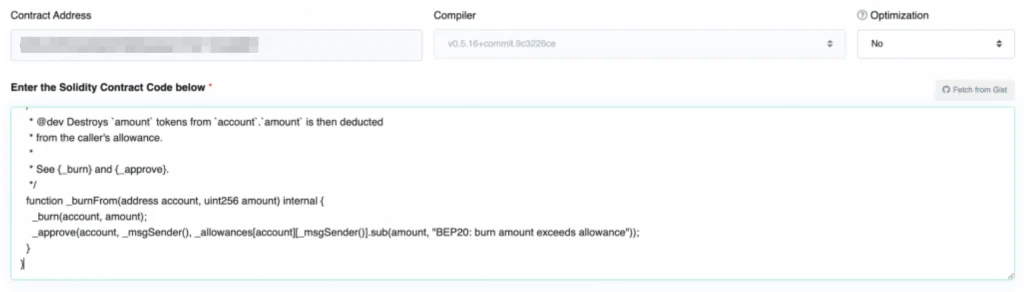
- Enter the contract ID, adjust the following settings and click Continue:
- Click Verify and Publish
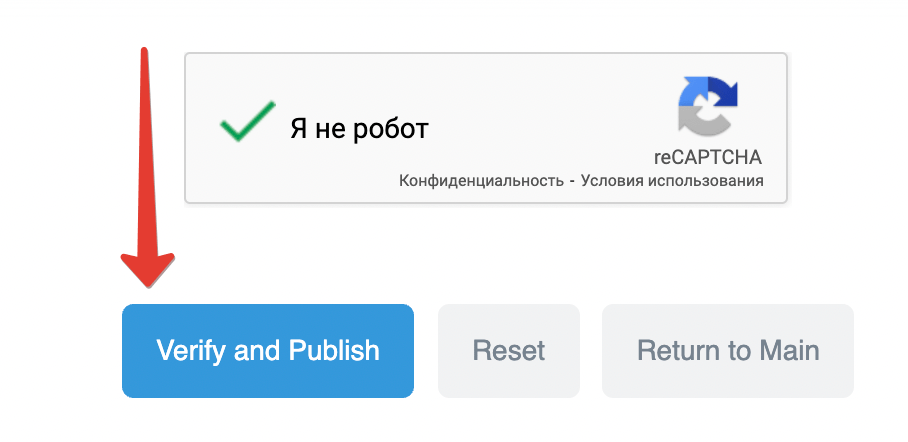
The contract is now successfully published. If it didn’t happen on the first try, just repeat until it works.
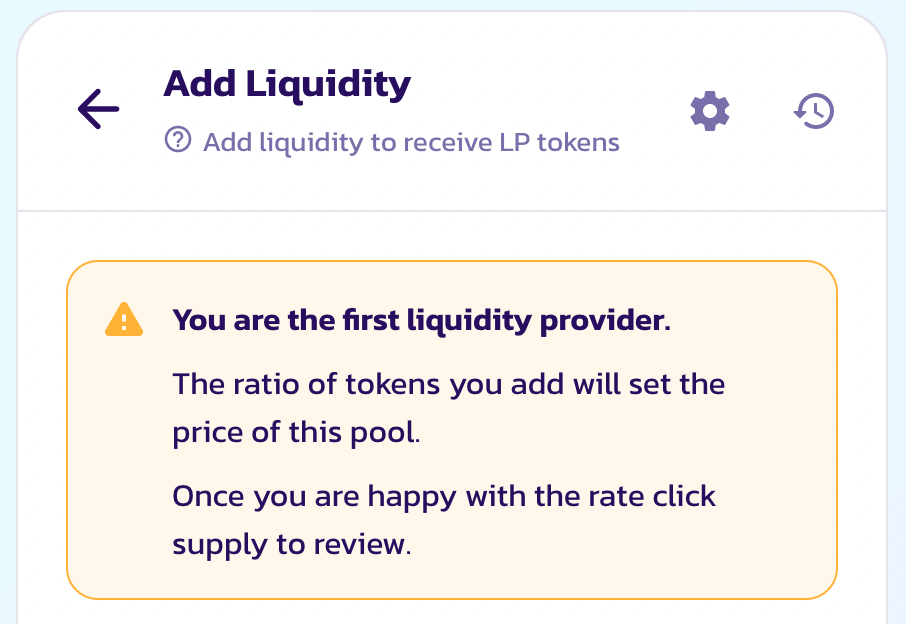
How to Create PancakeSwap Liquidity?
Liquidity is the pool of funds created by the developer to allow token trading.
A liquidity pool (LP token) is created by combining your token with another token that has a certain value, BNB in particular.
Once the liquidity pool has been created, the token will be listed on PancakeSwap Exchange and will be available for trading.
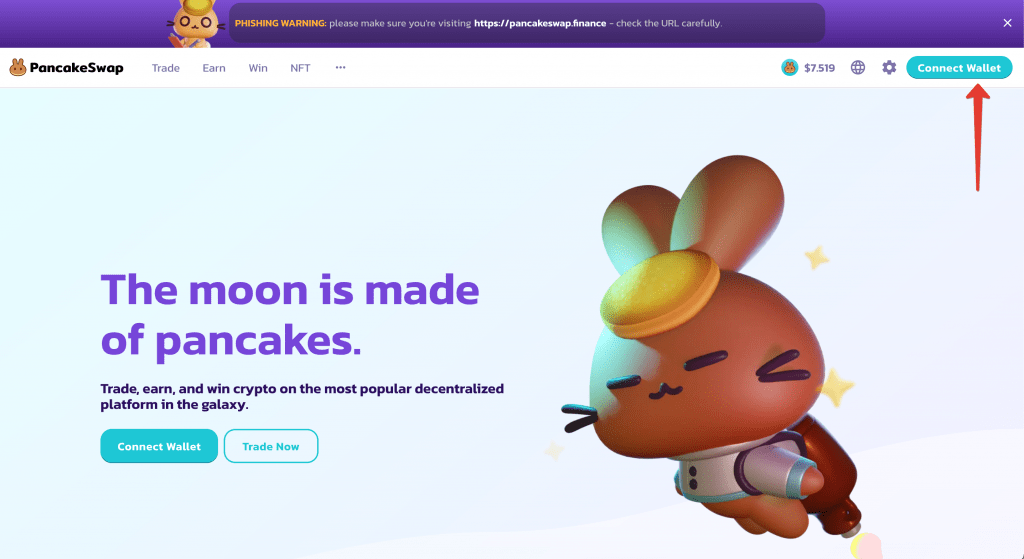
- Go to the PancakeSwap Exchange
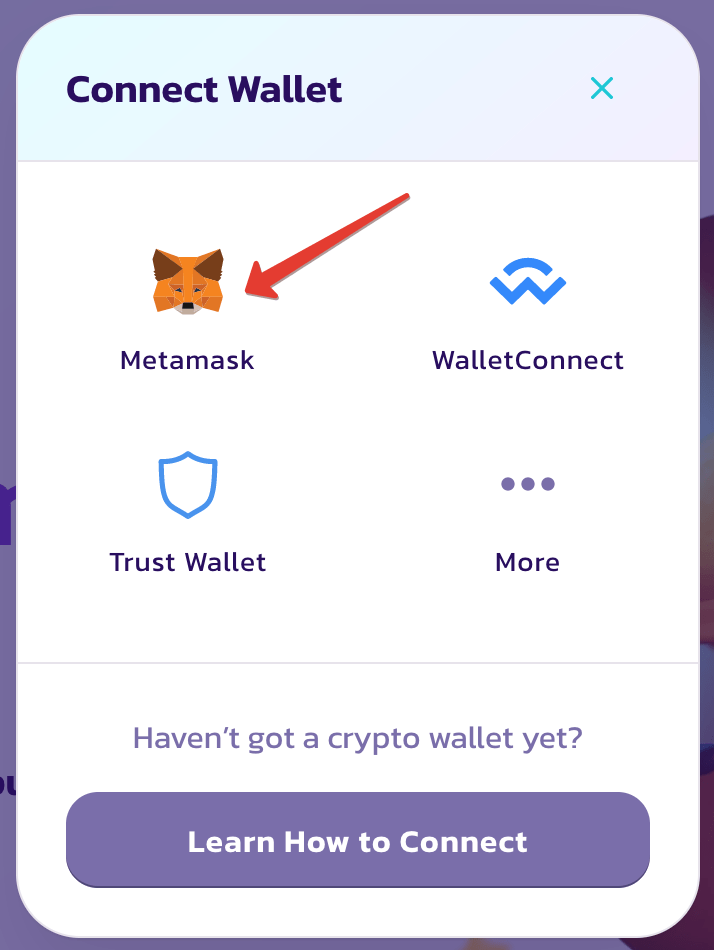
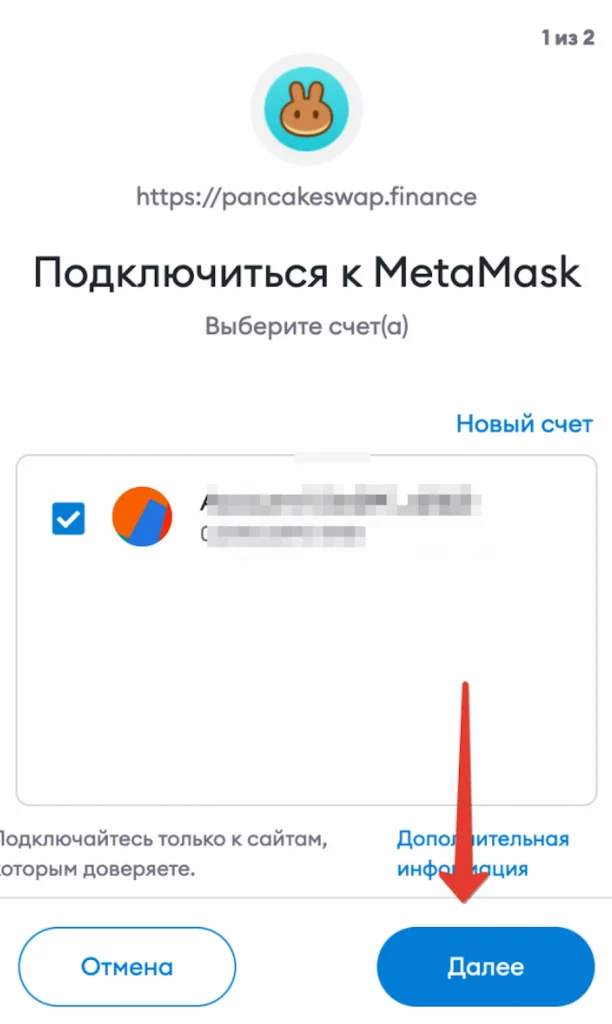
- Connect your MetaMask Wallet

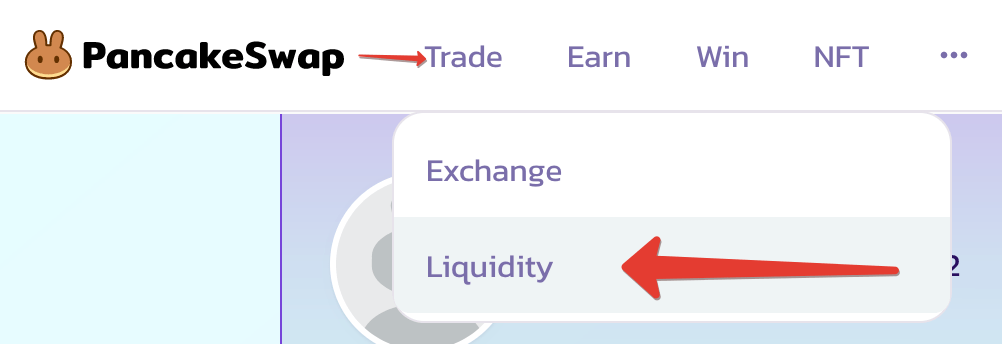
- Go to Trade tab -> Liquidity
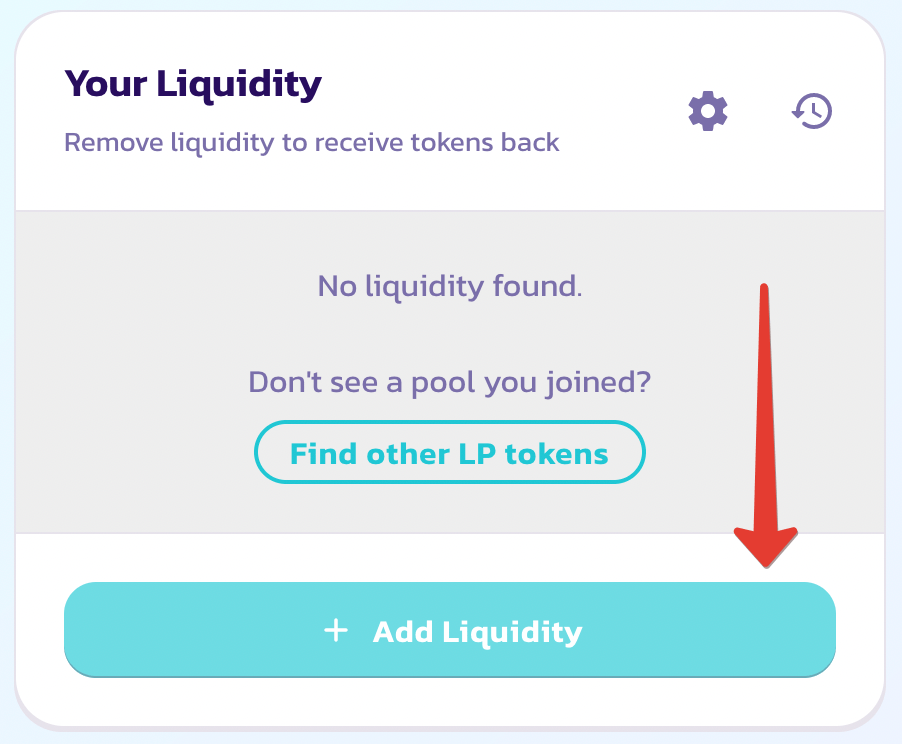
- Click Add Liquidity
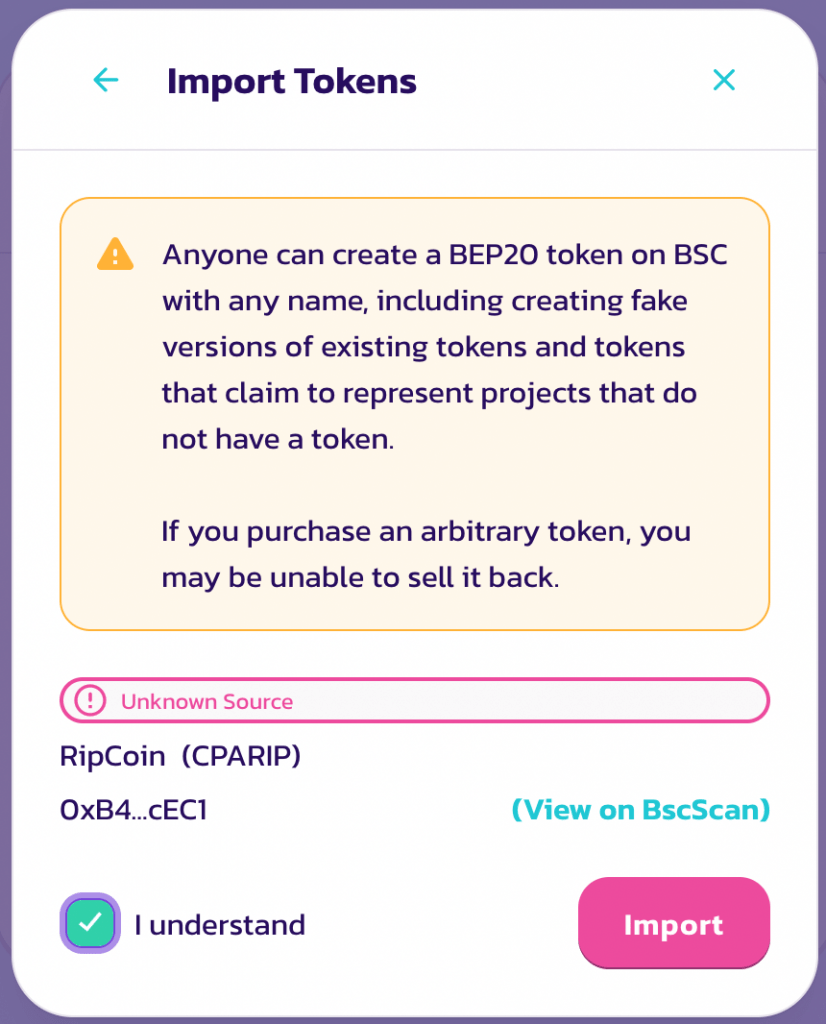
- You won’t be able to search for the token by name, so you have to look for the contract ID
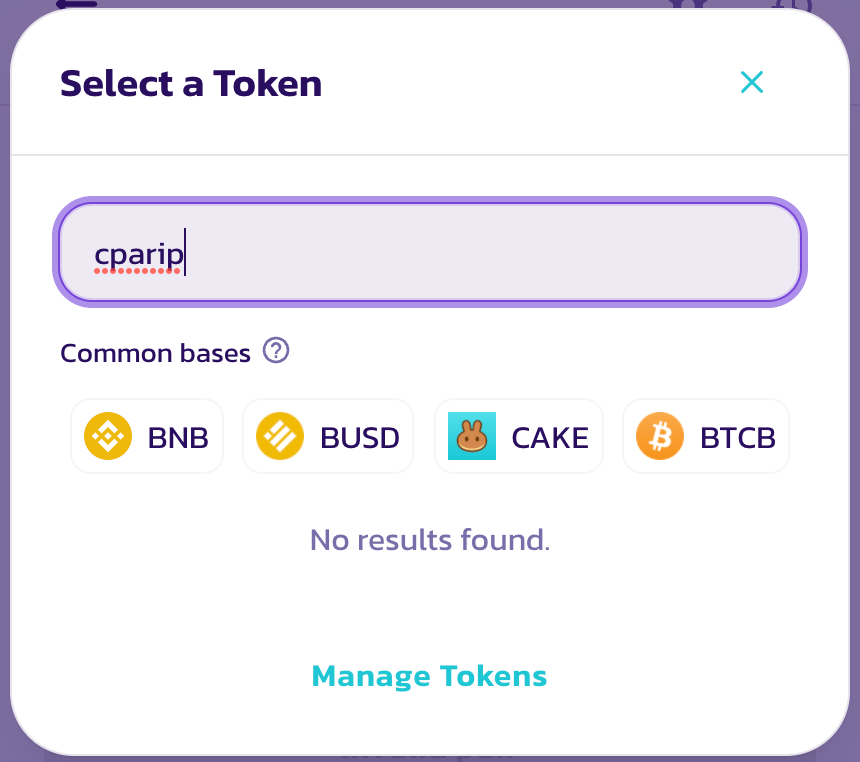
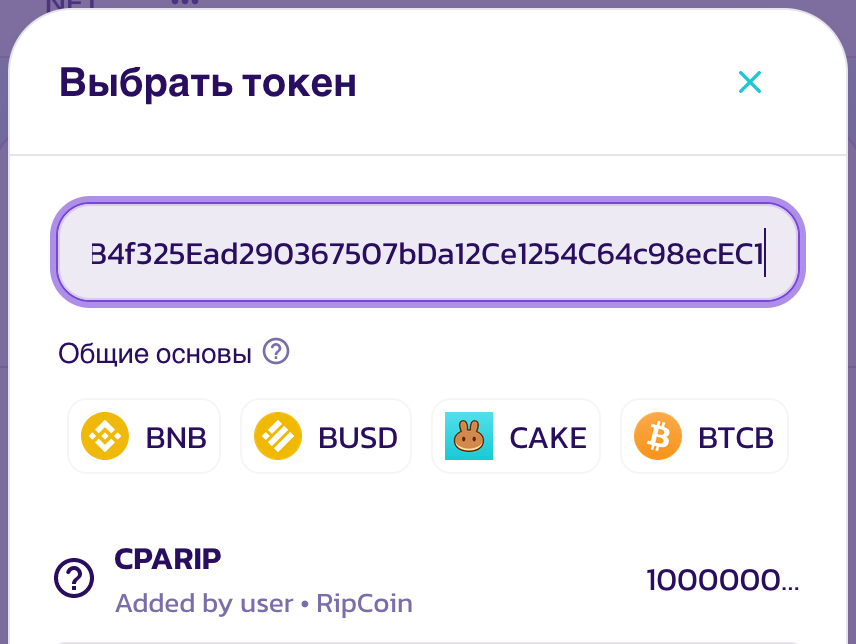
- Import token
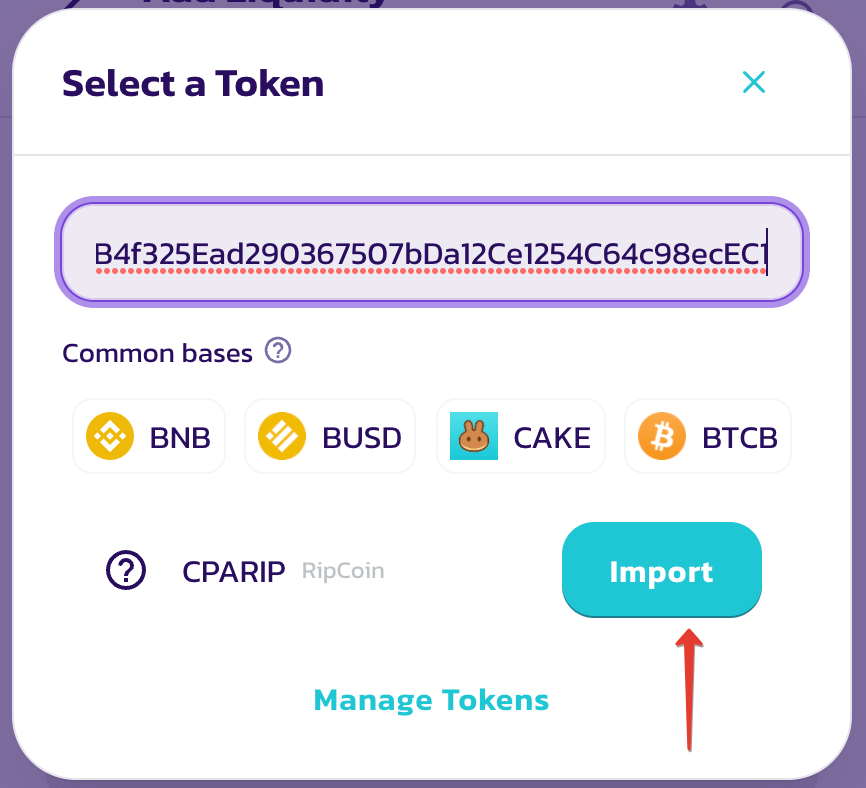
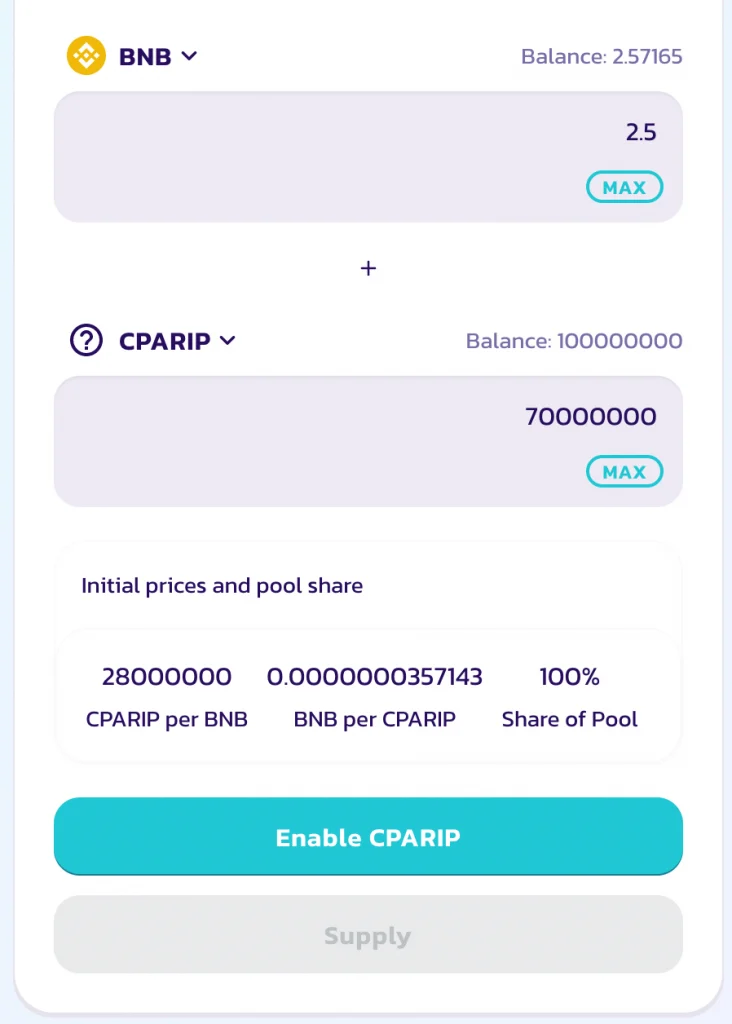
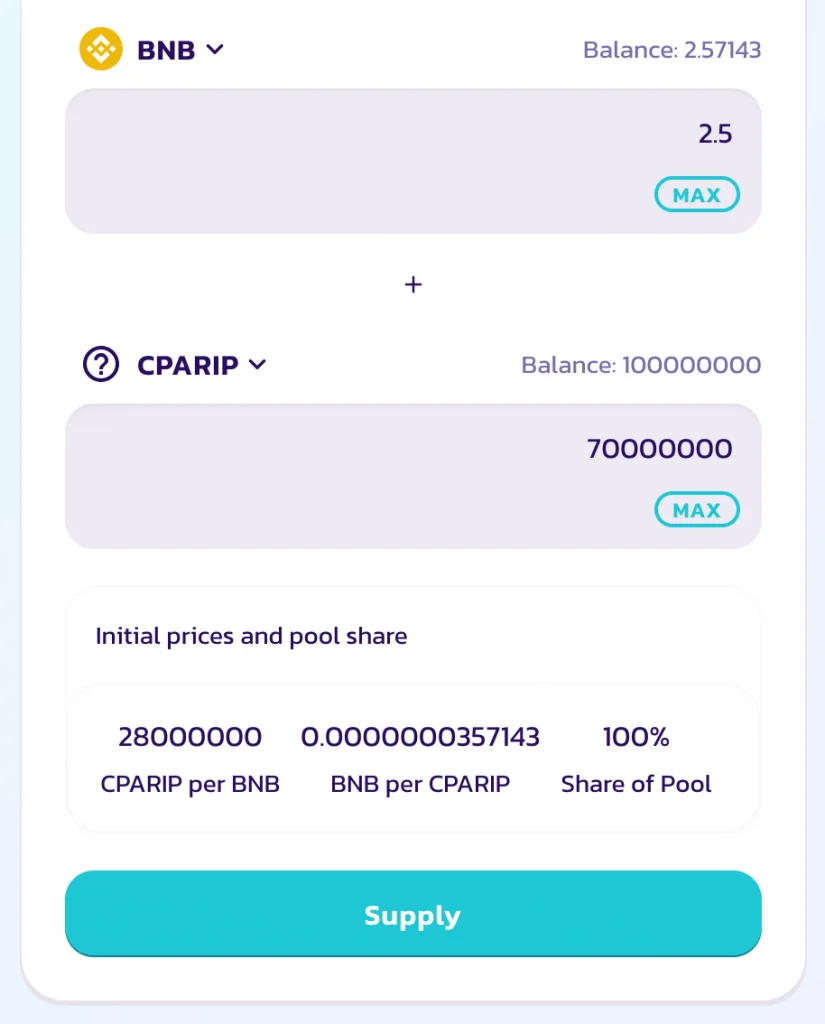
- At this step, enter the amount you want to provide liquidity for and the number of tokens for the pool
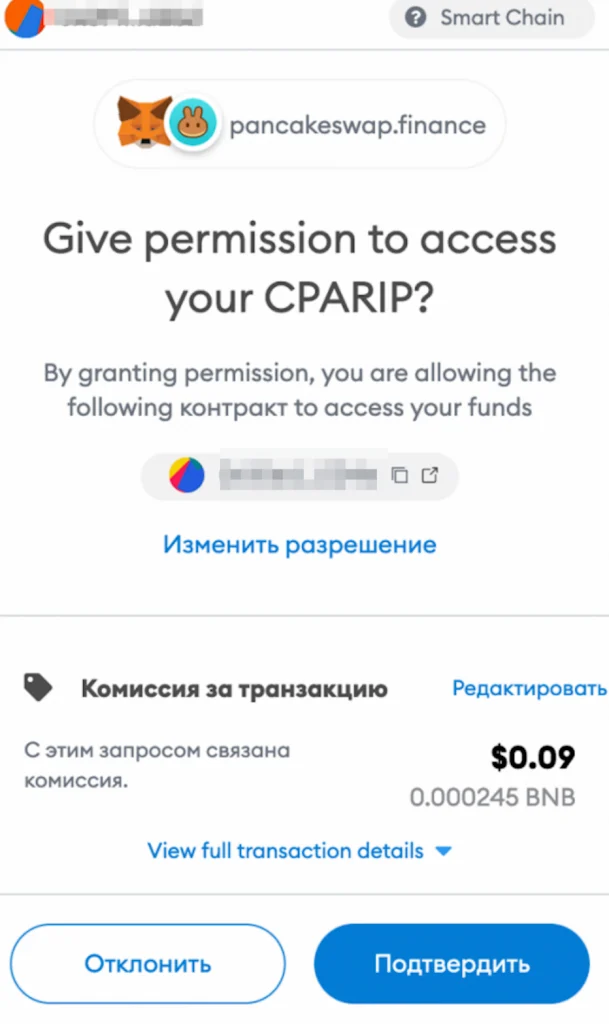
- Click Enable CPARIP
- It is necessary to confirm it in the MetaMask and pay the commission fee
- Then press Supply
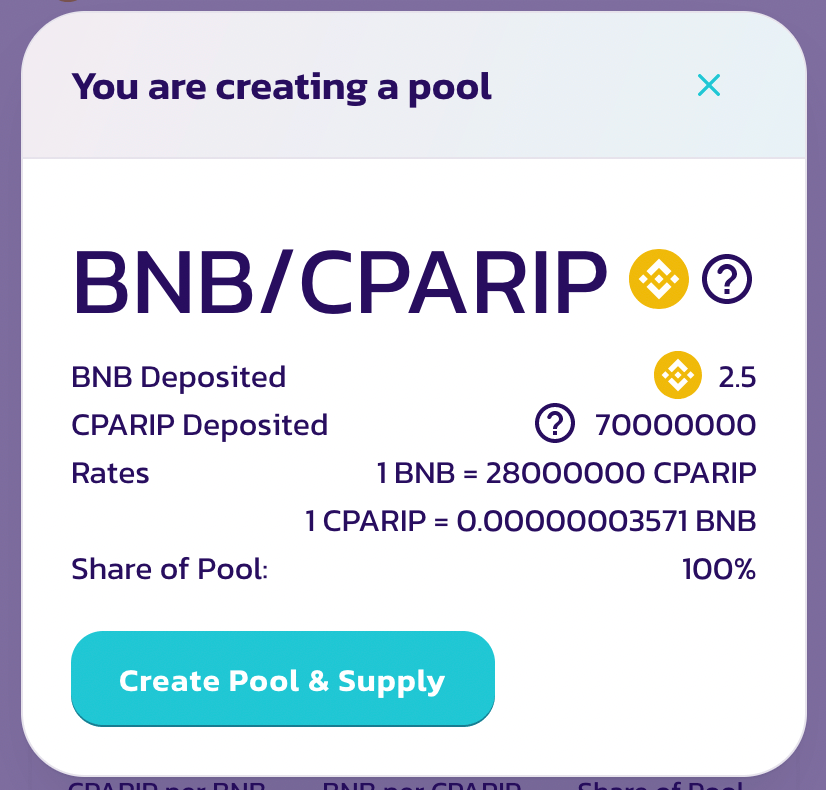
- Check the data entered and click Create Pool & Supply
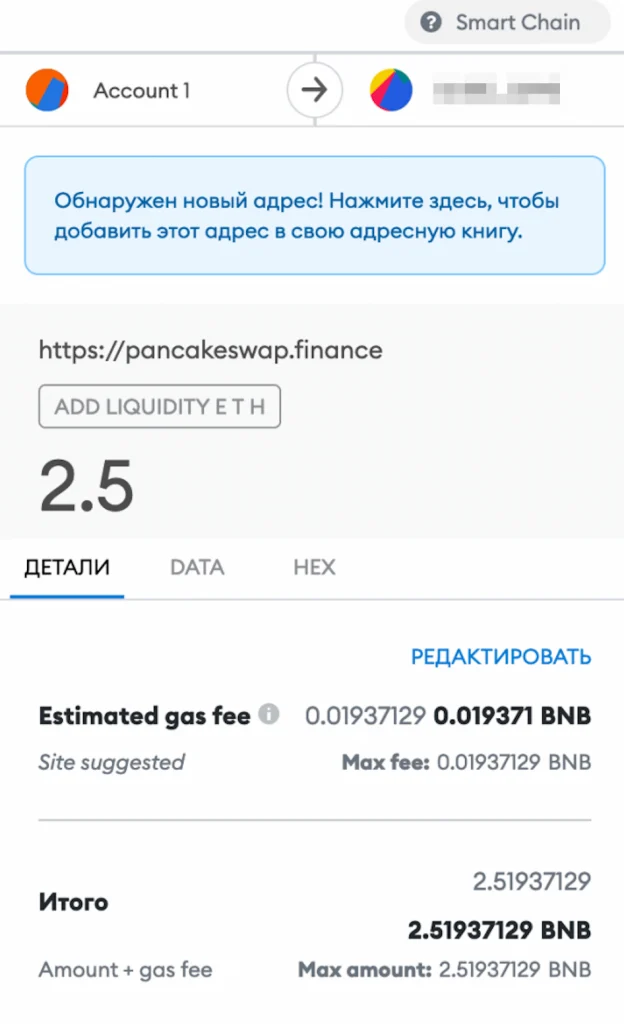
- Confirm a transfer

- It’s done!
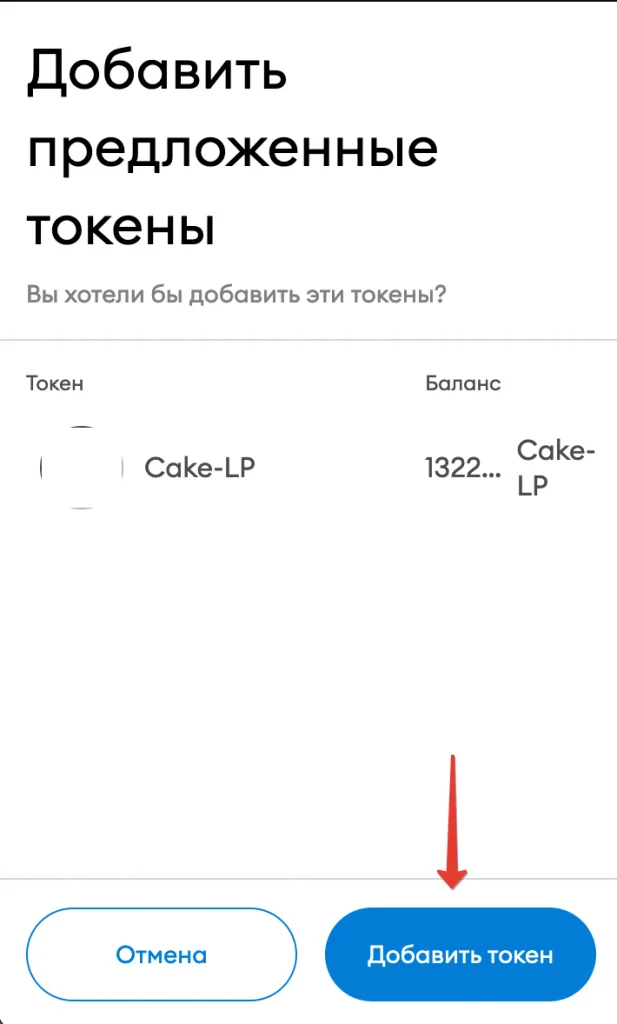
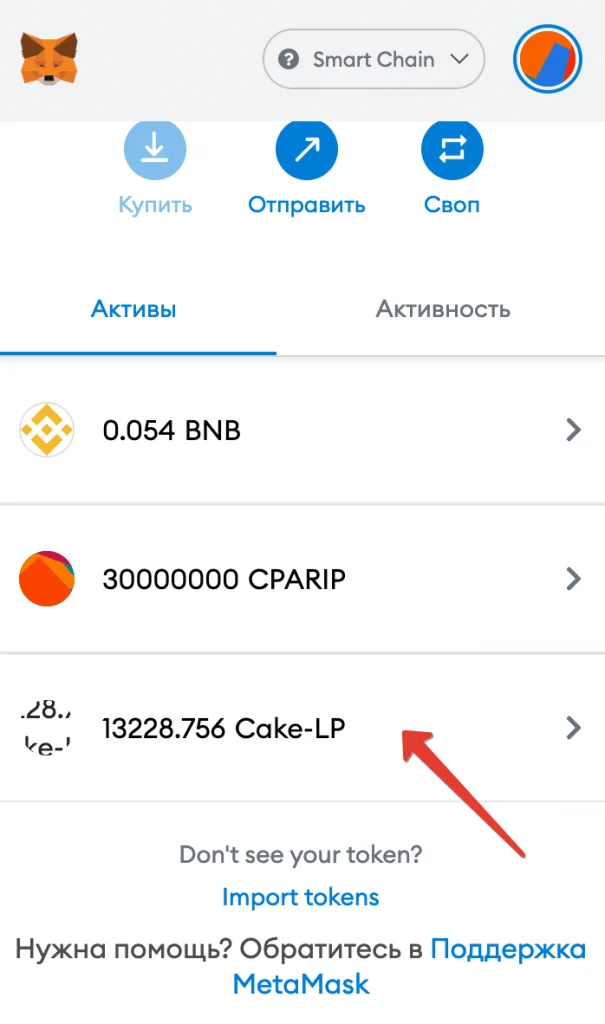
- Add the obtained LP token to your MetaMask Wallet
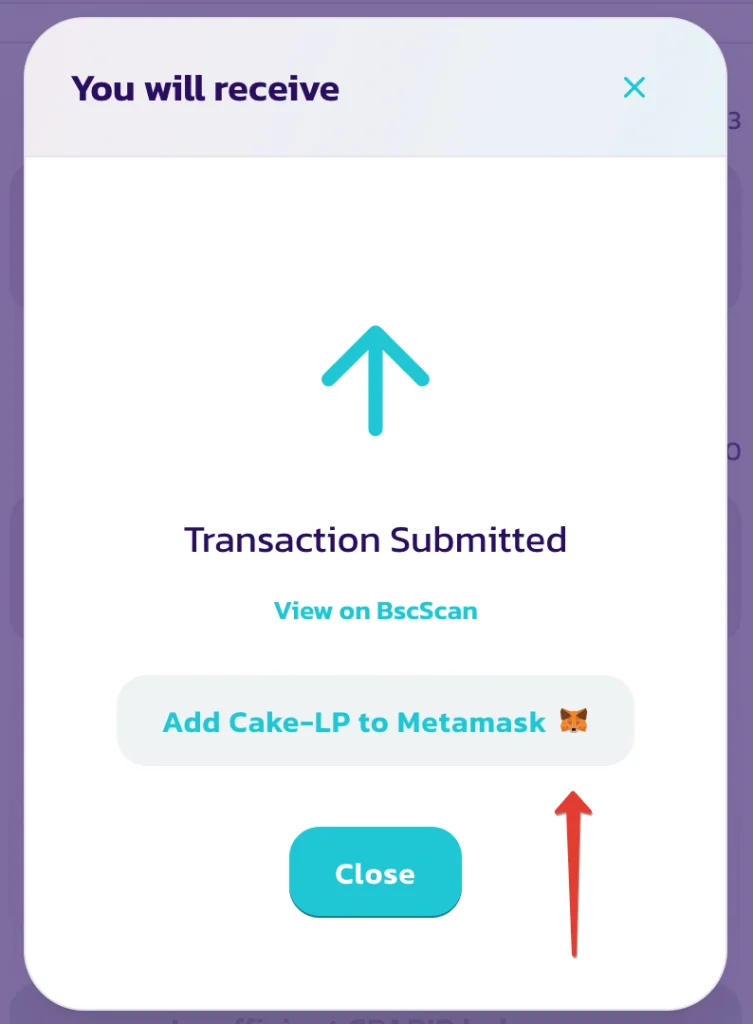
- At PancakeSwap, you can check the information about the liquidity pool you’ve created
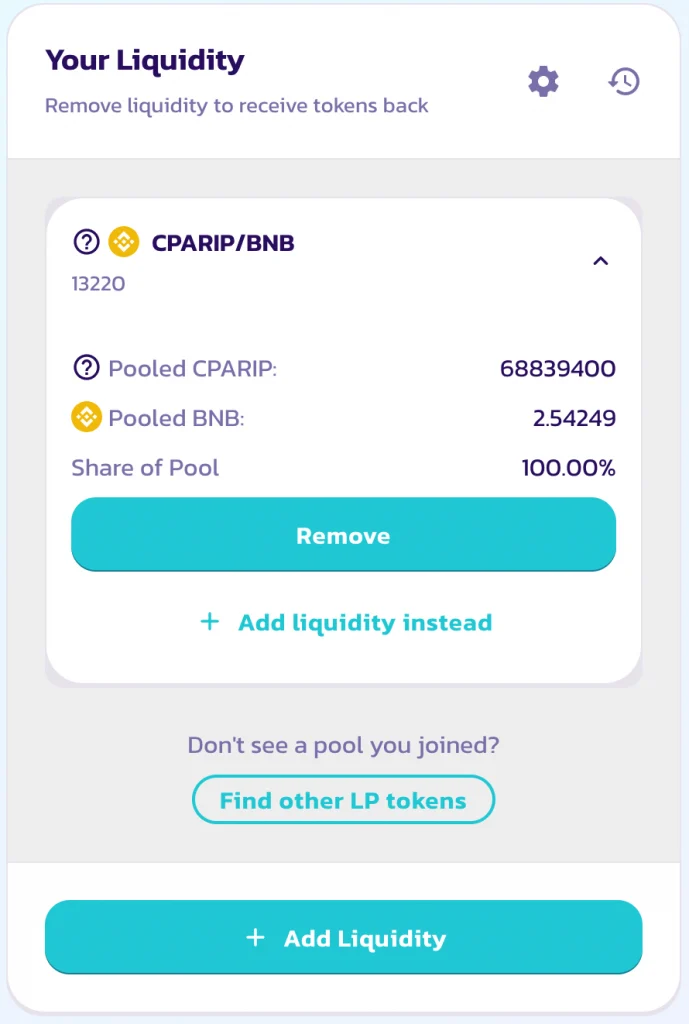
From this point on, you can conduct trading operations with the token.
How to Lock Liquidity?
The liquidity pool locker is an important feature for potential investors: it ensures that the developers will not ditch investors by withdrawing all the liquidity to themselves.
We will use paid services by the DxSale.
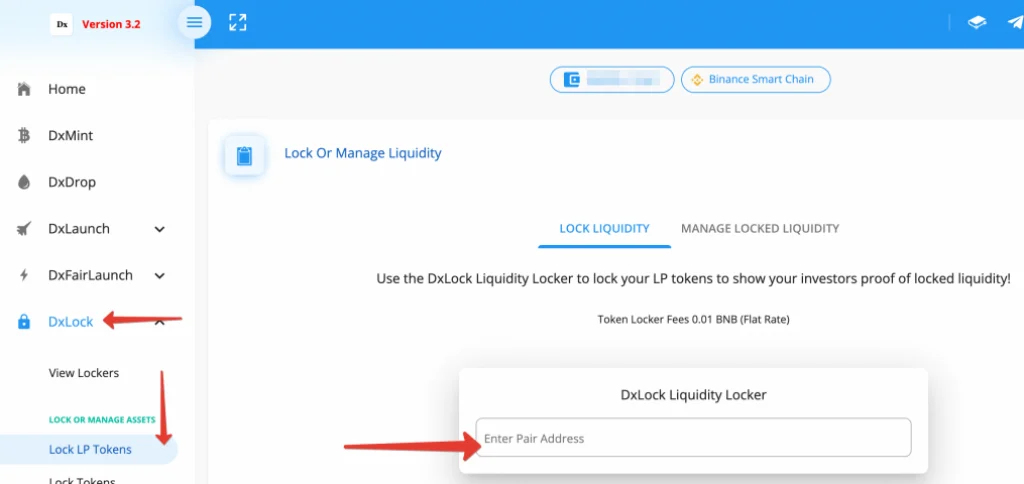
- Go to DxSale
- Then to DxLock -> Lock LP Tokens
- Enter the LP token (liquidity pool) address
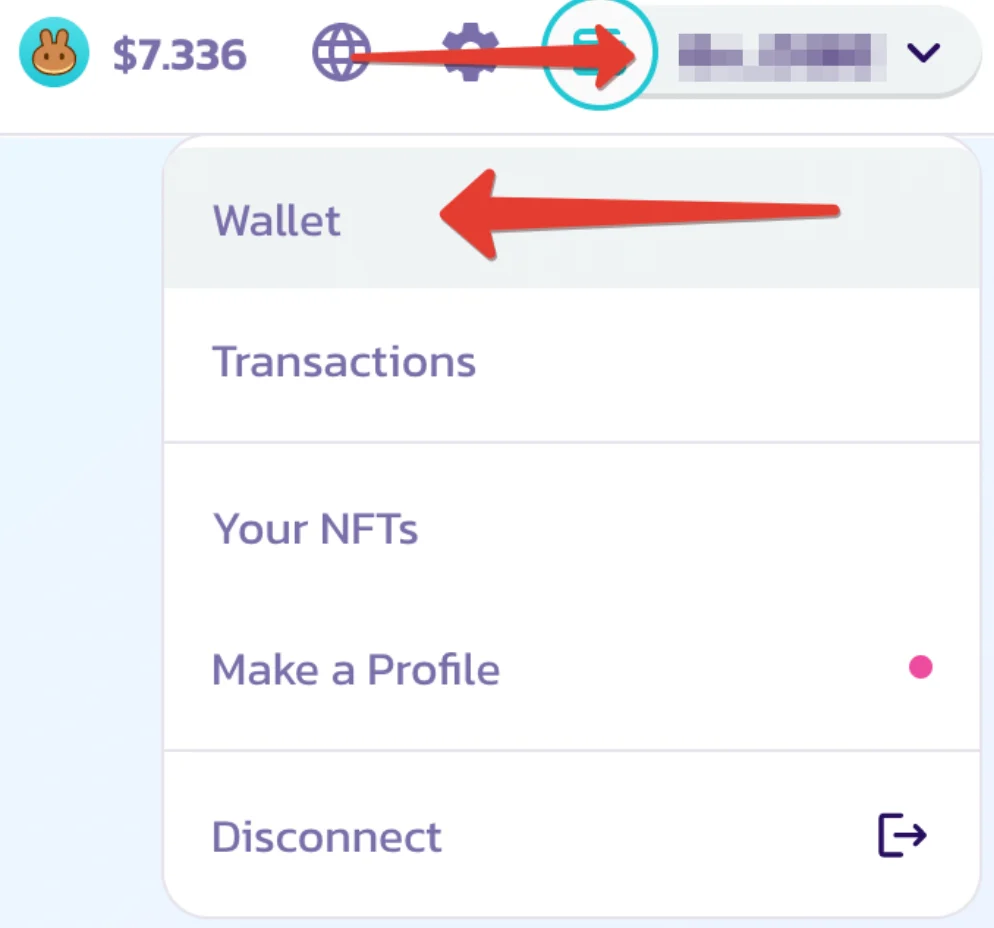
- To find the LP token address, go to PancakeSwap Exchange
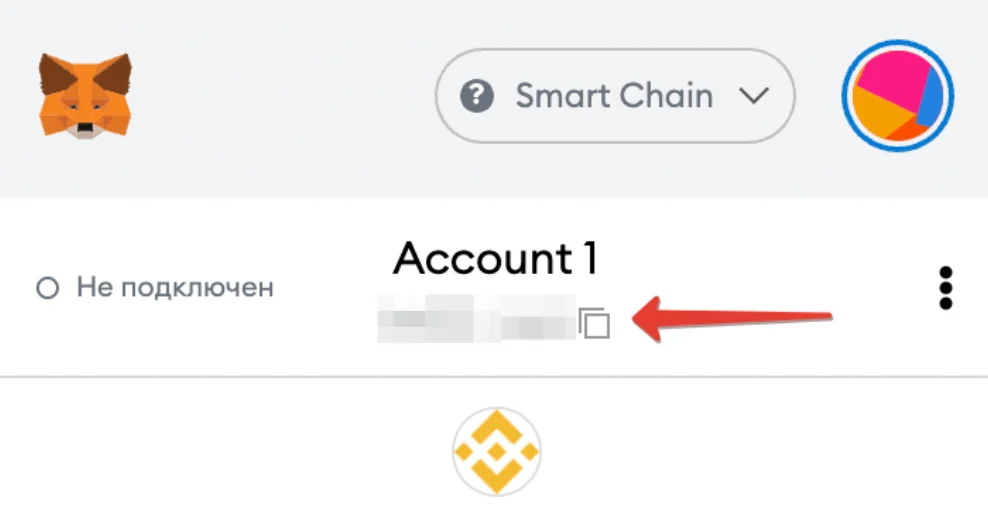
- Click the upper right arrow in the wallet address field
- In the menu that pops up, click Wallet
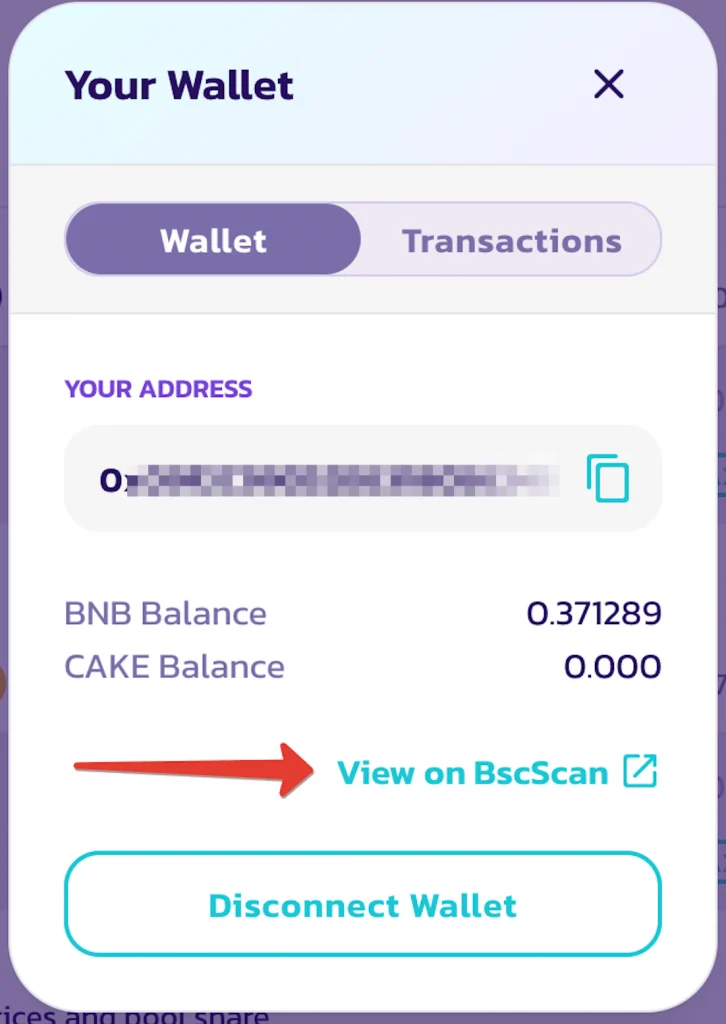
- Click View on BscScan
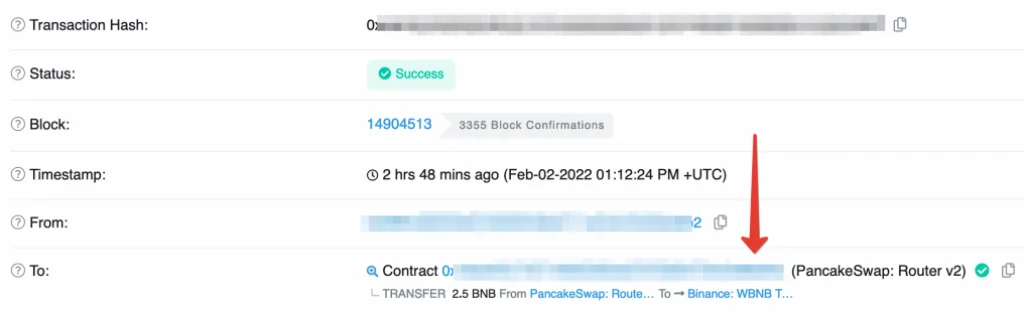
- Find the line with Add Liquidity ET… and click on it
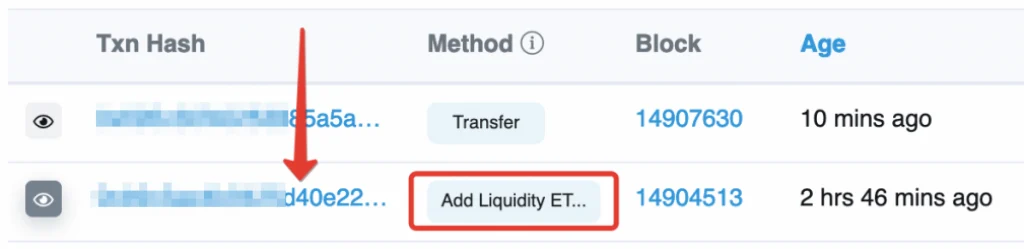
Next, click on the contract ID in the To field:
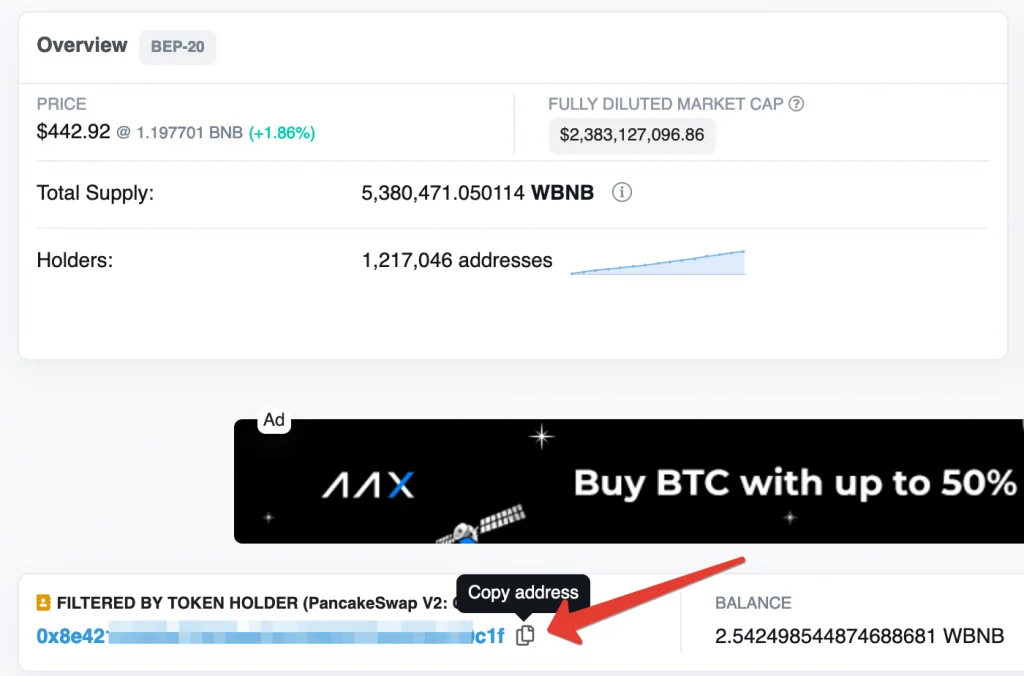
- Click as illustrated in the screenshot below

- Here, copy the required token ID
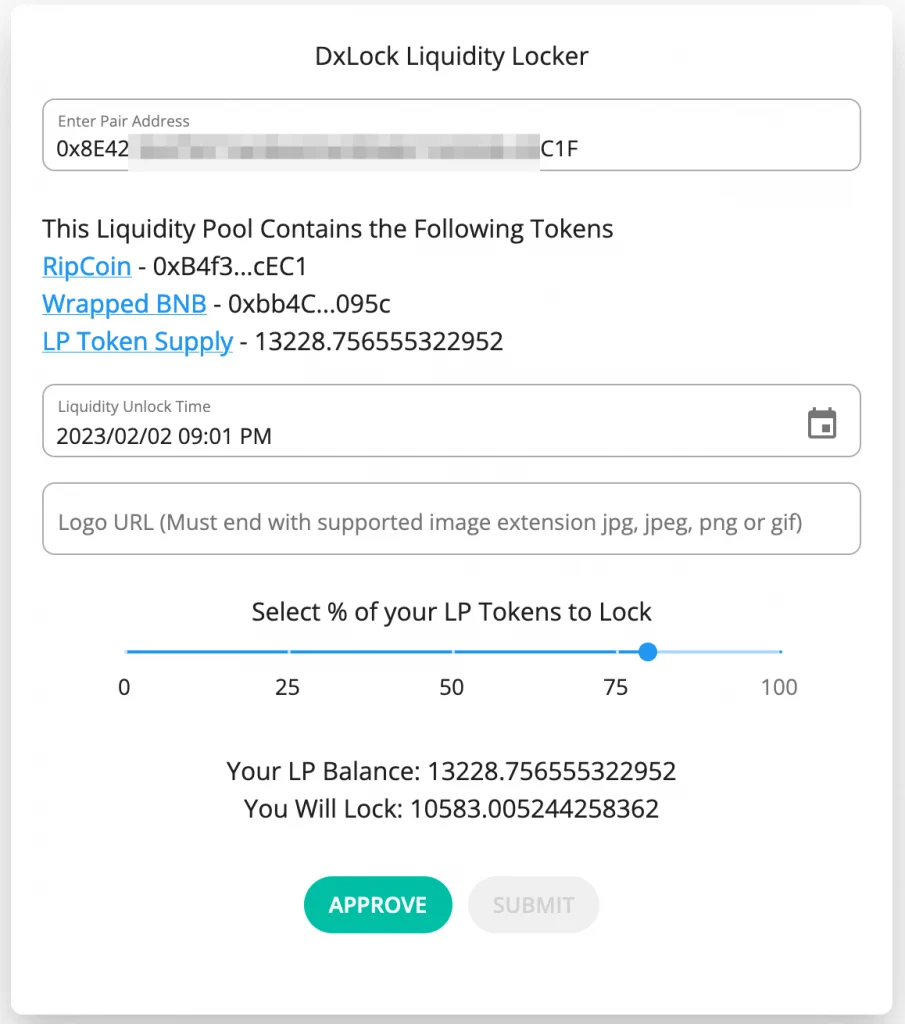
- Go back to the DxSale
- Paste the LP token address

- Next, you need to specify the liquidity pool you want to lock and liquidity unlock time
- Click Approve
- Confirm the access permission in MetaMask
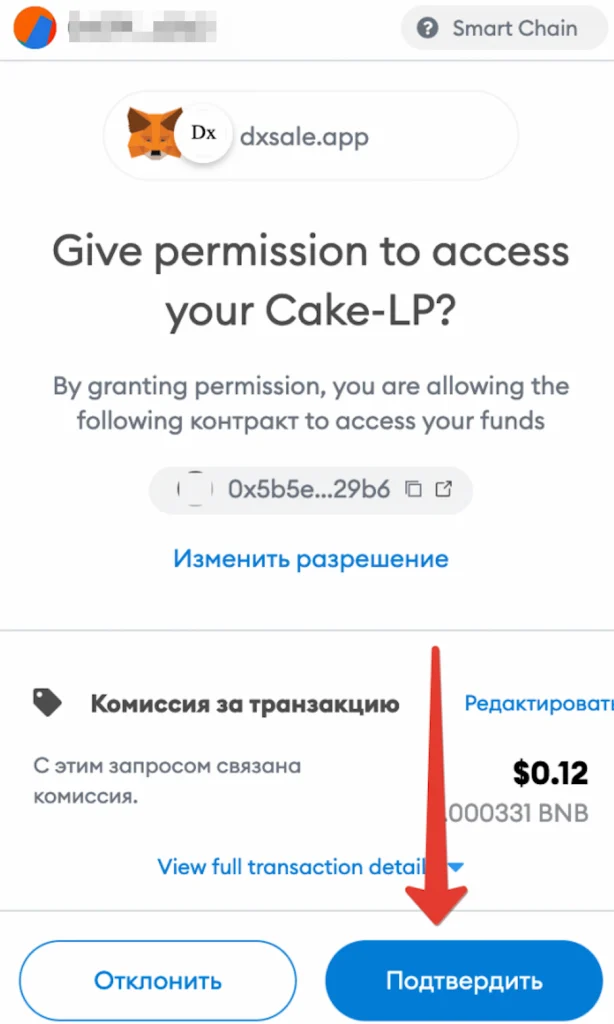
- Click SUBMIT

- Confirm payment in Metamask once more
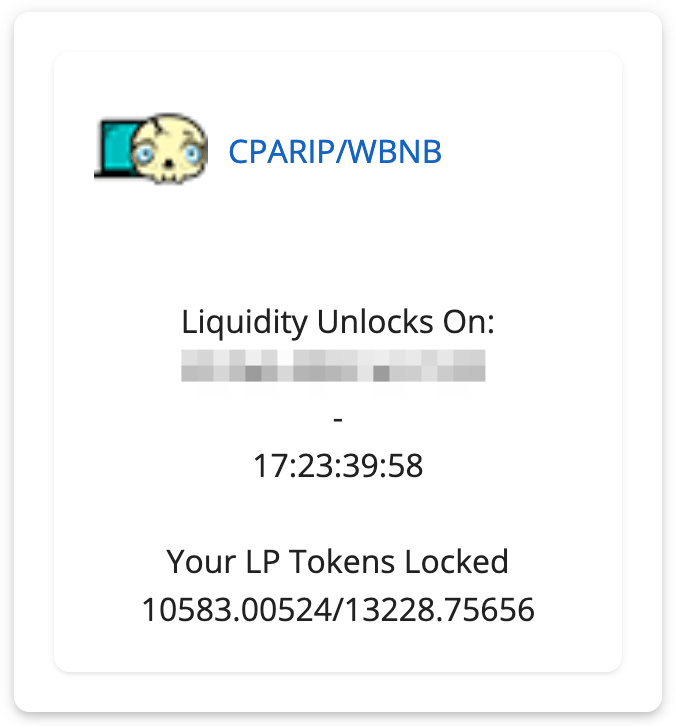
It’s done! The liquidity pool is locked and you won’t be able to withdraw it until the liquidity lock period expires.
How to Purchase Tokens?
Here’s a tutorial on token purchasing by the example of RipCoin (CPARIP). Smart token contract ID is 0xb4f325ead290367507bda12ce1254c64c98ecec1
- First of all, buy BNB on the Binance Exchange and transfer them to your MetaMask Wallet by following our instructions above.
How to purchase tokens via the decentralized PancakeSwap Exchange?
- Go to PancakeSwap and connect your MetaMask wallet

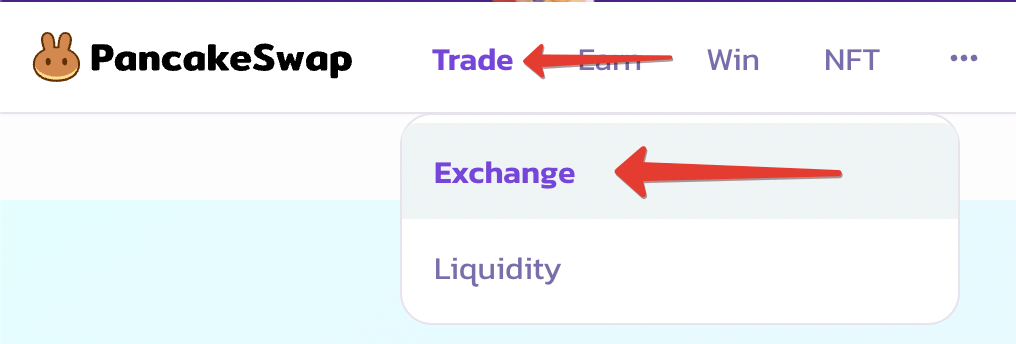
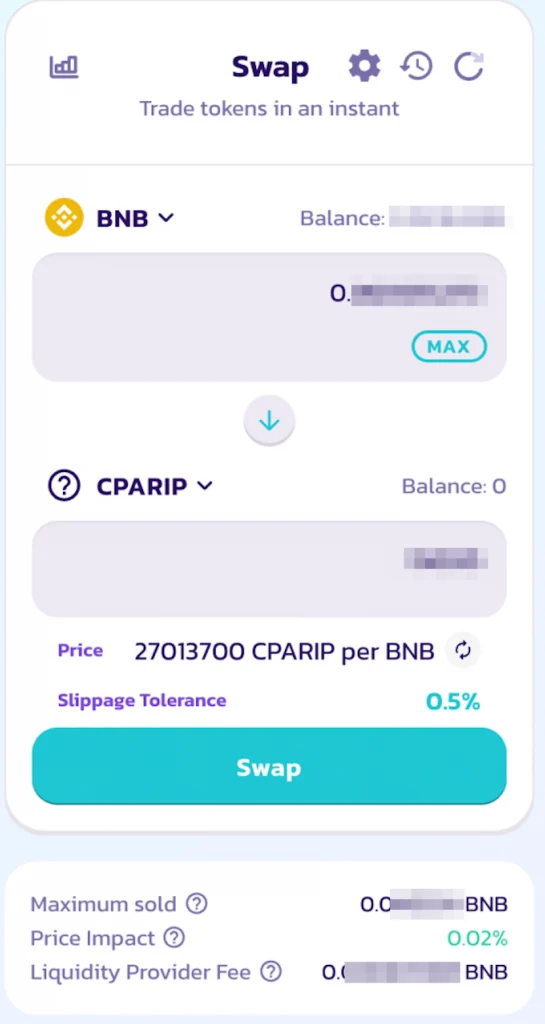
- Go to Trade tab -> Exchange
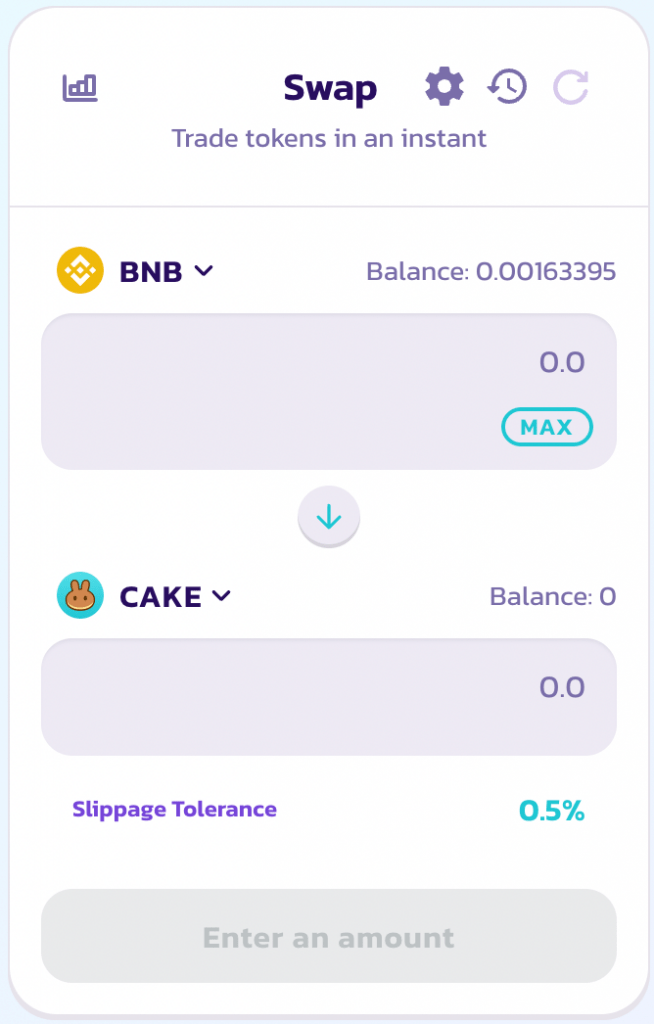
- Select BNB
- Exchange it for RipCoin (CPARIP)
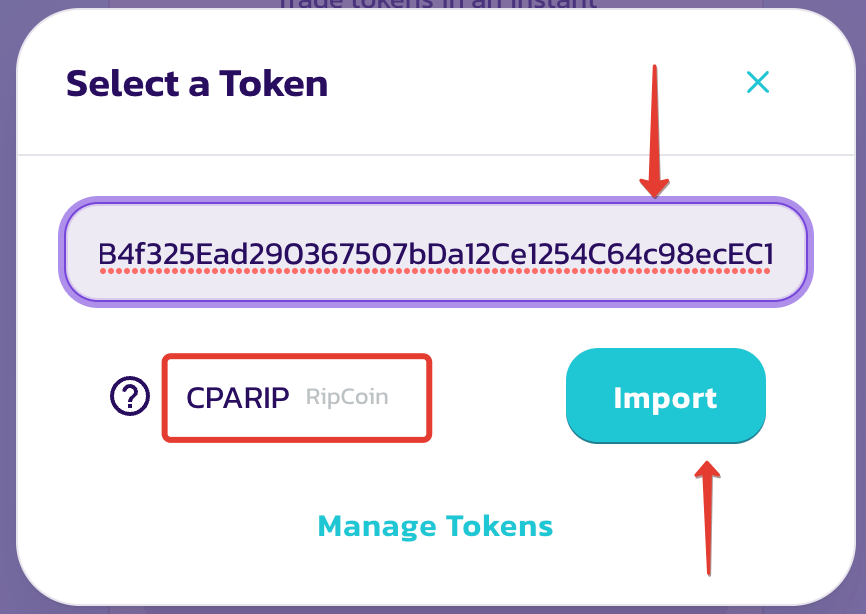
- Copy the RipCoin contract ID: 0xb4f325ead290367507bda12ce1254c64c98ecec1
- Paste it into the search box
- After that, you’ll see the CPARIP token you need
- Click Import
- Specify the number of tokens you wish to purchase
- Click Swap
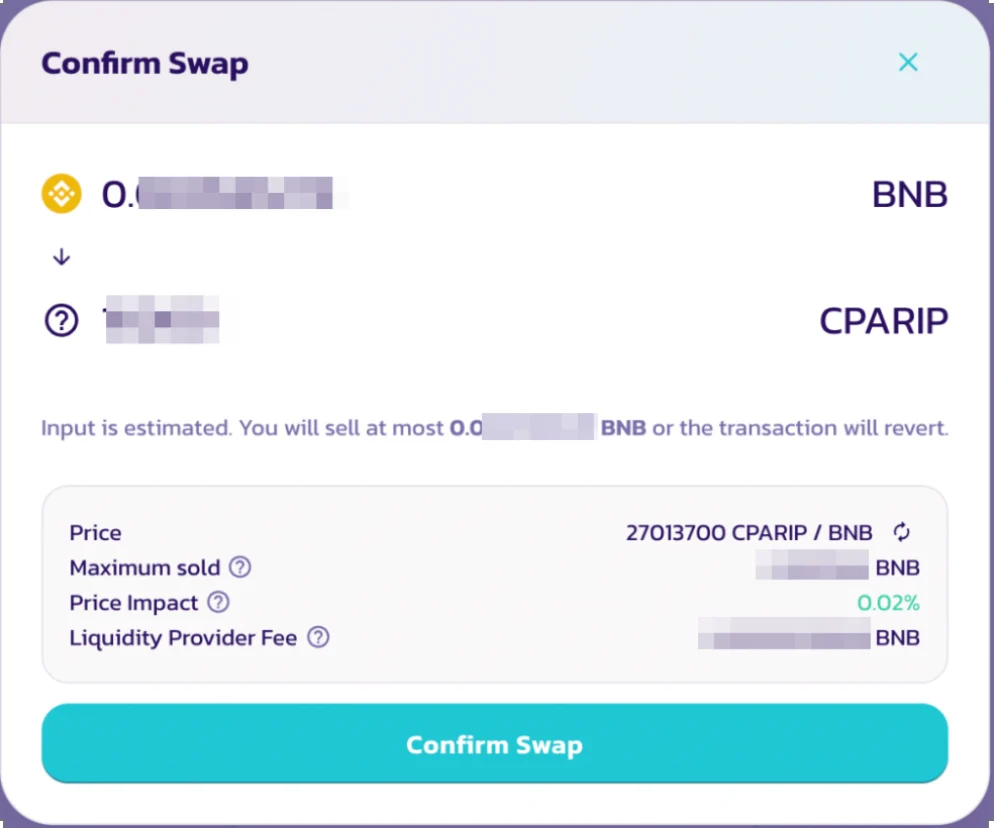
- Click Continue Swap
- Confirm it in the MetaMask Wallet
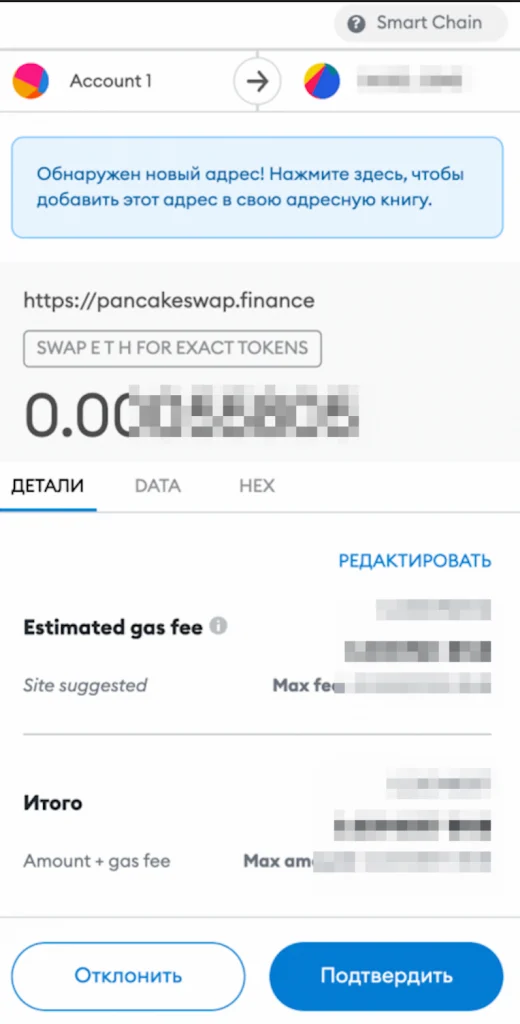
- A message of successful purchase will pop up
- If you haven’t added RipCoin token (CPARIP) earlier, click Add CPARIP to Metamask
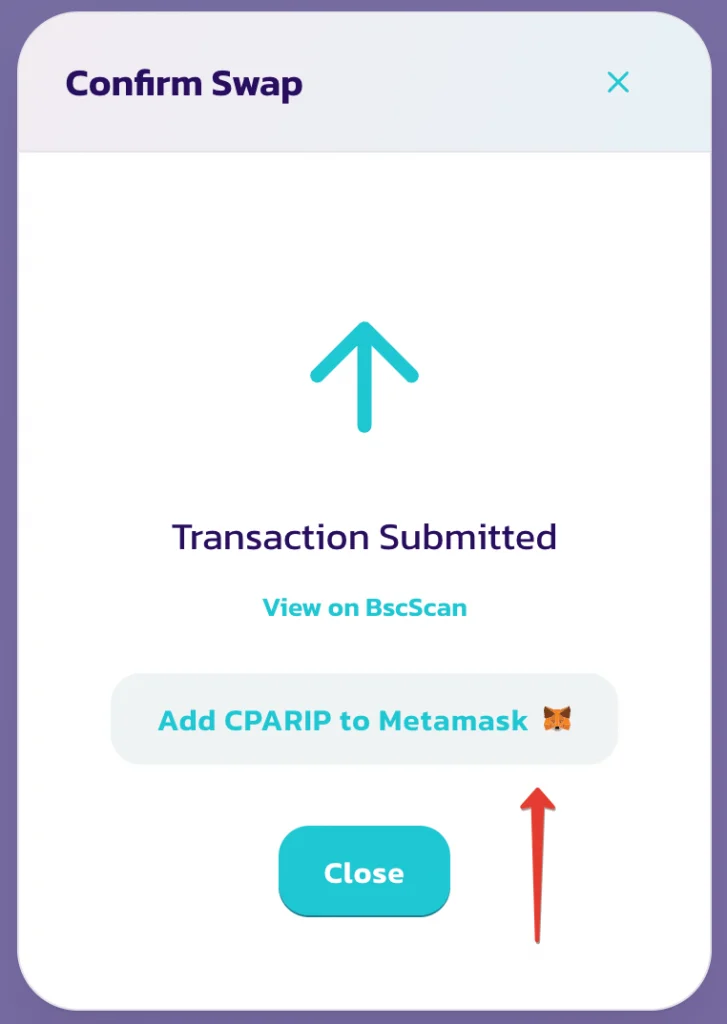
- The long-awaited tokens will appear in the wallet
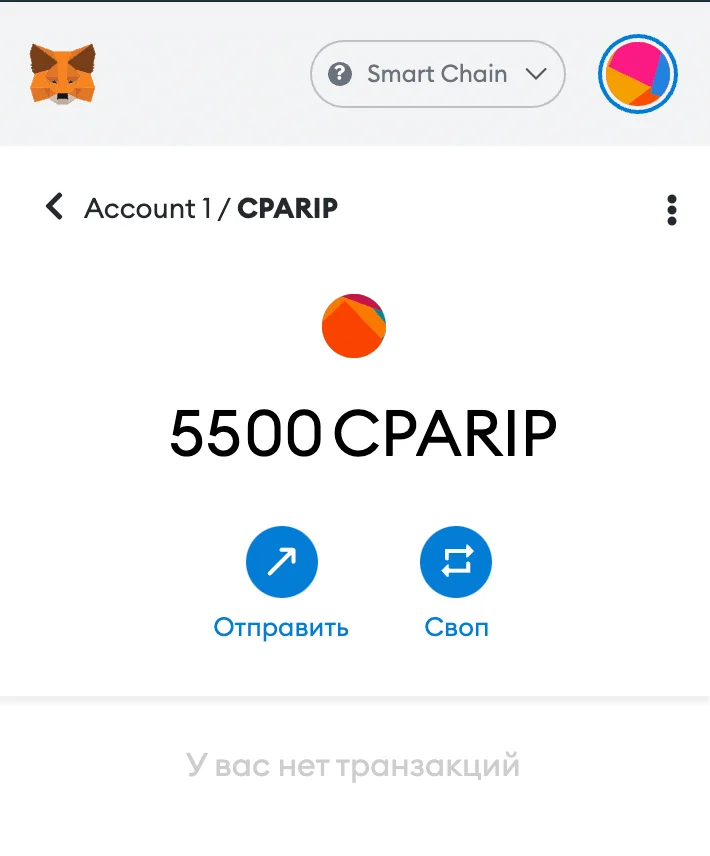
Profit! Congrats, you’ve successfully purchased a token.
- Selling the token is done in the same way
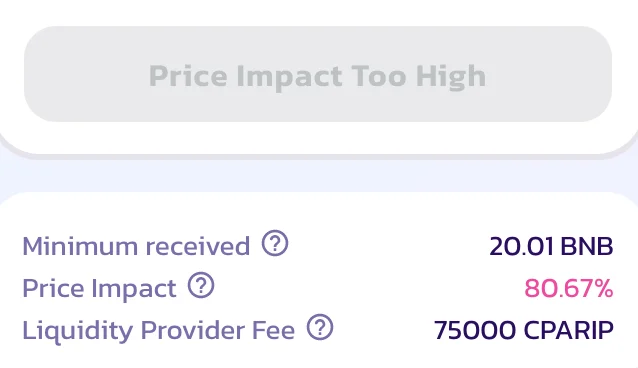
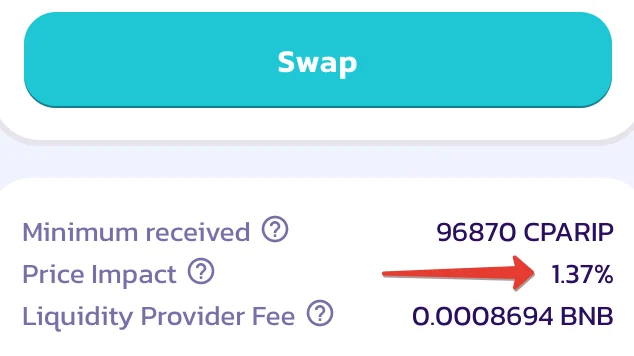
PRICE IMPACT TOO HIGH Pancake Swap Error
The error occurs when there is not enough liquidity.
- After you enter the amount to sell, a green Swap button will appear, which means that everything works and you can exchange currency. If the Price Impact indicator is low, that means the exchange will be close to the market quotation.
- If the Price Impact indicator is within 5% the pink Swap Anyway button will appear and you can still make the exchange without any problems, but the exchange rate will be lower than the market rate

- When the Price Impact indicator is between 5-15% you will get a warning message
- If the rate is off the scale, the PRICE IMPACT TOO HIGH message will appear and you won’t be able to make a transaction. You will have to reduce the exchange amount