A WebView app means that there is a website inside an app. Publishers use it for gambling, dating, cryptocurrency, commodity, and other verticals. Let’s create a simple WebView app for traffic arbitrage.
How to install and set up Android Studio?
Download the official Android Studio Desktop App from developer.android.com/studio. Install the app on your PC. Leave all settings by default.
Once you have installed it, launch Android Studio. The app will suggest Android SDK installation. At this step, choose the English language.
If you choose Russian, the app will return an error.
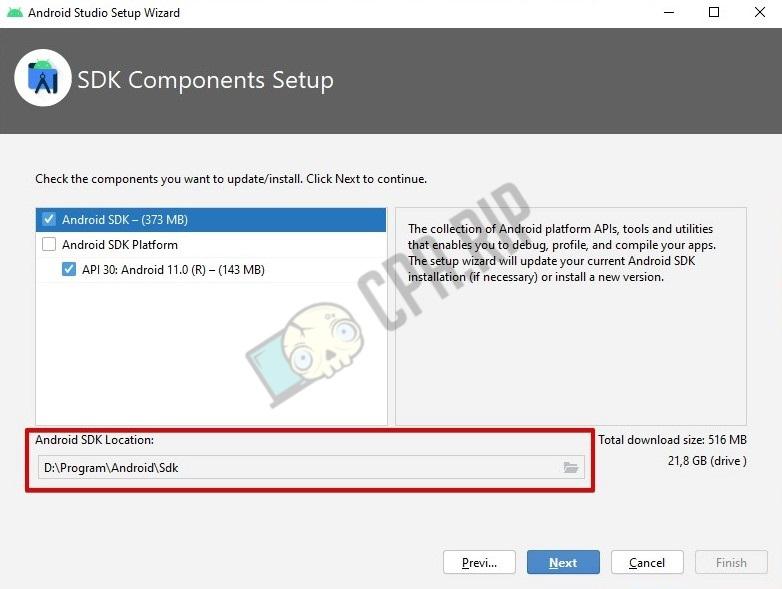
Choose the language and click ‘Next’. Then ‘Finish’. The installation of the Android SDK will start immediately.
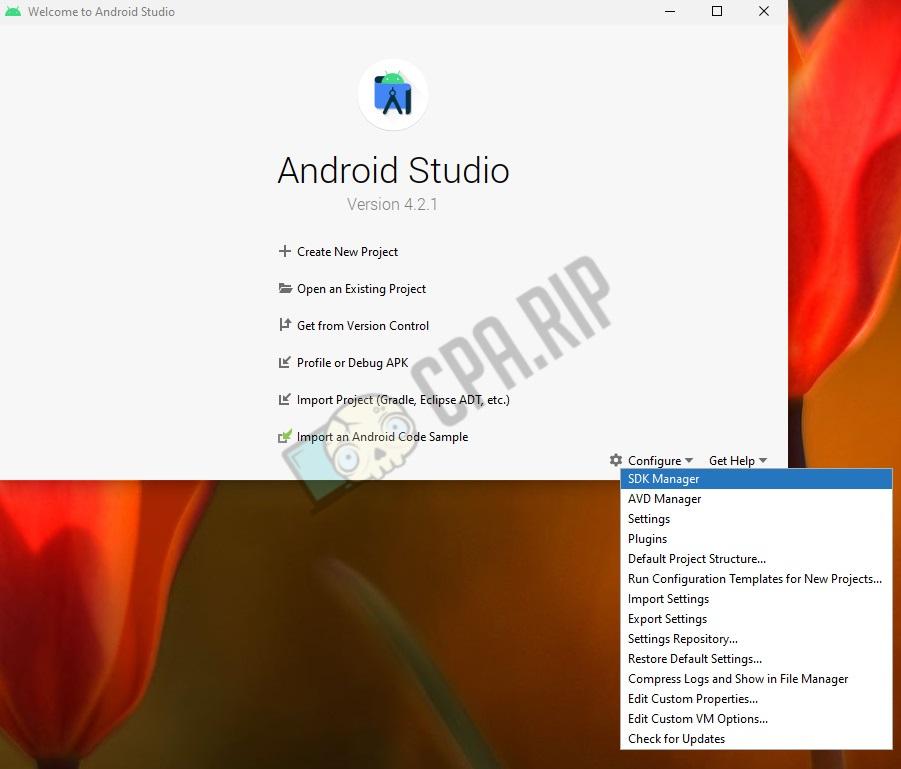
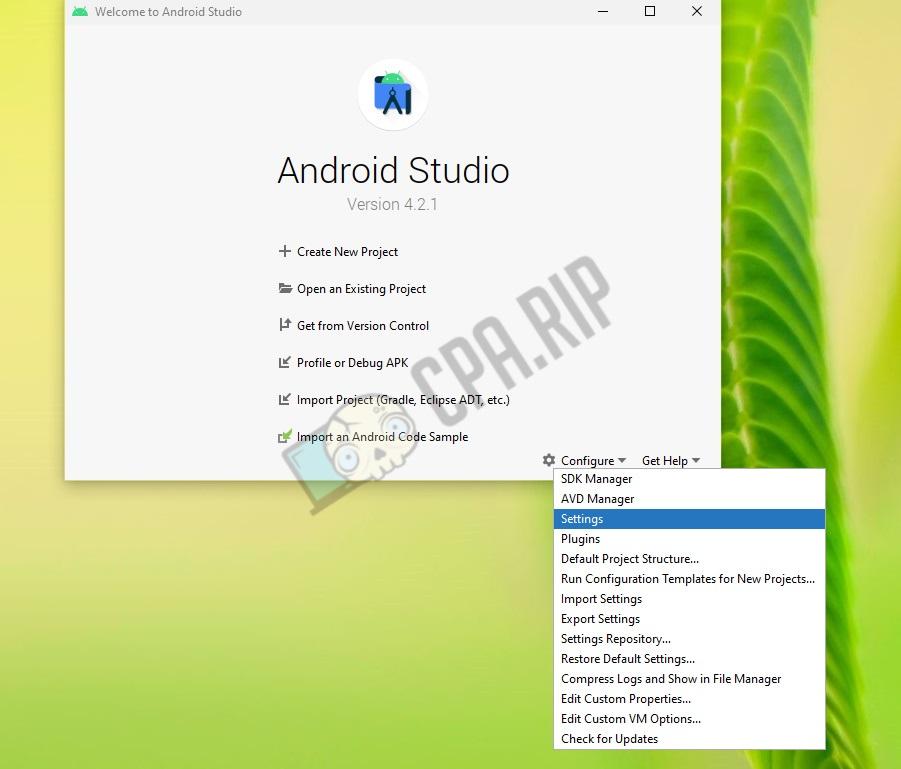
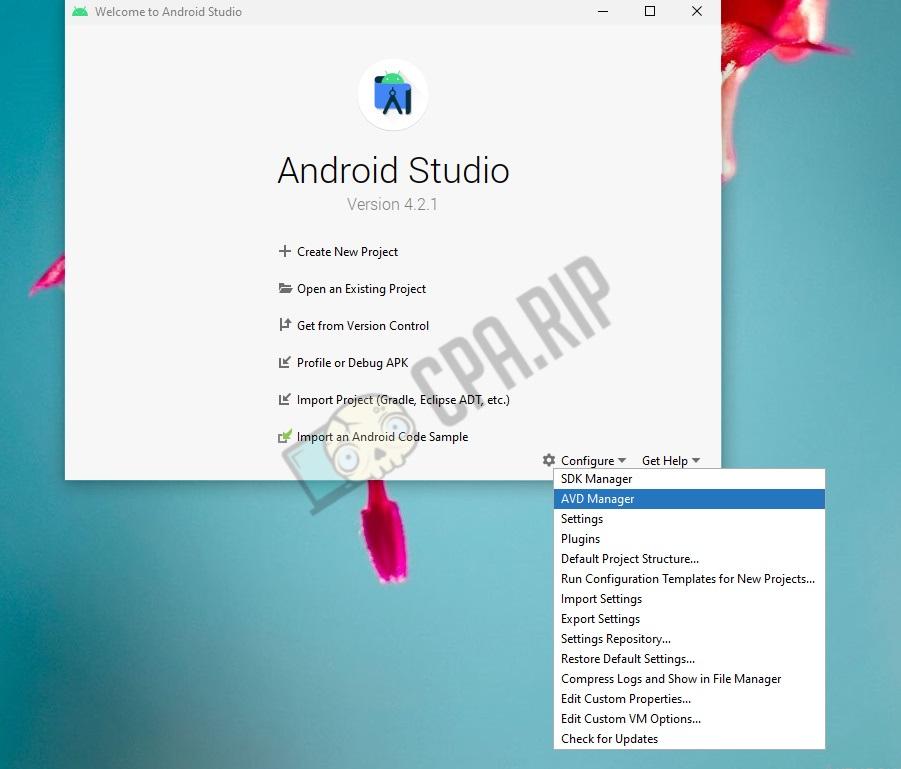
After installation of the Android SDK is complete, click ‘Configure’ on the welcome page. Select ‘SDK Manager’.
Then go to the ‘Android SDK’ tab (‘Appearance & Behavior’ → ‘System Settings’).
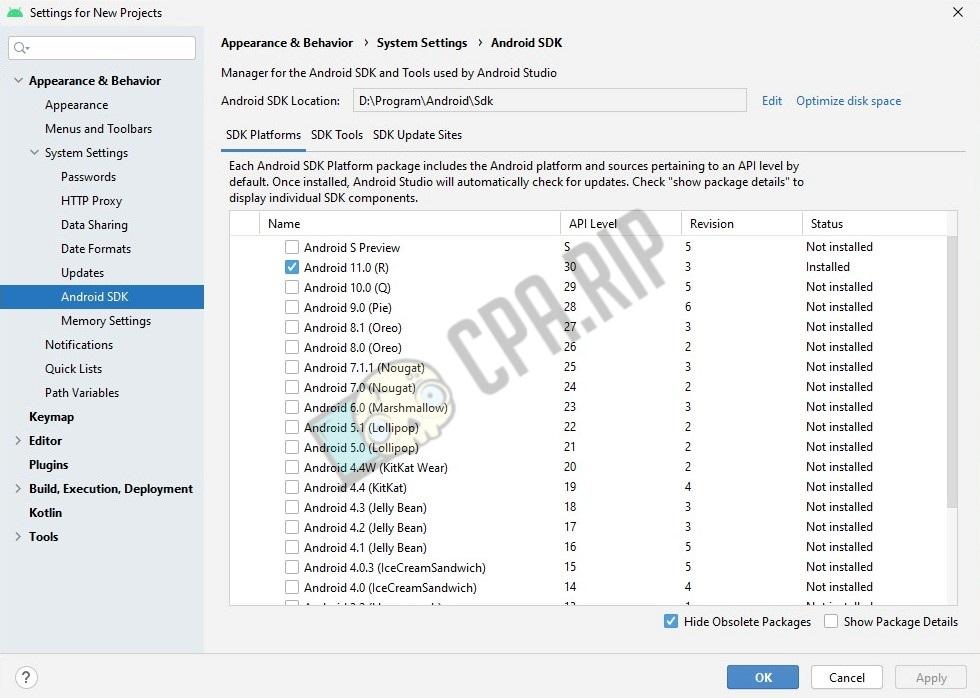
Uncheck ‘Android 11.0 (R)’. Check ‘Android 10.0 (Q)’. Go to the ‘SDK Tools’ tab.
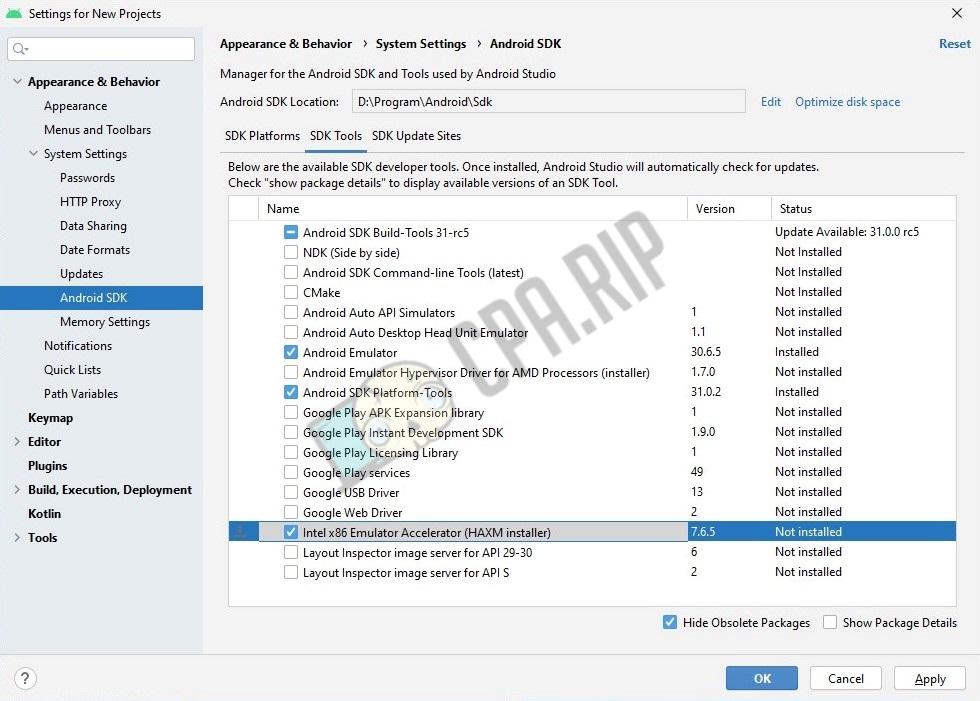
Check the following items: Android Emulator, Android SDK Platform-Tools, Intel x86 Emulator Accelerator (HAXM installer). Click ‘Apply’.
Click ‘Ok’ and accept the user agreement for each package.
During the download, a window may pop up where you’ll have to set the maximum amount of RAM to use emulator instances.

Specify the RAM amount and click ‘Next’.
Now let’s set the environment variable on your PC and in Android Studio. To do this, right-click on ‘My Computer’. Select ‘Properties’.
Click on ‘Advanced System Settings’ and select ‘Environment Variables’.
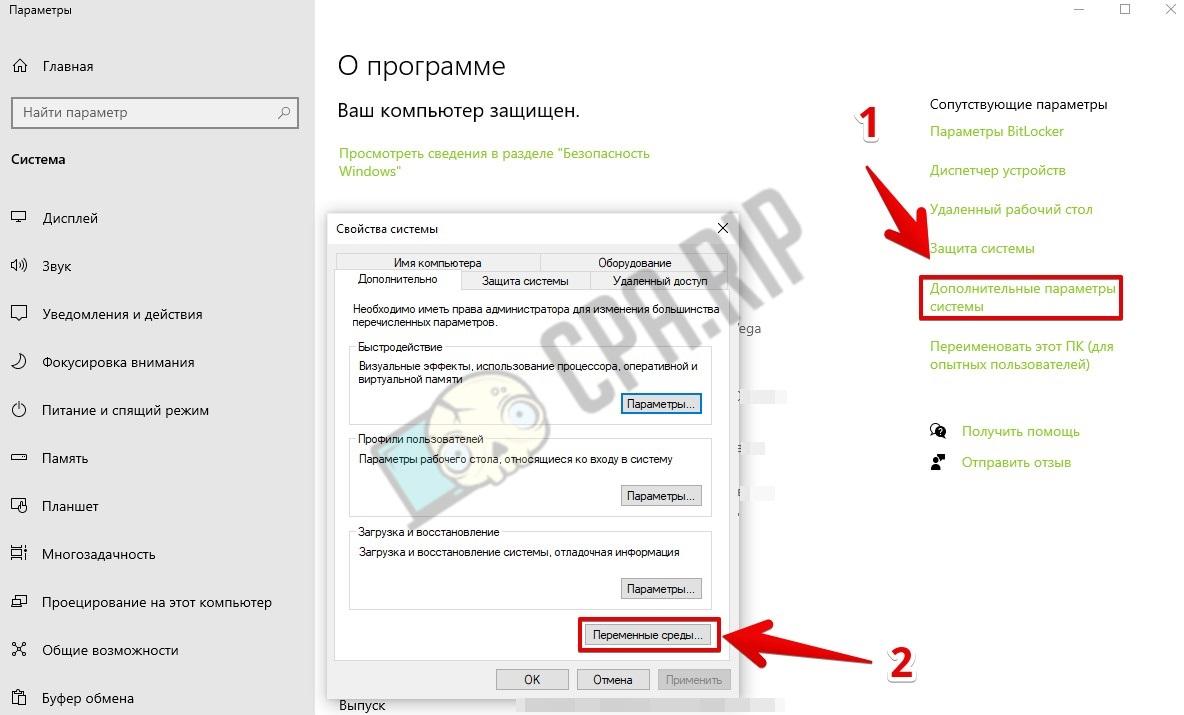
Click ‘New’ in the ‘User environment variables’ field.
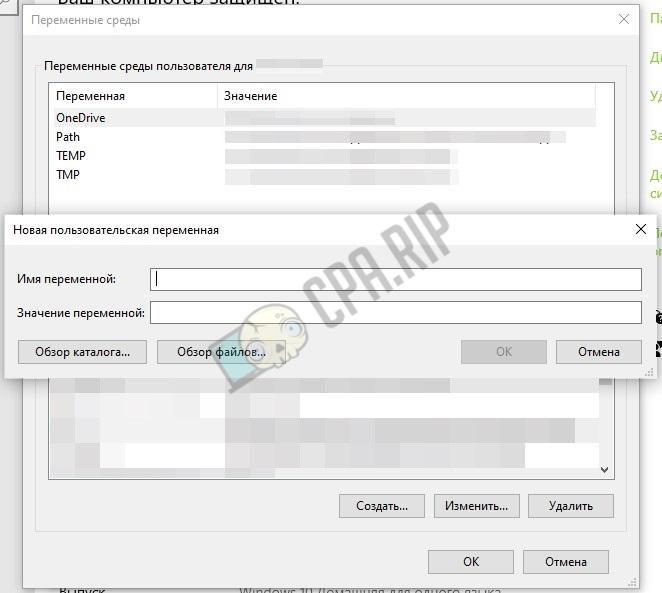
Specify the variable’s name ANDROID_SDK_ROOT and the variable’s value (for example, D:\your folder\AndroidStudioSDK). Click ‘OK’.
Let’s create another variable. Specify the variable’s name ANDROID_SDK_HOME and the variable’s value (for example, D:\your folder\AndroidStudioProjects).
Go back to Android Studio. Press ‘Configure’ and open ‘Settings’.
Go to the ‘Path Variables’ tab.
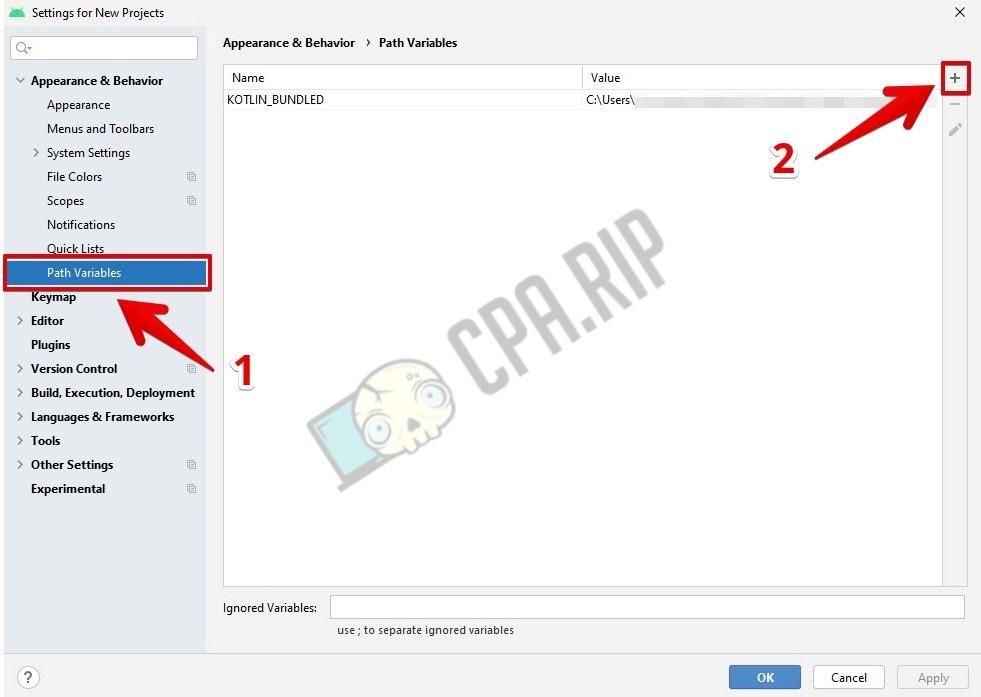
Create environment variables by clicking on the ‘plus’.
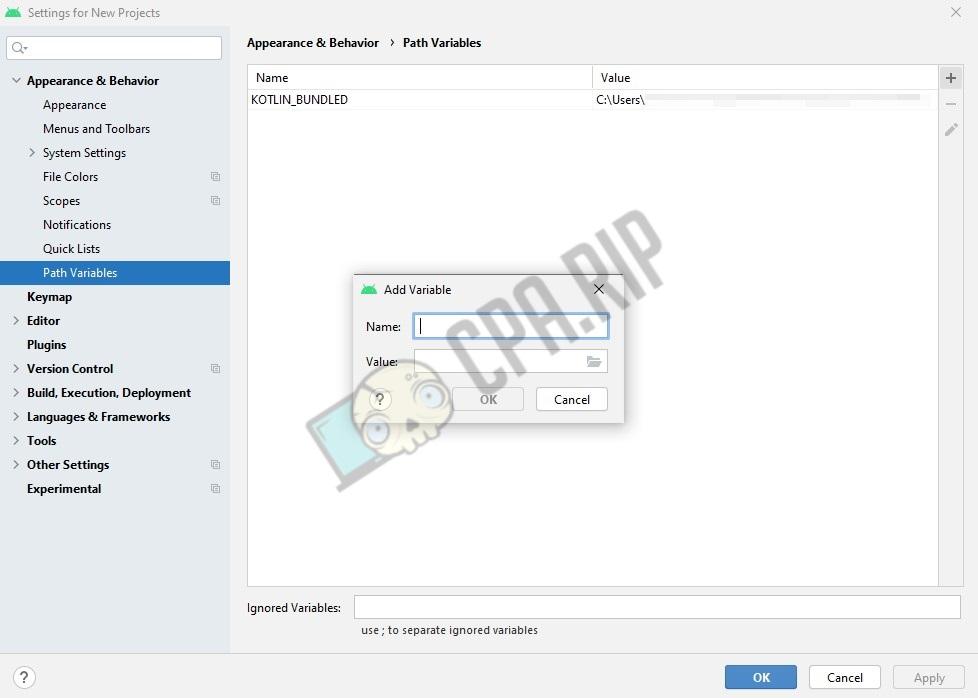
Specify the variable’s name ANDROID_SDK_ROOT and the variable’s value (for example, D:\your folder\AndroidStudioSDK). Click ‘OK’.
Let’s create another variable. Specify the variable’s name ANDROID_SDK_HOME and the variable’s value (for example, D:\your folder\AndroidStudioProjects).
Click ‘Apply’ and ‘OK’.
Now let’s create a VOM. To do this, click on ‘Configure’ and open the ‘AVD Manager’.
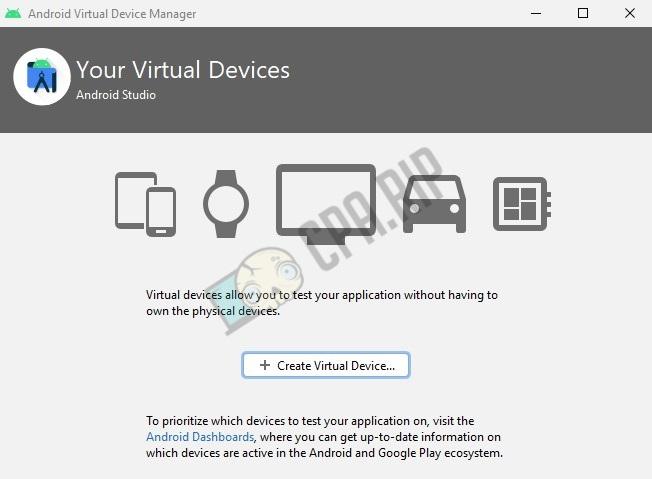
Click ‘Create Virtual Device’.
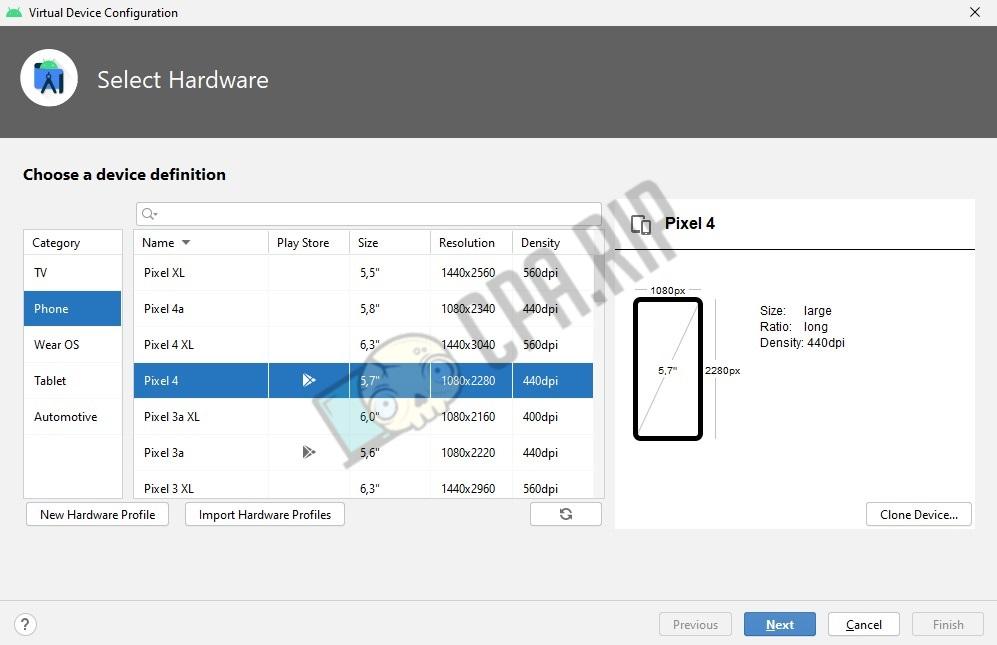
Choose a device definition and download it to your computer.
The app is ready. Let’s move on to creating your first WebView app.
How to create a WebView app?
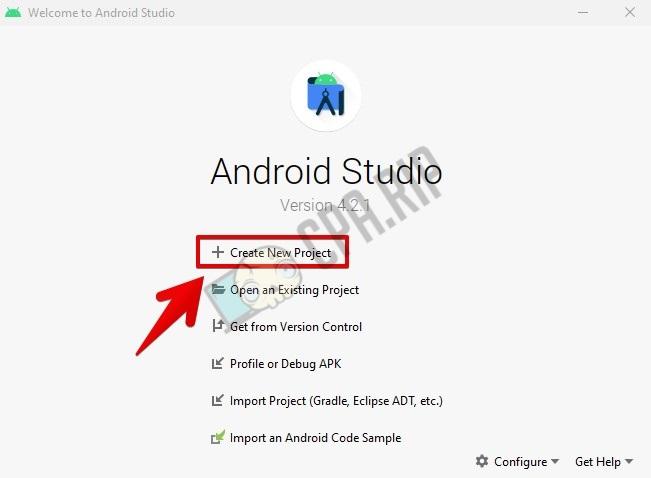
Open the app’s welcome page. Let’s create a new project. To do this, click on ‘Create New Project’.
Select the standard ‘Empty Activity’ template.
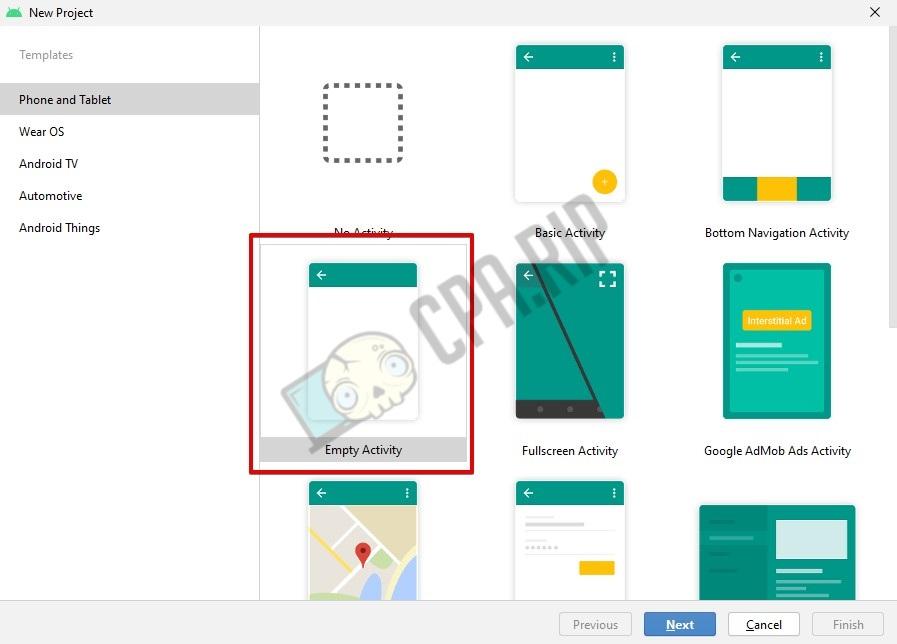
Click ‘Next’.
Type in the project name. Select the ‘Java’ APL and the Minimum SDK (the minimum Android OS supported).
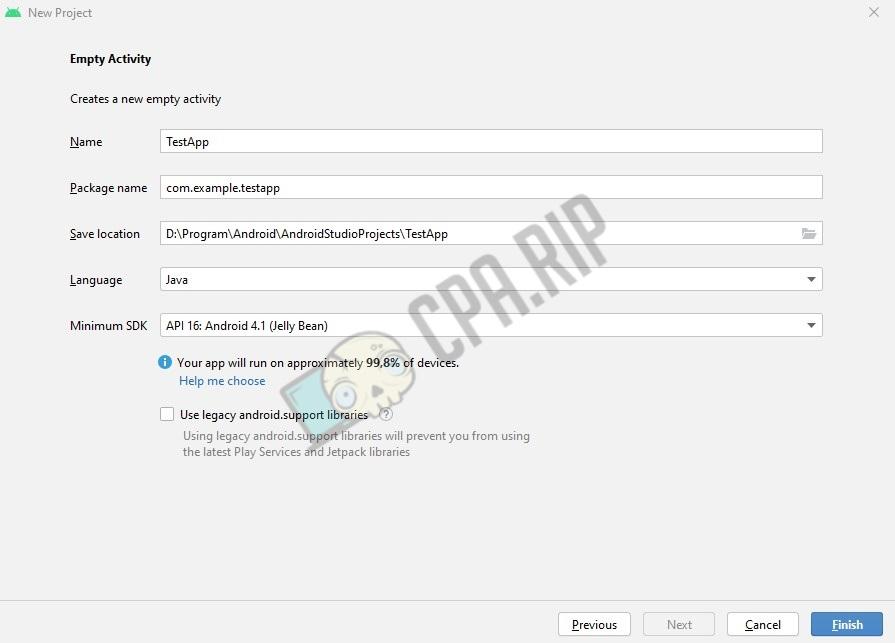
Click ‘Finish’.
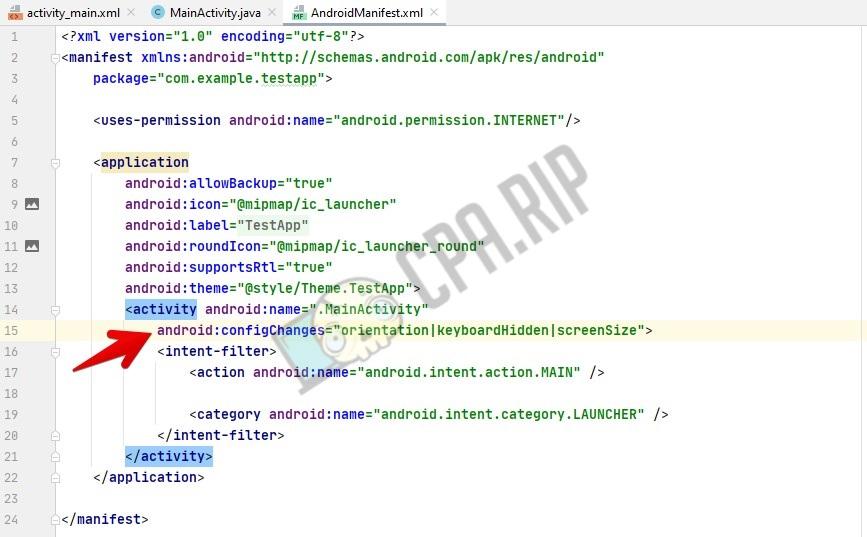
Go to the ‘manifest’ folder and open the ‘AndroidManifest.xml’ file.
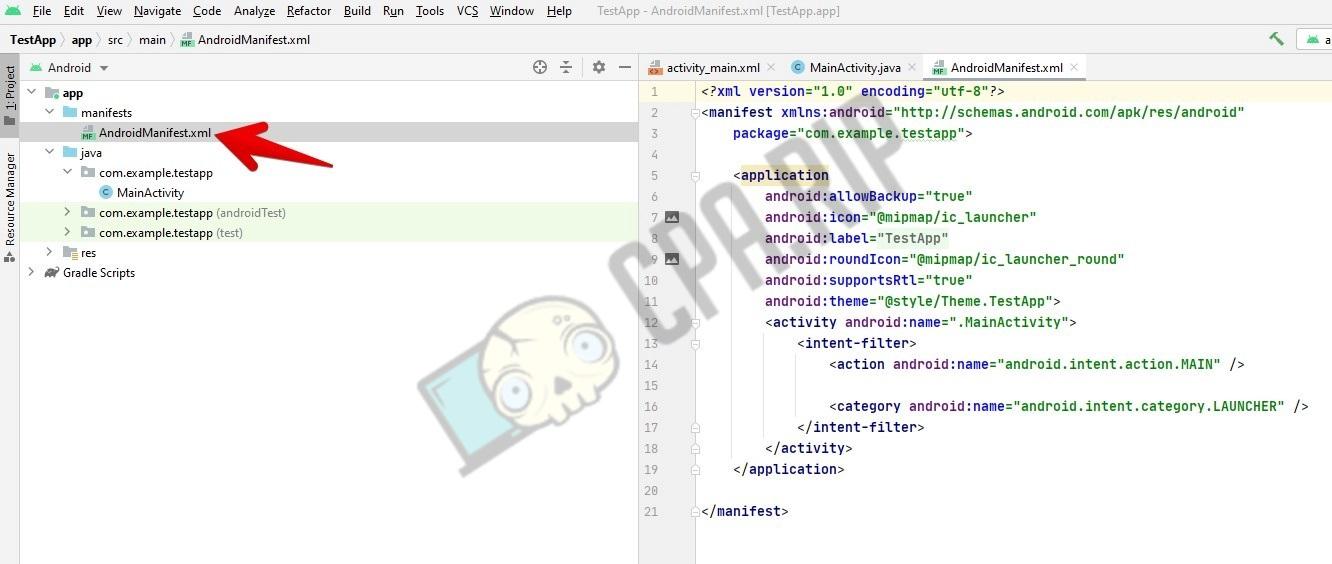
Specify Internet access permissions.
Before the ‘application’, insert:
<uses-permission android:name="android.permission.INTERNET"/>
Go to ‘res’ → ‘layout’. Open the ‘activity_main.xml’ file.
If you don’t see a code, click ‘Split’ in the upper right.

Delete the standard code text.
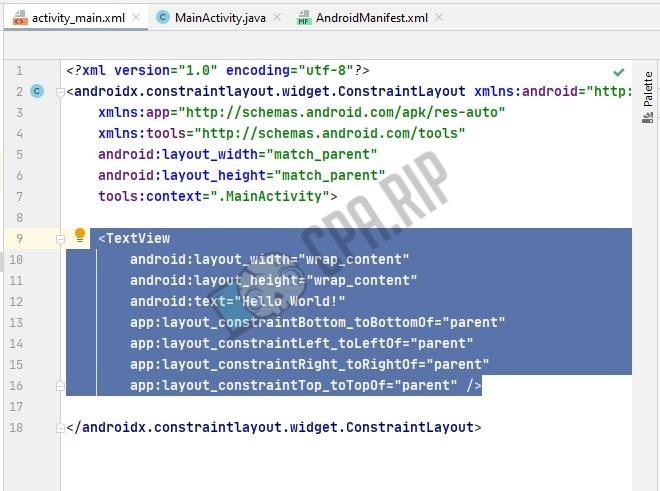
Insert the following code instead:
<WebView
android:id=”@+id/webView”
android:layout_width=”match_parent”
android:layout_height=”match_parent”
/>
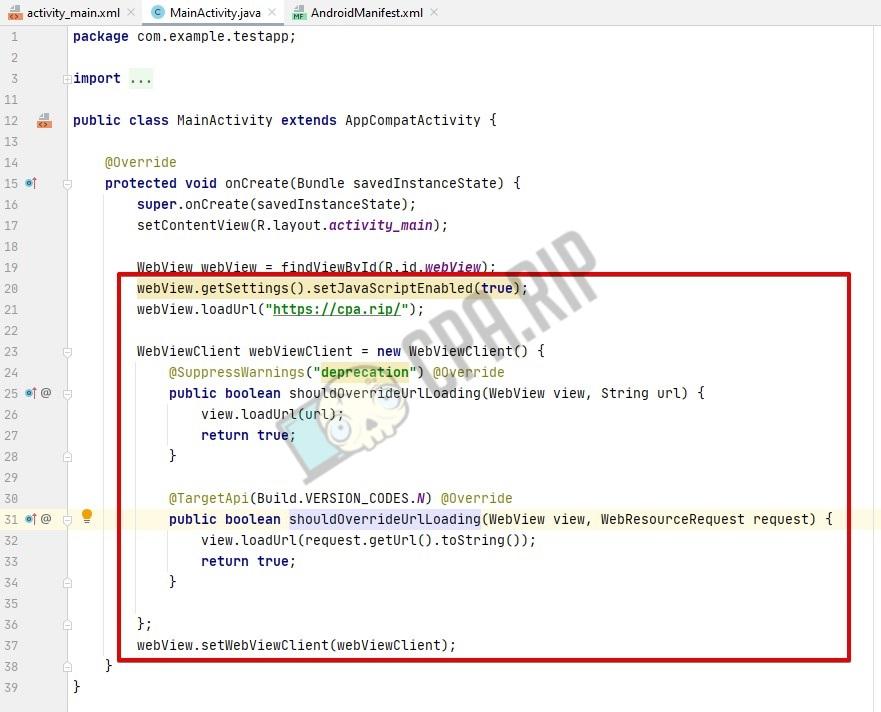
Find the ‘MainActivity’ file in the java folder.
Inside the ‘@Override’ method brackets, insert the code:
webView.getSettings().setJavaScriptEnabled(true);
webView.loadUrl("https://cpa.rip/");
WebViewClient webViewClient = new WebViewClient() {
@SuppressWarnings("deprecation") @Override
public boolean shouldOverrideUrlLoading(WebView view, String url) {
view.loadUrl(url);
return true;
}
@TargetApi(Build.VERSION_CODES.N) @Override
public boolean shouldOverrideUrlLoading(WebView view, WebResourceRequest request) {
view.loadUrl(request.getUrl().toString());
return true;
}
};
webView.setWebViewClient(webViewClient);
In the ‘webView.loadUrl’ variable, insert the URL that will open in the app. For example, webView.loadUrl("https://cpa.rip/");.
Open the ‘AndroidManifest.xml’ file. After the application tag, add the following code:
android:configChanges="orientation|keyboardHidden|screenSize"
You need it so that the app does not update when you rotate the screen.
If automatic classes import is disabled, do everything manually. Find red code snippets, move the cursor over and click on ‘Import class’ in the pop-up table.
All new apps have icons by default. To change an icon, right-click on the ‘Res’ folder, select ‘New’ and go to ‘Image Asset’.
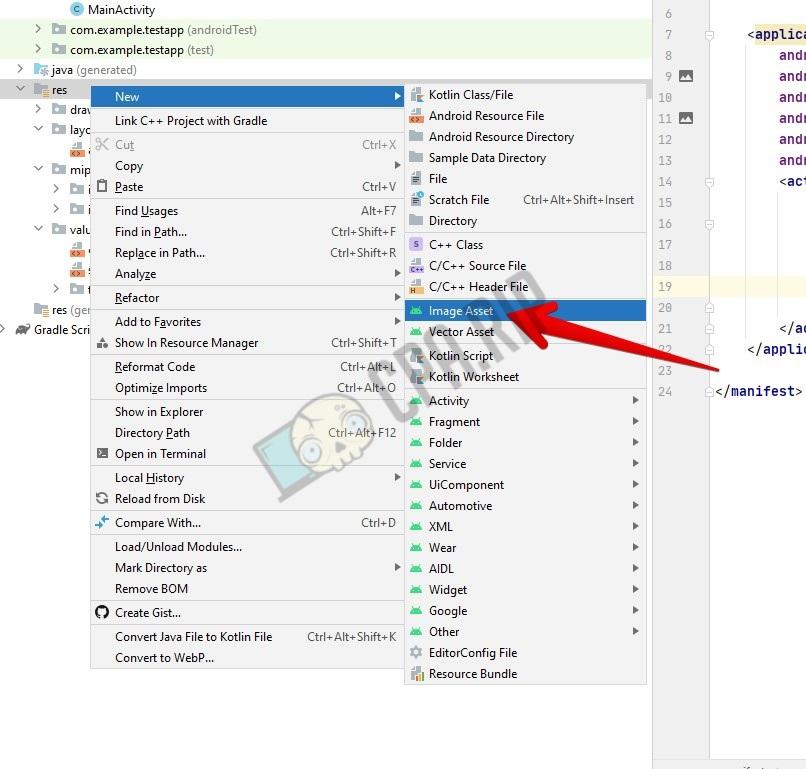
Click on the folder icon in the ‘Path’ column. Find the file you’d like to set as the app icon.
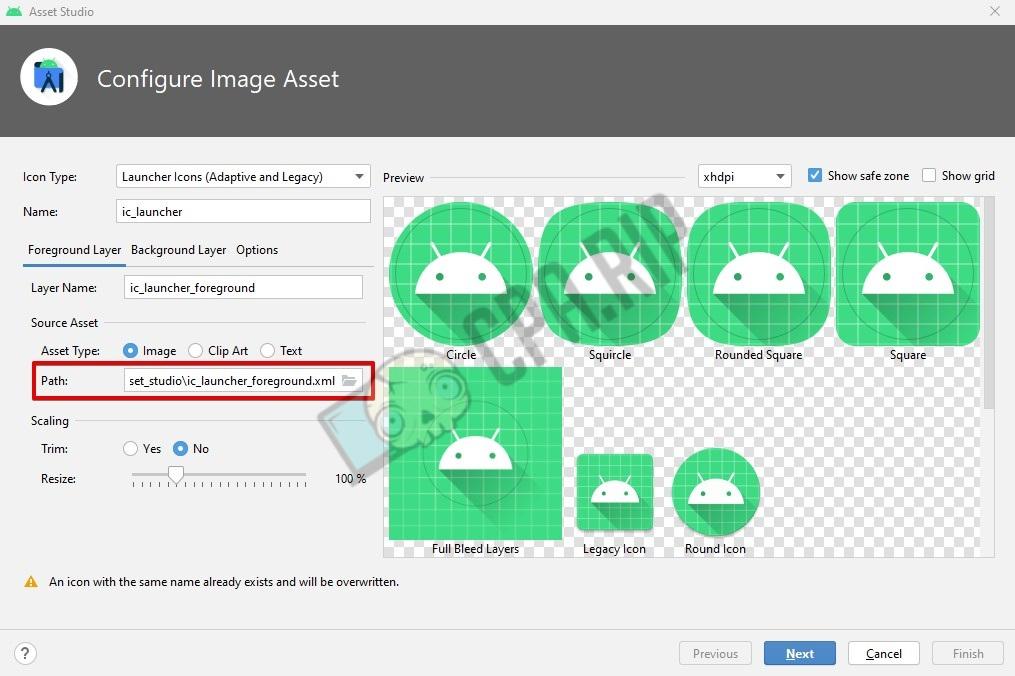
Click ‘Next’ and ‘Finish’.
Now let’s see if the app works. Run the emulator.

If it’s all good, the app works just fine.

A simple WebView app is ready. Now let’s create an APK file.
In the menu, click ‘Build’ and select ‘Generate Signed Bundle/APK…’

Select ‘APK’ and click ‘Next’.
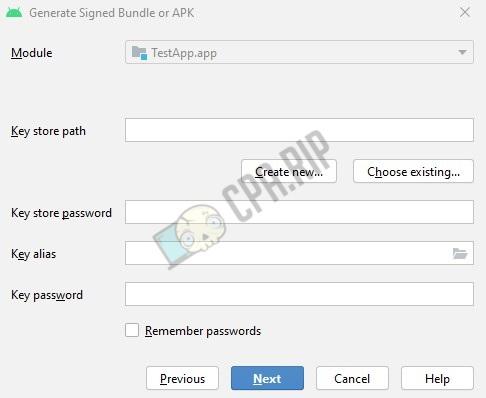
Since you are creating an app for the first time, you need to create a keystore file for an app signature as well. To do this, select ‘Create new’ in the ‘Key store path’ field.
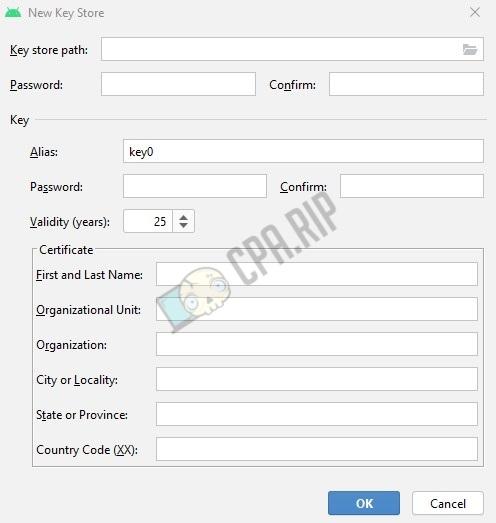
In the menu that opens, click on the right folder in the ‘Key store path’ field. Type in the name. Next, type in passwords.
Fill in the Name, Surname, company/organization name, city, region, country code in XX format.
Click ‘OK’ and ‘Next’.
Specify the path to save the APK file in the ‘Destination Folder’ field. Select ‘release’ below and check both boxes at the bottom.
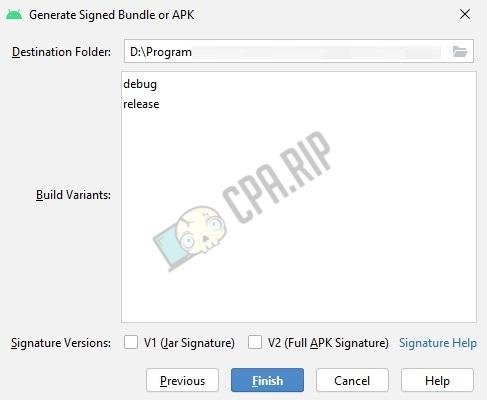
Click ‘Finish’.
Wait a few minutes. The app will display a notification that the APK file is ready.
Your simple WebView app is all set now.