This detailed technical guidance will help you to set up TikTok Pixel and work with it
Initial setup
The initial setup is the same for all options.
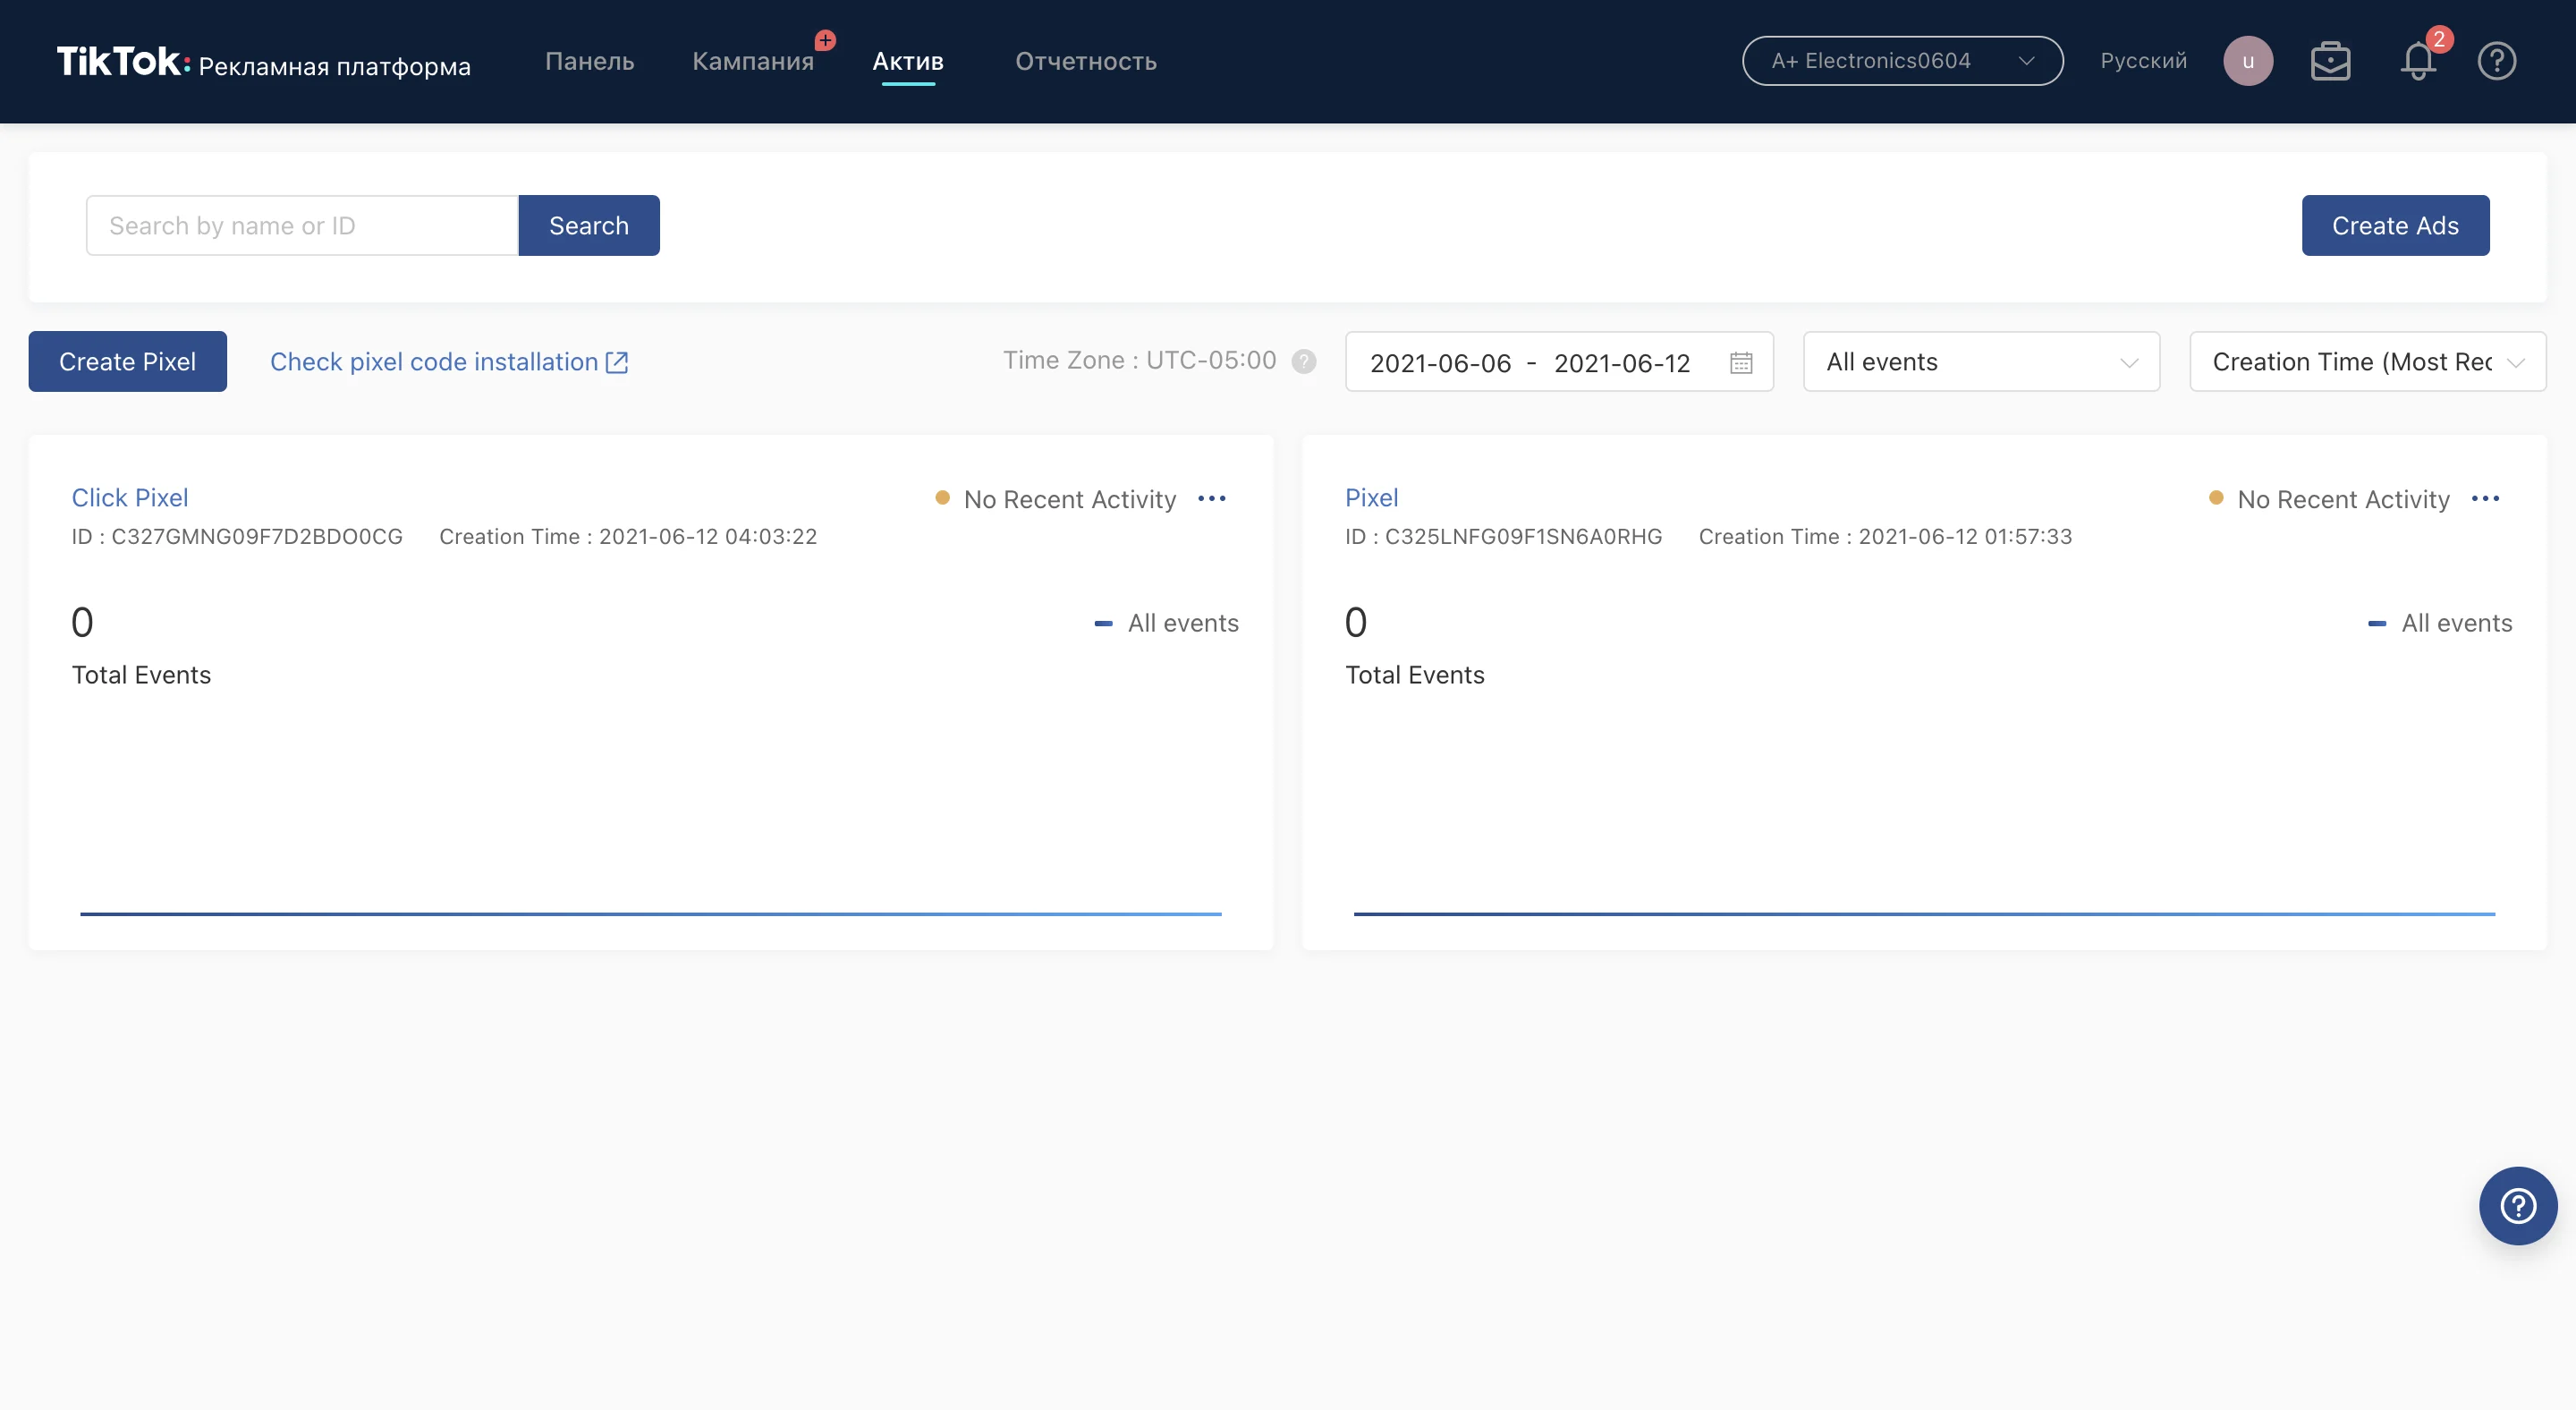
Go to the “Assets” tab, choose “Event”:
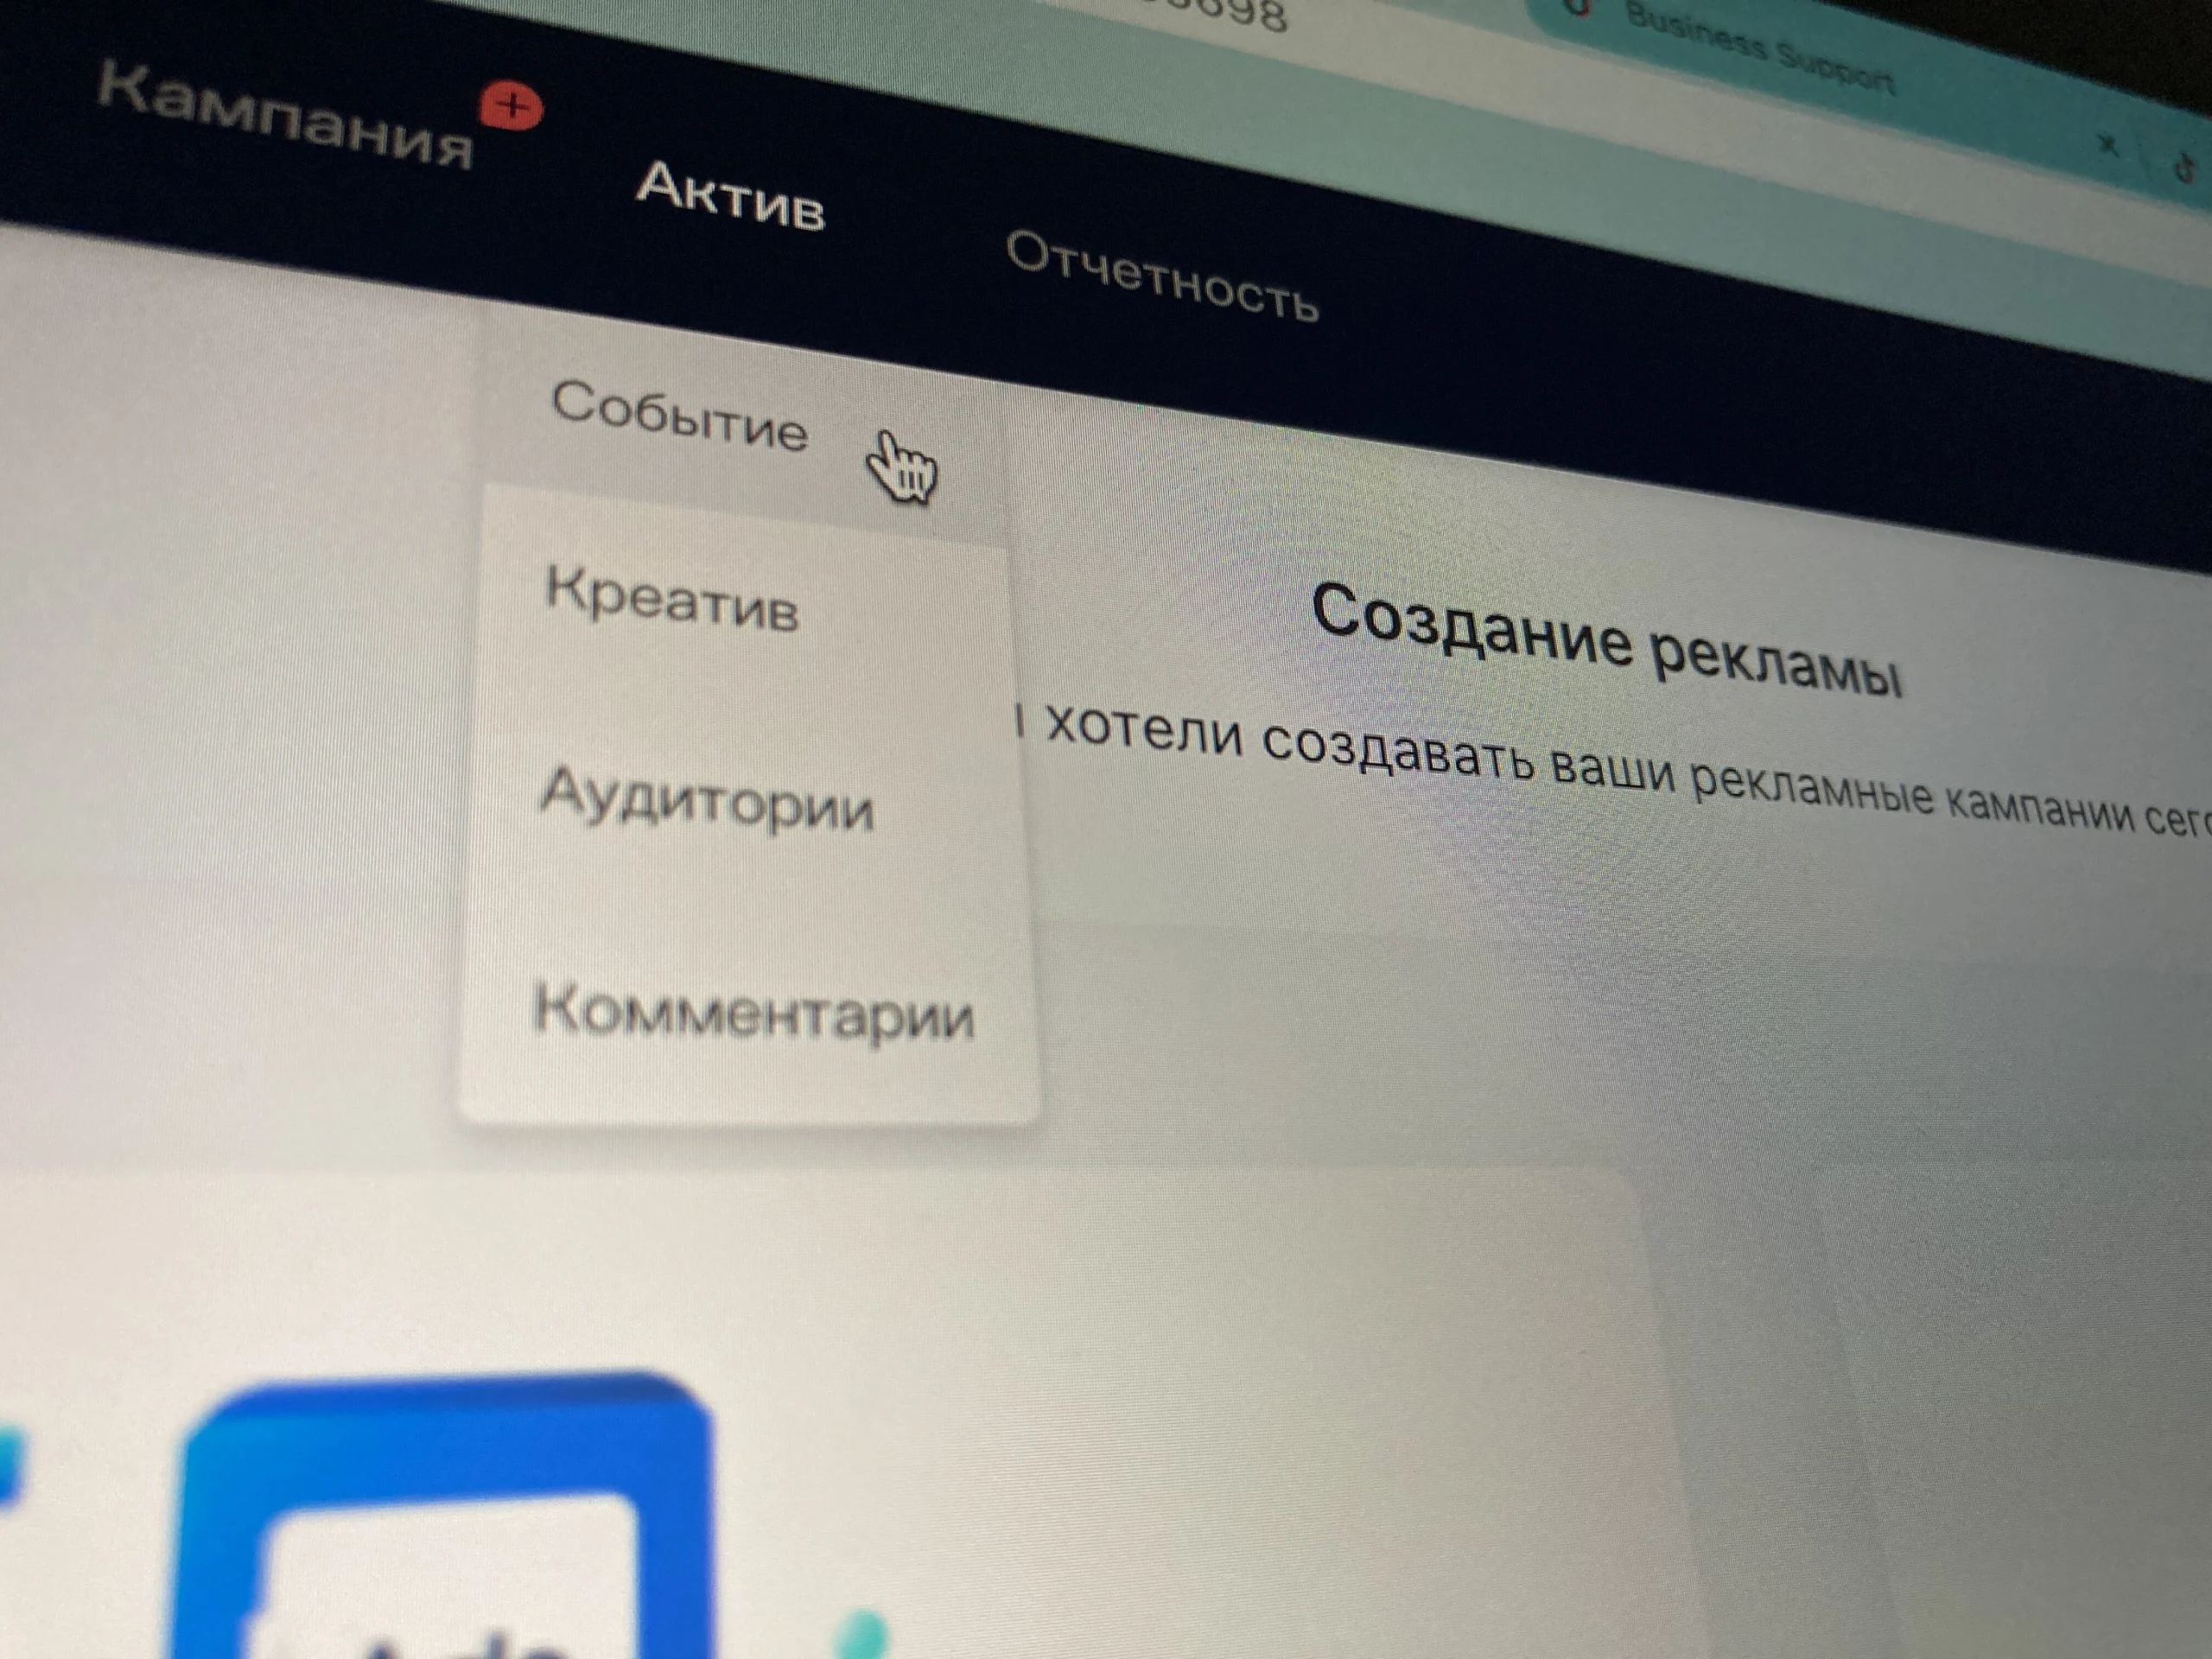
Select the “Manage Website Pixel” option:

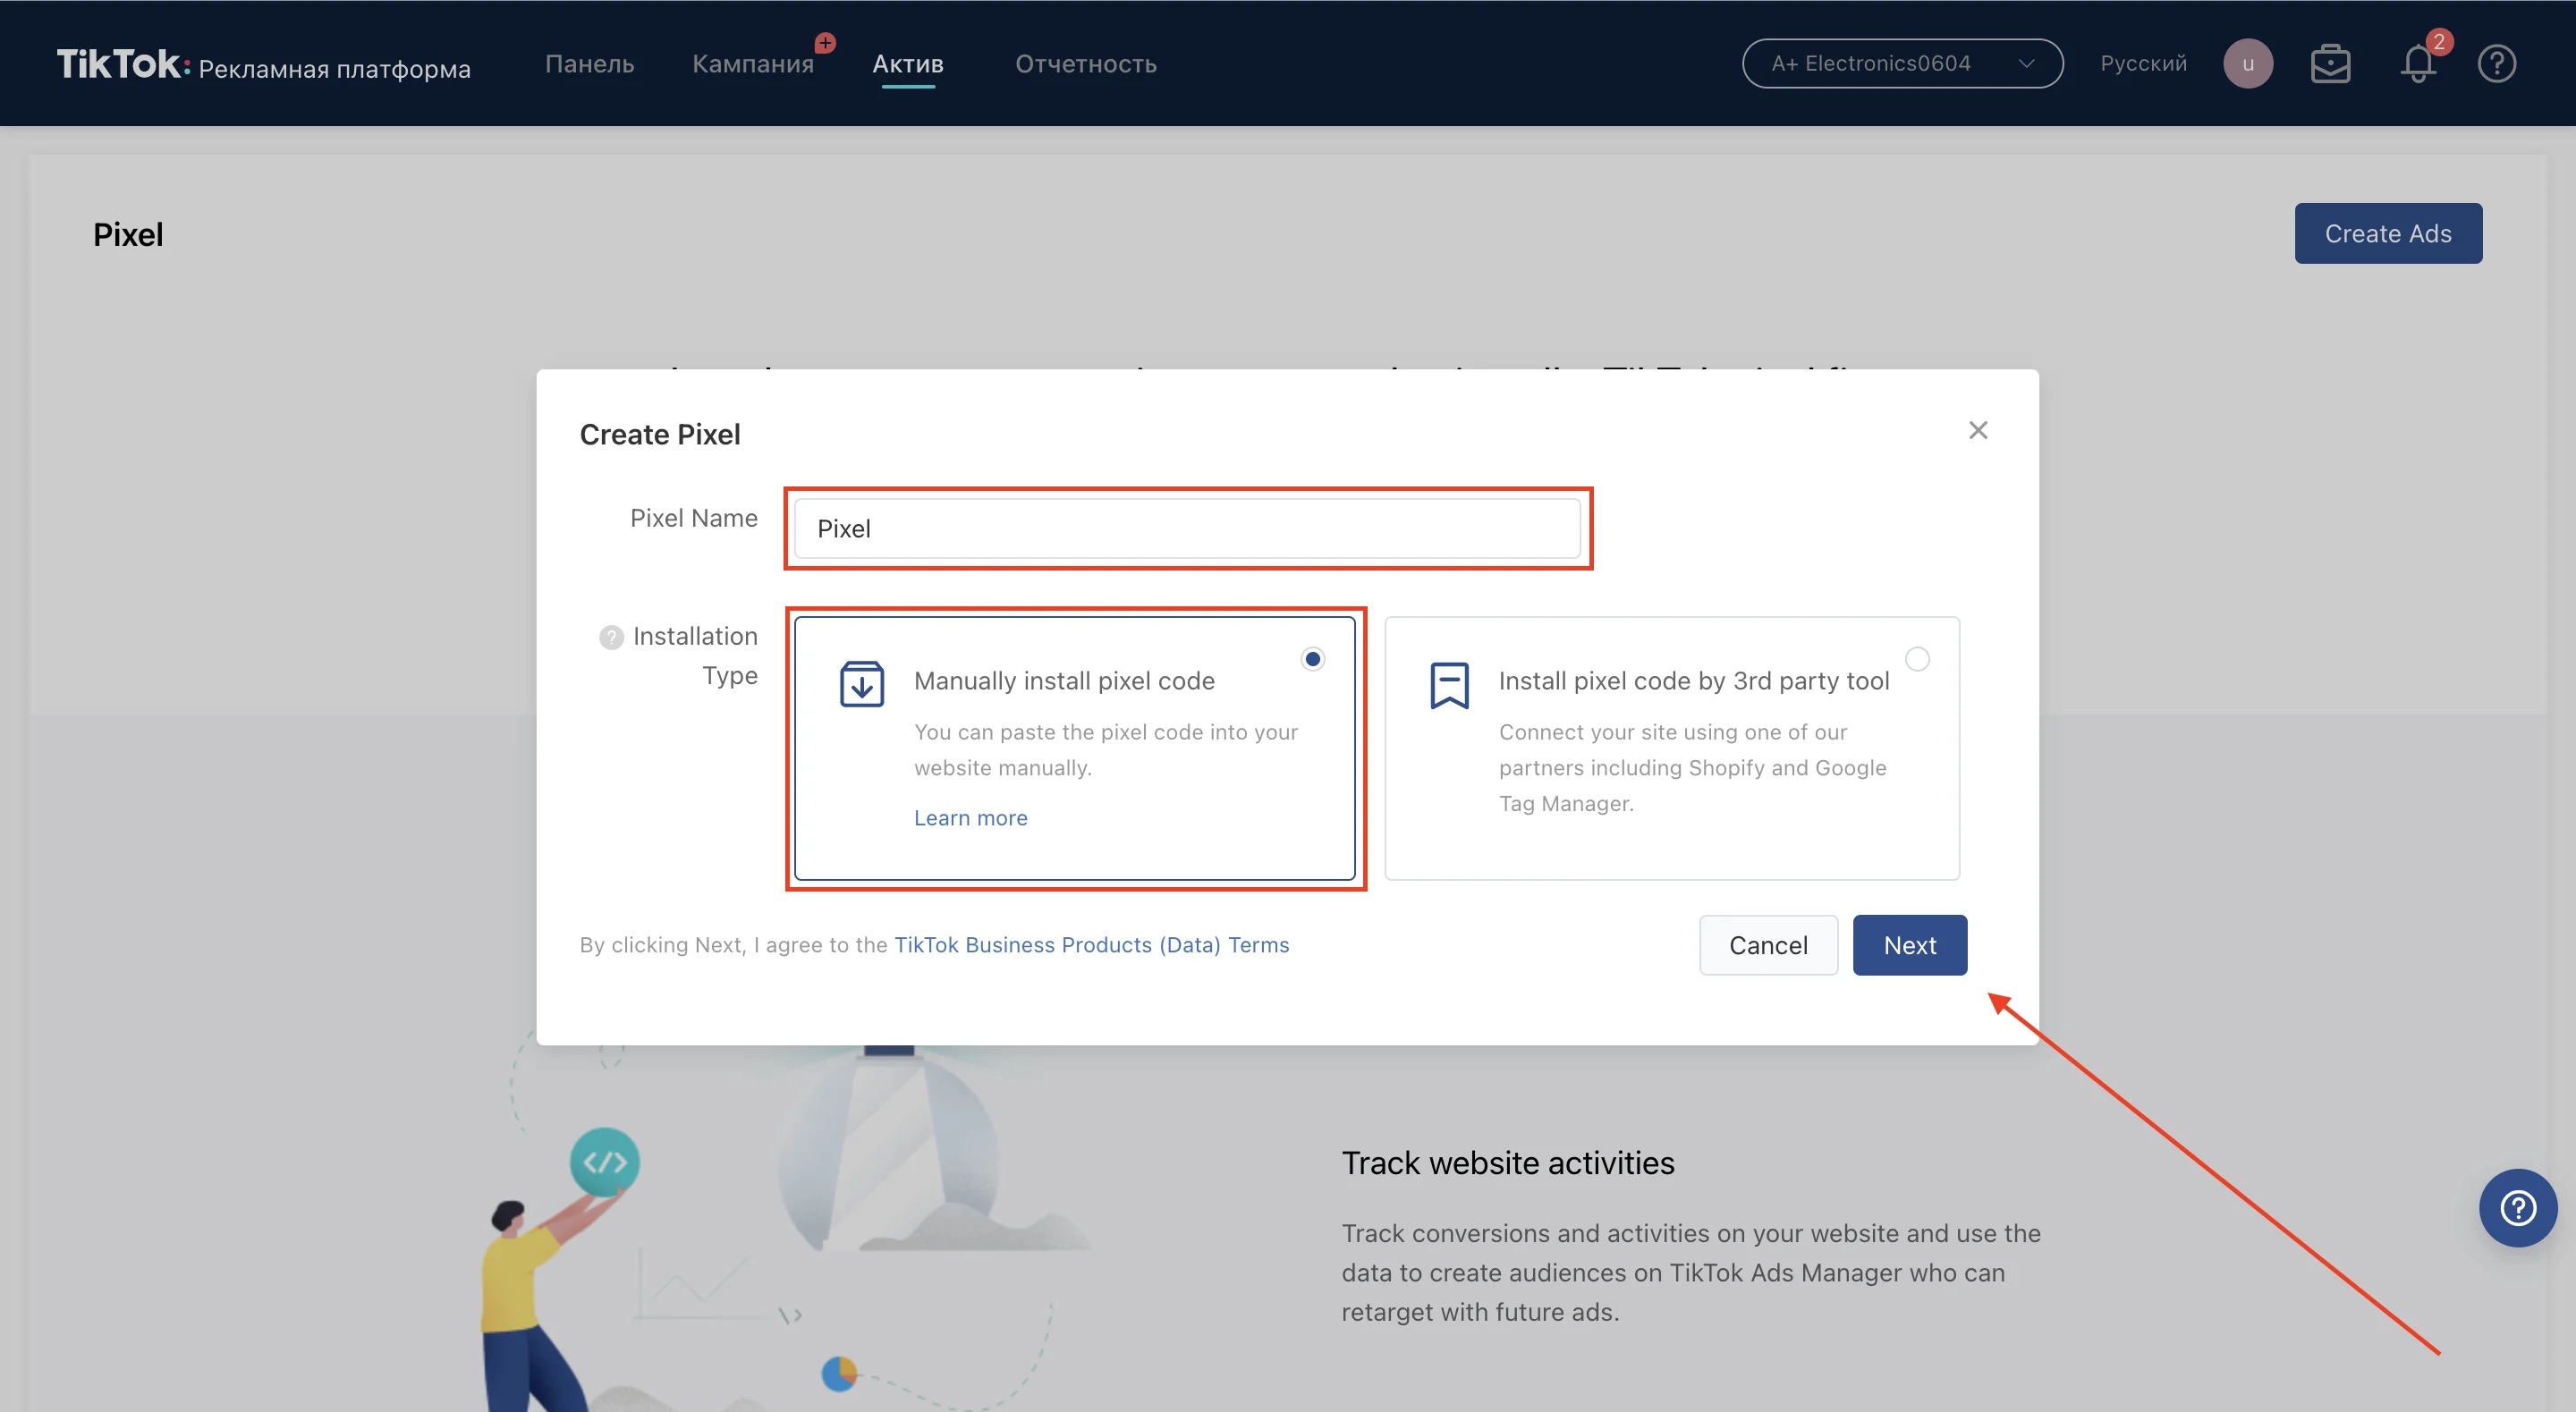
Next, click on “Create Pixel”. Name the pixel, choose “Manually install pixel code” and click “Next”:
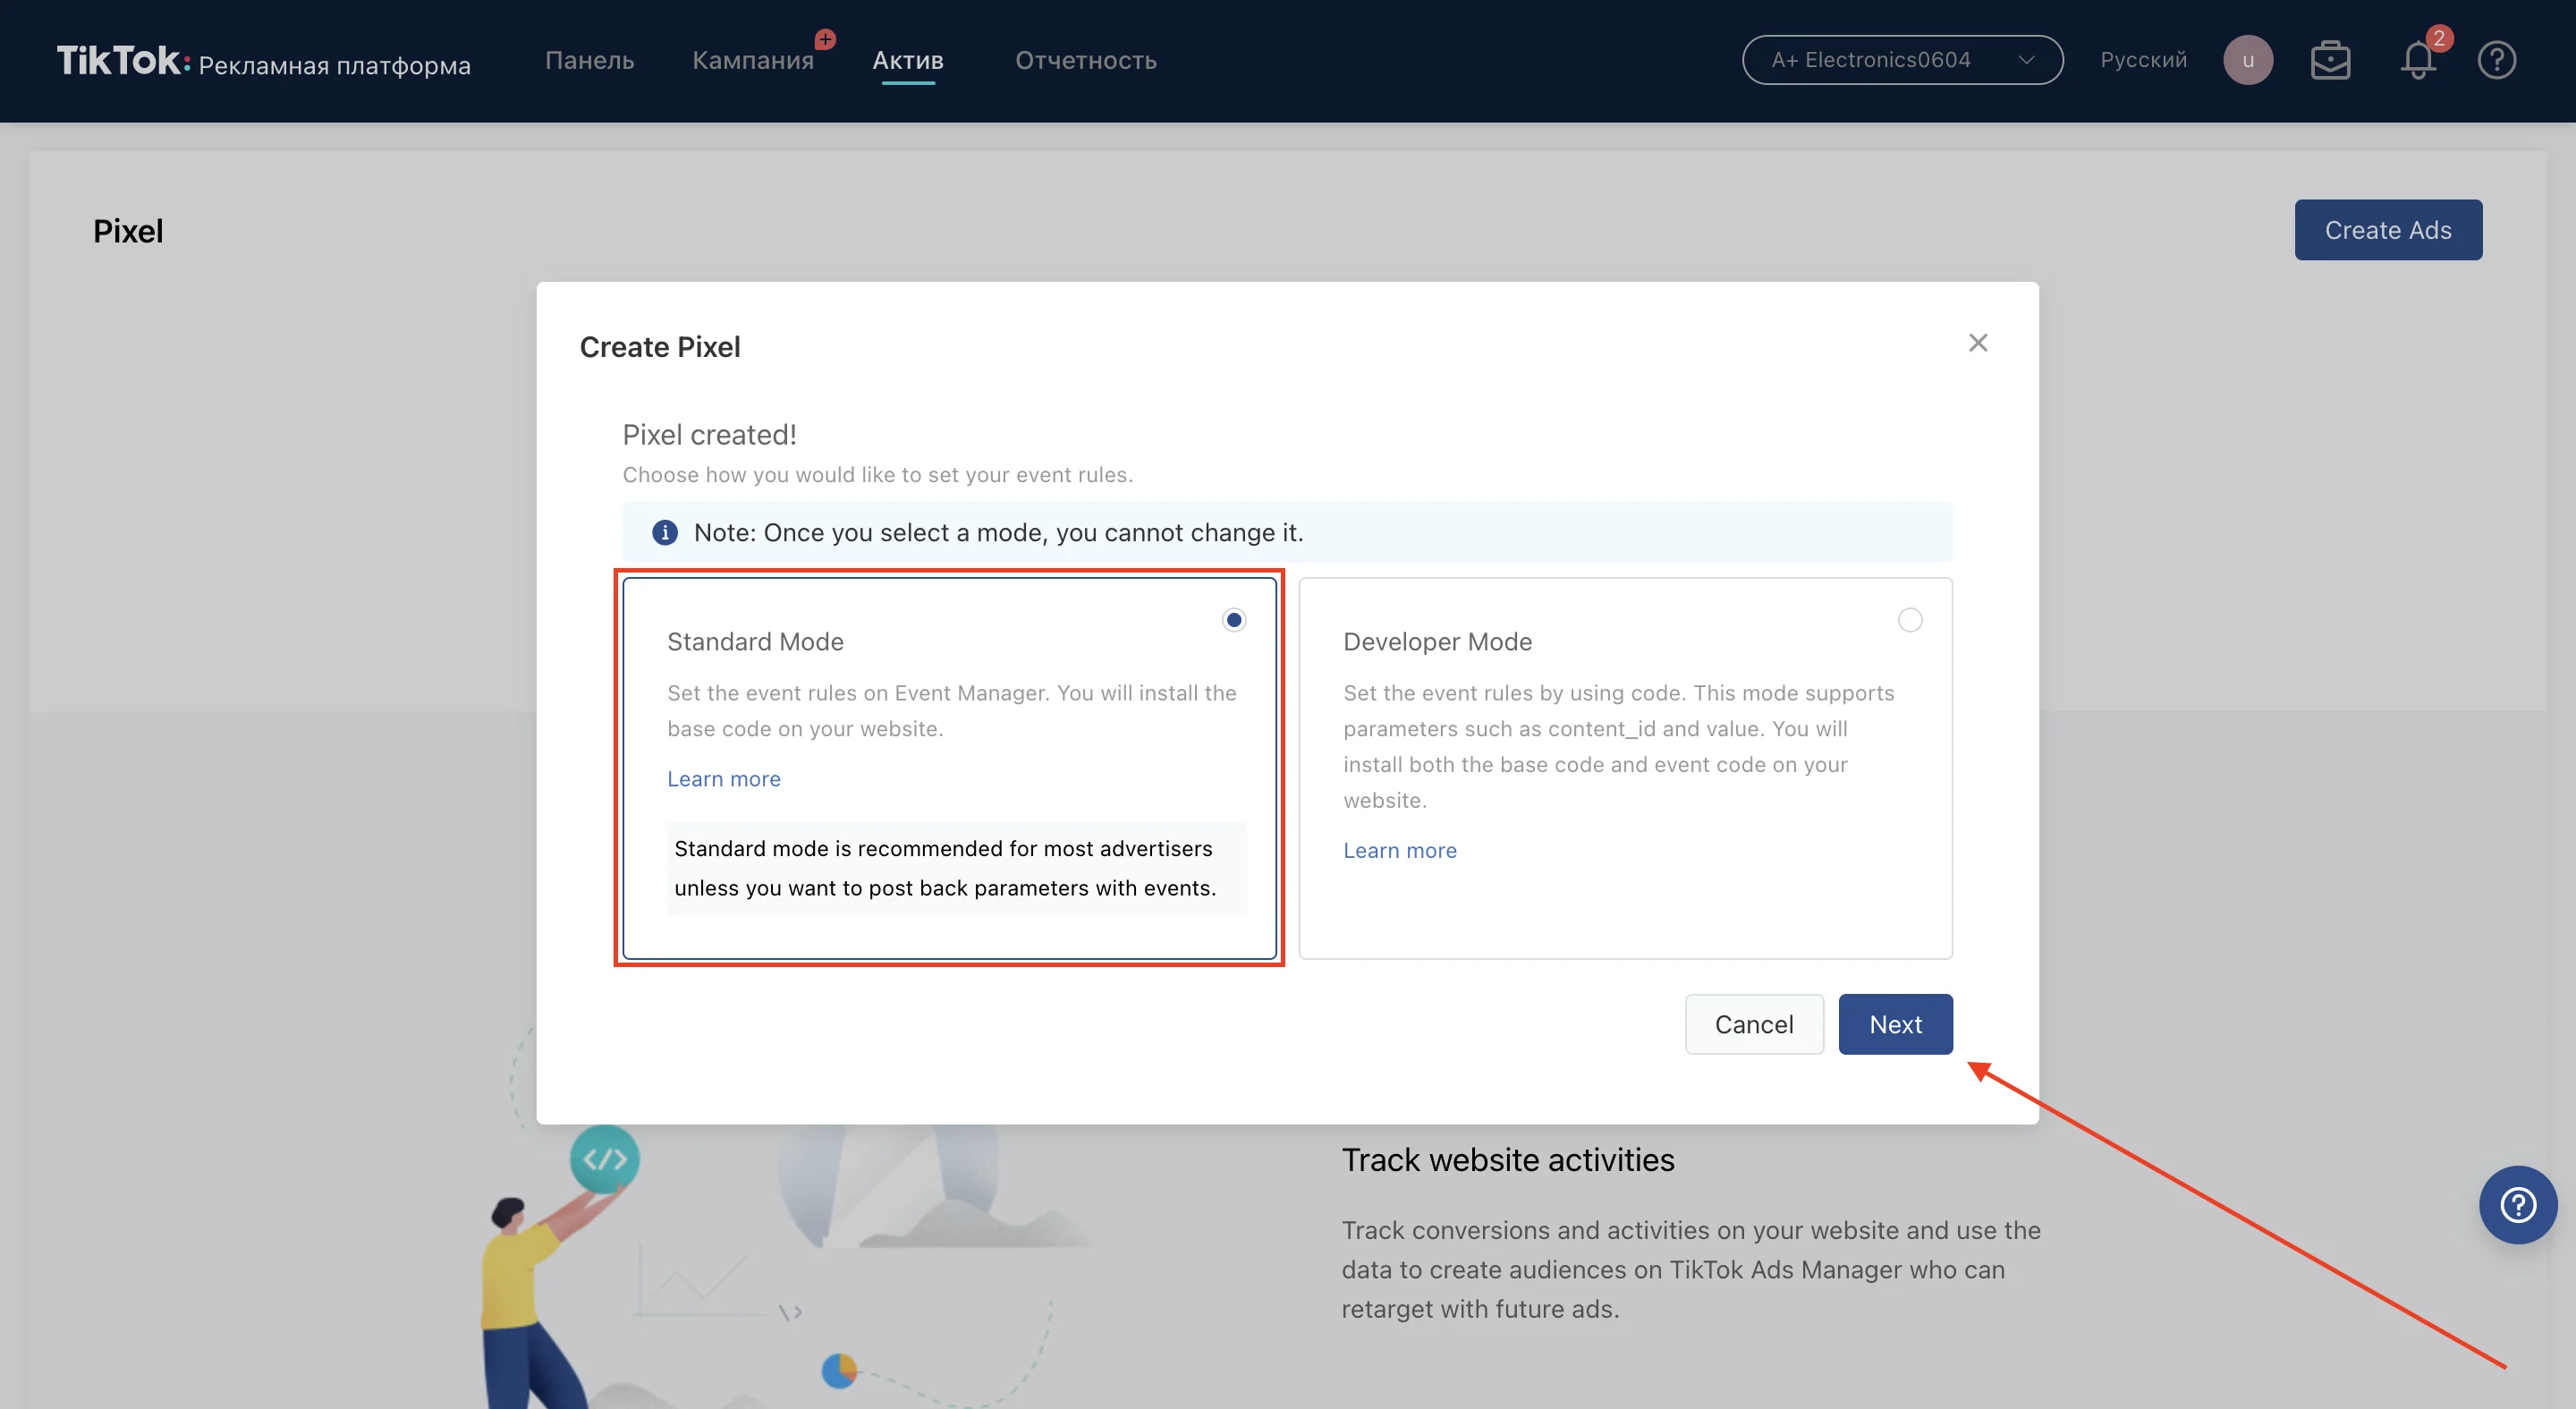
Select “Standard Mode”:
From here, there are two options available:
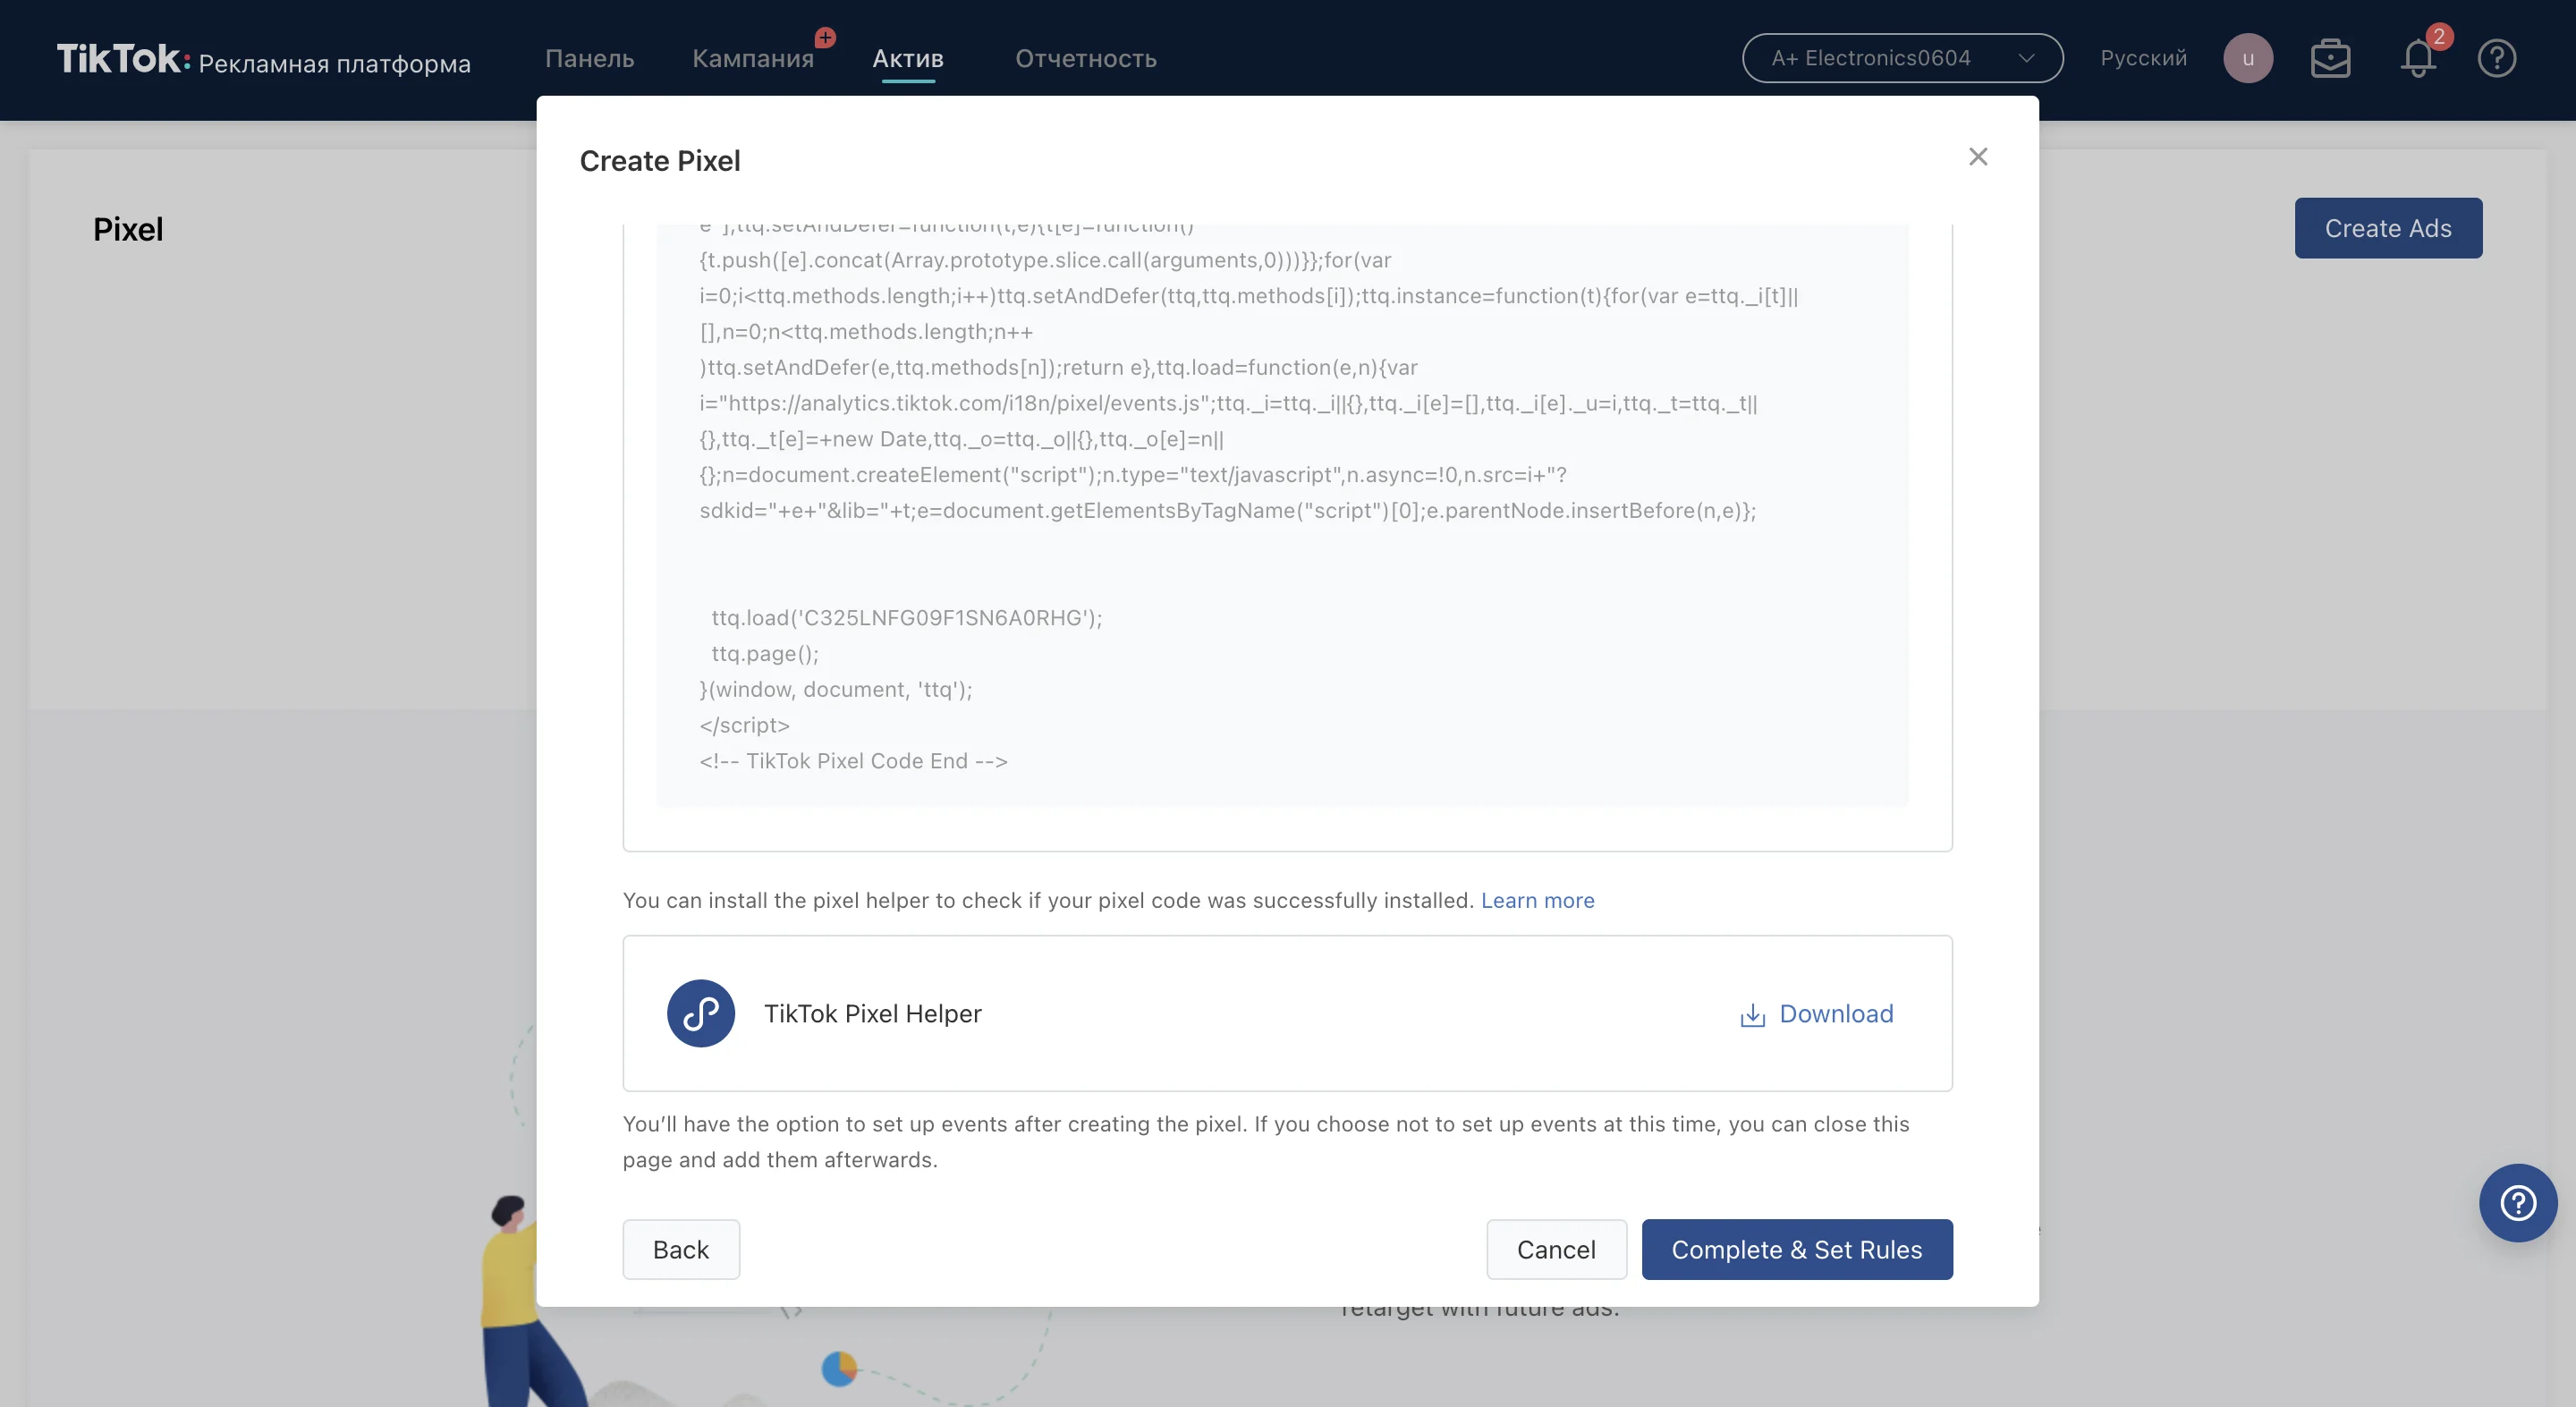
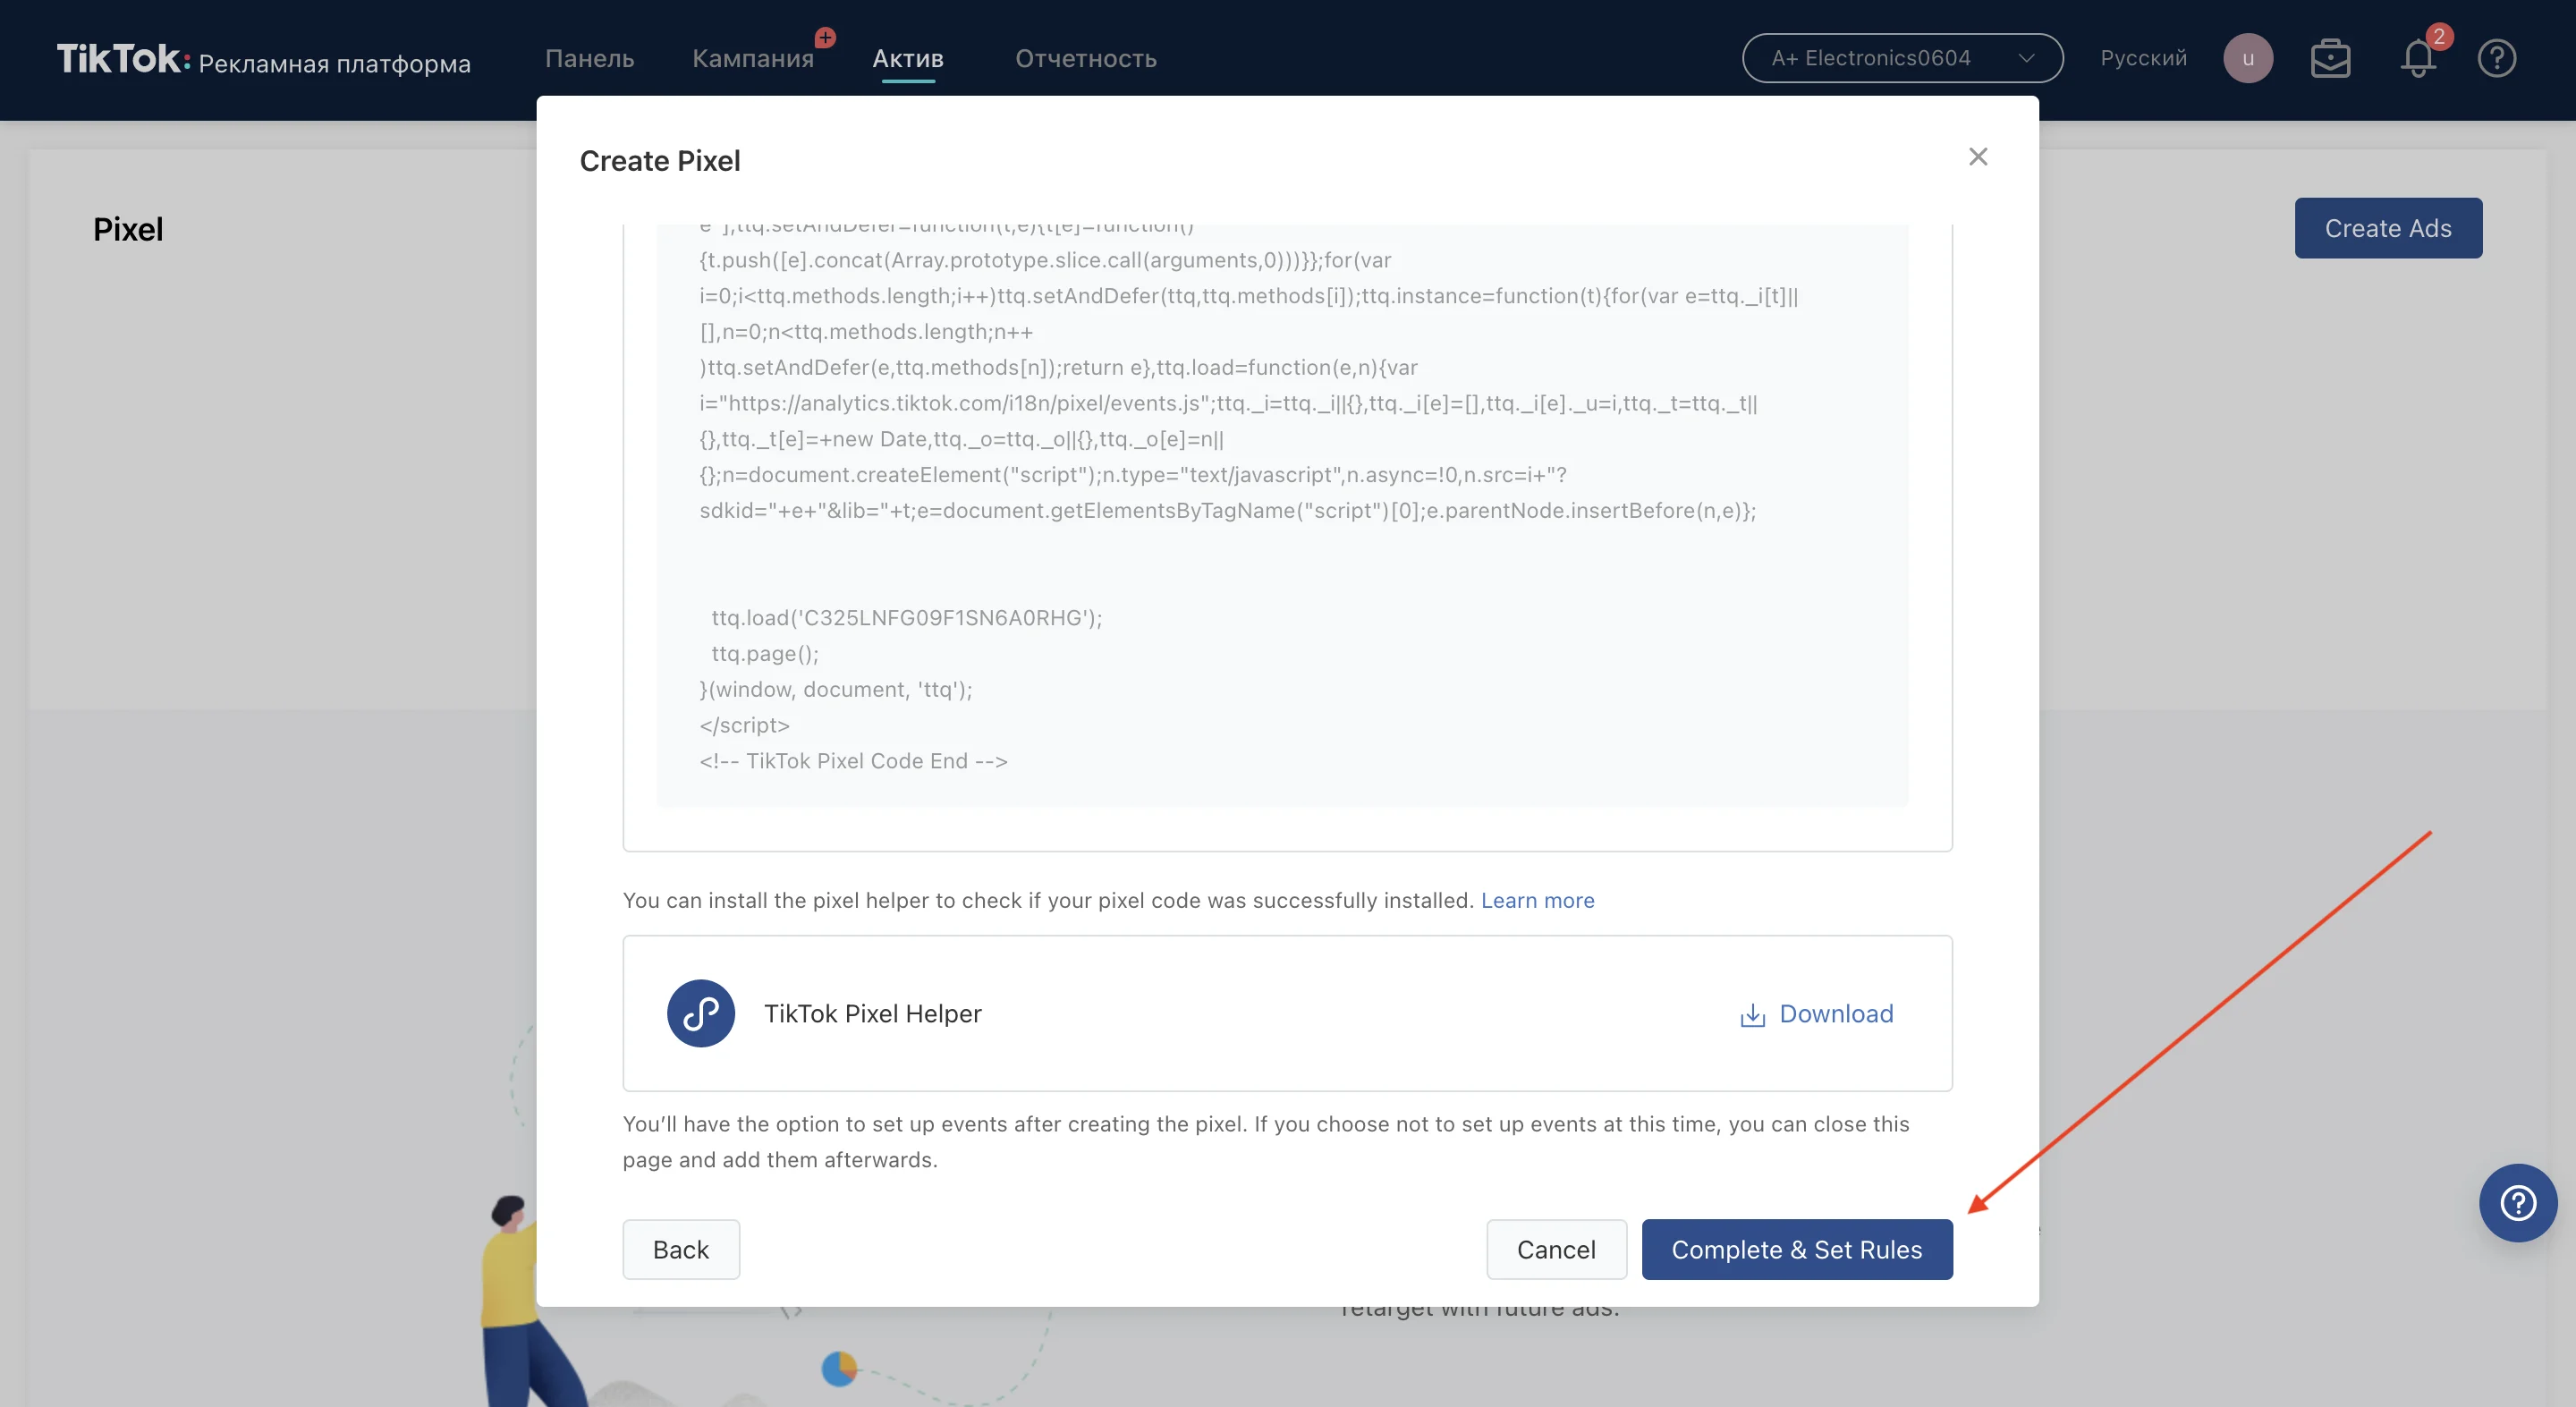
Pixel code – if you want to set up dynamic code, then go to THIS GUIDE. If you opt for a standard one, then copy the suggested code
Pixel Helper – you don’t need it if you set up Destination URL, but you’ll need it if you set up Click Events
Let’s begin with the first option
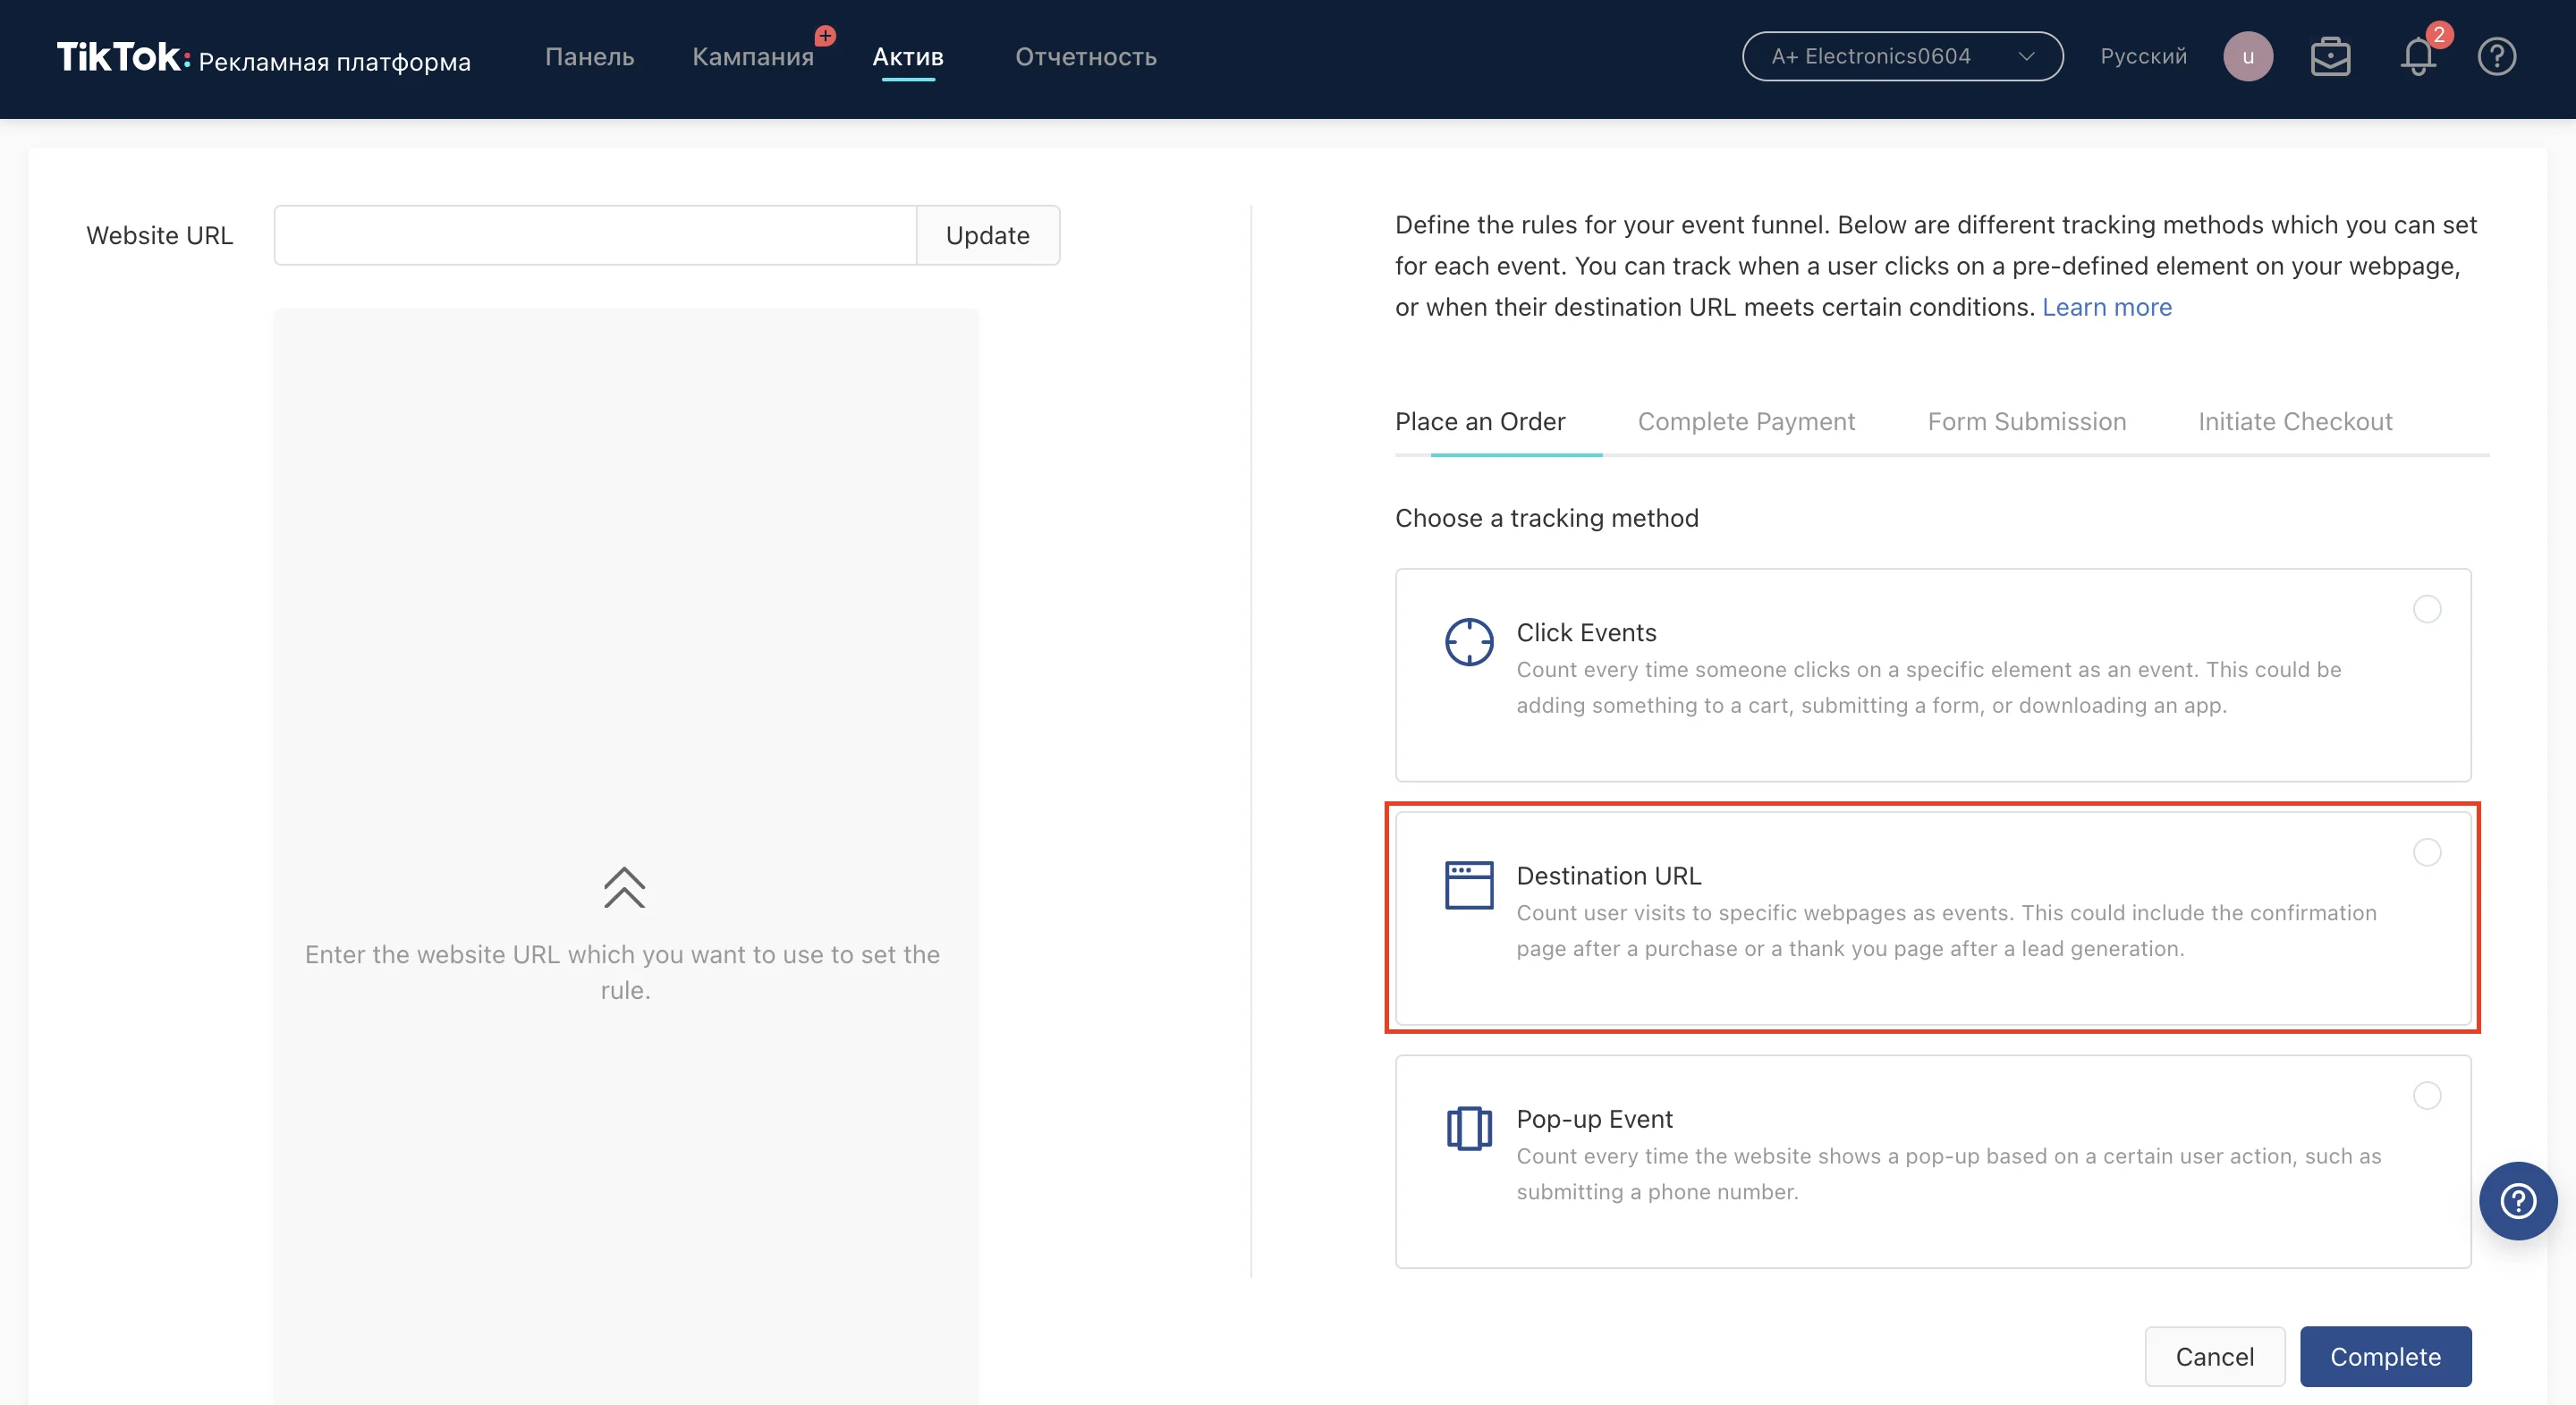
Destination URL
This option is convenient when you have a thank you page where the user is being forwarded after he’d performed the desired action.
Just press “Complete & Set Rules”:
Select “Custom Events”:
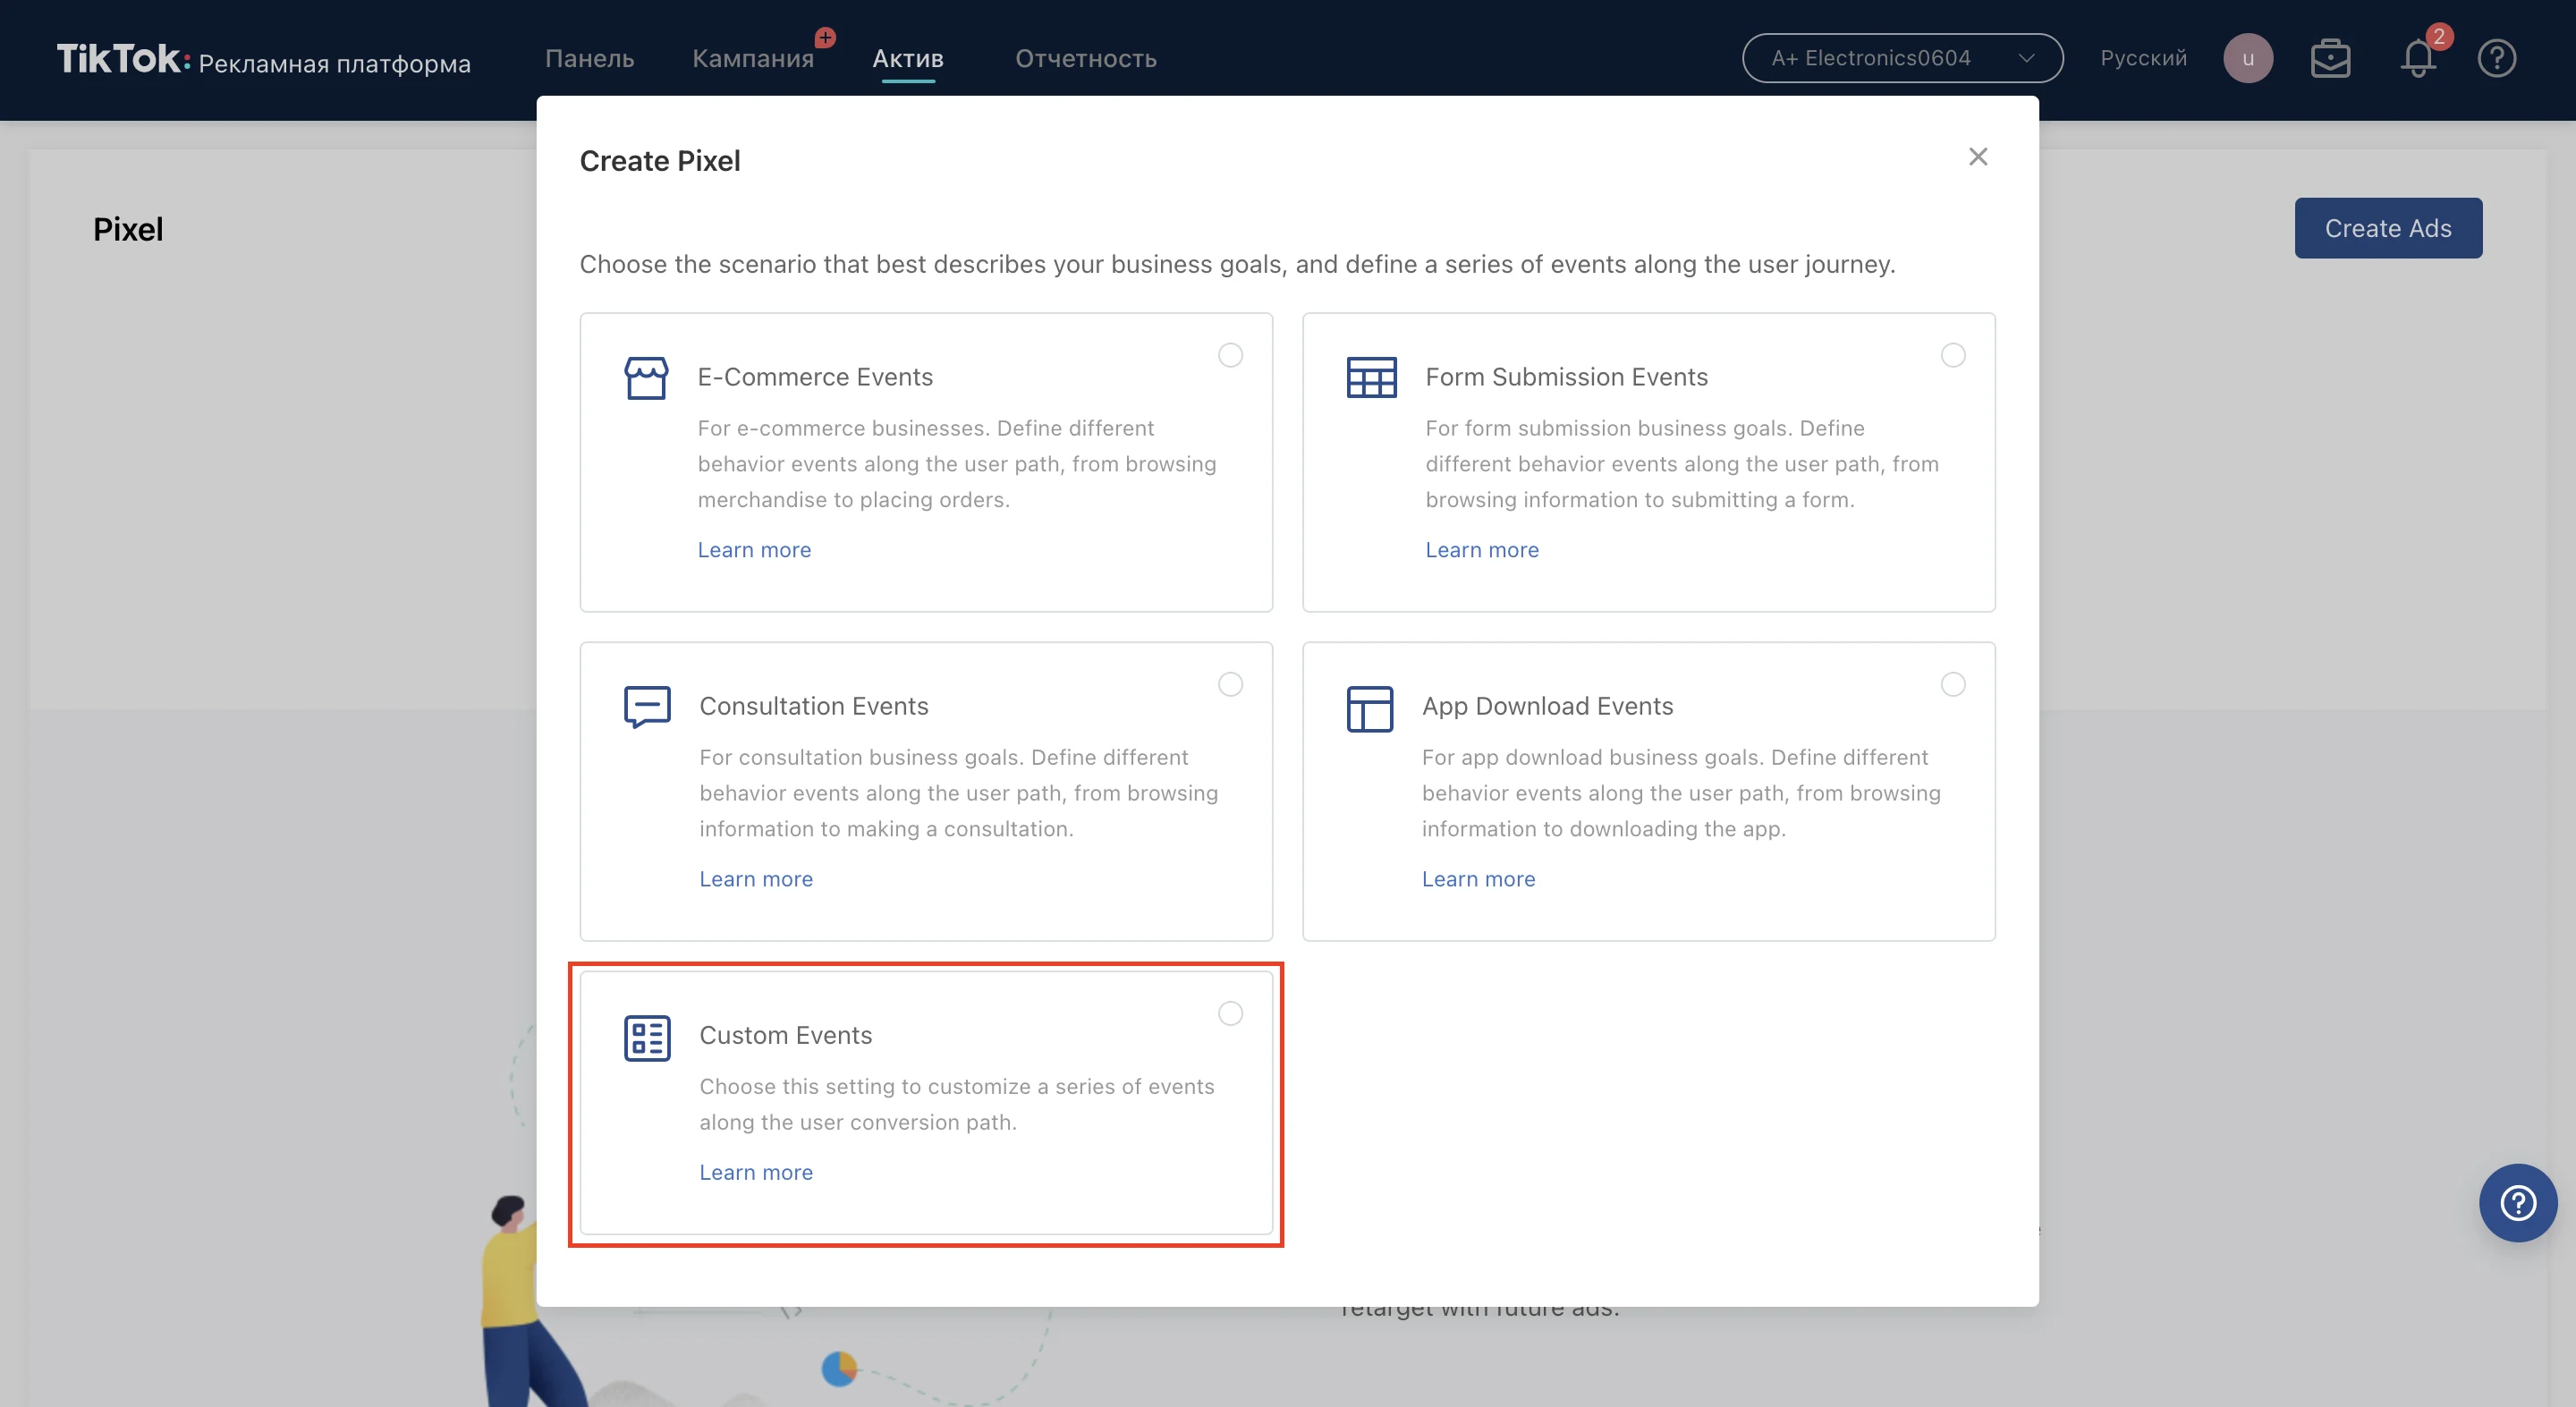
Then, select “Event Type”. I usually select these 4 types:
✅ Place an order
✅ Complete payment
✅ Form submission
✅ Initiate checkout
Why do I select multiple events? I’ll explain it in fine
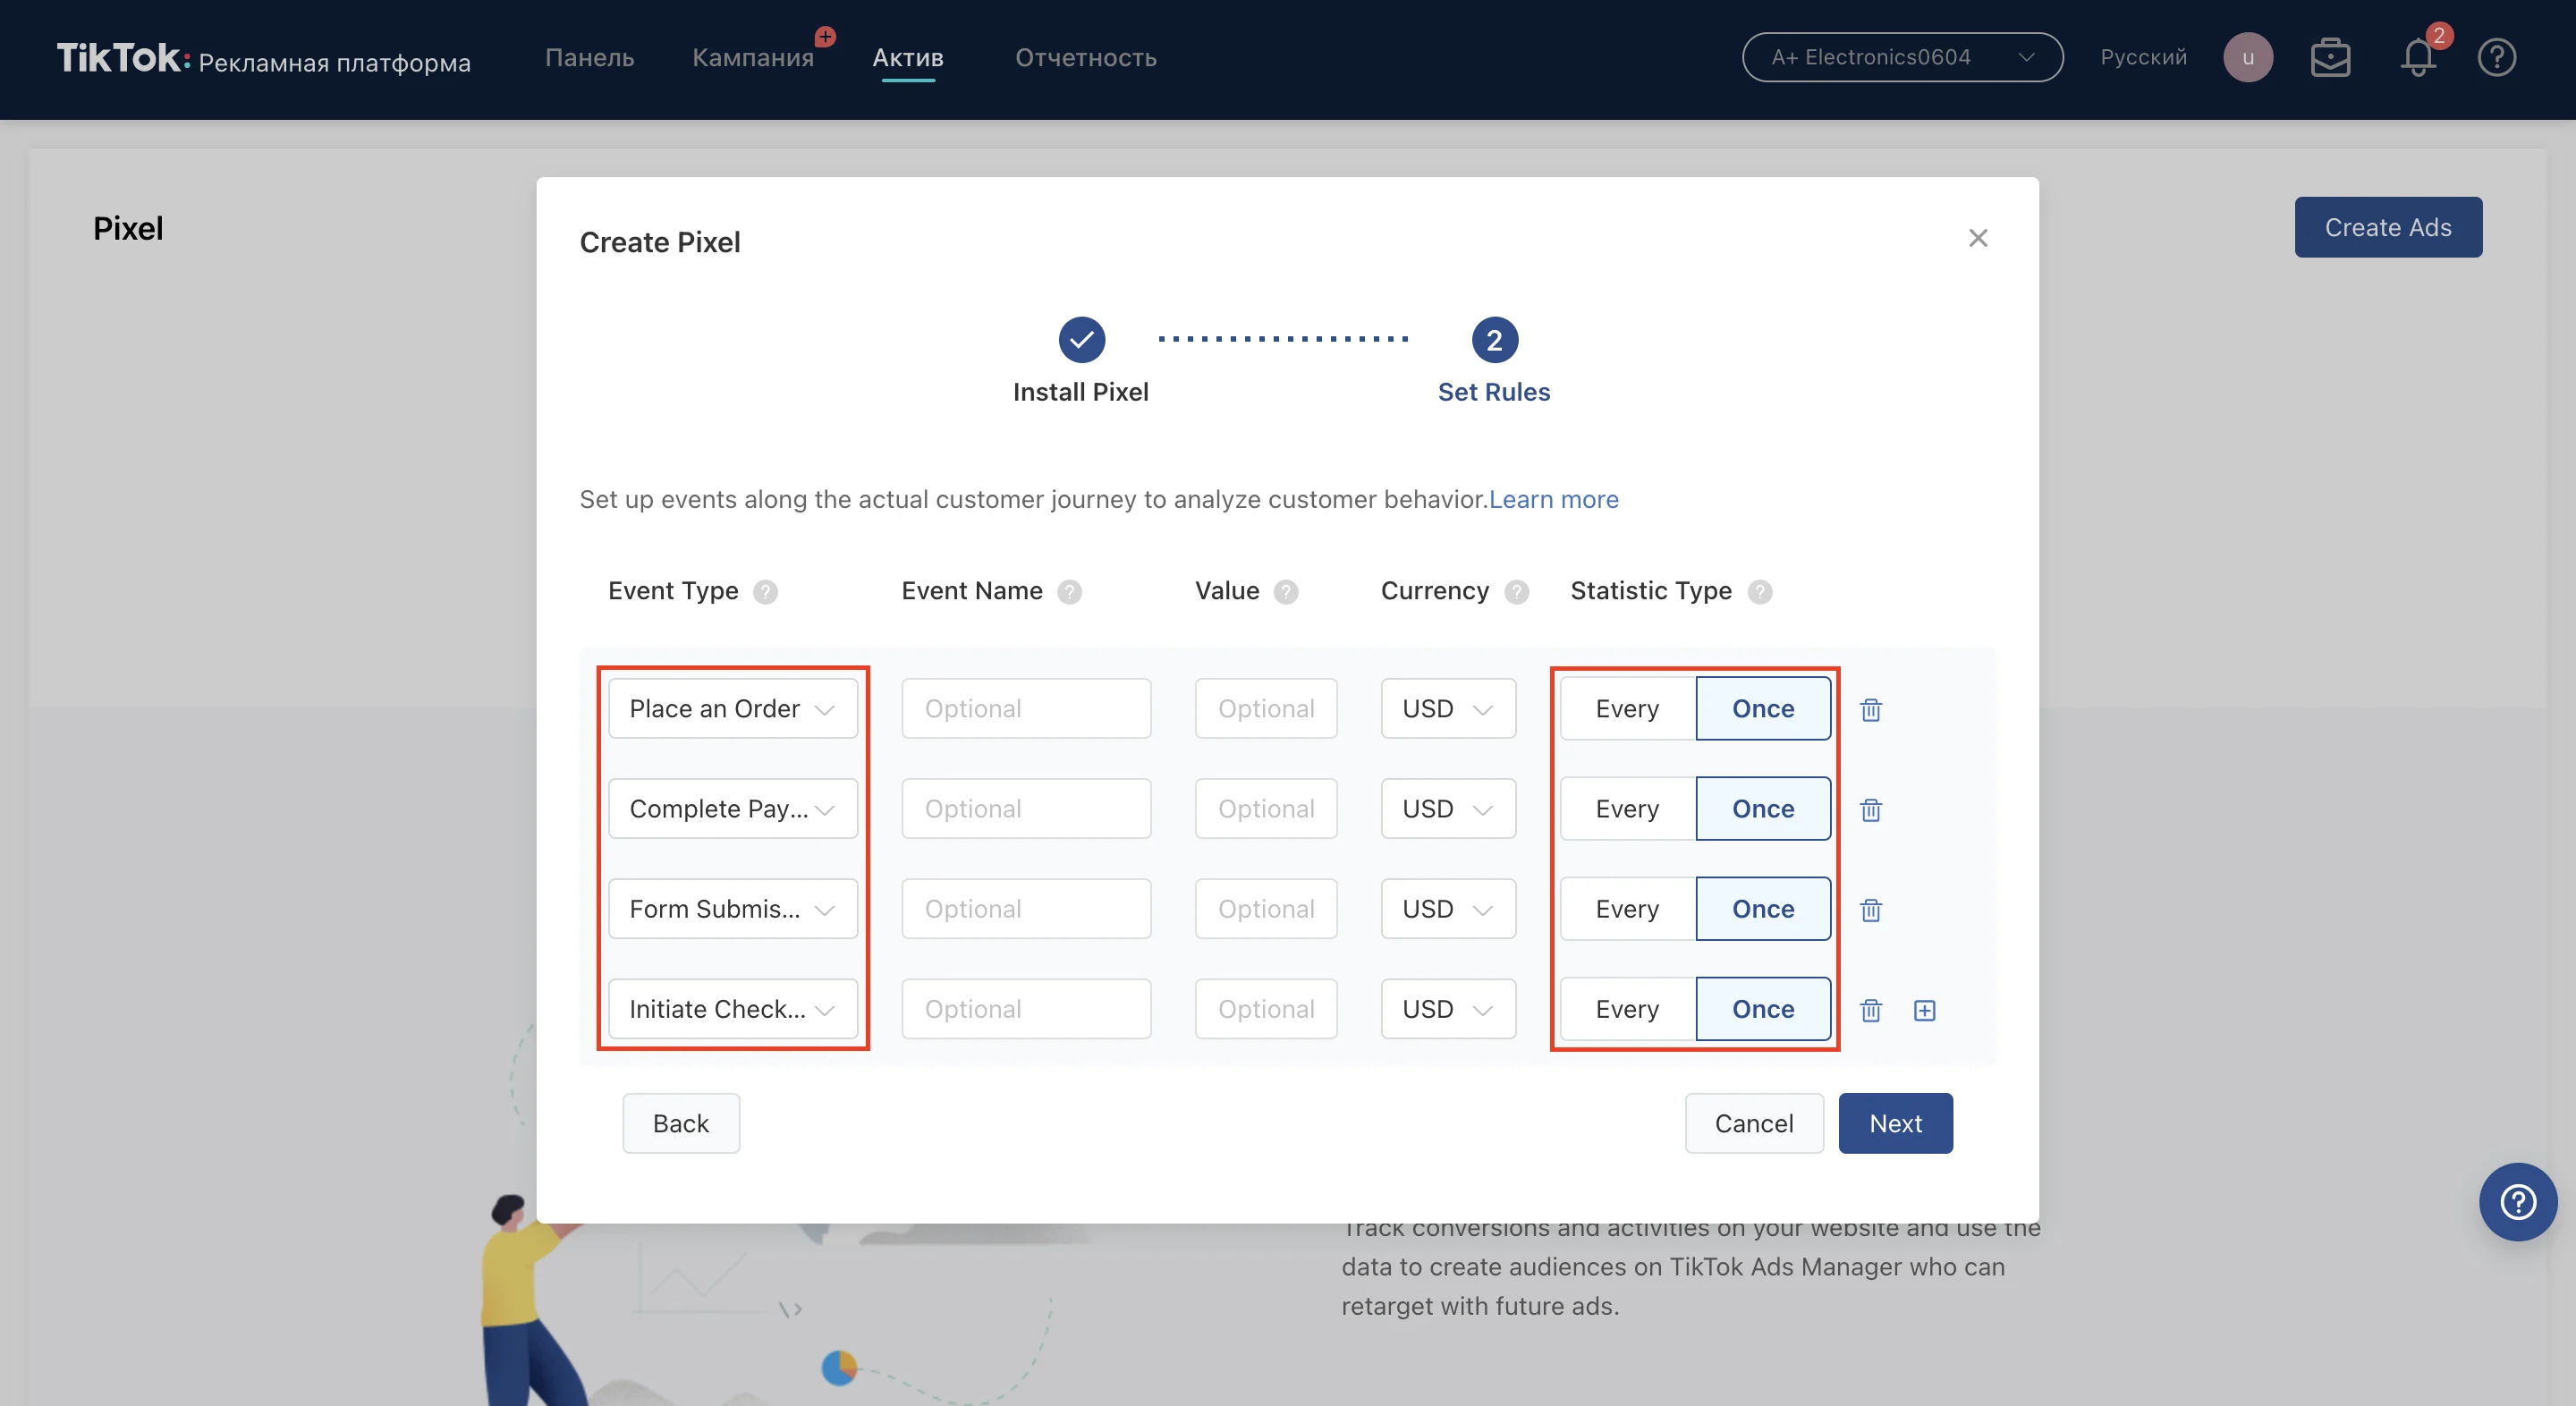
Leave Event name and Value blank
Select the same Currency you have on your account
Statistic Type – select “Once” if you don’t want it to count duplicates
It should look like this:
Then select the Destination URL, there’s no need to type in any links:
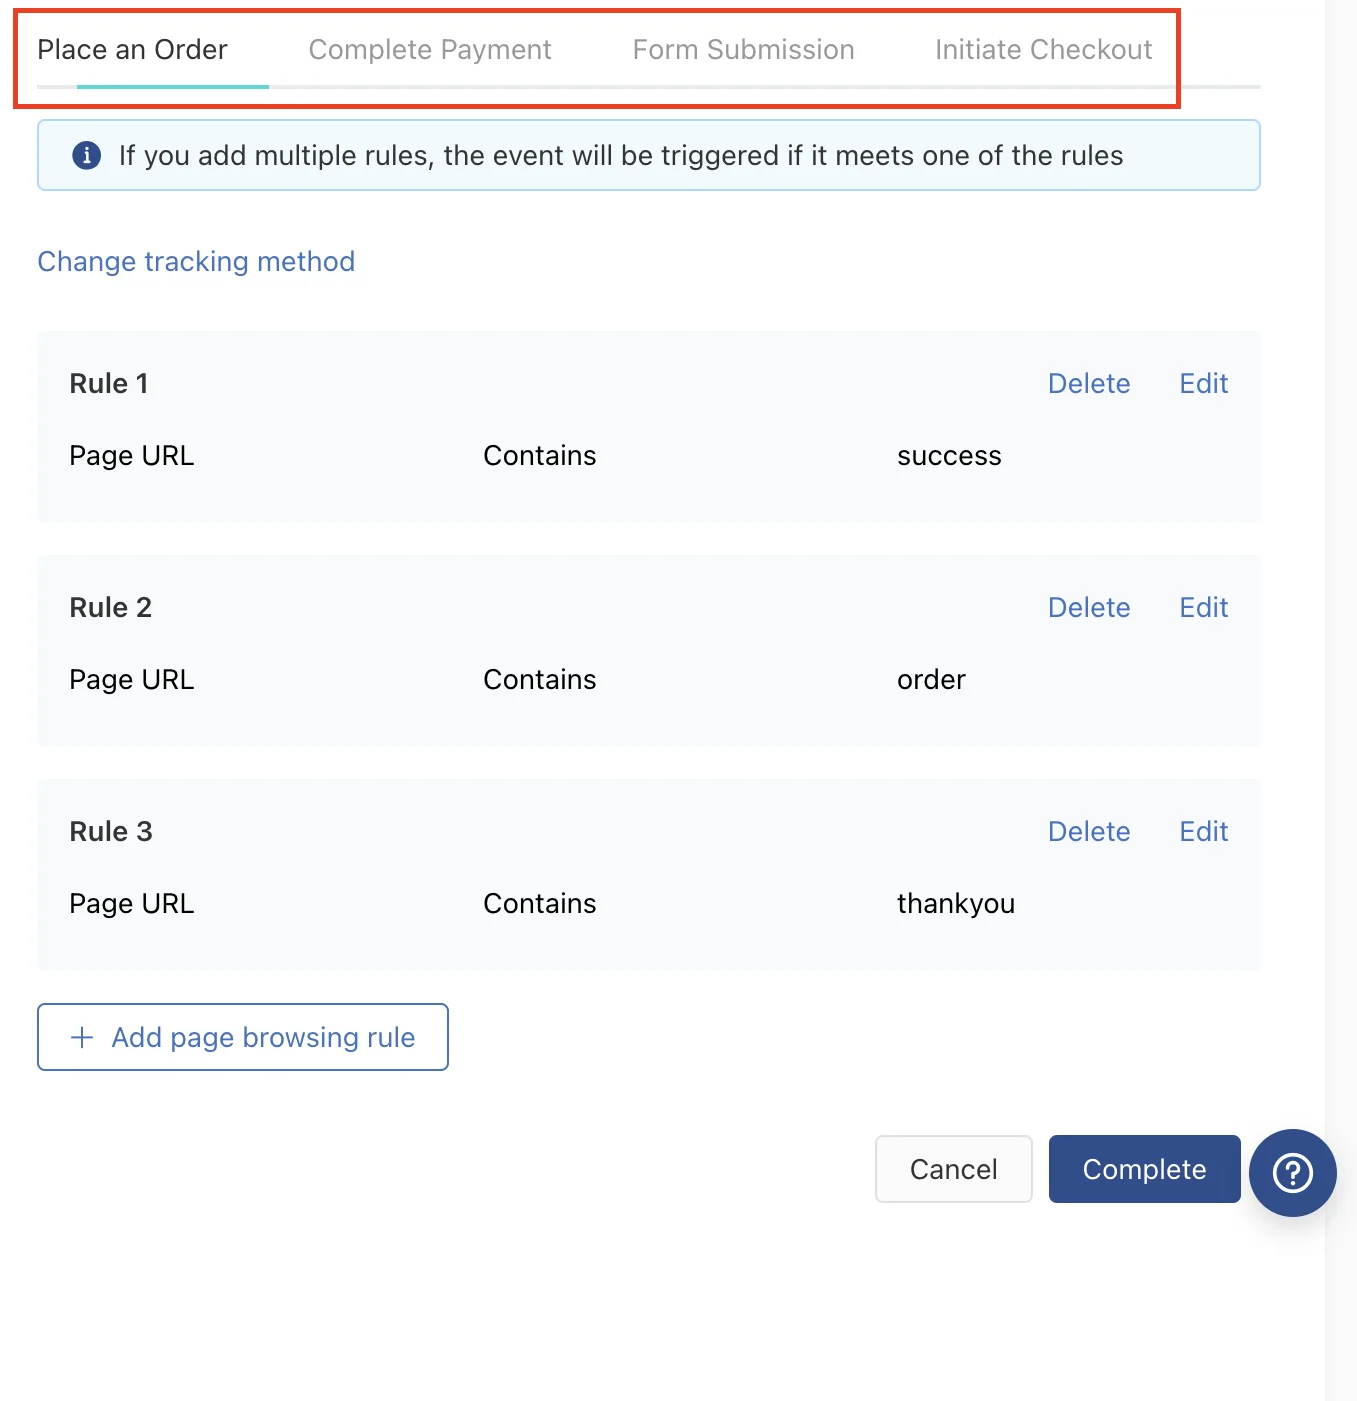
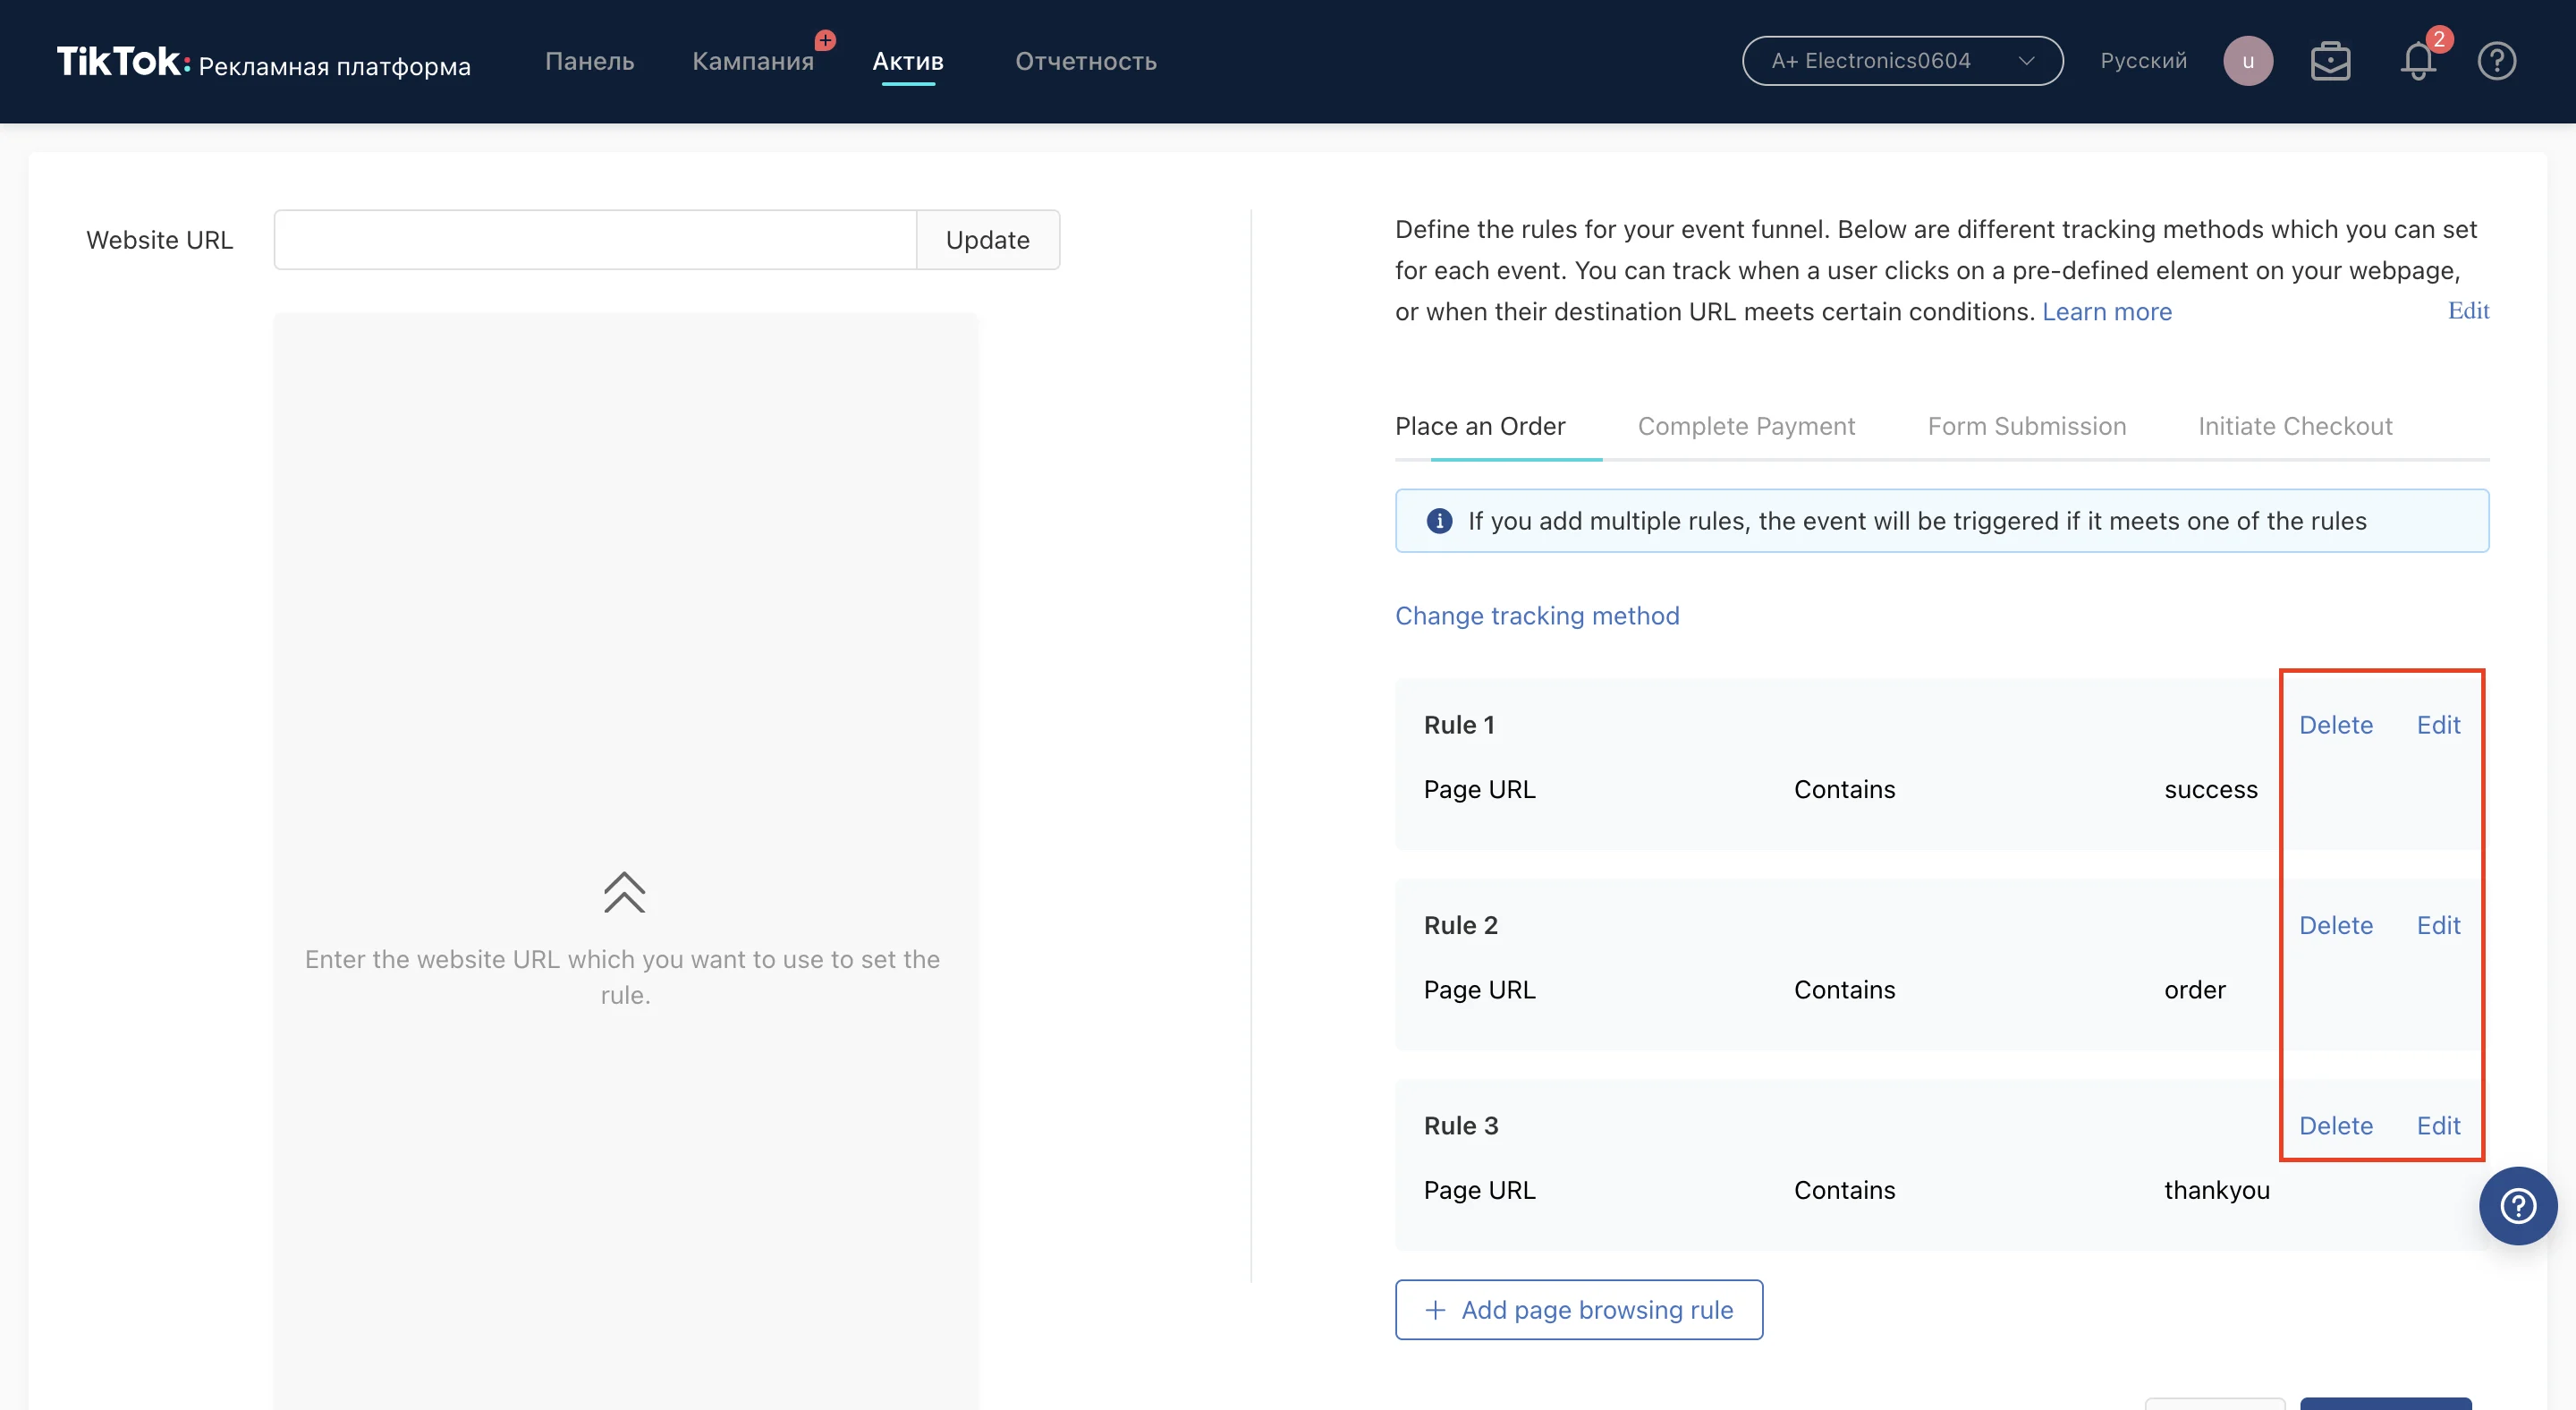
Press Add page browsing rule and select Page URL Contains. Insert the name of the pixel page in the third field without the file extension:

In case you have several pages with different names, add them all so that none of the leads would be missed in the statistics:

Don’t forget to save the rules:

You need to set up the same rules for all tabs:
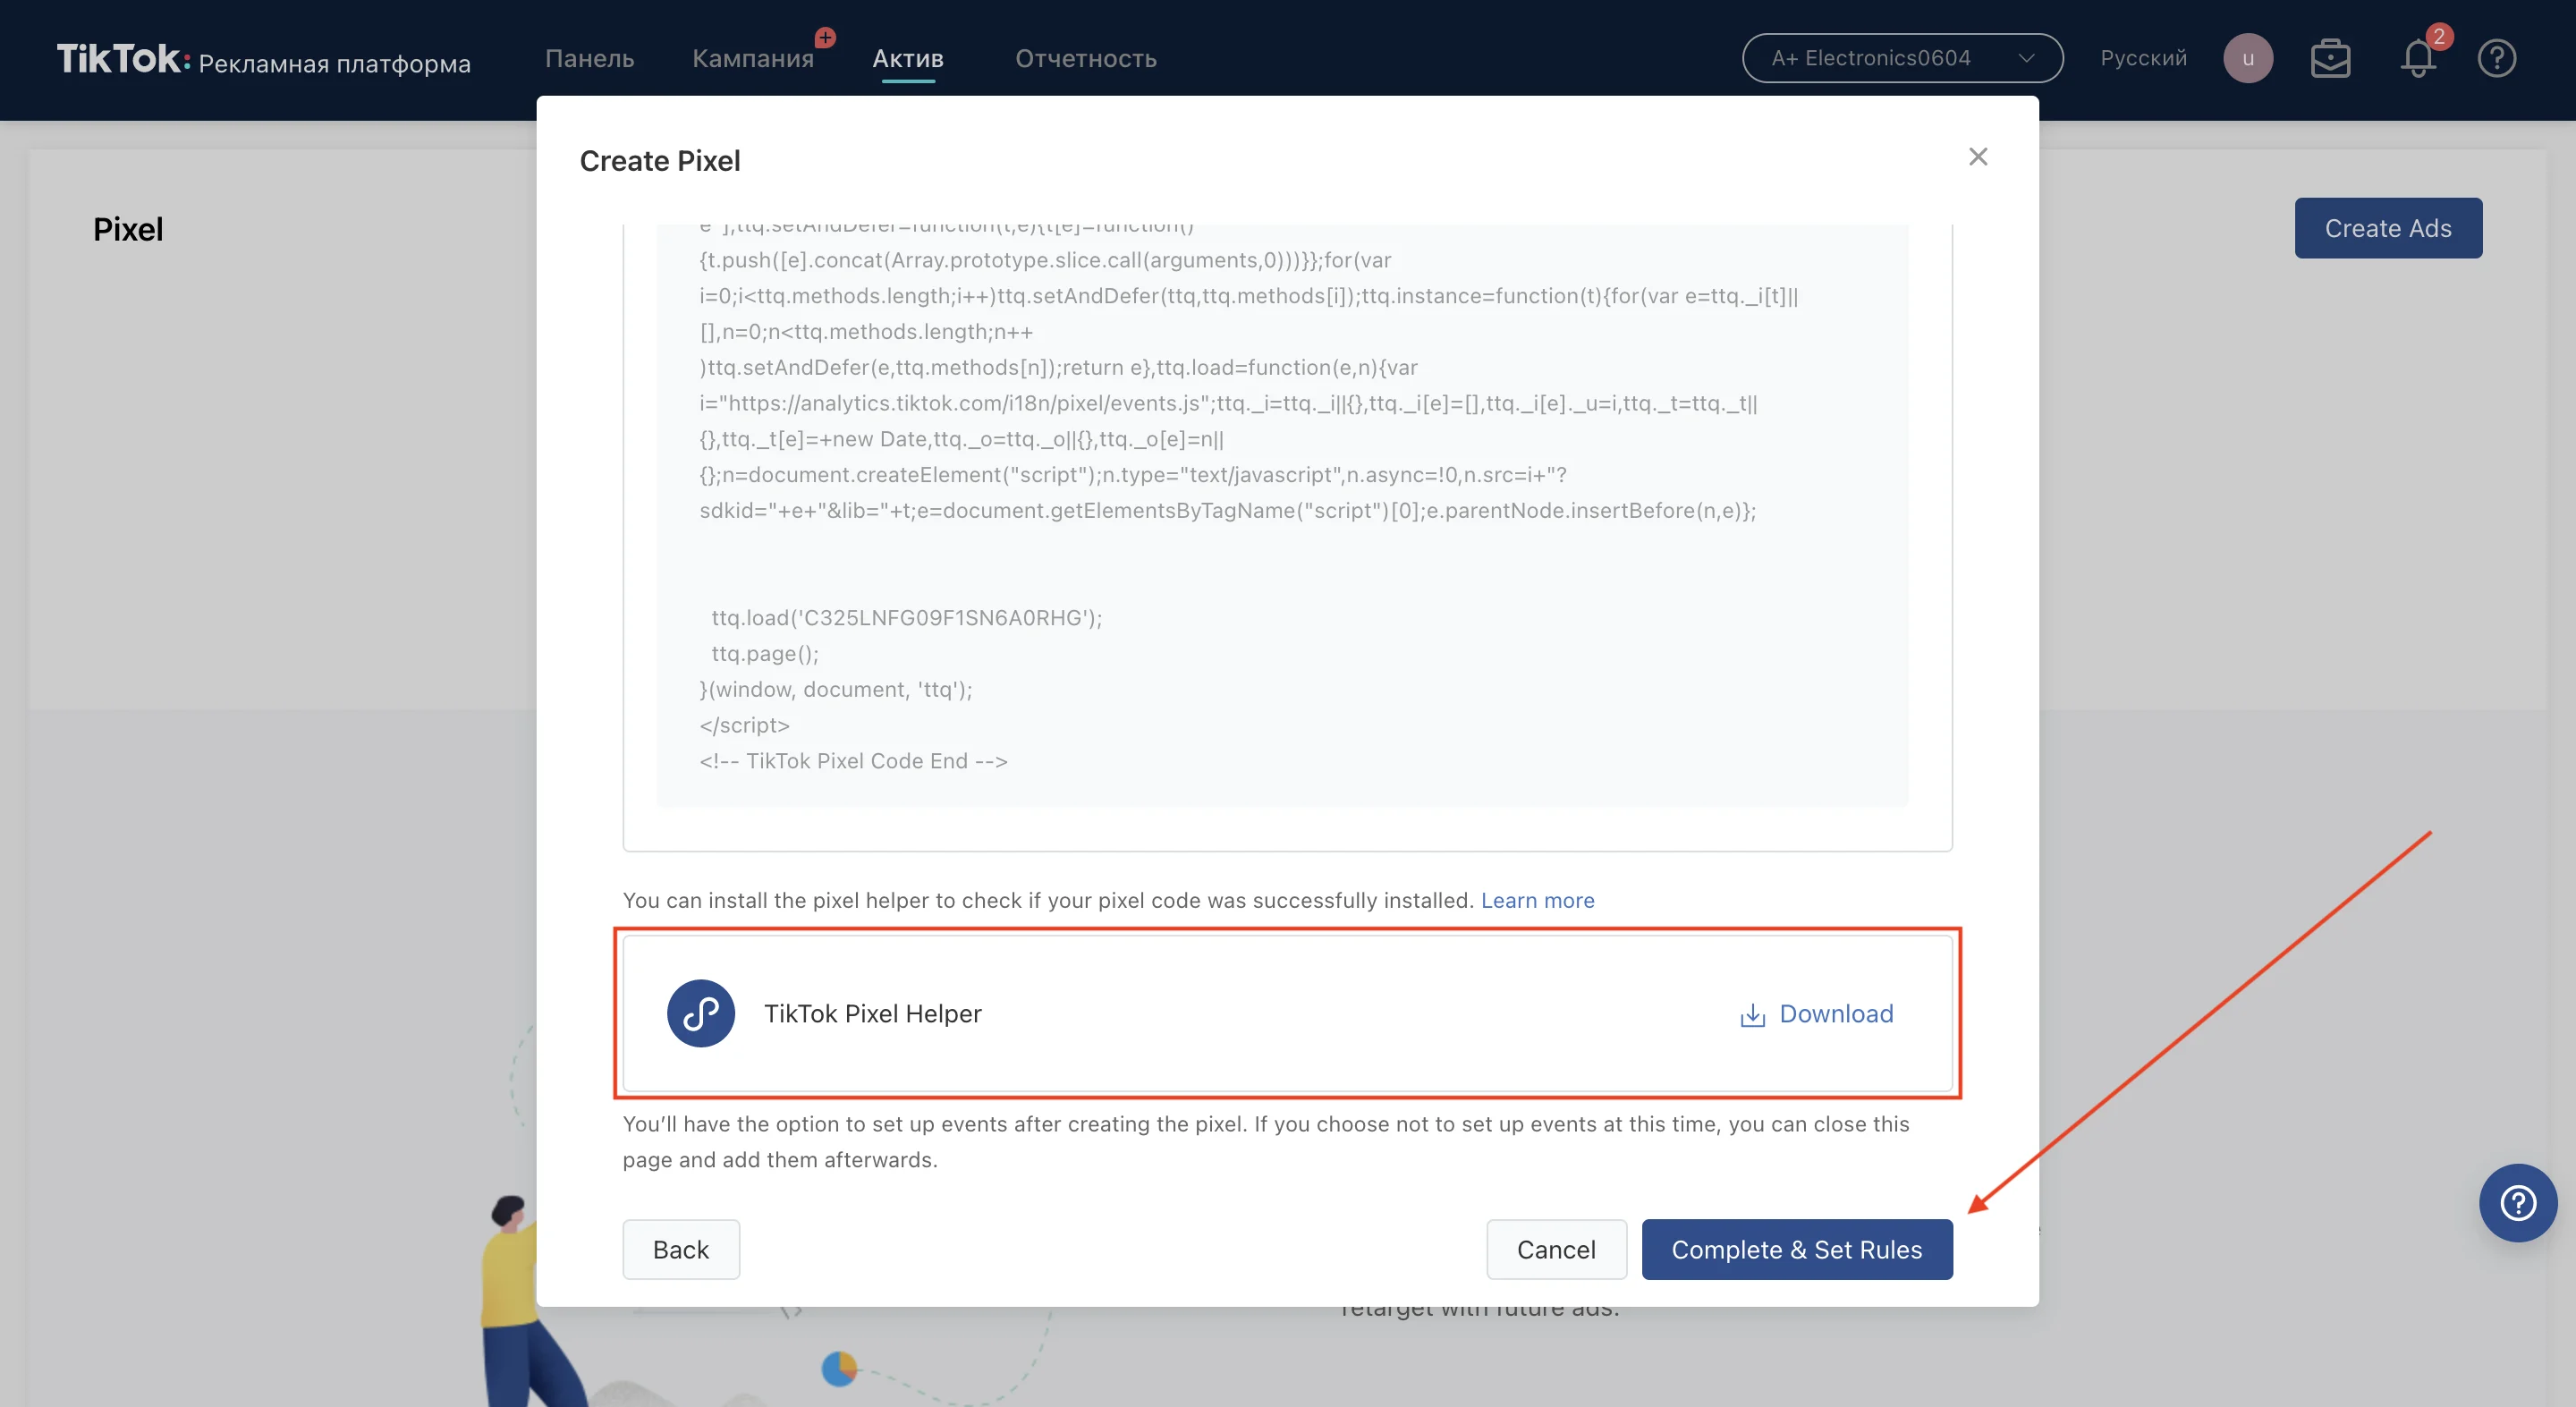
Press Complete and you’ll see this window (if you’ve done it right):

Click Events
This option is best if you do not have a thank you page (for example, if the desired action is a phone call)
First, you need to download TikTok Pixel Helper:
Next, set up custom events the same way as in the Destination URL option.
- In this case, you need to select different events. For example, if a phone call is the desired action, then you must select the “Phone call” option
Now, insert the website URL for the traffic and select the Click Events tracking method:

Next, press Element Selection at the top, move the cursor over the desired action button, and press “save”:
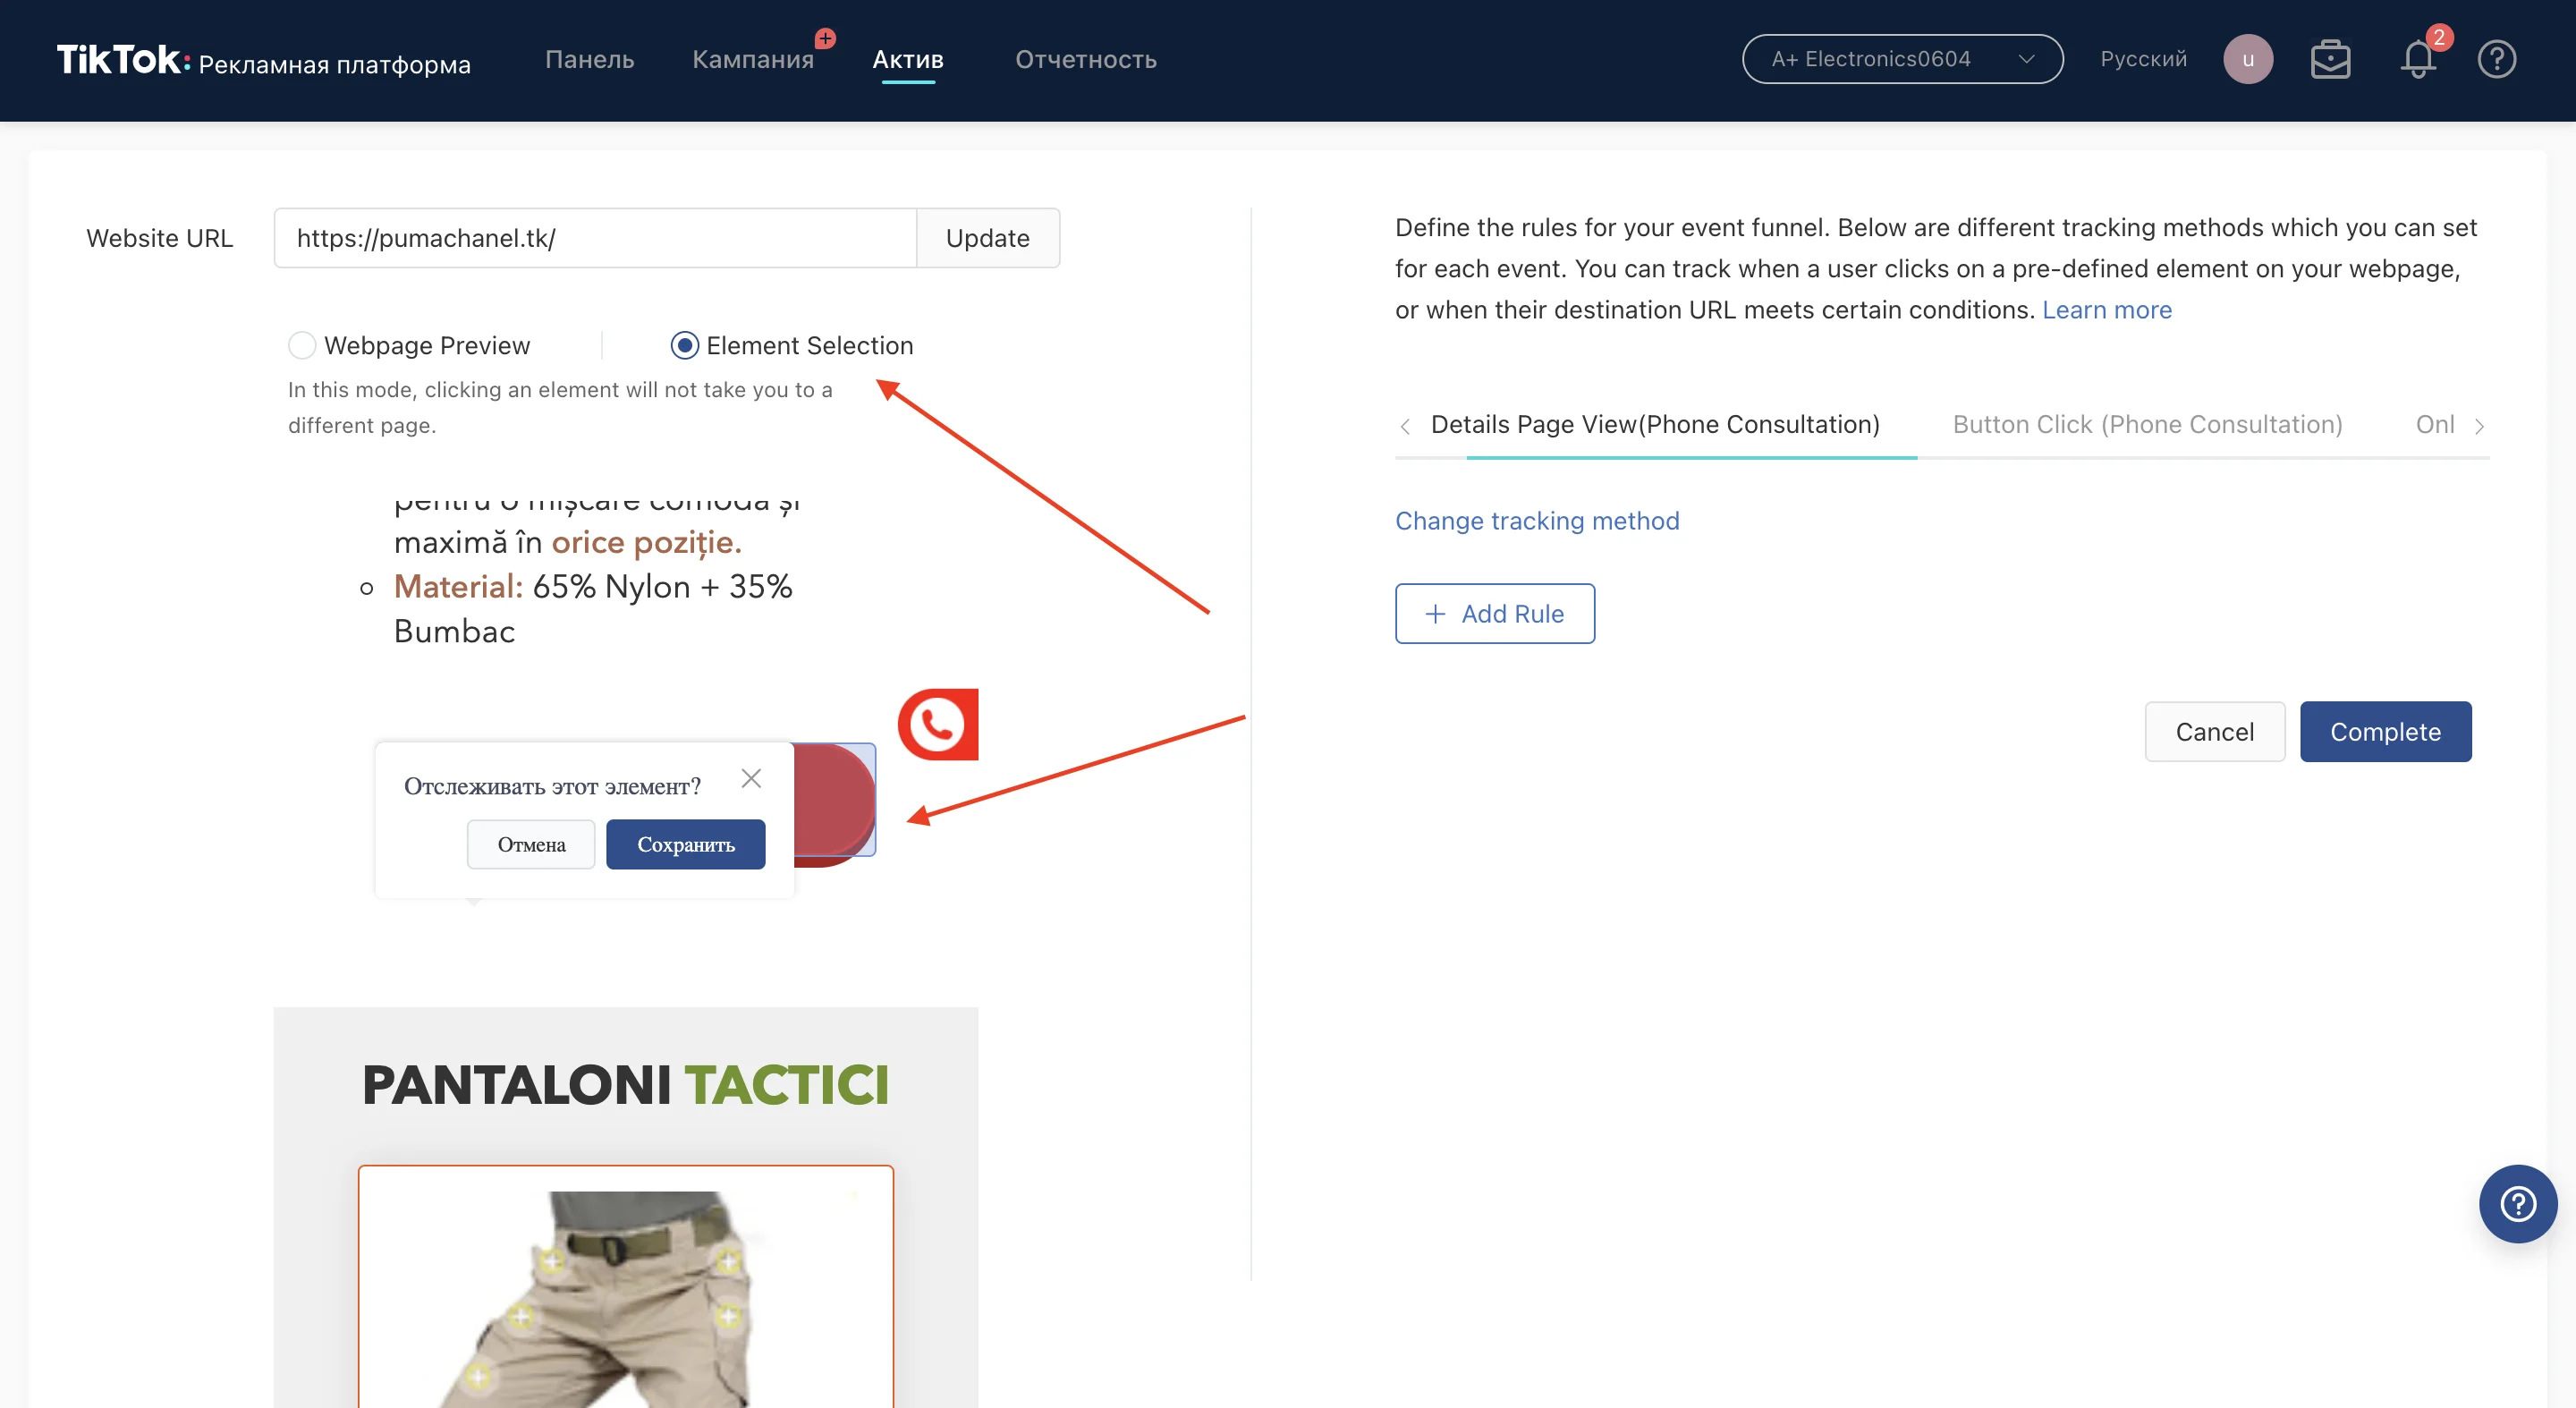
If there are several buttons, press them all. You should get this:
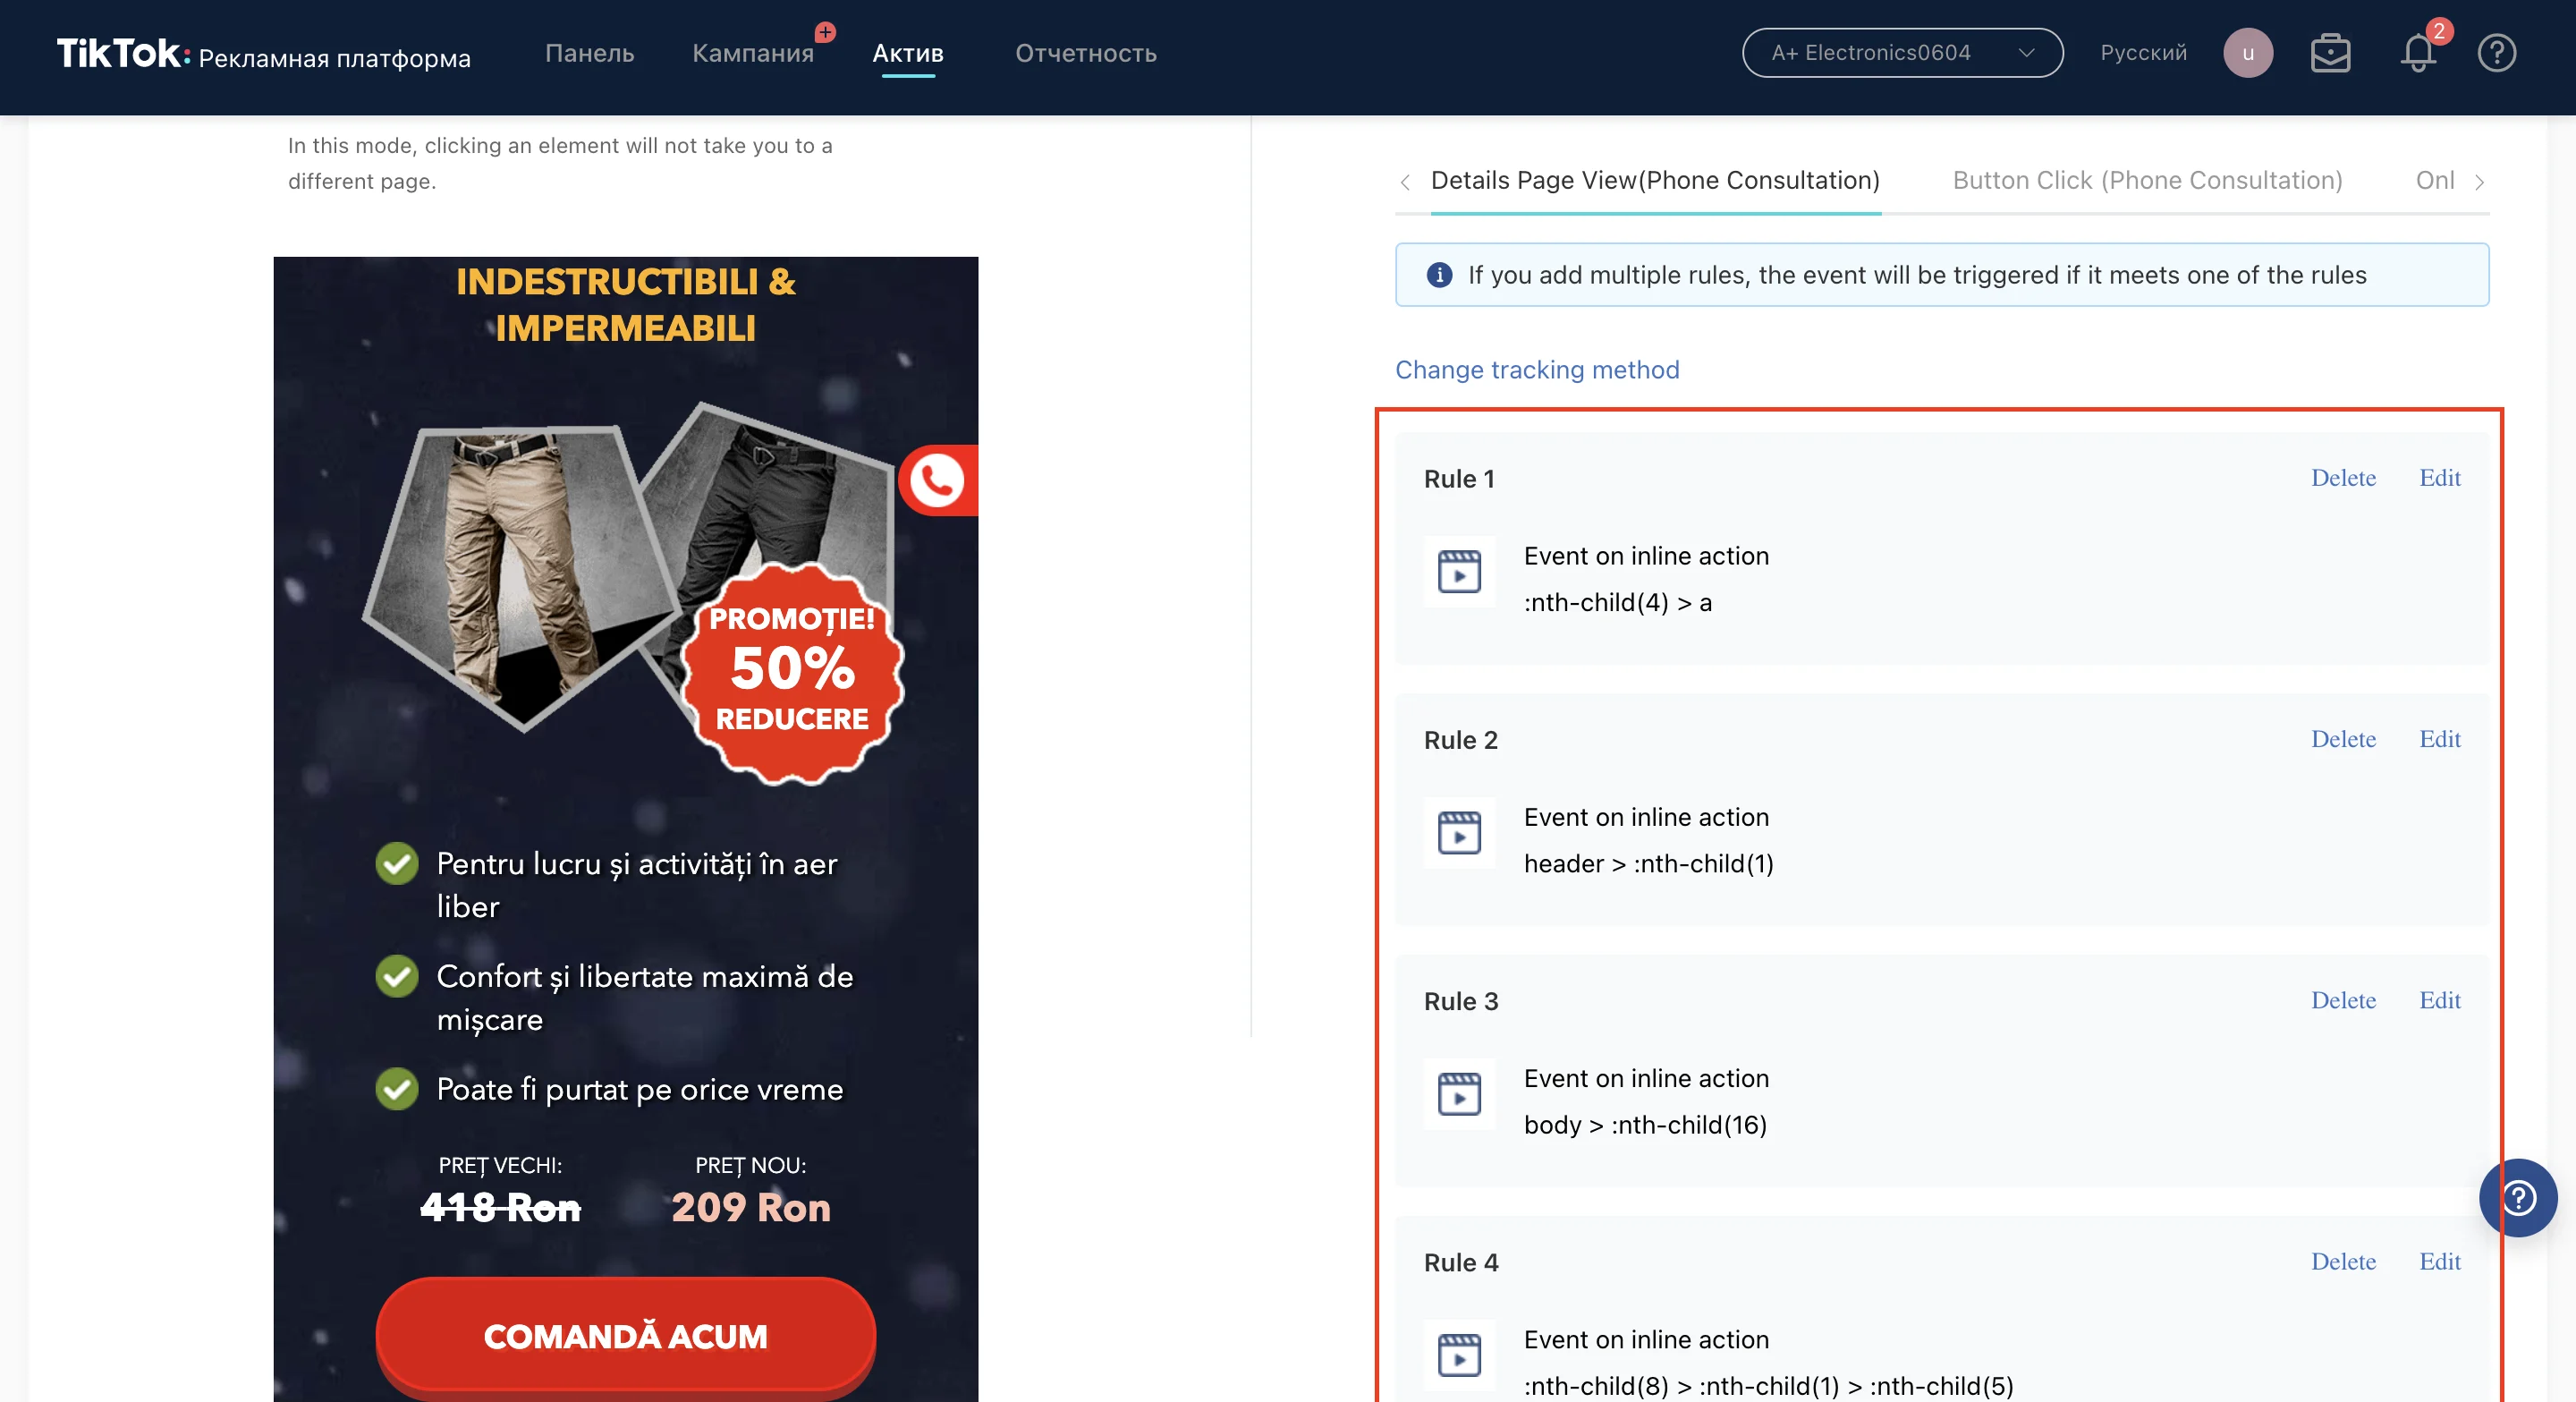
Don’t forget to repeat the settings for each event:
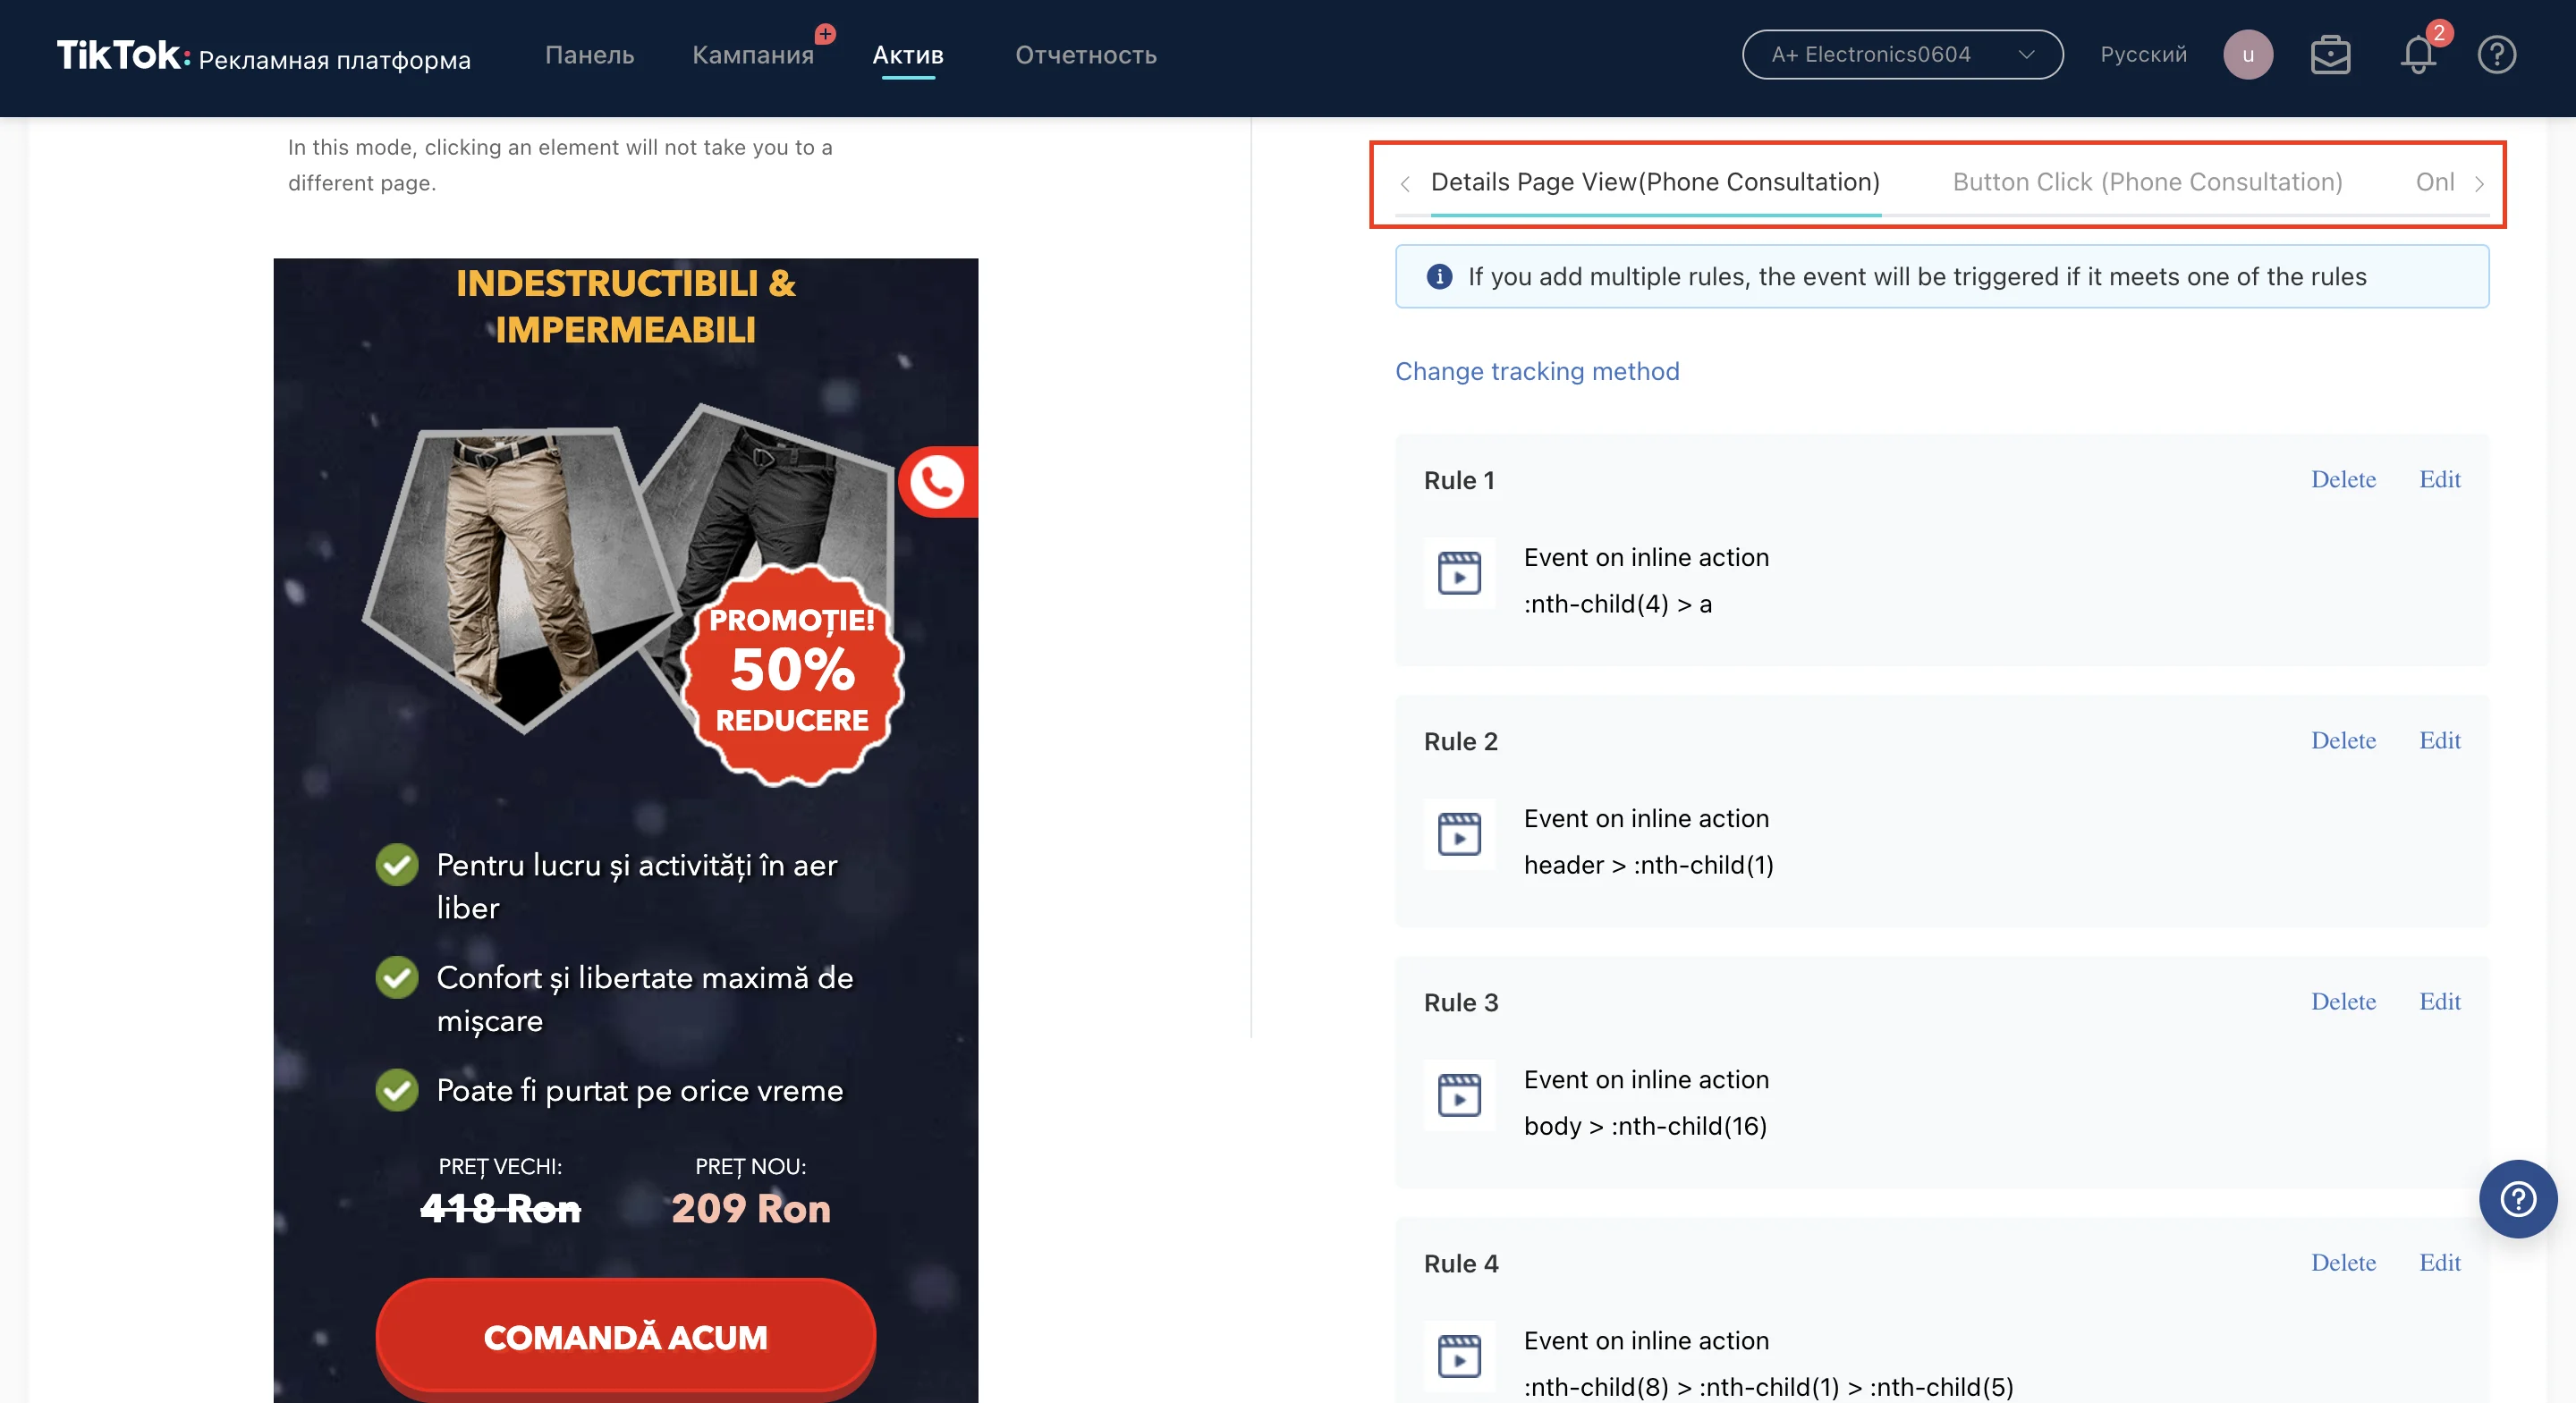
- With such configuration, the pixel code should be on the same webpage where you select the elements
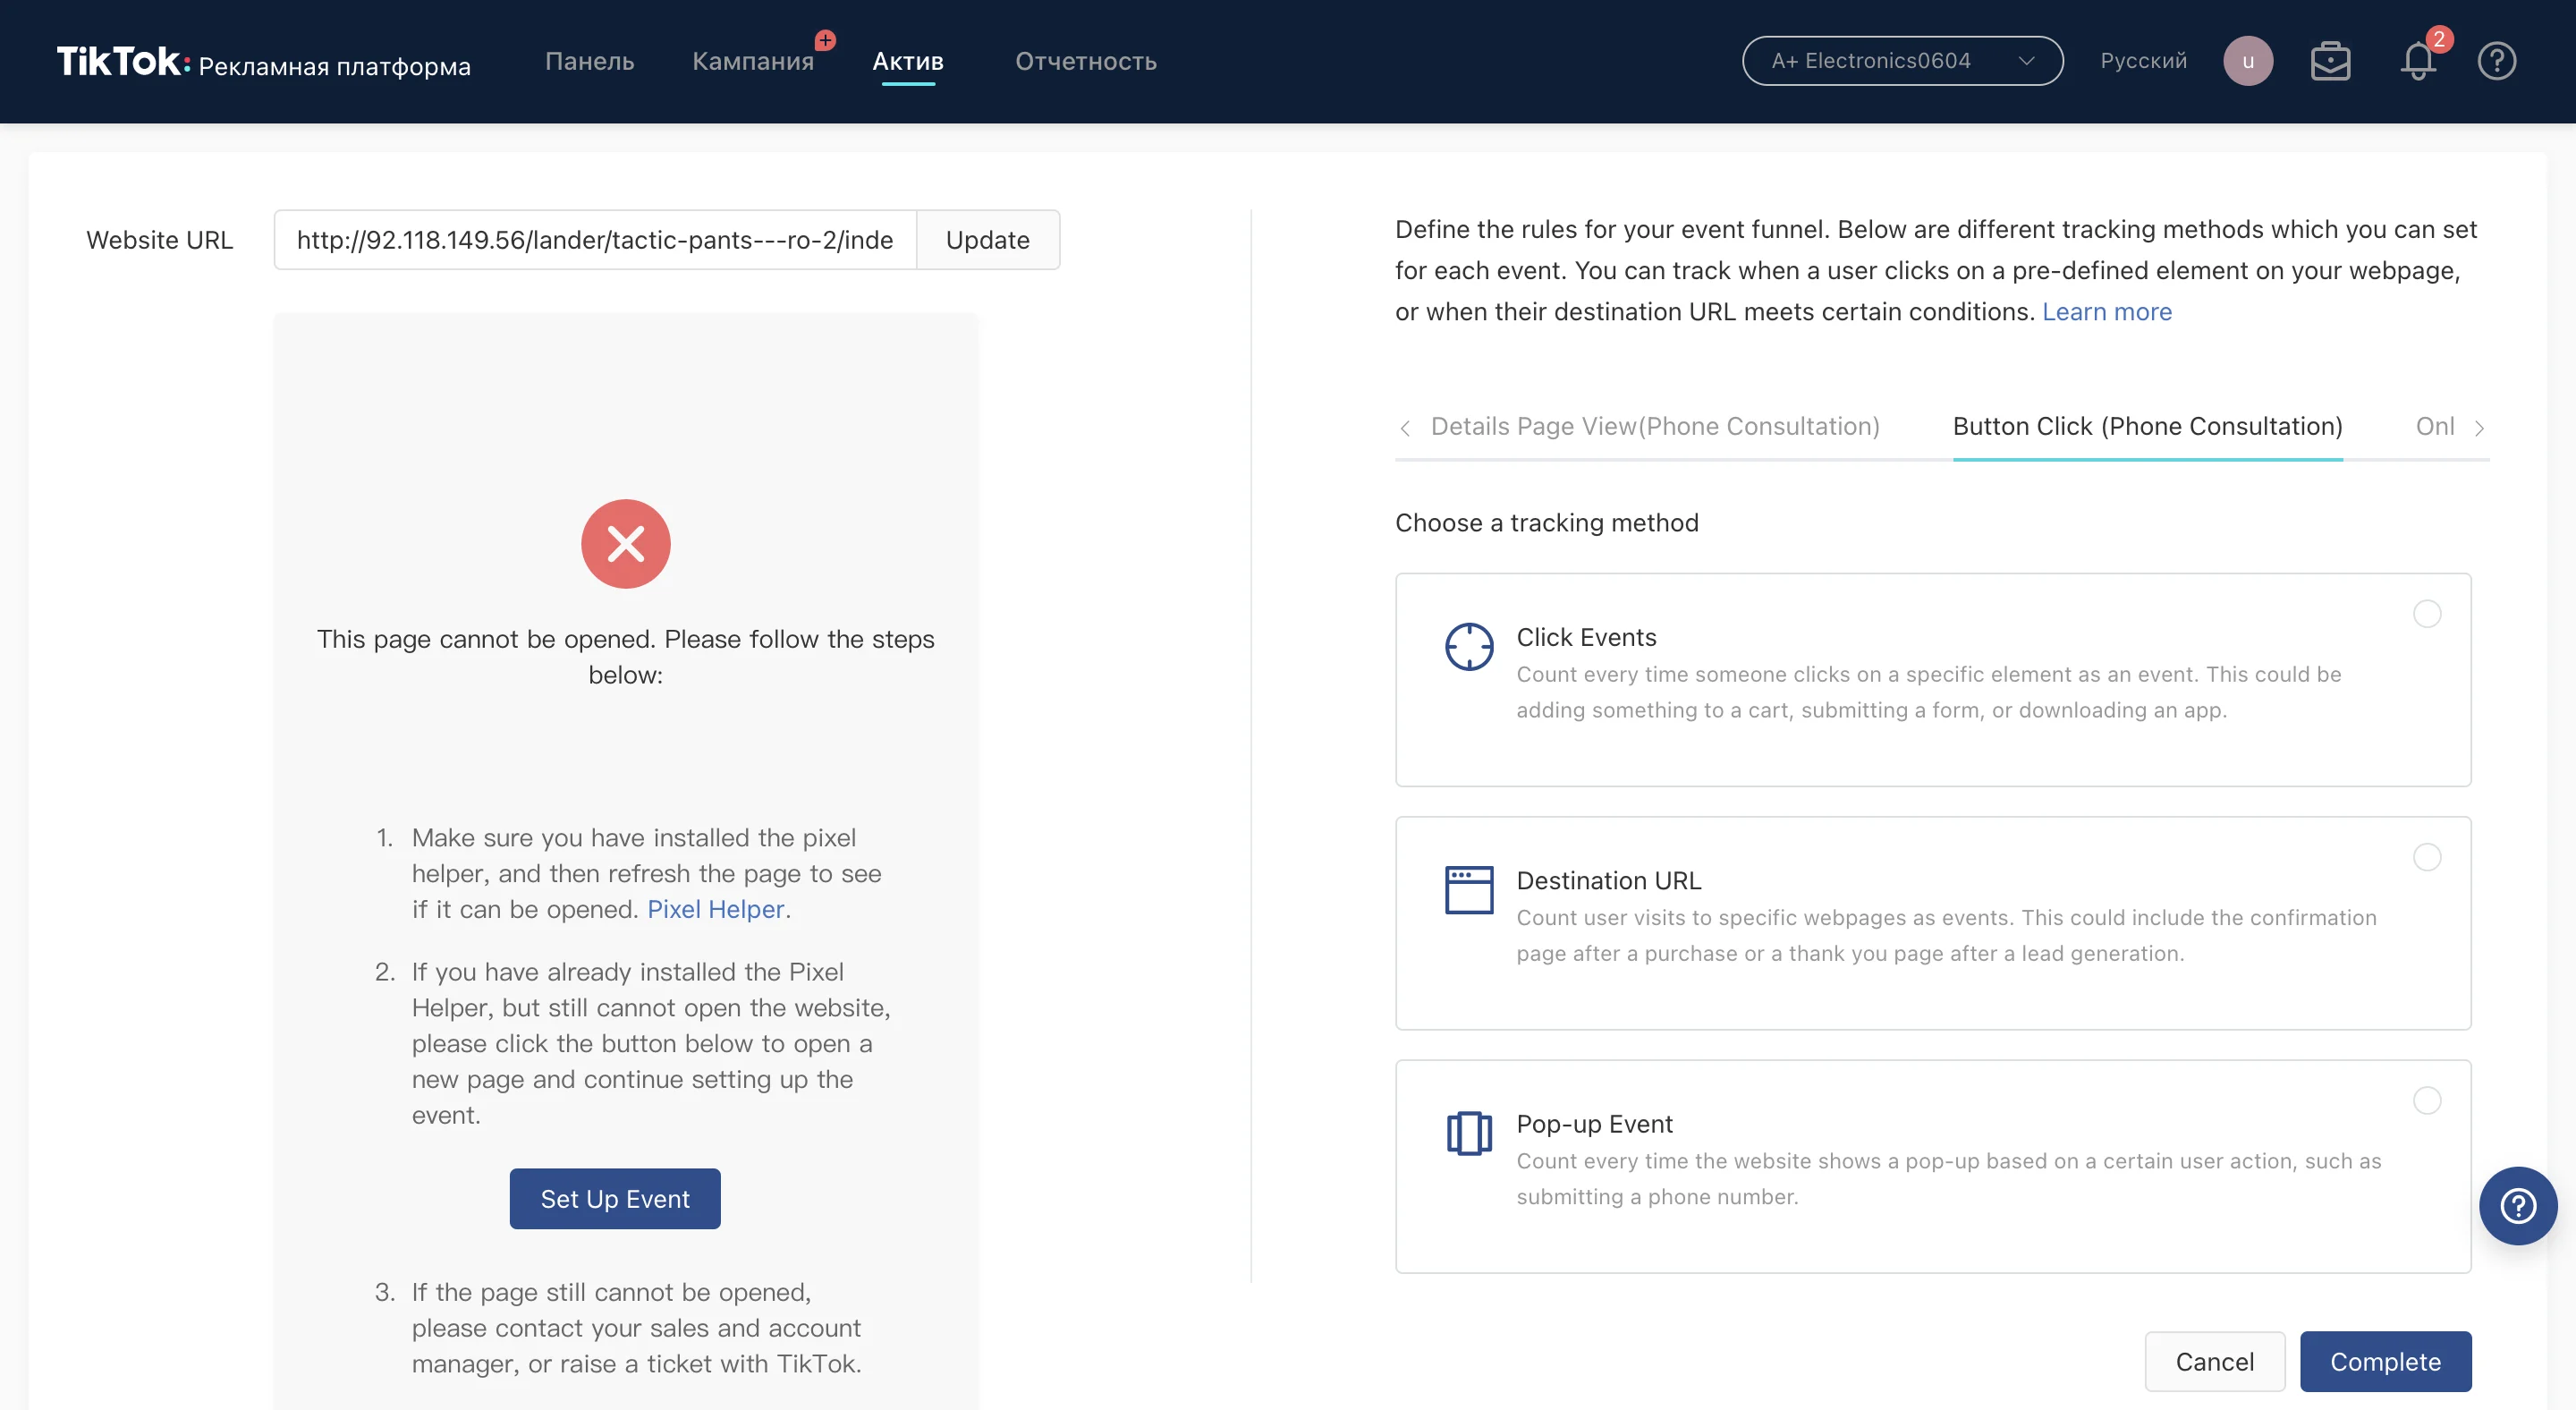
Preview error
Sometimes you may see this when inserting a link:
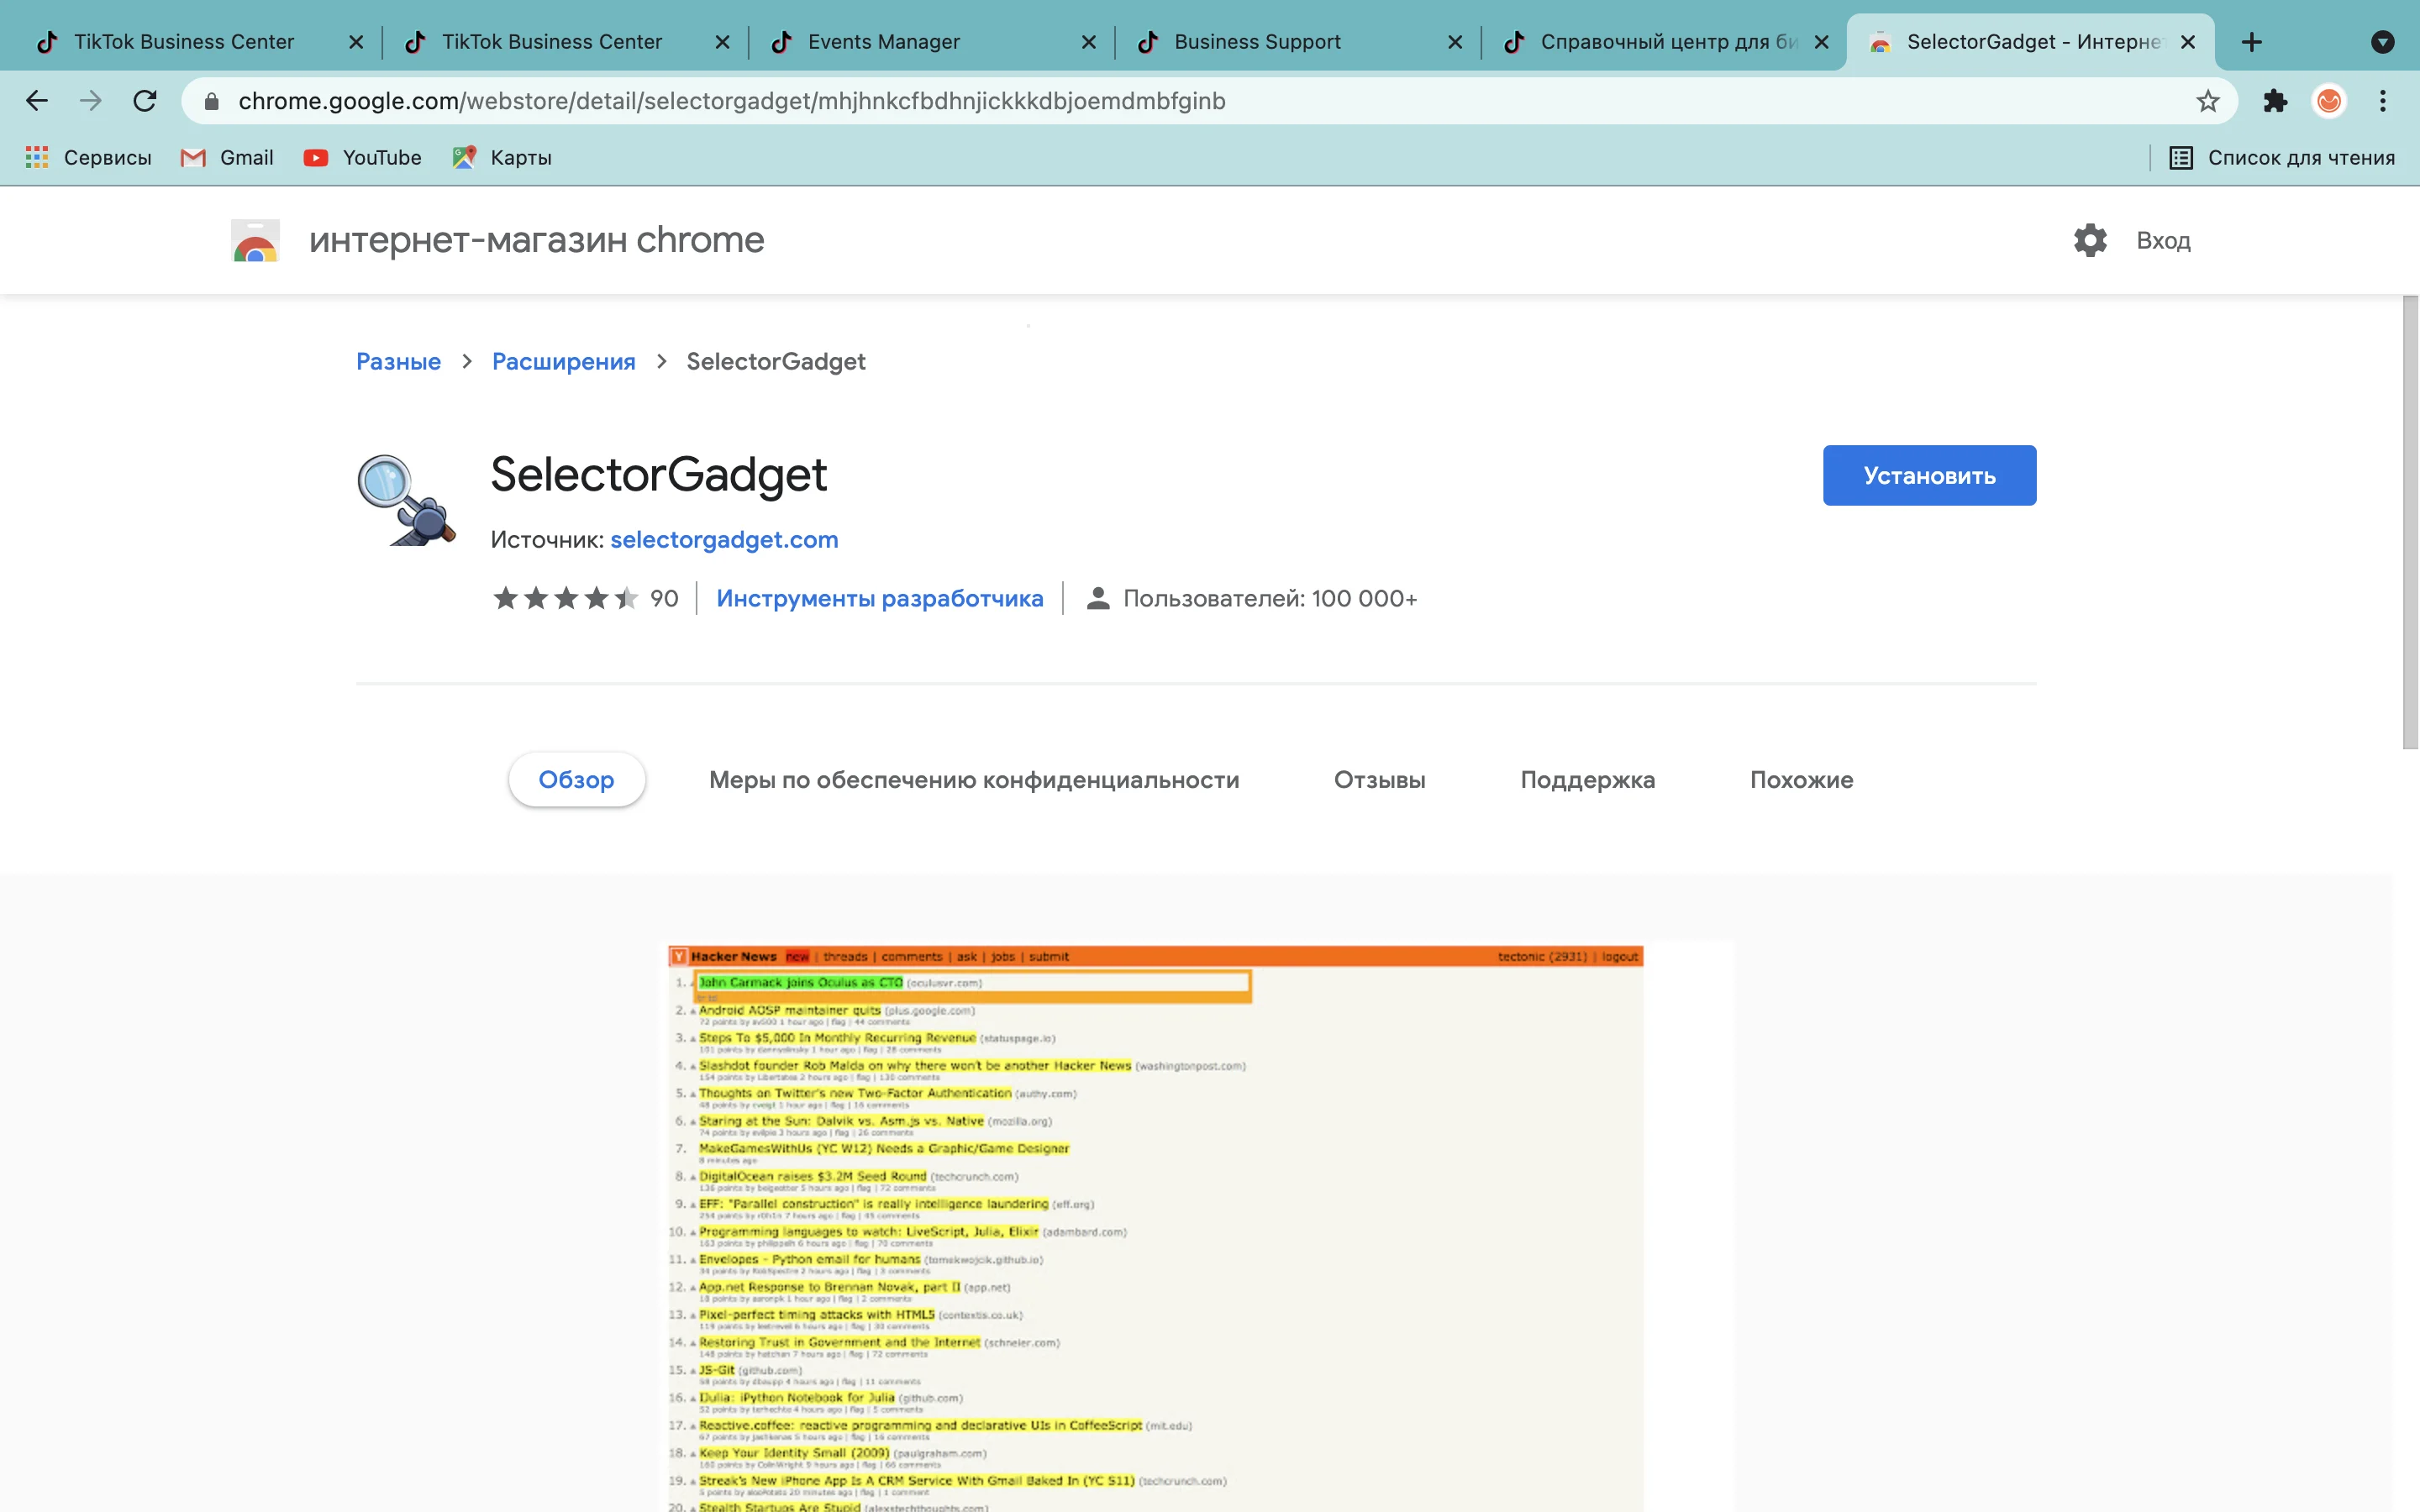
There is a solution. First, download THIS extension:
Then go to the website that throws an error message, turn the extension on and click on the element. A line should appear at the page bottom. Copy the value:
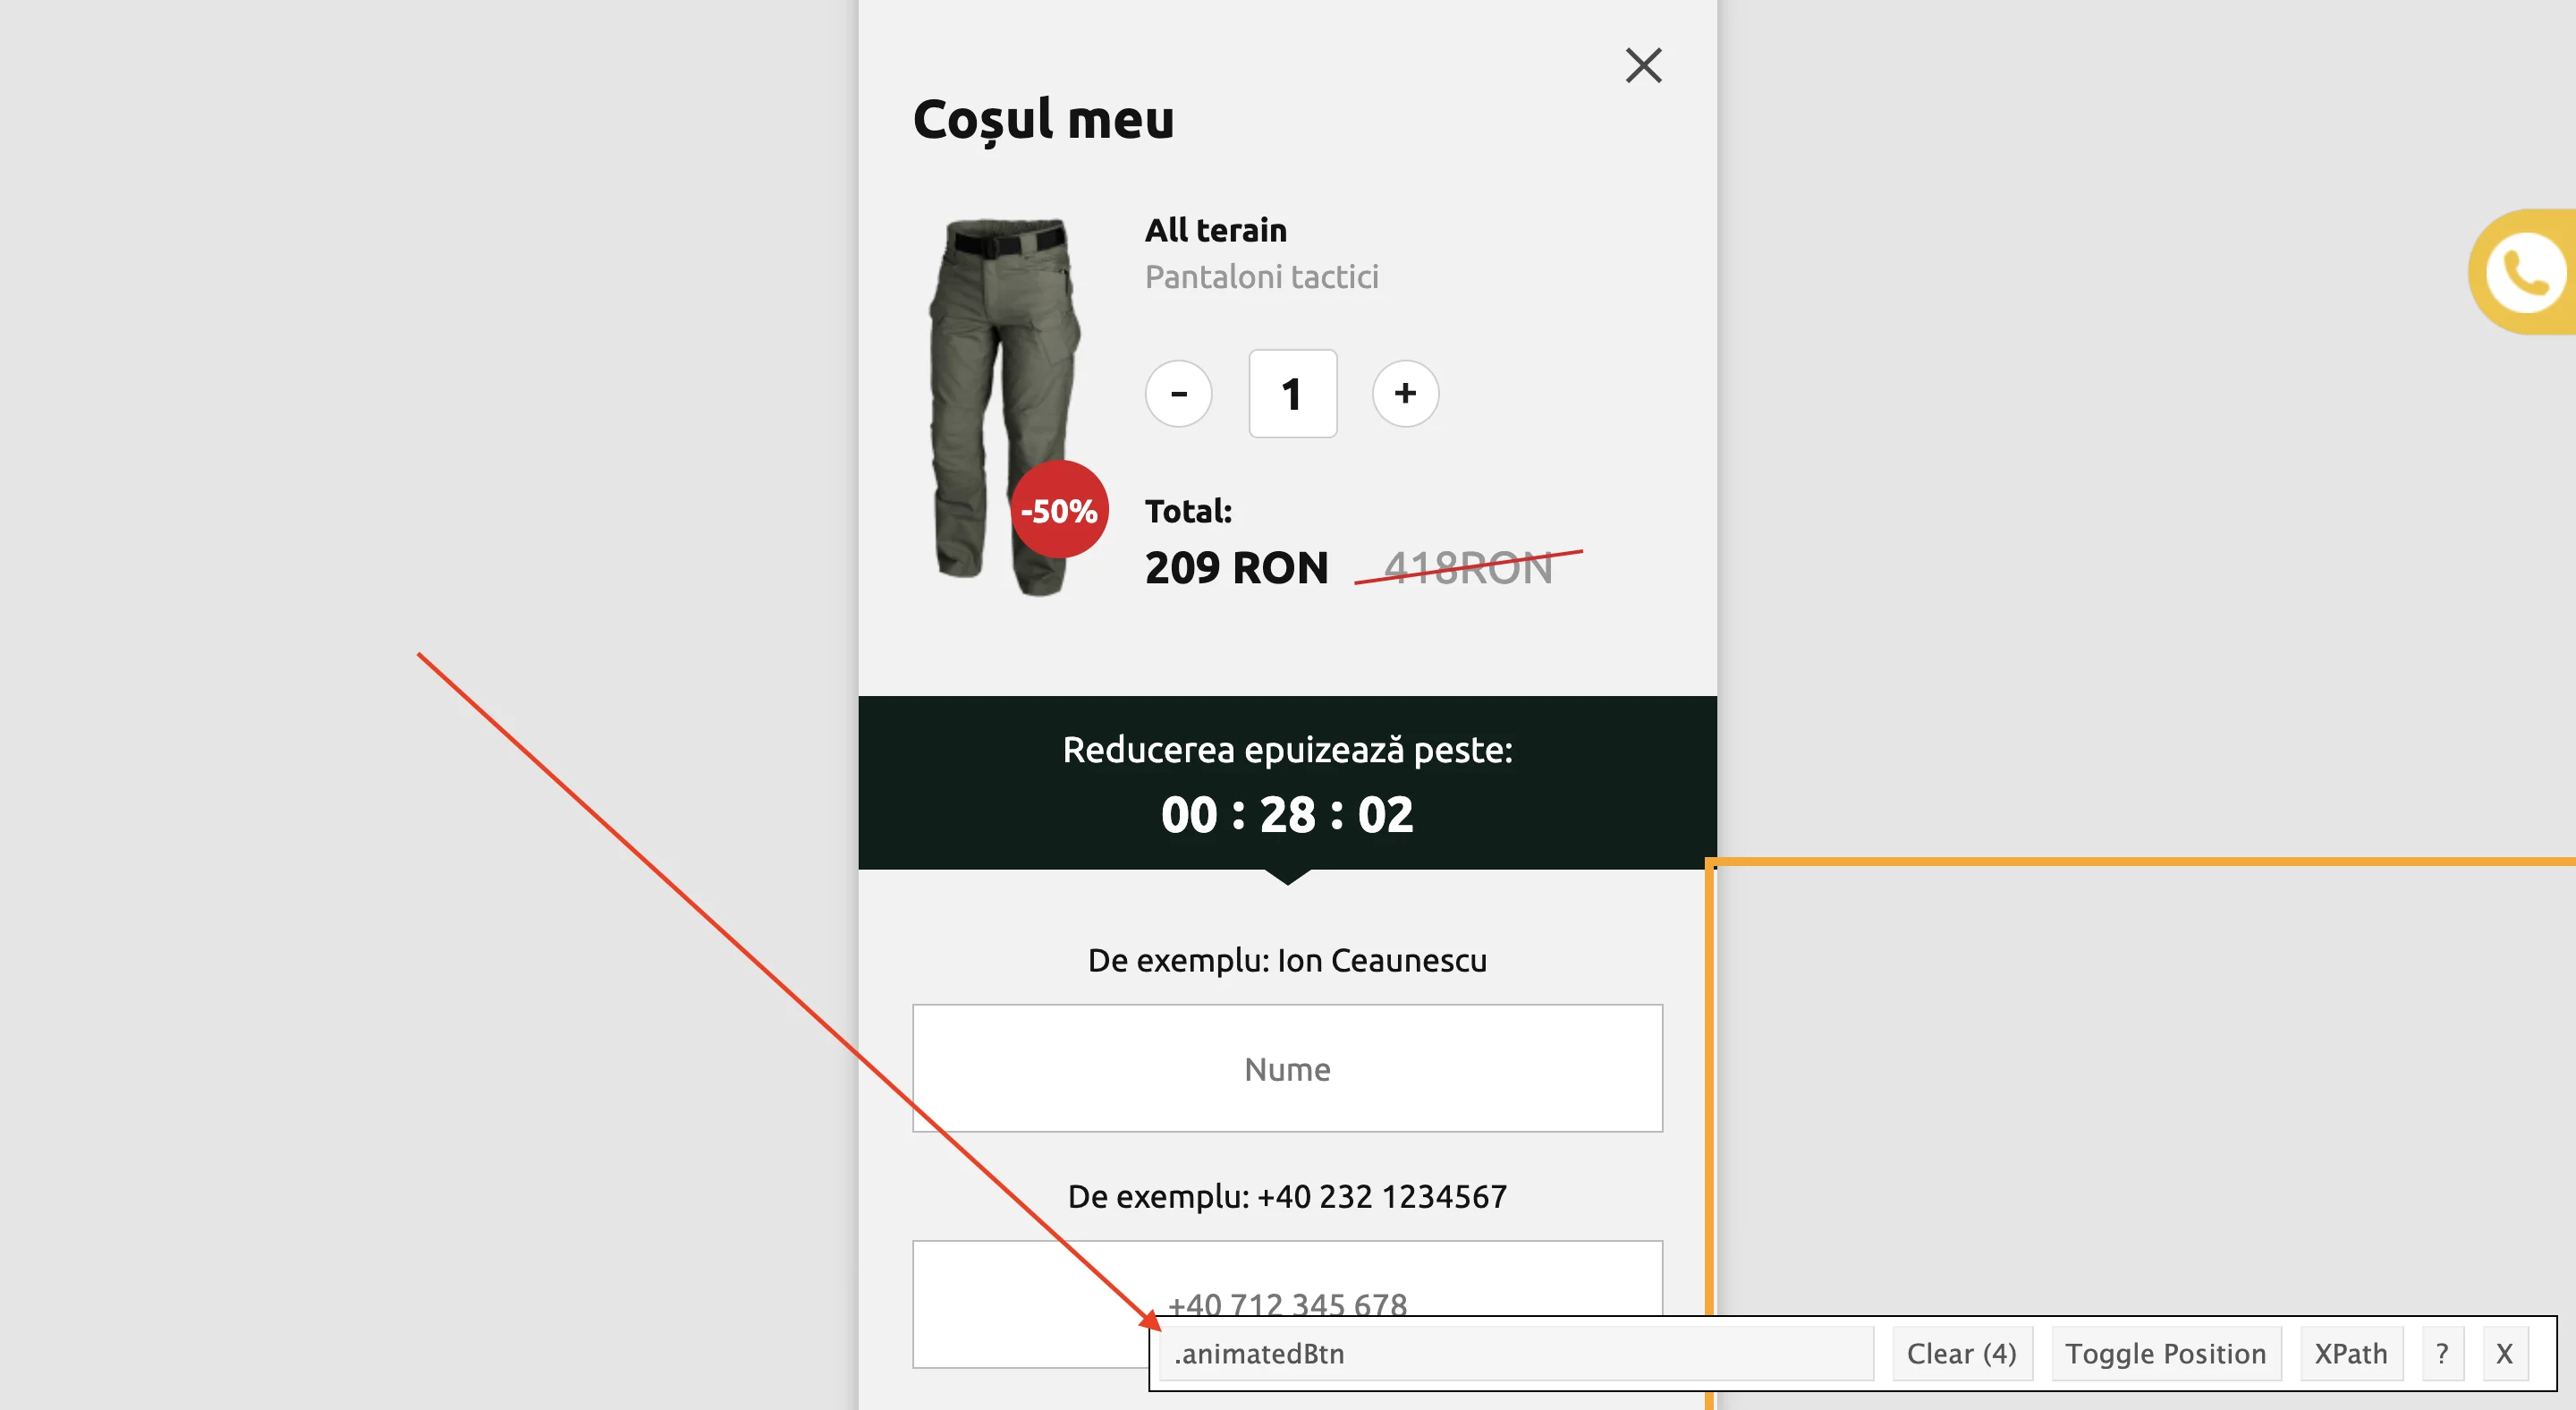
Return to the error, select Click Events on the right, add a rule, and paste the copied value:

In the same way, select all the necessary elements for all events. Do not forget to click Save for each rule and Complete when the setup is done
- You can also set up Click Events if you are cloaking, but you might want to use the Destination URL when cloaking. Otherwise, they may spot your landing page with the pixel.
Why multiple events?
Practically everybody who has already worked with TT had faced this problem at least once:
You run several optimized adsets in one event, and only one of them runs in a normal way.
So that this does not happen, I create multiple events and run one adset per event, thus targeting the different public. This way all adsets run at a steady pace =)
How to edit events?
Go to Assets tab — Event — Website Pixel — Select the pixel you wish to edit:
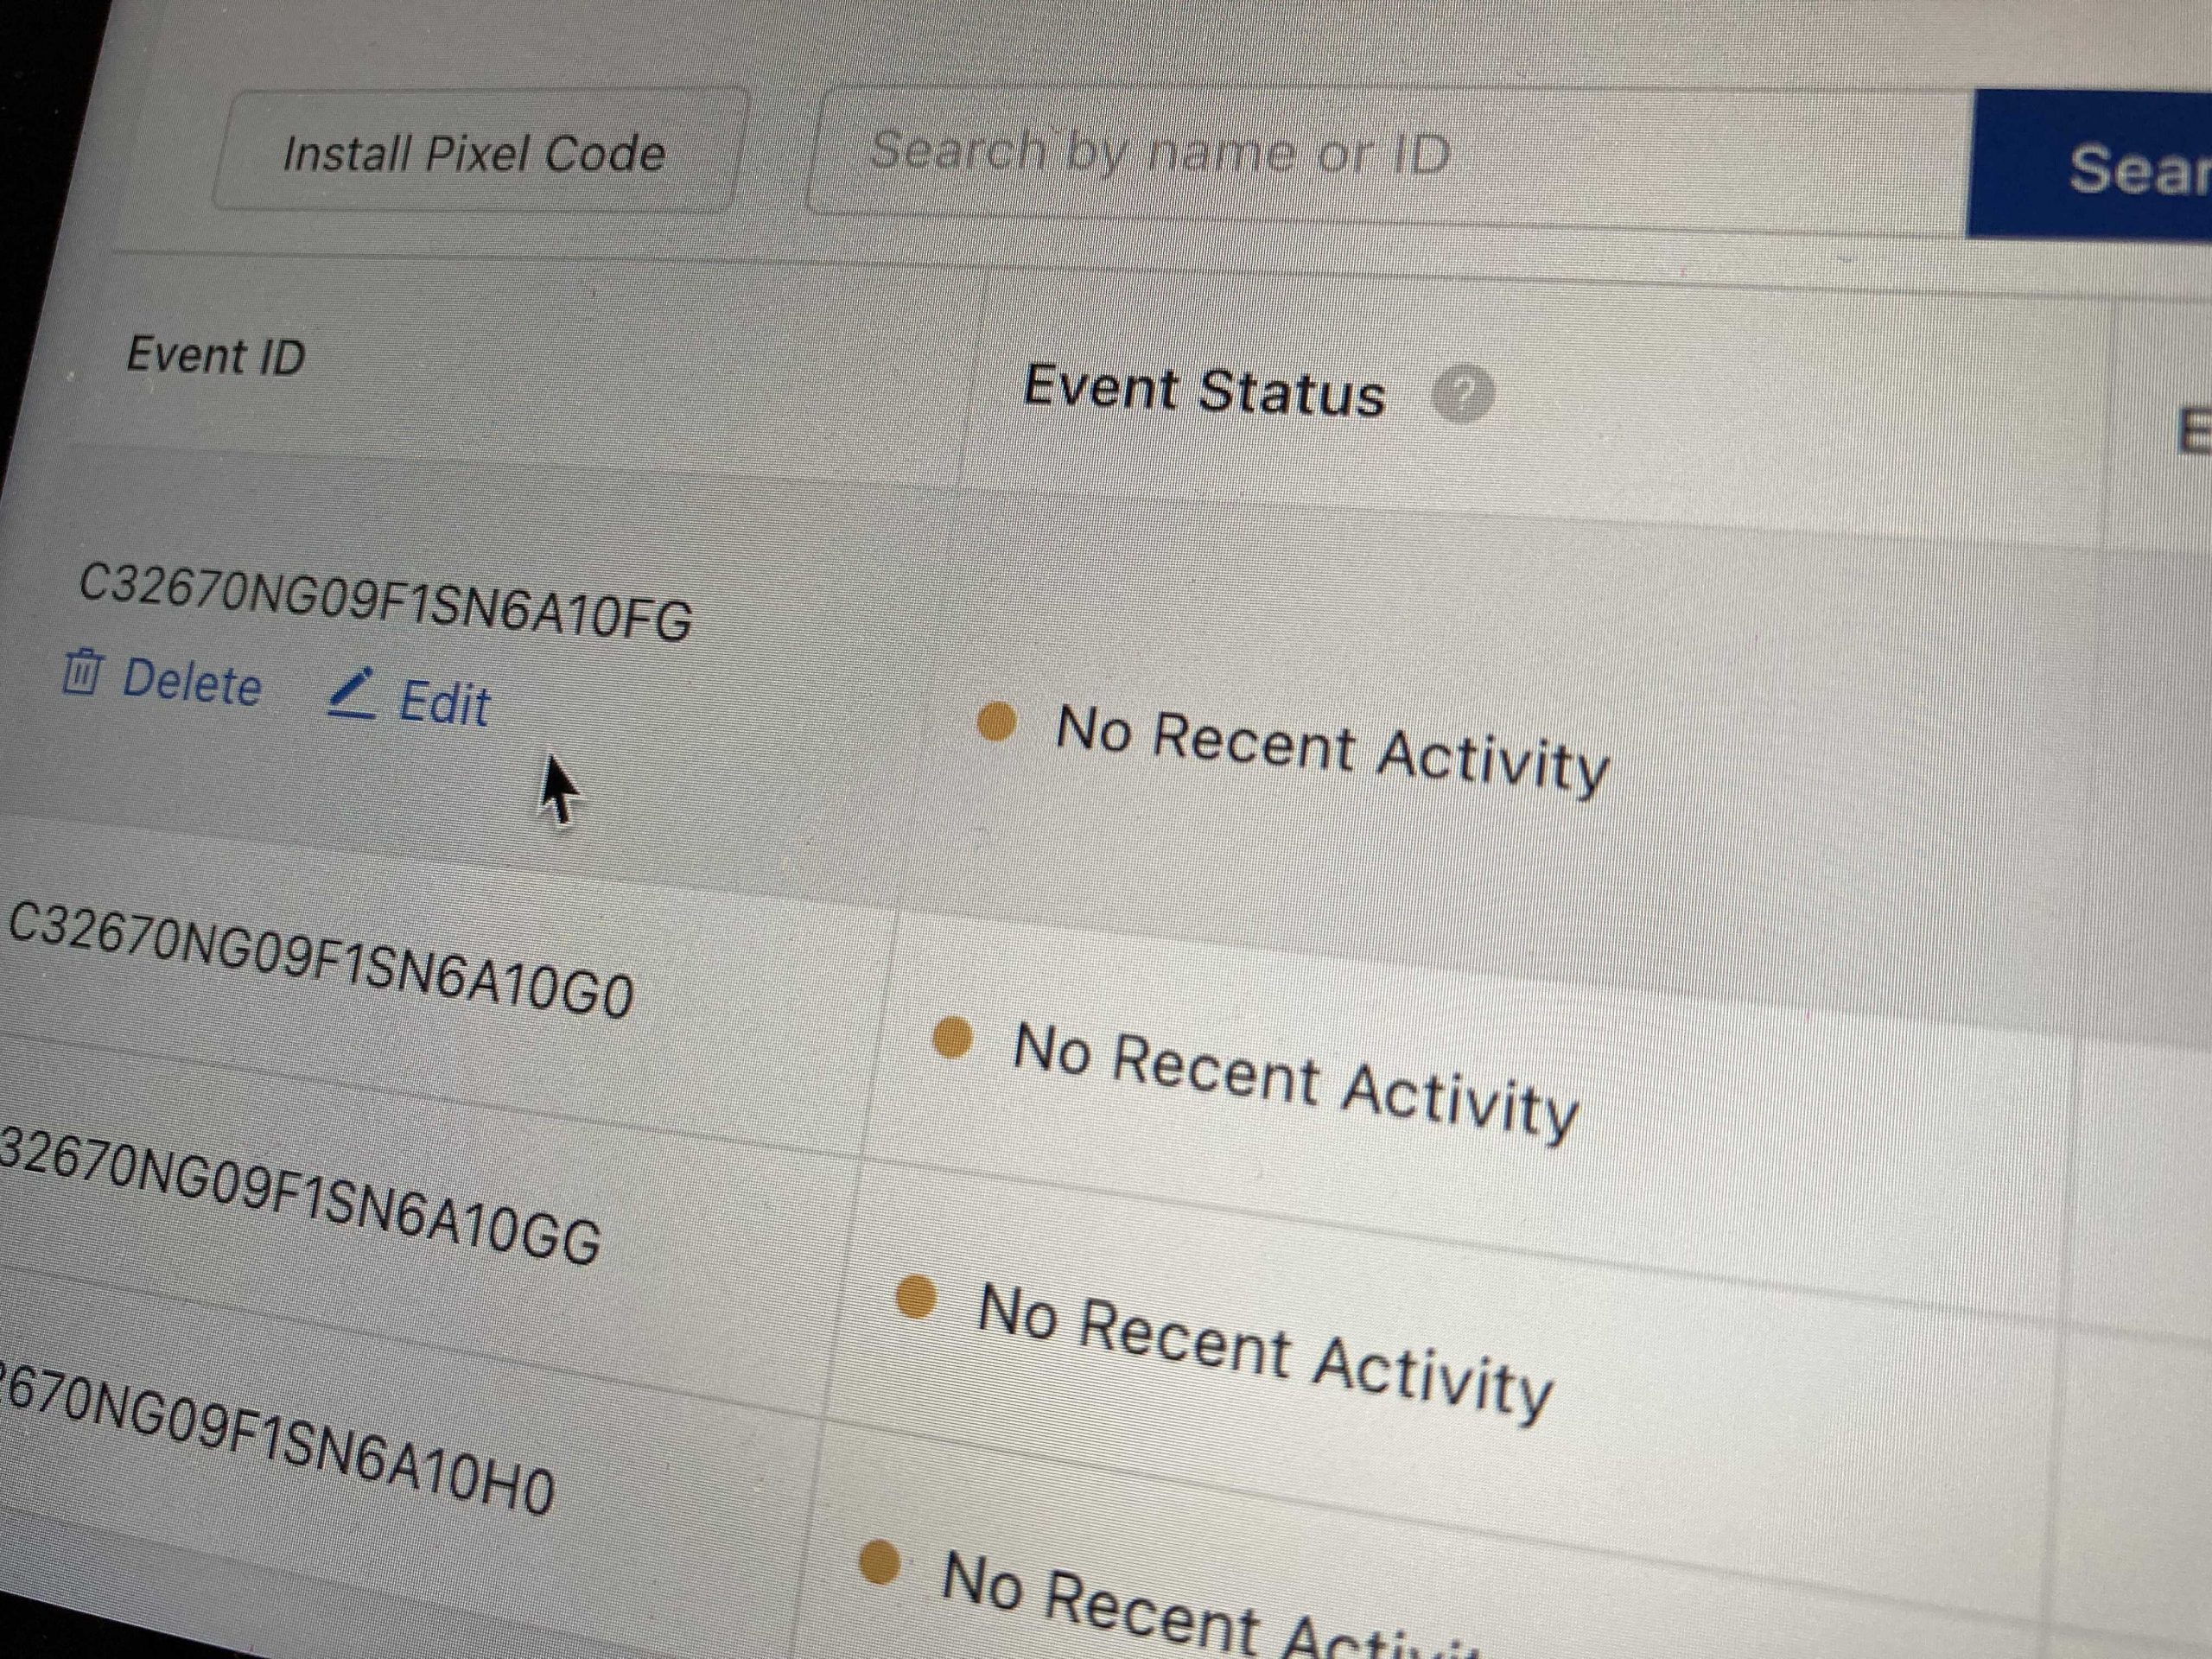
Scroll down, select any event and you’ll see an Edit option:
I think it’s clear how to edit events created earlier, you can see the Edit Option in the Rules fields:
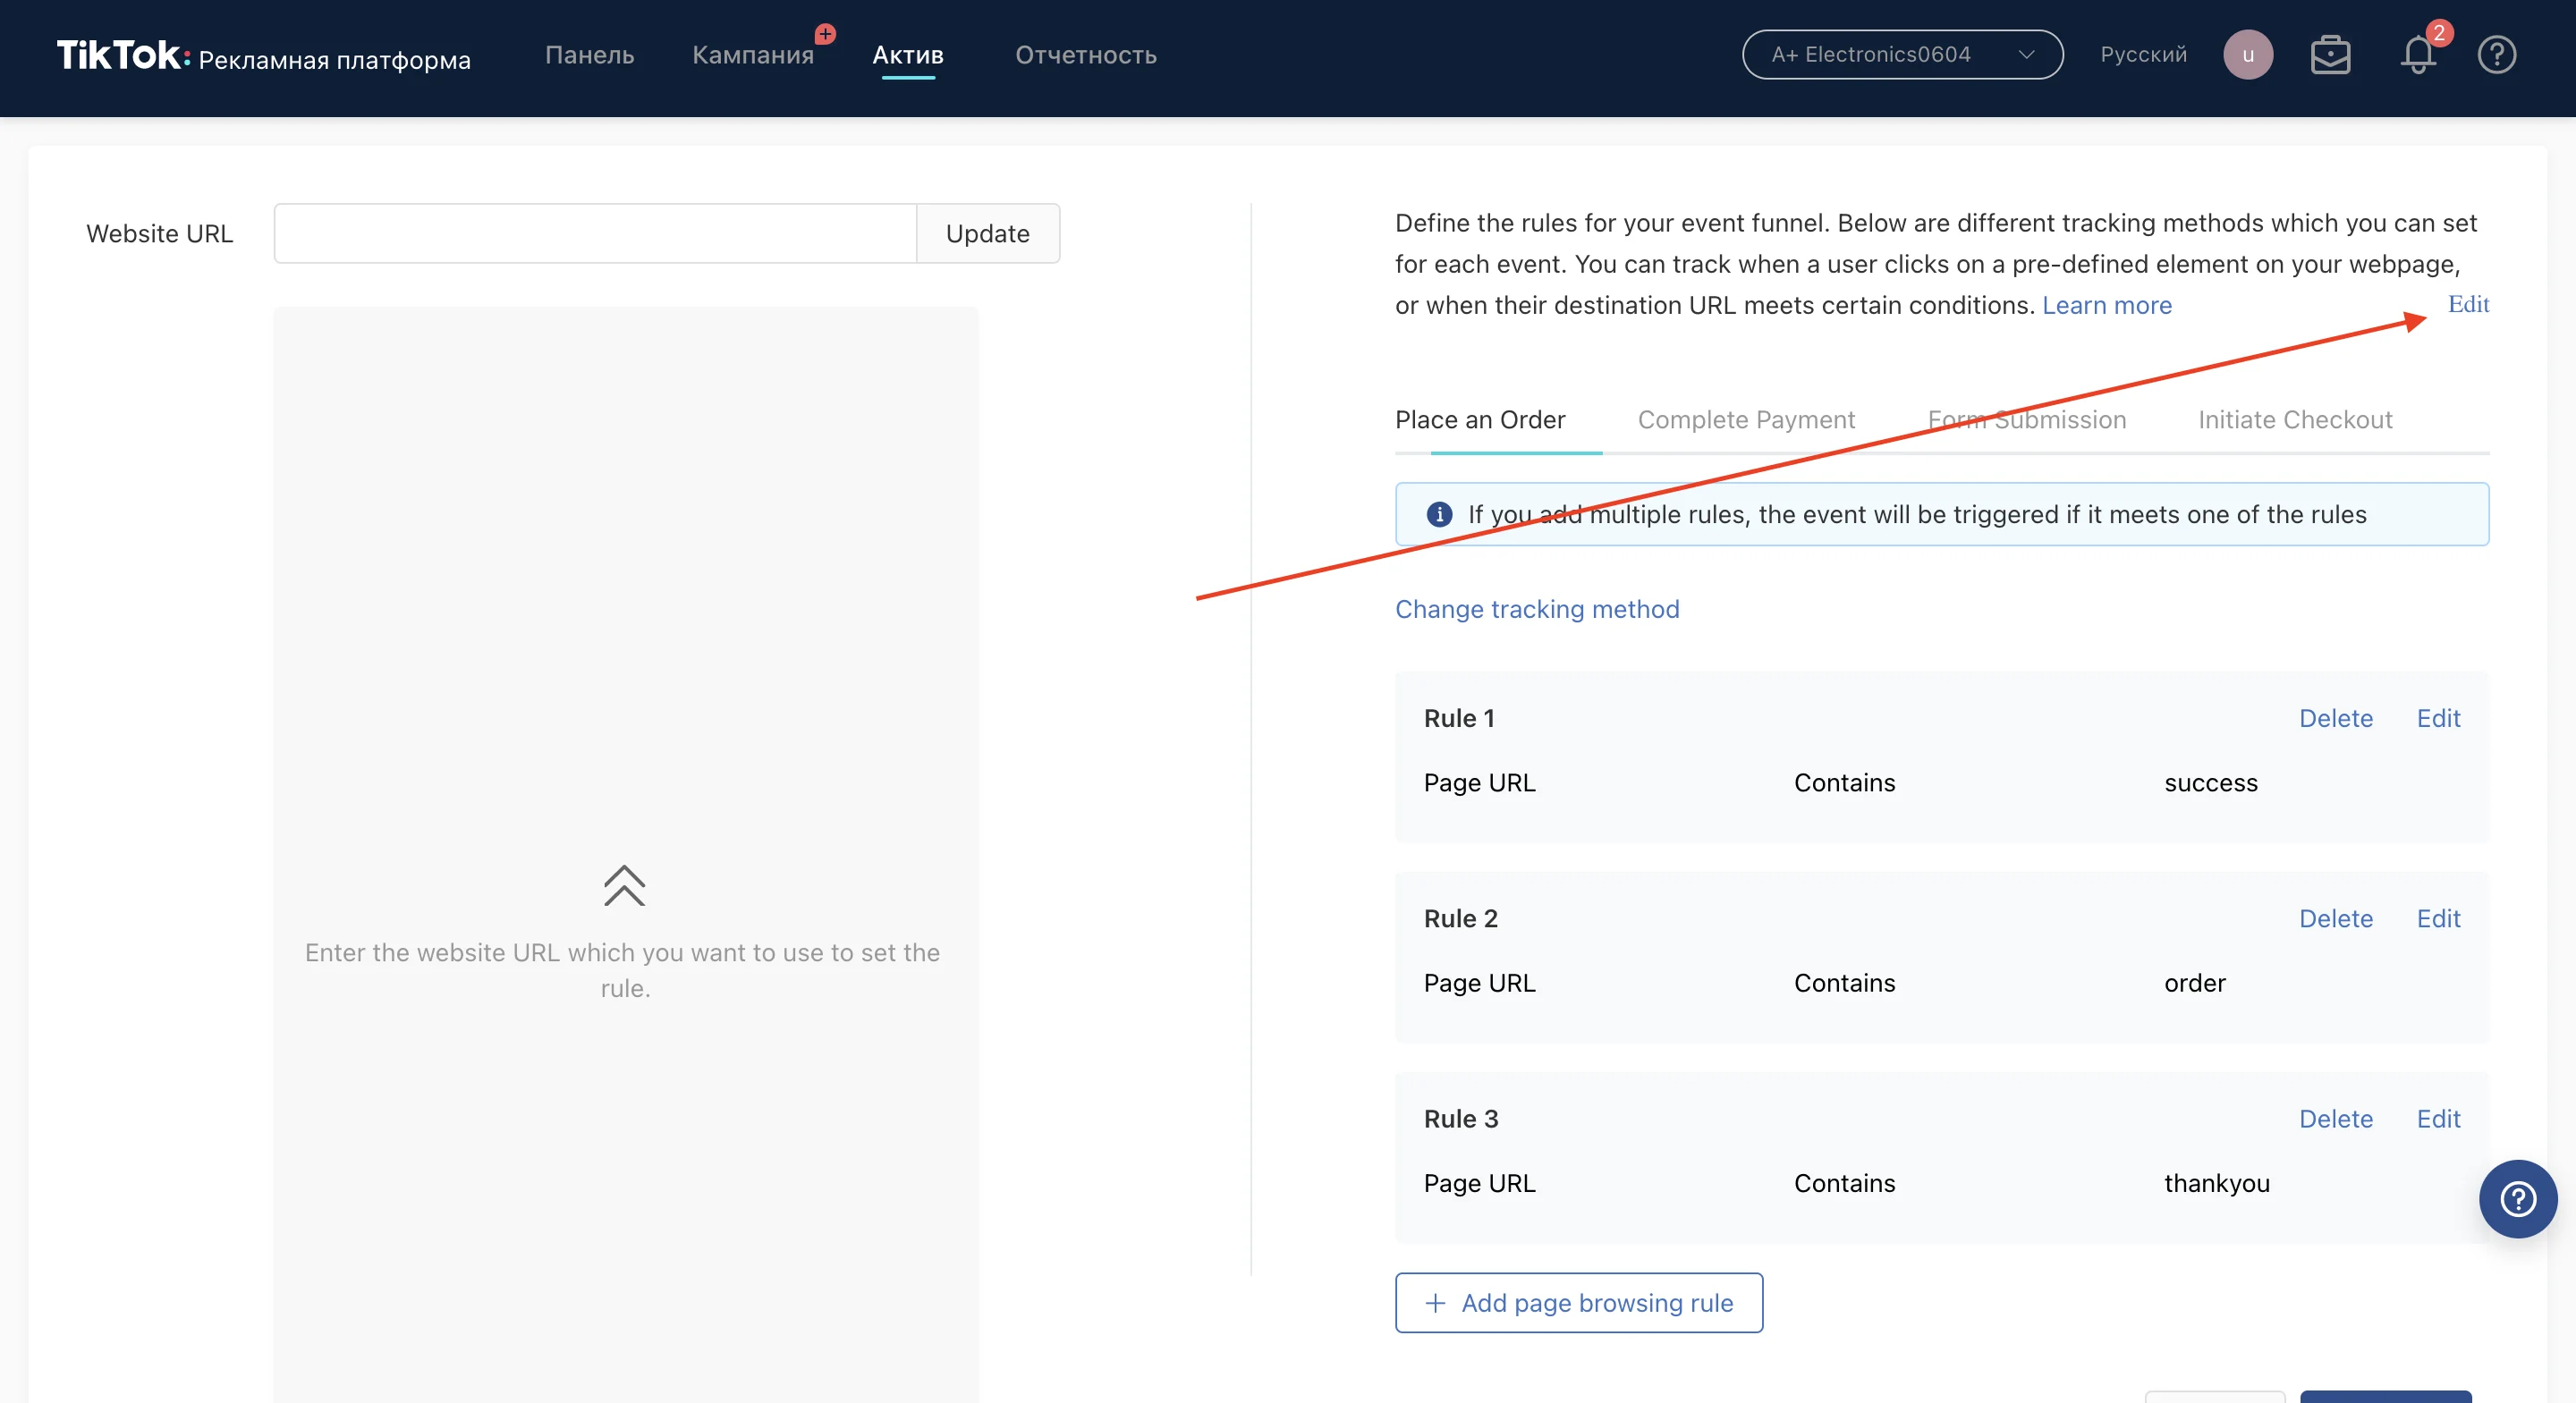
If you need to add an event, there is an Edit button at the top:
Featured links
Contributor’s Telegram channel.
Contact contributor.