


Step-by-step tutorial and ready-made code to create a Telegram bot that will send notifications when the specified keywords are mentioned on Telegram channels, groups, and chats you are subscribed to.
This script, using the Telethon library, listens to all new messages and analyzes them for specified keywords, and automatically sends notifications to a predefined chat via a bot created with Aiogram.
The script provides the following features:
- Connecting to your Telegram account using Telethon allows you to listen to all messages in real-time.
- Analyzing all incoming messages in channels, groups, and private chats for the presence of specified keywords.
- Automatic generation of notifications with detailed information about the sender, chat name, link to the message (if possible), and other data.
- Sending notifications to a specified target chat via Telegram bot using the Aiogram library.
The script can be configured on the server or your PC (it is free). In this article, we will consider the option of customizing its work on the server, Windows, and macOS.
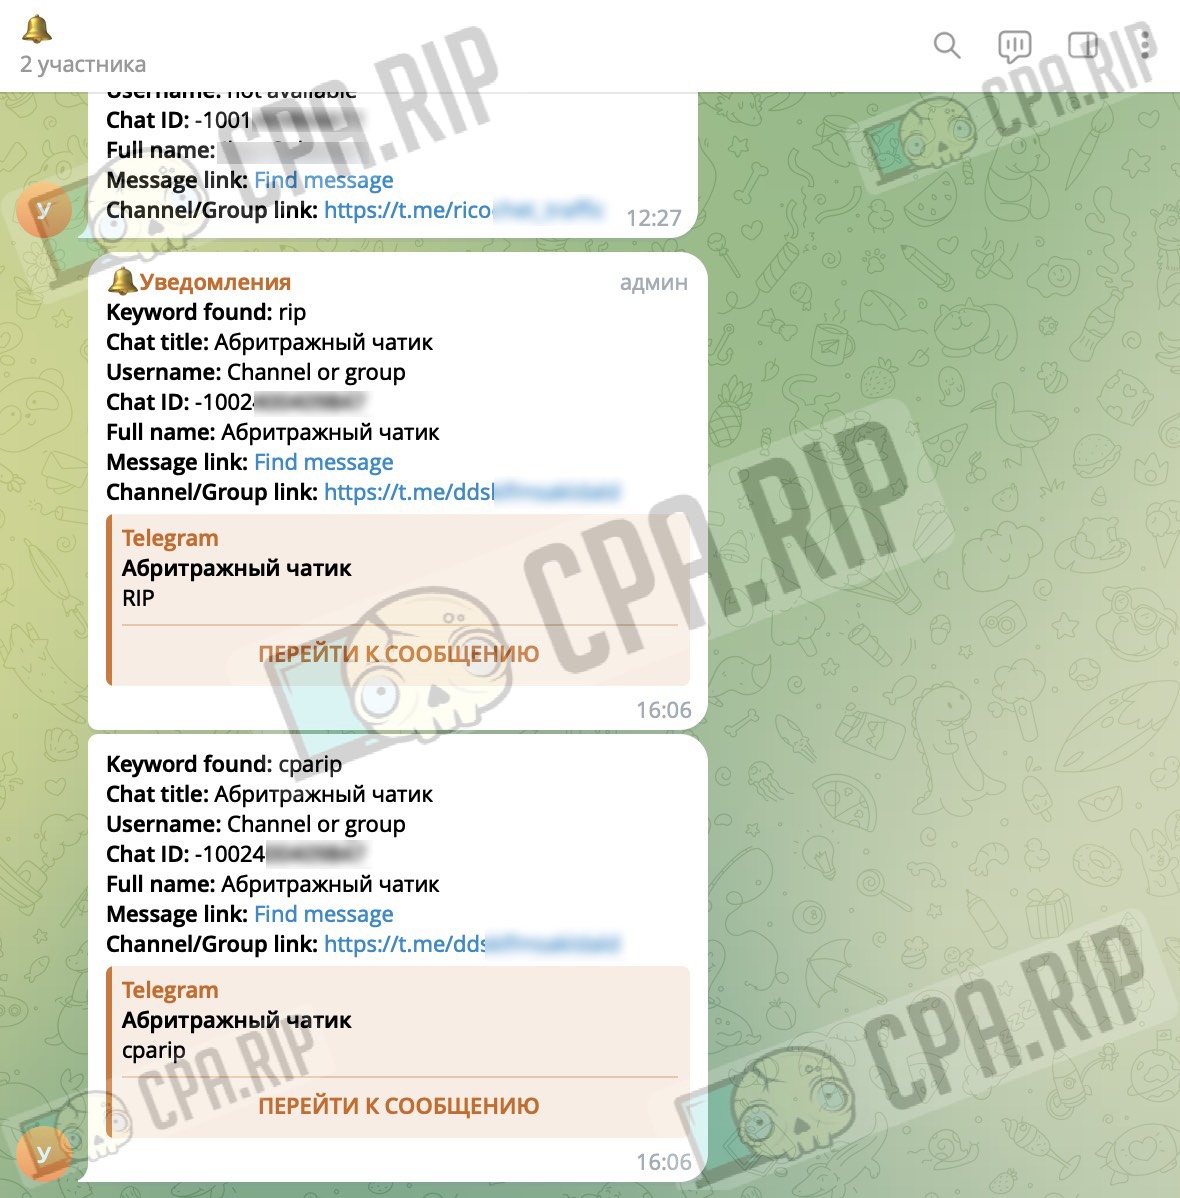
Work result
The script is suitable for tracking activity on Telegram when you need to promptly receive information about messages containing important keywords. The result of the work will look as follows:
Source code
We will create and customize the bot using this script:
from telethon import TelegramClient, events, types
from aiogram import Bot
import asyncio

# API ID and Hash obtained through my.telegram.org
api_id = 'YOUR_API_ID'
api_hash = 'YOUR_API_HASH'

# Your bot token created through BotFather
bot_token = 'YOUR_BOT_TOKEN'

# Your account phone number
phone_number = 'YOUR_PHONE_NUMBER'

# Keywords to monitor
keywords = ['cparip', 'rip']

# Create a Telethon client
client = TelegramClient('session_name', api_id, api_hash)

# Create a bot instance to send messages
bot = Bot(token=bot_token)

@client.on(events.NewMessage)
async def new_message_listener(event):
    """
    Listen for all new messages in channels and groups.
    """
    # Split the message text into words and check for exact keyword match (case insensitive)
    message_words = event.raw_text.lower().split()
    matched_keyword = next((keyword for keyword in keywords if keyword.lower() in message_words), None)
    if matched_keyword:
        try:
            sender = await event.get_sender()  # Get information about the sender
        except Exception as e:
            sender = None
            print(f"Error getting sender information: {e}")

        # Start forming the message to send
        username = "Unknown sender"
        full_name = "Unknown"
        channel_link = "Link not available"
        chat_title = "Unknown chat"  # Title of the group, channel, or chat

        # Get chat information from the event
        chat = await event.get_chat()

        # Check if the sender is not None
        if sender is None:
            username = "Unknown sender"
            full_name = "Unknown"
        elif isinstance(sender, types.User):
            # For users
            username = f"@{sender.username}" if sender.username else "not available"
            full_name = f"{sender.first_name} {sender.last_name if sender.last_name else ''}".strip()
        elif isinstance(sender, (types.Channel, types.Chat)):
            # For channels or chats
            username = "Channel or group"
            full_name = sender.title if sender.title else "Unknown"

        # Check if chat information is available and fill in the data
        if chat:
            chat_title = chat.title if hasattr(chat, 'title') and chat.title else "Unknown chat"
            # Check if there is a username to form a direct link to the channel or group
            if hasattr(chat, 'username') and chat.username:
                channel_link = f"https://t.me/{chat.username}"
            else:
                channel_link = "Link not available"

        # Form a link to the specific message
        try:
            if isinstance(chat, types.Channel) or isinstance(chat, types.Chat):
                if hasattr(chat, 'username') and chat.username:
                    # If the group or channel has a username, form a direct link to the message
                    message_link = f'https://t.me/{chat.username}/{event.id}'
                else:
                    # If the username is not available, use the chat ID to form the link
                    chat_id_str = str(event.chat_id).replace('-100', '') if event.chat_id < 0 else str(event.chat_id)
                    message_link = f'https://t.me/c/{chat_id_str}/{event.id}'
            else:
                message_link = "Message link not available"
        except Exception as e:
            message_link = "Message link not available"
            print(f"Error forming message link: {e}")

        # Form the notification text
        text = (
            f'<b>Keyword found:</b> {matched_keyword}\n'
            f'<b>Chat title:</b> {chat_title}\n'
            f'<b>Username:</b> {username}\n'
            f'<b>Chat ID:</b> {event.chat_id}\n'
            f'<b>Full name:</b> {full_name}\n'
            f'<b>Message link:</b> <a href="{message_link}">Find message</a>\n'
            f'<b>Channel/Group link:</b> {channel_link}'
        )

        # Send the message to the specified chat via your bot
        target_chat_id = '-1000000000'  # Specify the chat ID where the bot should send notifications
        async with bot:
            try:
                await bot.send_message(chat_id=target_chat_id, text=text, parse_mode='HTML')
            except Exception as e:
                print(f"Error sending message: {e}")

async def main():
    # Start the Userbot
    await client.start(phone_number)
    print("Userbot started and listening to channels and groups...")

    # Userbot will run until manually stopped
    await client.run_until_disconnected()

# Start the client
if __name__ == "__main__":
    with client:
        client.loop.run_until_complete(main())
In this code, you need to replace the values of the following variables with your own:
api_id = 'YOUR_API_ID'
api_hash = 'YOUR_API_HASH'
bot_token = 'YOUR_BOT_TOKEN'
phone_number = 'YOUR_PHONE_NUMBER'
target_chat_id = '-1000000000' # Specify the target chat ID
keywords = ['cparip', 'rip'] # Keywords for tracking
Getting data for script customization
API ID и API Hash
Important: We do not recommend using a personal Telegram account for this script.
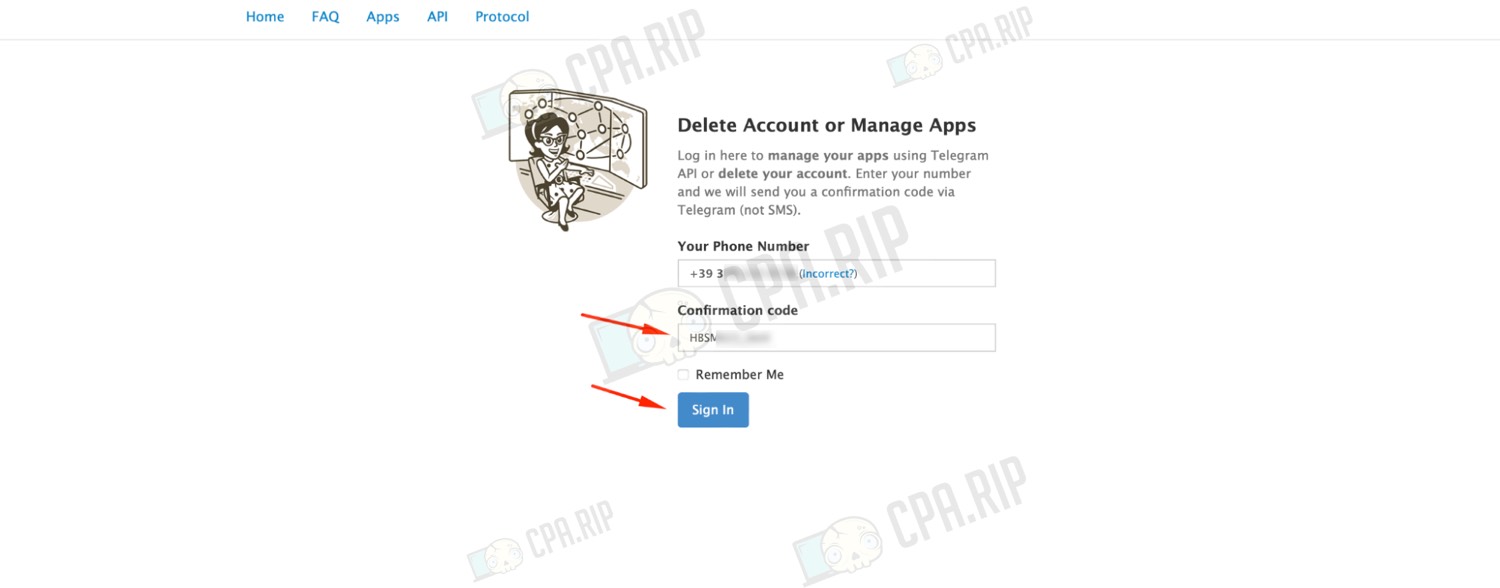
Go to http://my.telegram.org to get API for a Telegram account. Enter the phone number connected to the account and click “Next”.

Enter the code that was sent to the Telegram account and click “Sign In”.
Fill in the fields “App title” and “Short name” with random values. Then click “Create application”.

Substitute the data into the code using the values from the “App api_id” and “App api_hash” fields:
api_id = 'YOUR_API_ID'api_hash = 'YOUR_API_HASH'

Bot Token
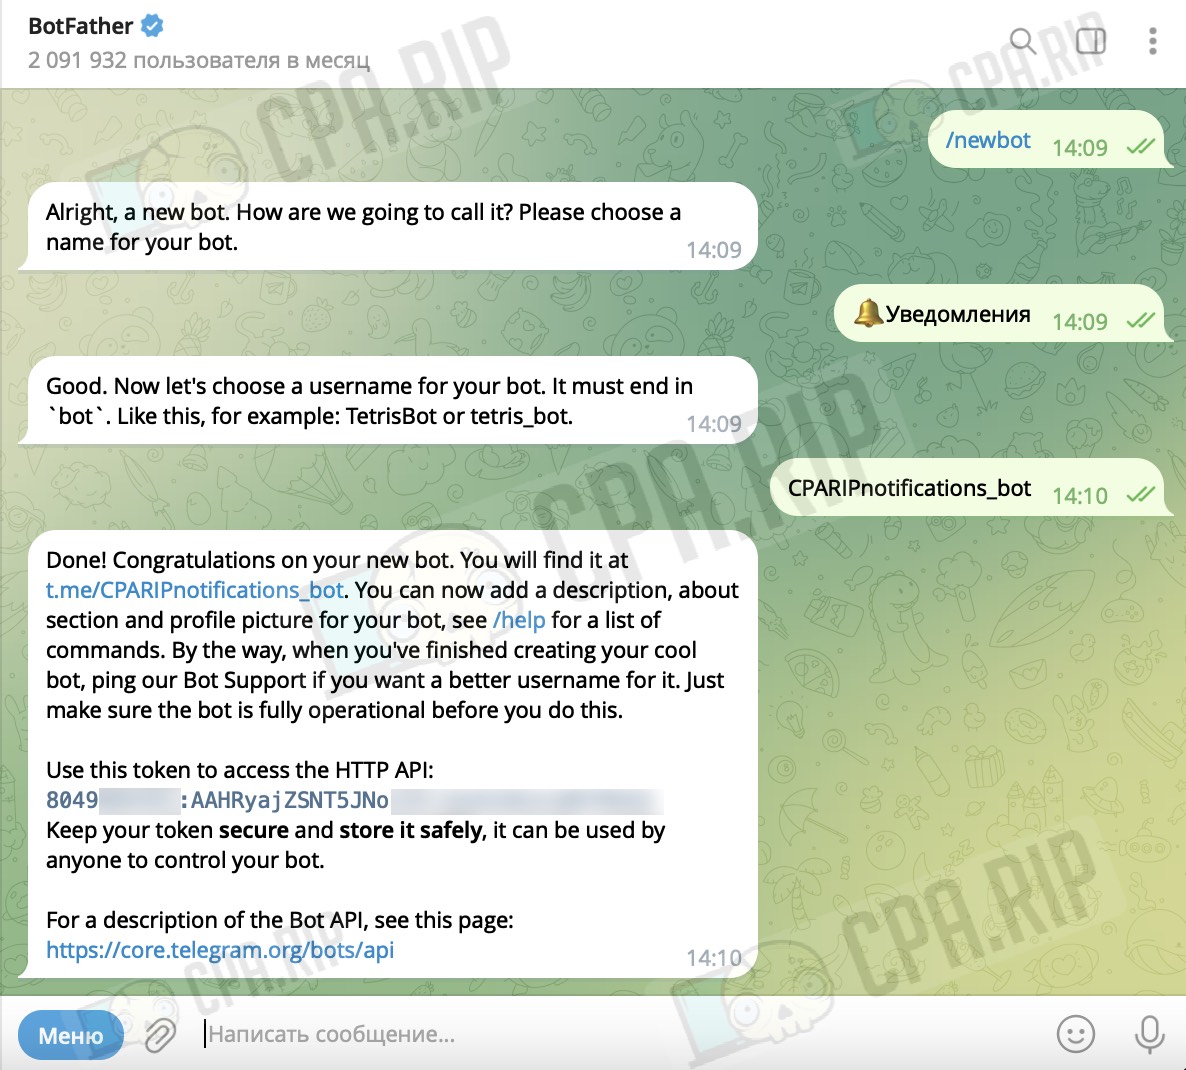
- Create a bot on Telegram using @BotFather: send the command
/newbot, enter the name of the bot, and then send its username. - Save the issued API token and insert it into:
bot_token = 'YOUR_BOT_TOKEN'
Phone number
Important: We do not recommend using a personal Telegram account for this script.
Enter the phone number from the Telegram account that will be used for authorization via Telethon.
phone_number = 'YOUR_PHONE_NUMBER'
Chat ID for notifications
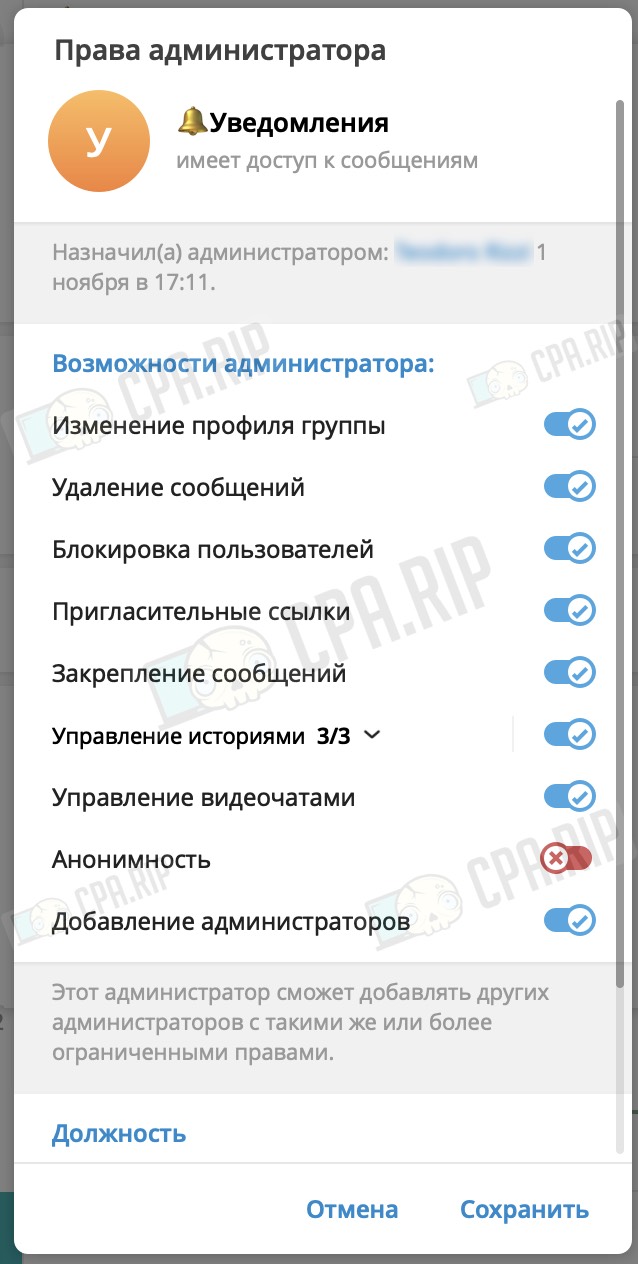
- Create a channel or group and use the @chatidcheck_bot to find out the chat ID.

- Invite the created bot there and give it all administrator rights.
- Replace
target_chat_idin the code with the chat ID where the bot should send notifications.
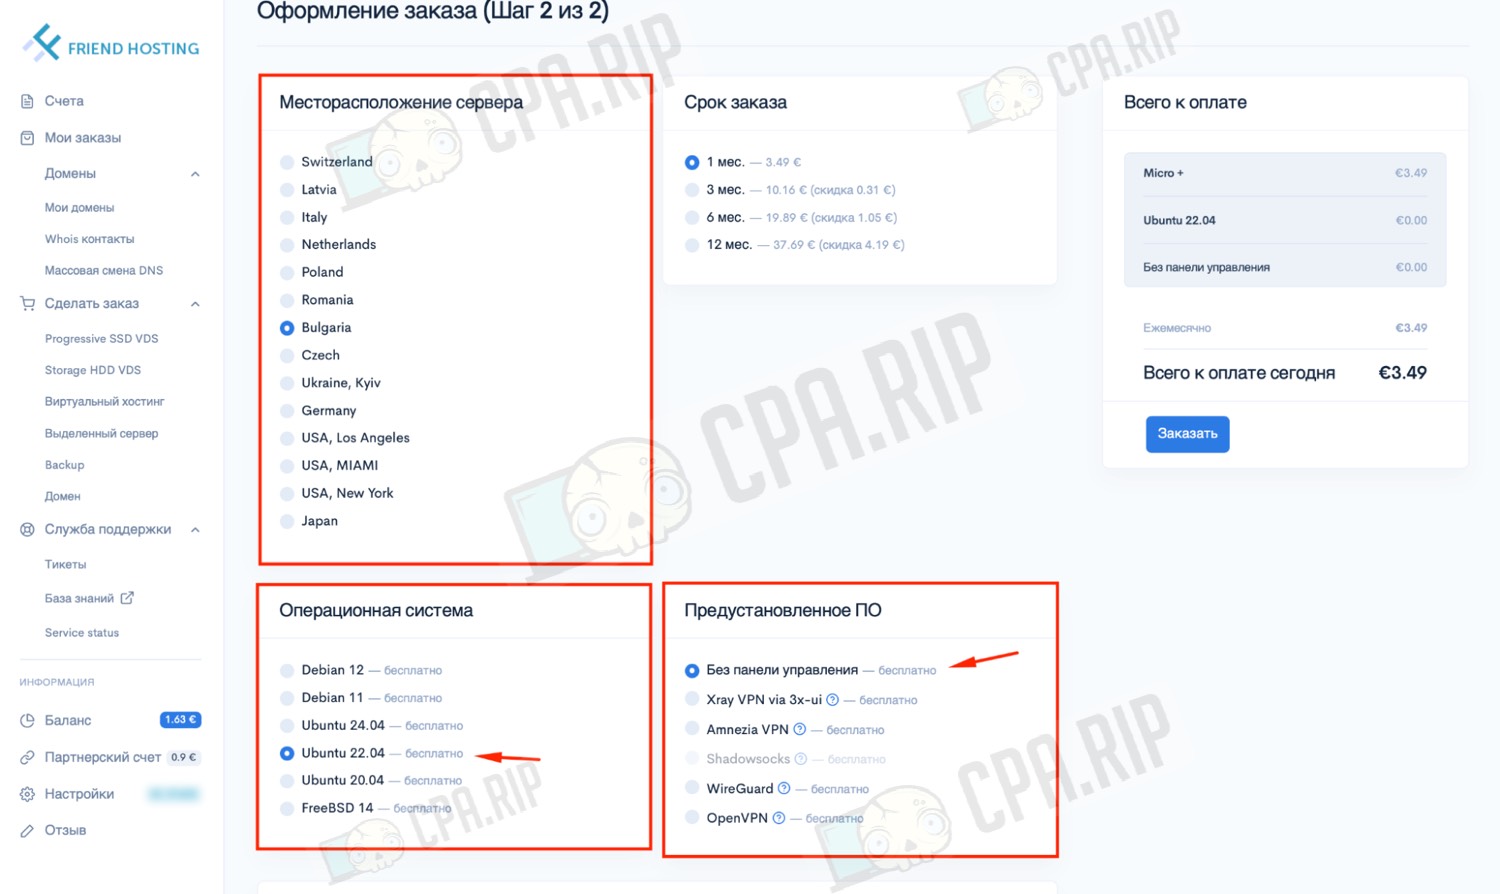
Running script on VDS server
Server purchase
Buy VDS-server on FriendHosting with Ubuntu 22.04 bit operating system and Without a control panel. After purchasing a VDS server, you will receive server access data (SSH).
Connection to VDS
Create a connection to the server via SSH:
Use Terminal on macOS, or install a program to connect via SSH on Windows, such as PuTTY.
Connect to the server using the command:
ssh LOGIN@IP-SERVER -p PORT

Enter the password:

Installing Python and necessary tools
Add Python and its tools for working with virtual environments and installing dependencies:
apt install python3 python3-venv python3-pip -y

This command will install Python 3, the virtualization tools, and the pip package manager.
Creating folder for project
- Create a folder for the project:
mkdir telegram_bot

The folder is necessary for convenient work with the project.
- Go to the created folder:
cd telegram_bot

Creating and activating virtual environment
- Create a virtual environment:
python3 -m venv venv
![]()
The virtual environment is necessary to isolate project dependencies.
- Activate the virtual environment:
source venv/bin/activate
![]()
After activating the virtual environment, your command line should change displaying (venv).
Install required libraries
- Add the required libraries:
pip install telethon aiogram

These libraries are required to work with the Telegram API.
Adding the script to the server
- Create a file with your script:
nano telegram_bot.py
![]()
nano is a command-line text editor. You can also use any other editor you like.
- Add your previously prepared code to the telegram_bot.py file. To do this, paste it in nano. Use the right mouse button or CTRL+C / CTRL + V to paste it.
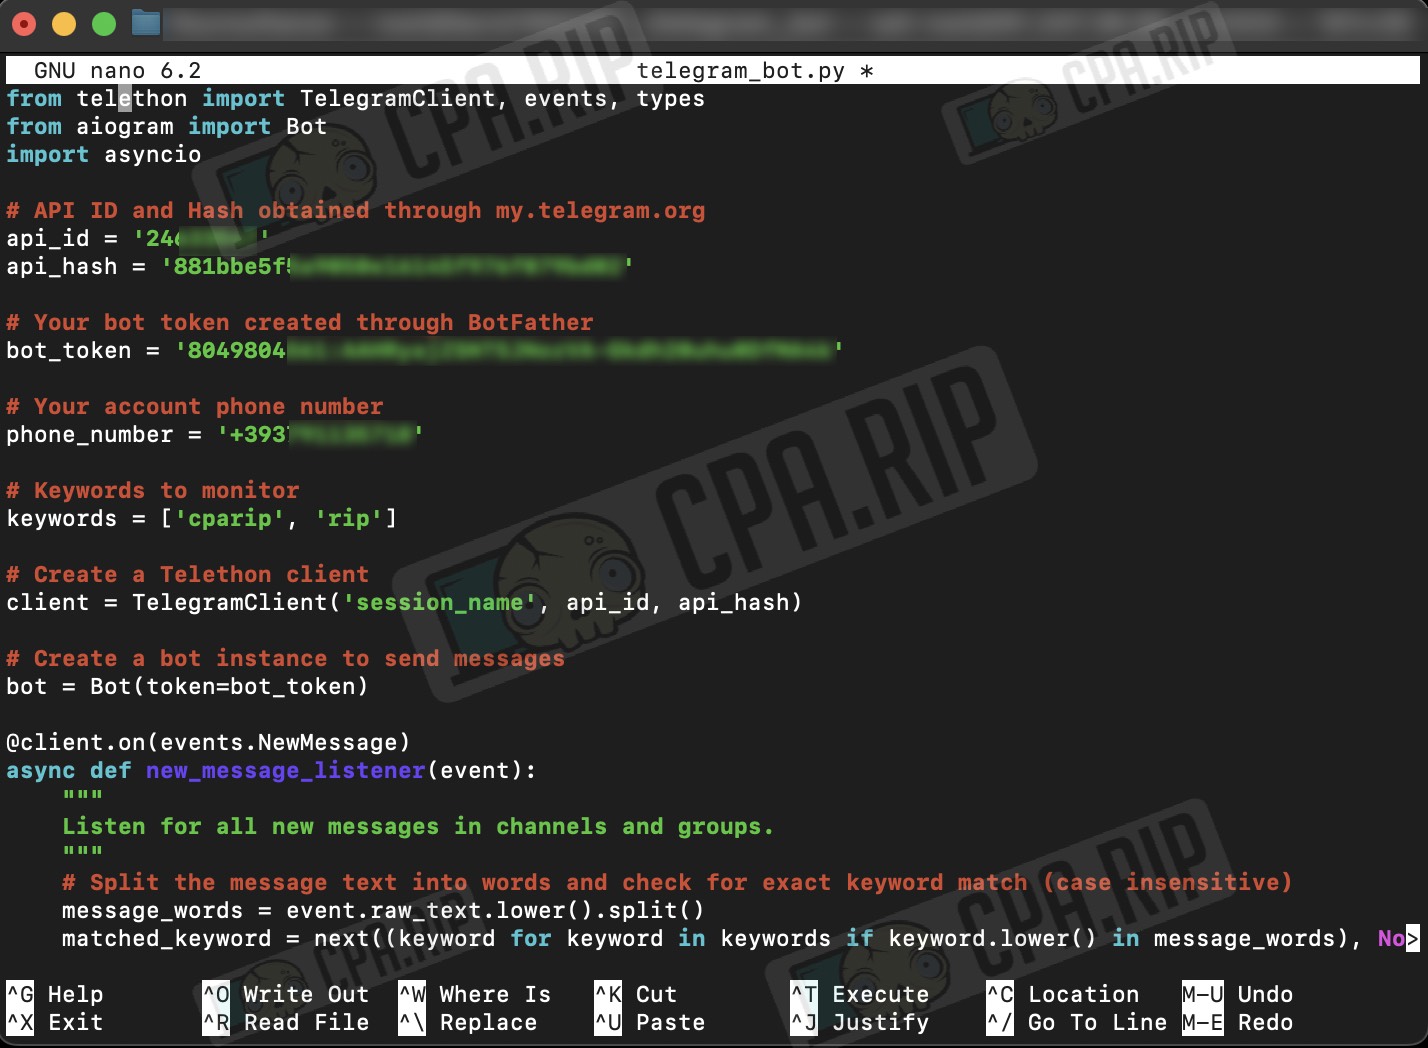
- After adding the code, click CTRL + O to save your changes, then click “Enter”.

-
To exit the editor, click CTRL + X.
Running bot in background
To keep the bot running after closing the terminal, use the screen utility.
- Install screen:
apt install screen -y
![]()
- Create a new screen session:
screen -S telegram_bot
![]()
- Run the script:
python telegram_bot.py

The first time you run the script, you will be asked for a confirmation code sent to your phone number. Enter this code into the terminal to complete the authorization process.
- Please enter your phone (or bot token): Phone number from Telegram
- Please enter the code you received: Confirmation code
- Please enter your password: 2FA code (if there is two-factor authentication on the account).
- After a successful launch, the following message will appear in the terminal: “Userbot is running and listening to channels and groups…”.
- If the bot finds messages with keywords, it will send a notification to the specified chat.

After that, the bot will start working in the given screen session.
- To disconnect from a screen session: click CTRL + A, then D to exit the session, leaving it running.
- To get back to screen:
screen -r telegram_bot
Running script locally (on PC)
Running the script locally will help you save money on buying a server but you will have to keep your computer turned on and your terminal with the script running.
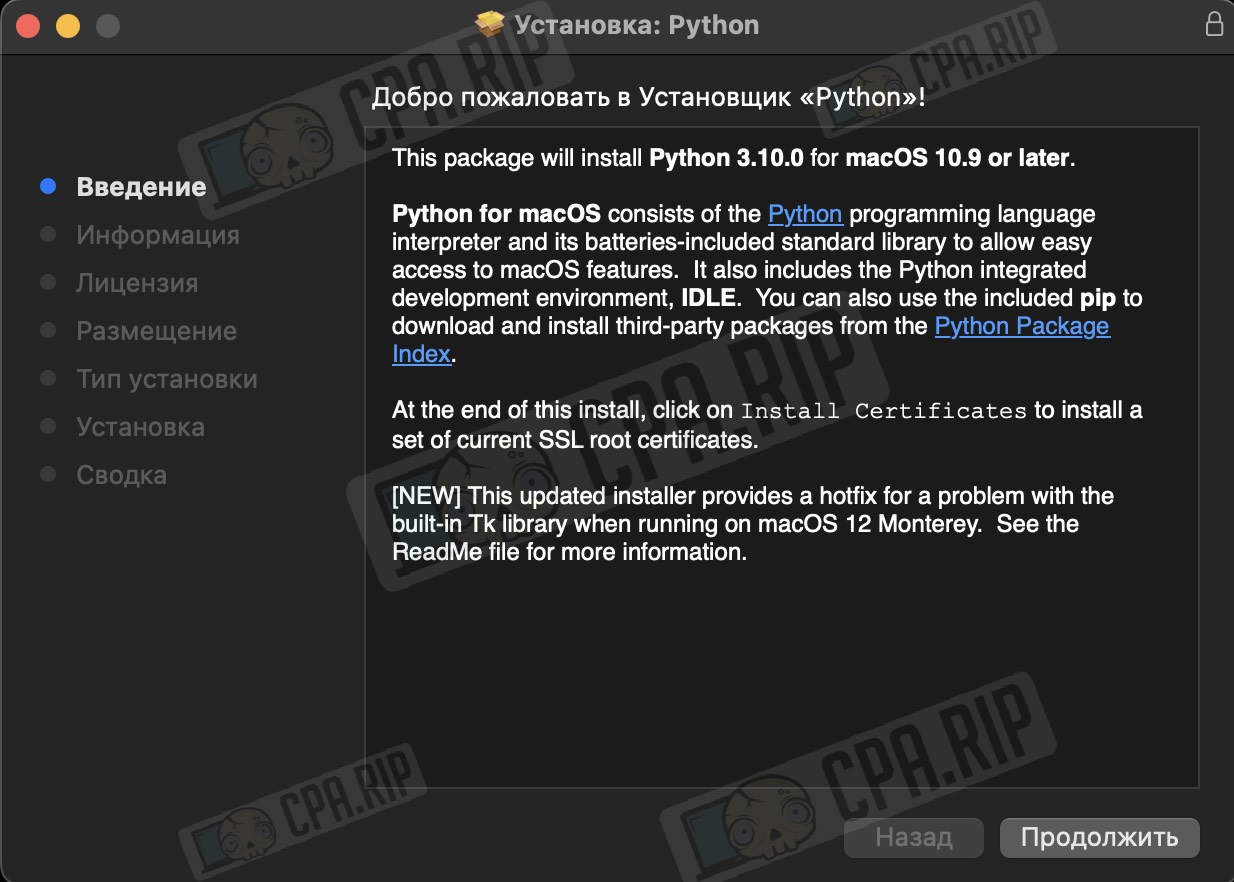
Installing Python
- Go to the official Python website: https://www.python.org/downloads/.
- Download and install the latest version of Python.
Important: On Windows, be sure to check the “Add Python to PATH” box to make Python available on the command line. On macOS, this setting is usually done automatically.
Verify Python installation:
- Windows: Open Command Prompt and run the command:
python --version
- macOS: Open Terminal and run the command:
python3 --version
If everything is successful, we will see the Python version, for example, Python 3.10.0.

Installing Visual Studio Code
- Download and install Visual Studio Code from the official site: https://code.visualstudio.com/.
- After installation, launch VS Code.
Installing extension in Visual Studio Code
- Launch VS Code and go to the Extensions tab (the squares icon on the sidebar or click Ctrl+Shift+X).
- In the extensions search, type Python and install the Microsoft extension that is needed to work with Python in VS Code and run our script.

Setting up virtual environment for project
- Create a folder for the project, name it, for example, telegram_bot.
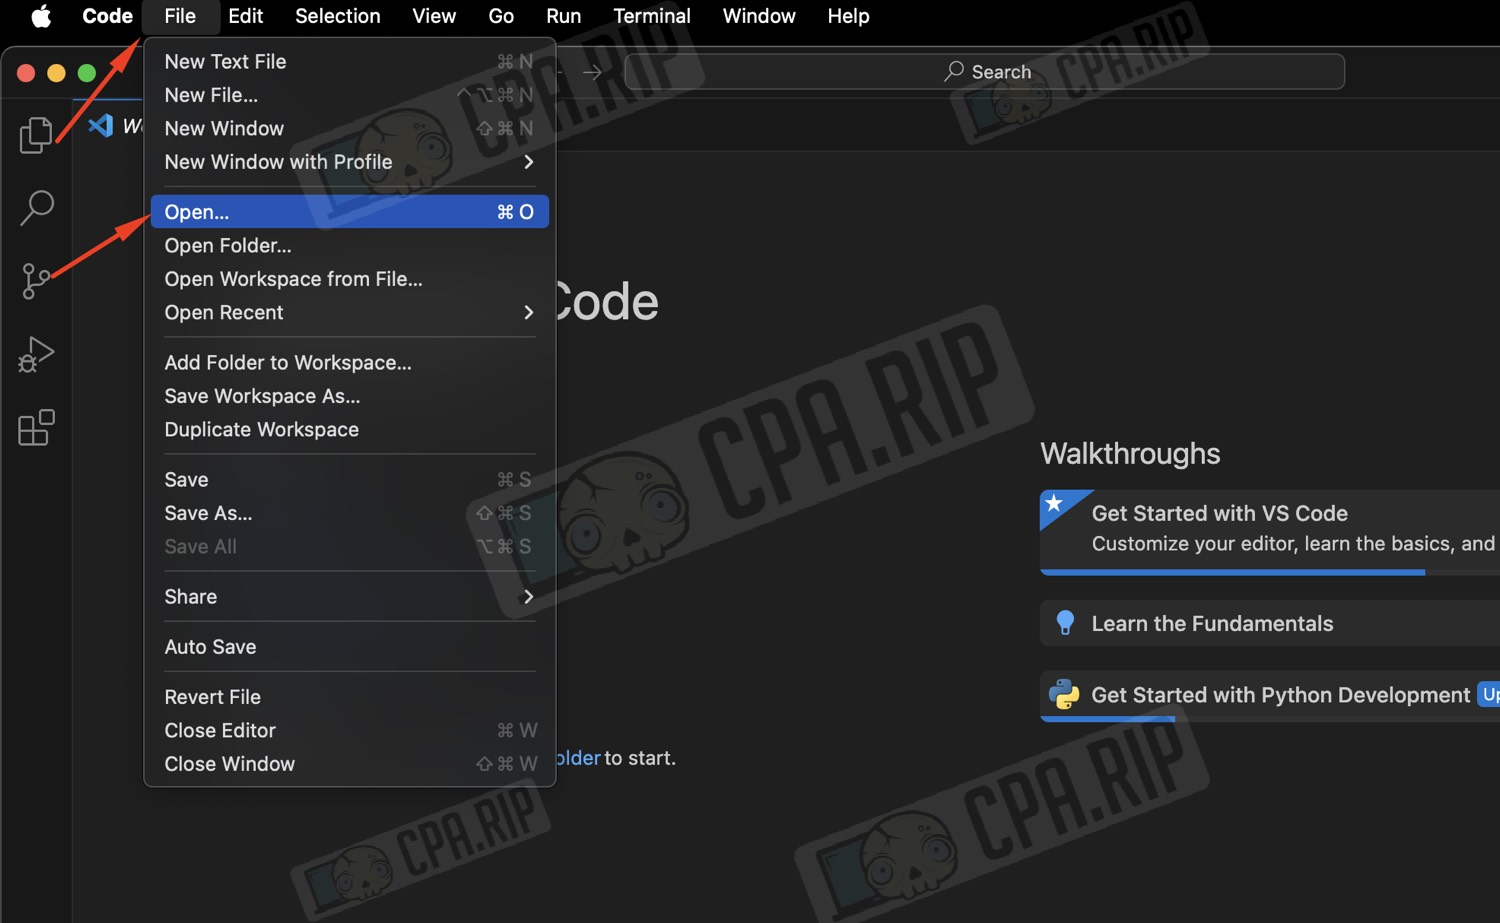
- Open this folder in Visual Studio Code: choose
File -> Open Folder(orFile -> Openon macOS) and find the created folder.
Creating virtual environment:
- Windows: Open terminal in VS Code (
View -> Terminal) and create a virtual environment with the command:
python -m venv venv
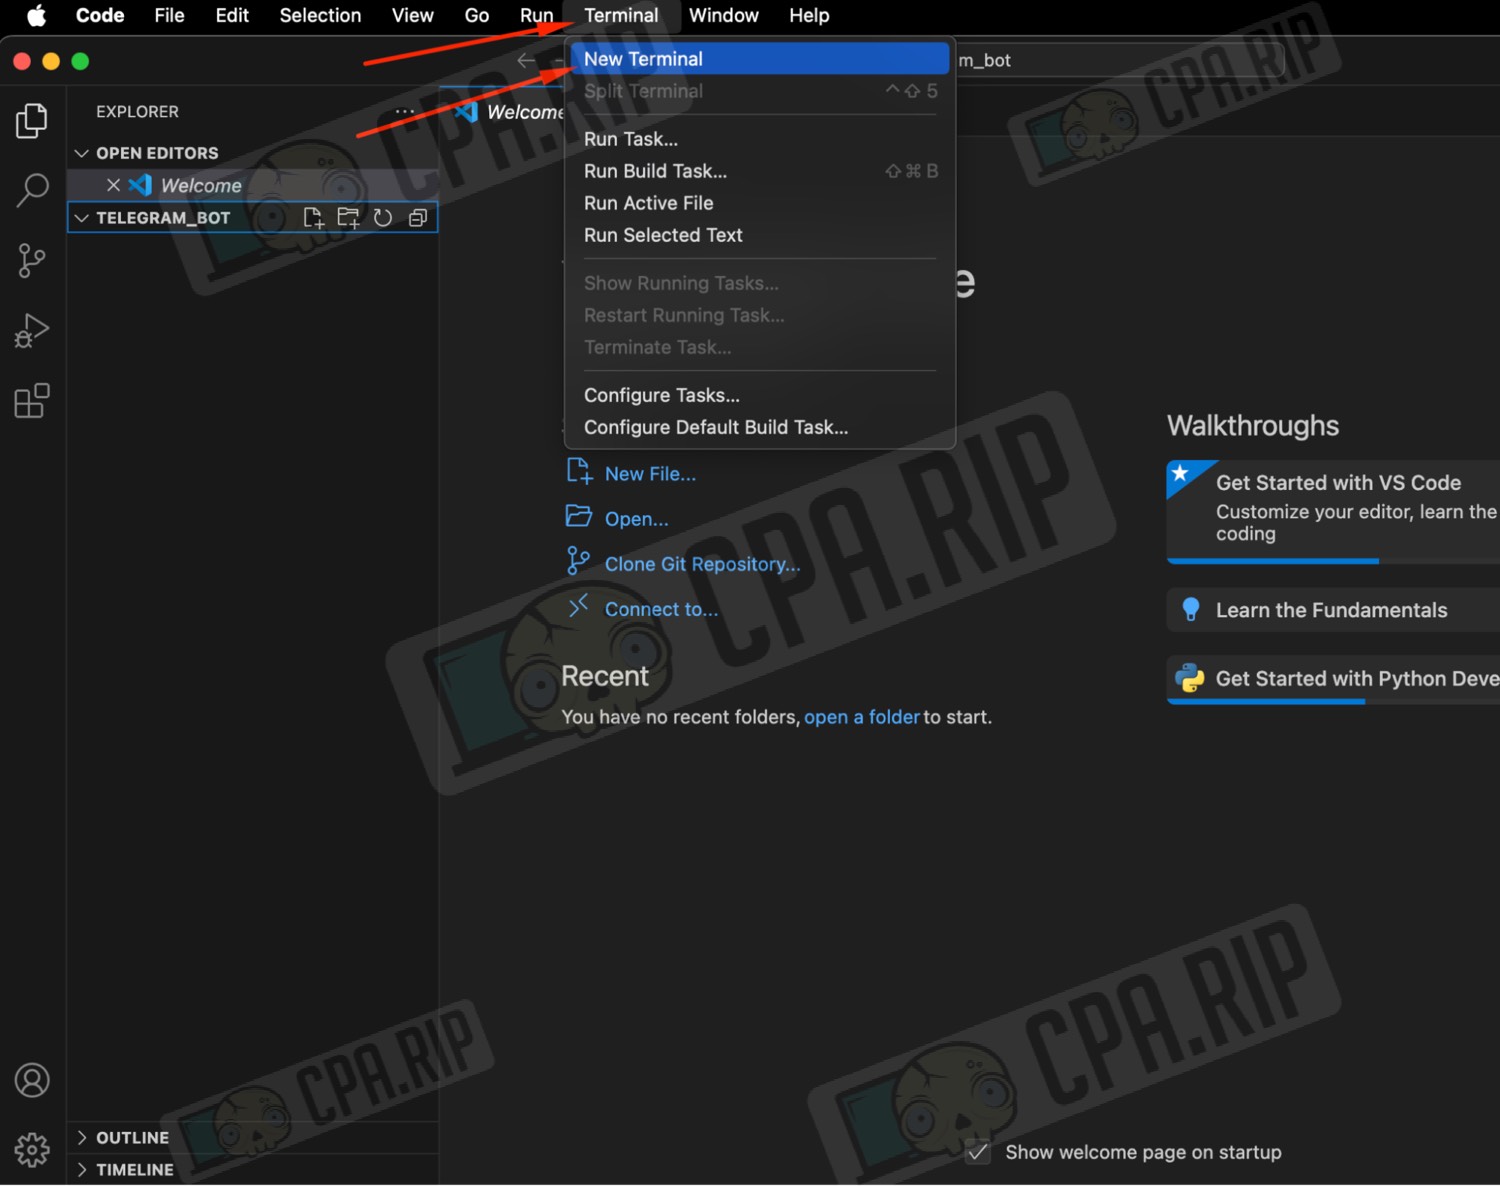
- macOS: Open terminal in VS Code (
Terminal -> New Terminal) and create a virtual environment with the command:
python3 -m venv venv

This will create a virtual environment named venv in the project folder.

Activating virtual environment
- Windows: Run the command:
.\venv\Scripts\activate
- macOS: Run the command:
source venv/bin/activate
After activation, (venv) should appear at the beginning of the terminal line, which confirms that the virtual environment has been successfully activated.

Installing necessary libraries
In the open terminal in VS Code, install Telethon and Aiogram libraries:
- Windows:
pip install telethon aiogram
- On macOS, you may need to use pip3:
pip3 install telethon aiogramм

Check that the libraries are installed:
pip list
You should see telethon and aiogram in the list of installed libraries.
Creating Python file and pasting code
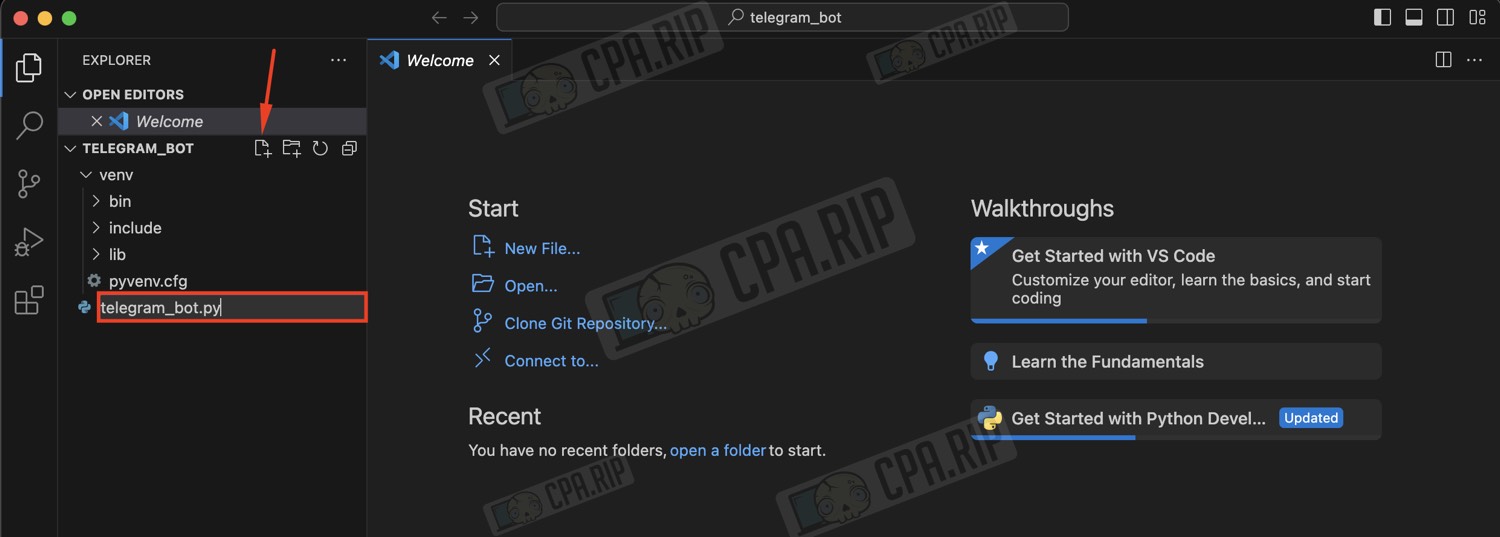
- Create a new file in Visual Studio Code in the Telegram_Bot folder and name it
telegram_bot.py.
- Paste the previously prepared code into it:
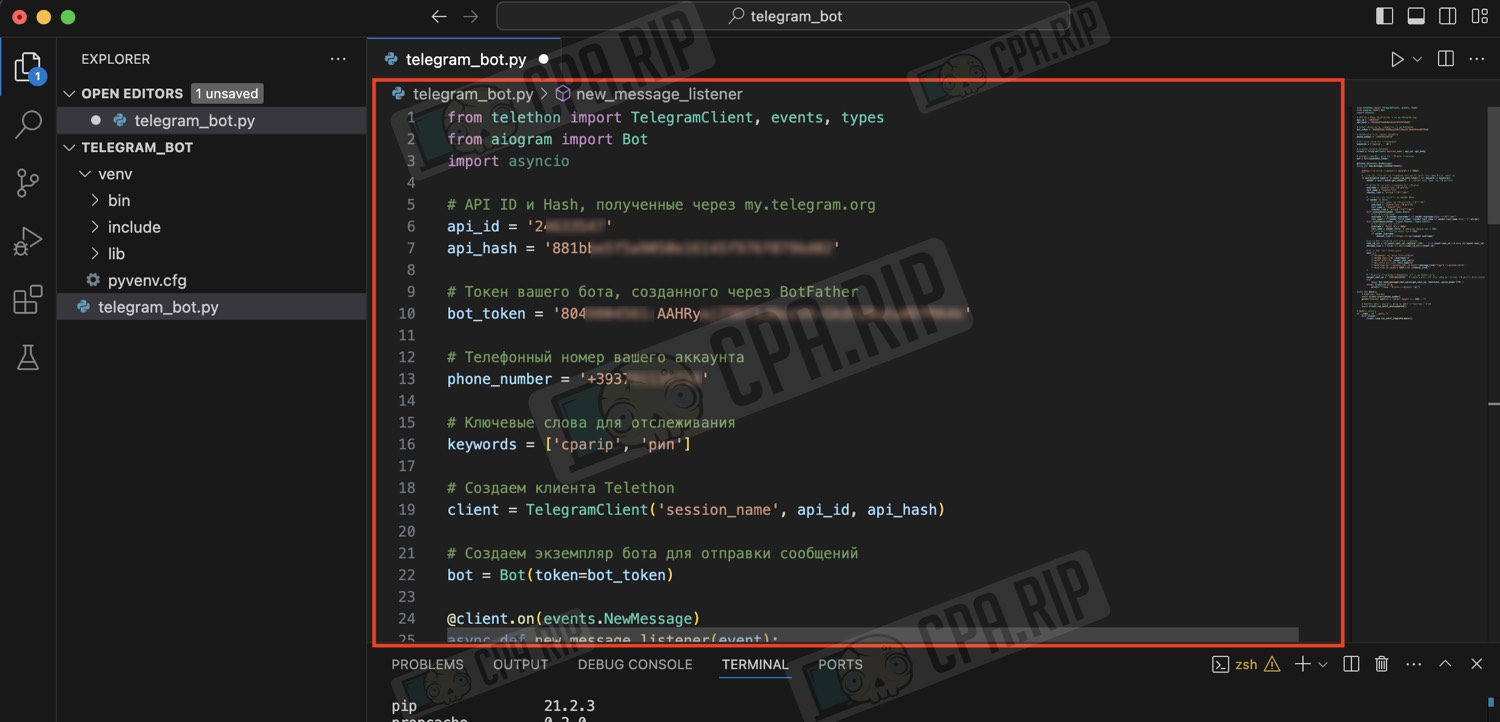
Important: Before running the script, make sure your file is saved.
Saving a file in VS Code on Windows:
- Key combination: Click Ctrl + S to save the current file.
Via the Menu: You can also go to the menu at the top of the window:
- Click File.
- Select Save.
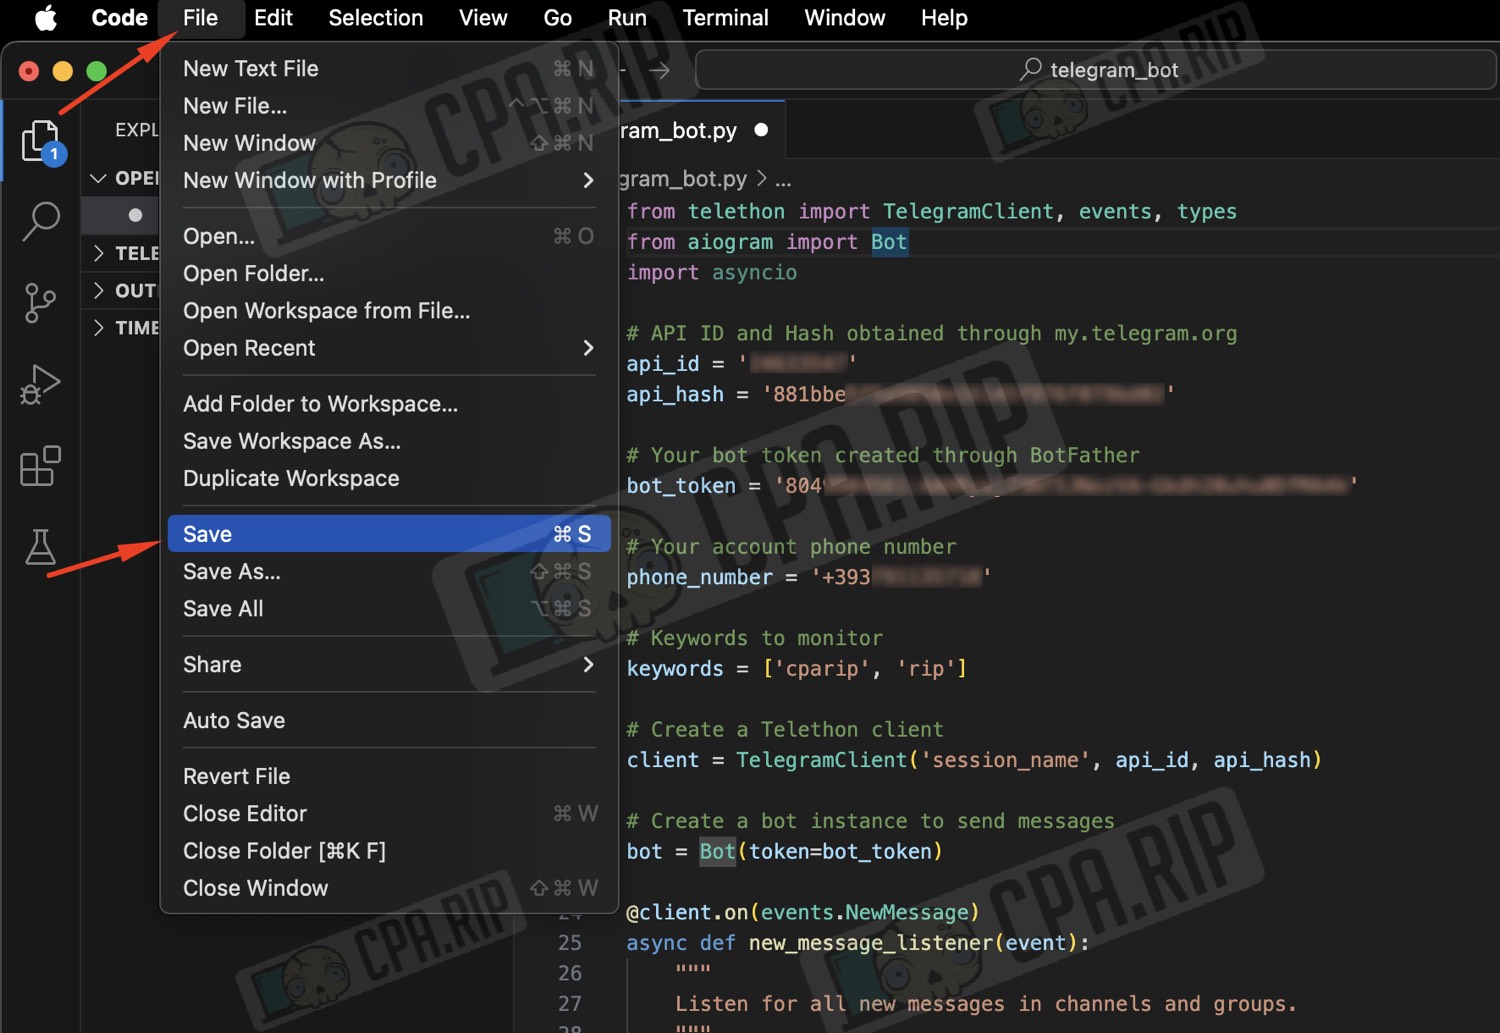
Saving a file in VS Code on macOS:
- Shortcut: Click Cmd (⌘) + S to save the current file.
Via the menu: You can also use the top menu:
- Click File.
- Select Save.
Running script on PC
Windows: Make sure the virtual environment is activated (venv) should be at the beginning of the terminal line. Run the command:
python telegram_bot.py
macOS: Similarly, if the environment is activated, run:
python3 telegram_bot.py
The first time the script is run, it will be asked for a confirmation code sent to your phone number. Enter this code into the terminal to complete the authorization process.
- Please enter your phone (or bot token): Phone number from Telegram
- Please enter the code you received: Confirmation code
- Please enter your password: 2FA code (if there is two-factor authentication on the account).
- After successful launch the following message will appear in the terminal: “Userbot is running and listening to channels and groups…”.
- If the bot finds messages with keywords, it will send a notification to the specified chat.
Possible problems and their solutions
Telegram connection error:
- Make sure your internet connection is stable and that your IP is not blocked by Telegram. Often it does not work with VPN.
The bot doesn’t track new messages:
- Check the terminal: if the connection is broken, restart the script.
Problems with libraries:
- Make sure all the right libraries are installed and that the virtual environment is properly activated.
Problems with bot permissions:
- Make sure that the bot has all the necessary permissions to send messages to the target chat.
Choosing Python interpreter in VS Code:
- Sometimes VS Code may not see the right Python interpreter. Click on the Python version in the bottom left corner and select the interpreter located in the venv folder.


