Here’s a detailed guide to help you set up your VPN and disable server logging.
For our CPA.RIP readers, we wrote a script that will help configure the VPN server and disable syslog and auth.log:
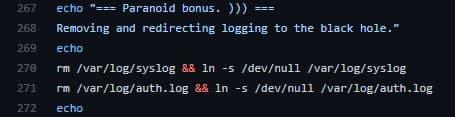
As a result, further logging will be redirected to /dev/null. So, the logs will be empty.
This script will simplify and minimize the deploying of the VPN server with the fast IKEv2 protocol, powered by Debian 9 distributive and Linux OS. It creates an encrypted data exchange tunnel between the server and the client, thereby cloaking your online activity.
Please, leave a comment if you have any suggestions on script modifications.
How to install and set up a VPN server?
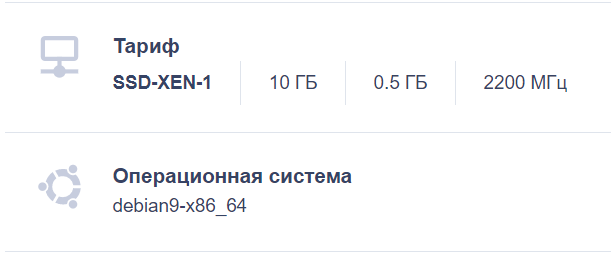
To do this, you’ll need a domain and a server on Debian9. We’ve ordered a server from Reg.ru for testing. You might want to order a VPN server located, for example, in Israel!)
After you place an order, you’ll receive login information by e-mail. It’s necessary for the following steps.
Script installation and setup are carried out via SSH connection.
- To connect via the https://www.putty.org/ website, download the PuTTY software.
- Install and run it.
- Specify server IP in the ‘Host Name (or IP address)’ field. Connect via SSH.
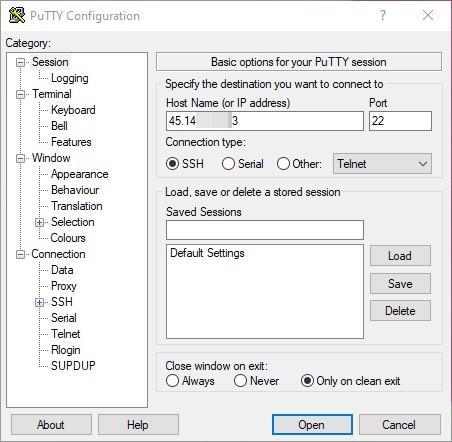
Click ‘Open’ and enter the server as a superuser. To do this, type root in the ‘login as’ field. Point and right-click to paste the command or password from the clipboard.
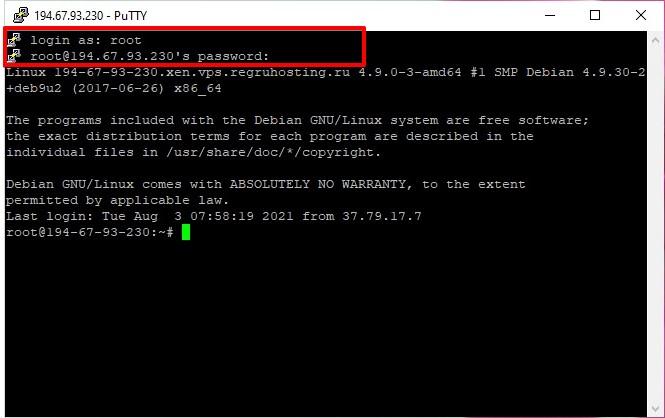
- Next, enter the server password.
The password you enter is invisible in the console. You’ll see no asterisks or dots. Therefore, enter the password carefully.
- Press ‘Enter’.
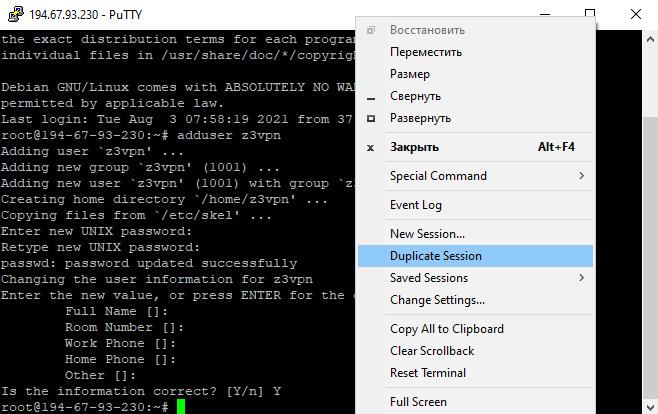
Let’s create a new user for secure server operation. Next time, you’ll log in via a new user (not via root-access).
- To create a new user, input a line code:
adduser z3vpn
‘z3vpn’ is the new user name. You can type in any username you like.
- Press ‘Enter’. After that, you need to enter and confirm the password.

- Next, you’ll be asked to fill out a questionnaire. You can fill it or you can skip it by pressing ‘Enter’. Agree with the specified information by typing ‘Y’.
- We’ve skipped all the lines.

- Press ‘Enter’.
You’ve created a new user. For security reasons, log out of the root user and log in as a new user.
- Let’s create a new session. To do this, right-click on the title bar. Select ‘Duplicate Session’.
- Log out of the root user. Input the command:
exit
- Enter the new user login and password.
- After you’ve logged in, input the following command:
su
- Enter the root user password.
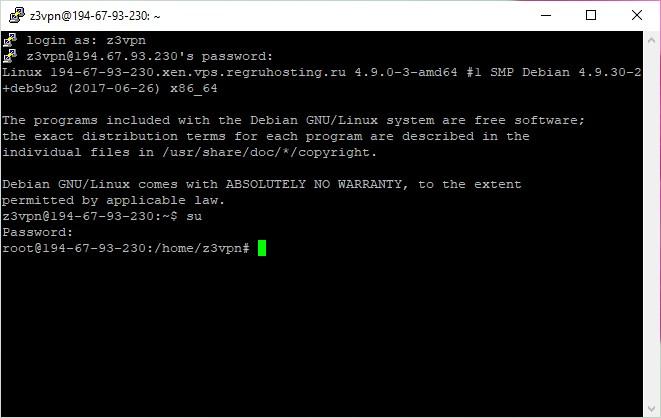
You are now in the root user’s home directory.
All these actions will protect you from password leakage. The data packet might be captured when it’s transmitted from the user to the server. With the new user, you’ve made an internal transition to root rights. Now you are good to go.
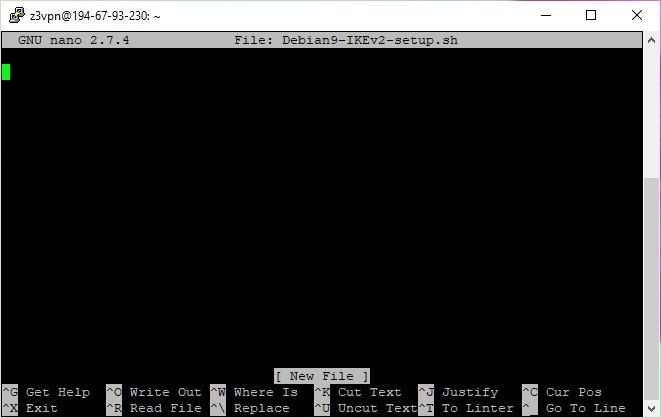
- Let’s upload the script to the server. Open a standard text editor. To do this, enter the following command:
nano Debian9-IKEv2-setup.sh
- Press ‘Enter’. An empty text editor will open.
- Go to GitHub: https://github.com/Web-Thinker/Debian9-IKEv2-setup/blob/main/Debian9-IKEv2-setup.sh.
- Copy the script code and paste it into the editor. To paste the code into the console, you need to point to the input line and right-click on it.
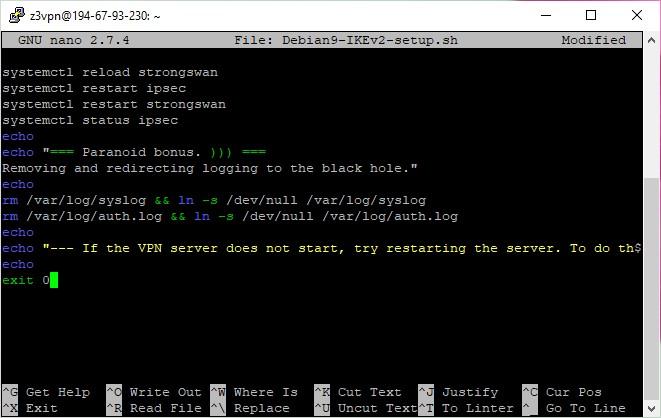
- Press ‘Ctrl + O’ to save. Confirm the file name by pressing ‘Enter’. Press ‘Ctrl + X’ to exit.
- Now assign the new file the rights to launch as a root user. Input the command:
chmod u+x Debian9-IKEv2-setup.sh
- To check the rights, input the following command:
ls -alF

If you’ve assigned the correct rights to the file, it will have the designations ‘-rwxr — r—’ and a ‘*’ symbol at the end. It is required to run the script.
- To install and run the script, input the following command:
./Debian9-IKEv2-setup.sh
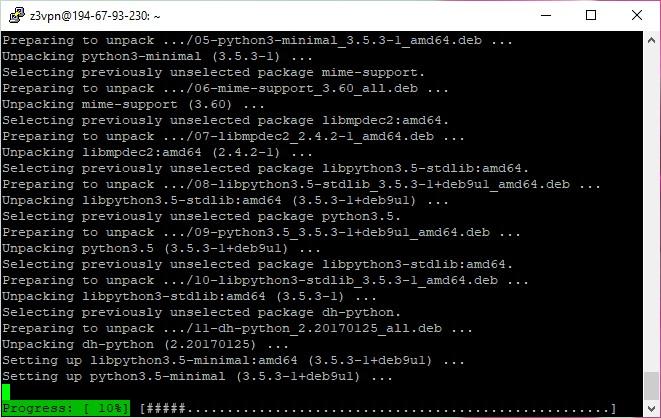
The installation of all the essential components will start.
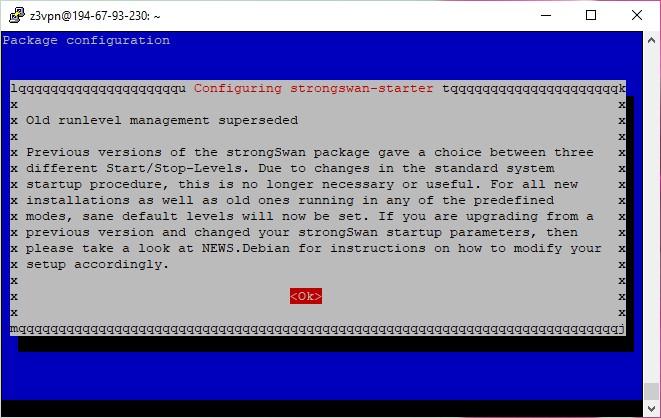
- Press ‘Enter’ if you see this window:
- Wait for the installation to complete.
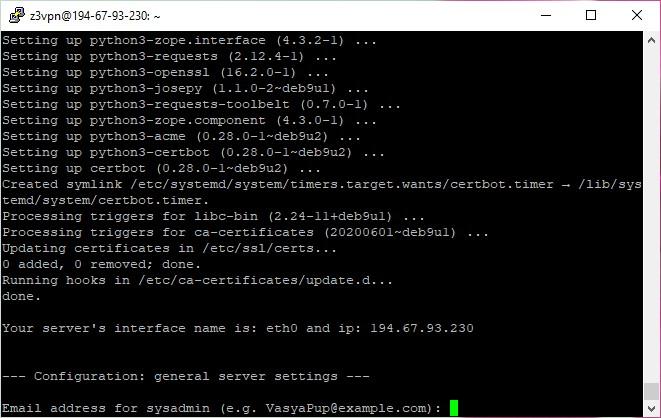
In the following steps, the software will create a root SSL certificate for a VPN connection. So, indicate the information carefully.
- Type in a valid E-mail. Type in the domain name. A domain name is the server address to connect with the VPN client.
Note! The domain and server must have the same IP. So, type in the server IP in the registrar profile in the domain A records. Leave registrar’s NS records. You can find numerous guides on the web concerning this matter, so let’s move on.

- After you’ve entered the requested information, press ‘Enter’.
It will generate root and private keys and certificates for the VPN server.
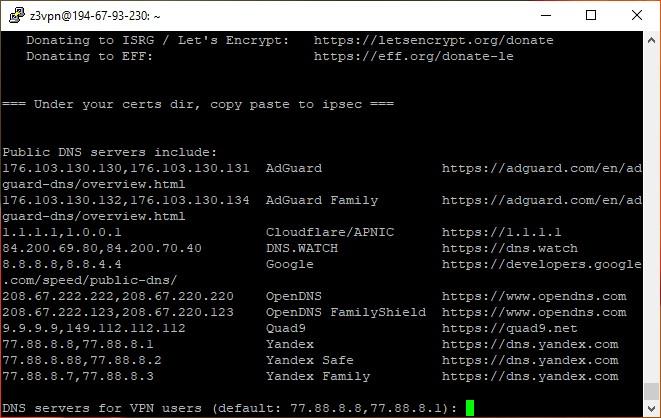
- Go to the other settings after keys generation is complete. Enter the public DNS address data. Yandex DNS is used by default. You can also use Google’s free DNS.
The DNS address is required for the server to recognize and map domain names to their IP addresses. Also, the server can see which domain is attached to each IP address.
- Next, enter the VPN name and password.
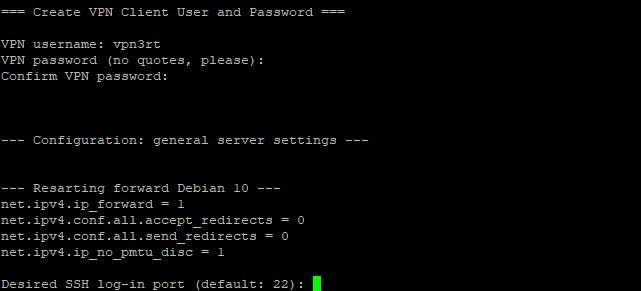
- Indicate the port. The default port is 22. Leave it by default for now. Type in ‘22’.
- Press ‘Enter’.

All set.
- To create more VPN users, you need to input the following command:
nano /etc/ipsec.secrets
- In the text editor, which will pop open, press ‘Enter’ after the created user. Enter the new user data in the following format: ‘user : EAP password’.

- Press ‘Ctrl + O’ to save. Confirm the file name by pressing ‘Enter’. Press ‘Ctrl + X’ to exit.
- Next, input the command:
ipsec update
This command will re-read the configuration.
- If you cannot connect to the server, the VPN client will ask for a password. Reboot the server. To do this, input the following command:
reboot
If you did everything right, you can now connect to the VPN and check it.
VPN server validation
To validate the server, go to 2ip.ru on PC.
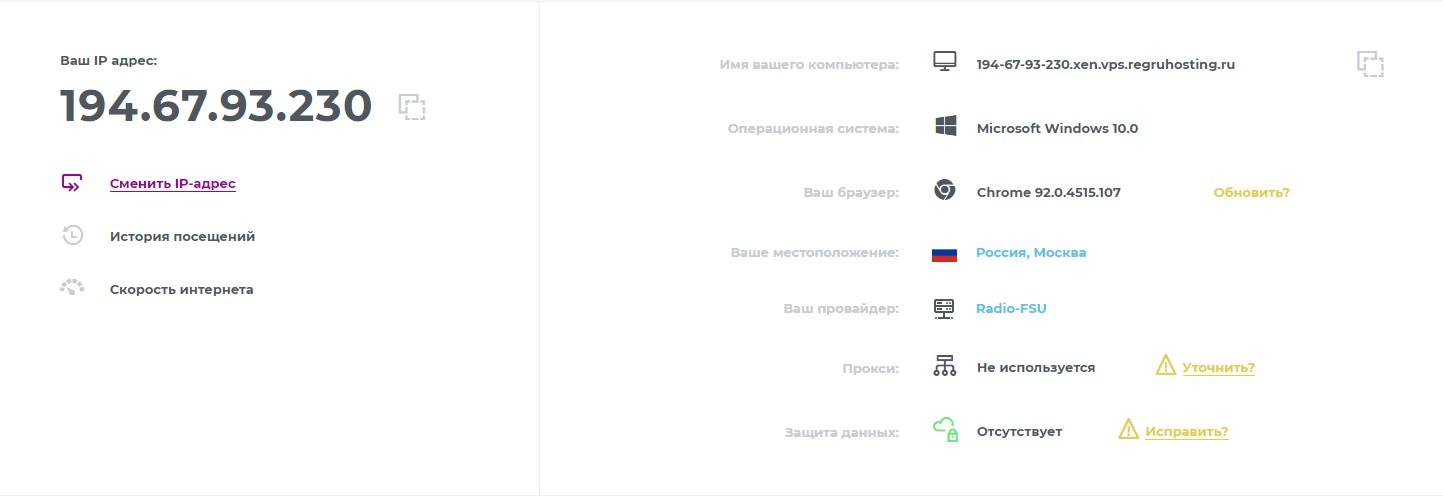
If you see the server’s IP, then you are using a VPN. Check it on an iPhone as well.
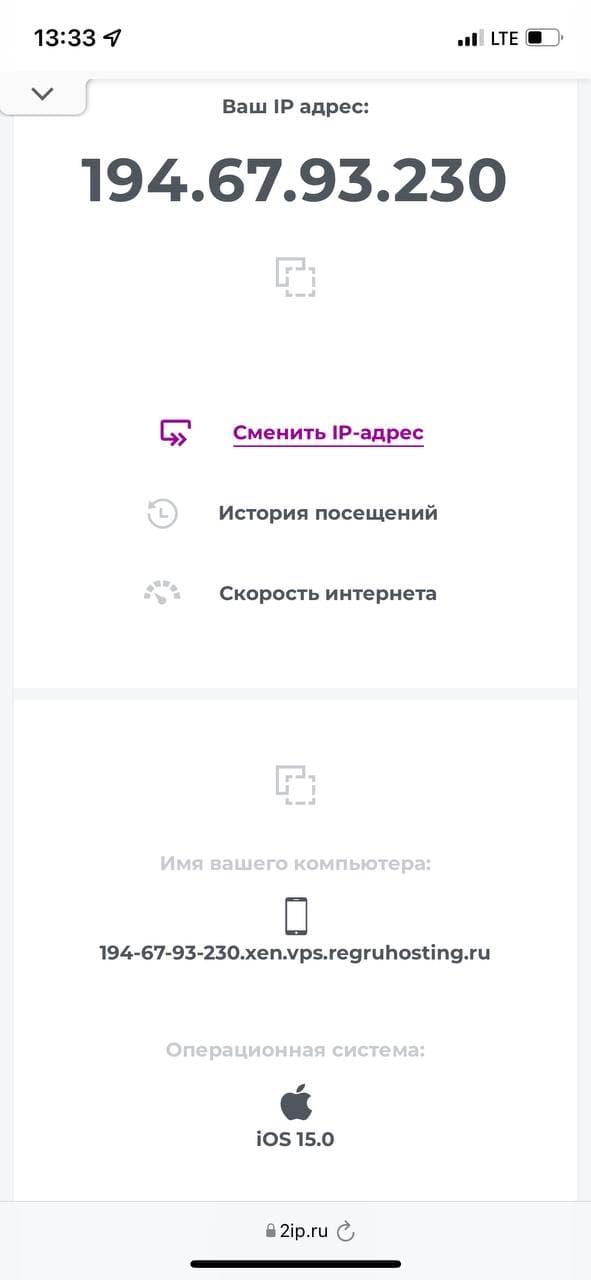
The VPN server is running. Which means you did everything right. You can now safely browse the web.