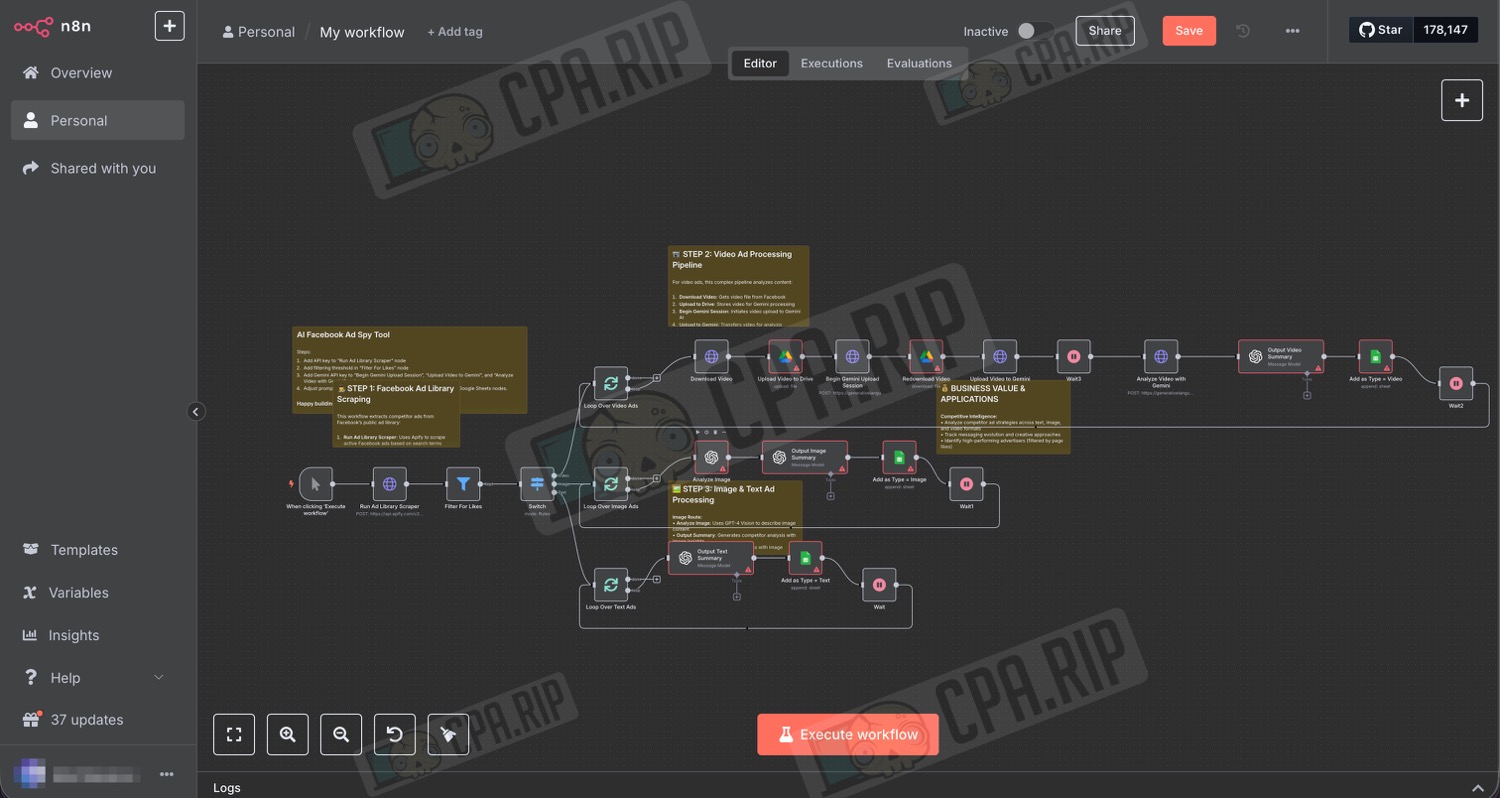
A ready-to-use n8n automation template for collecting adverts from the Facebook Ad Library, which automatically gathers adverts, analyses them using AI, and generates new copy and prompts for creating images and videos. The results are saved in a spreadsheet. We’ve broken down step-by-step how to import the template into n8n, how to set up credentials, and how to search for creatives.
To get the project up and running, you’ll need access to the n8n automation service. For a quick test, it’s easiest to use the trial version of the cloud-based solution at https://n8n.io/. Alternatively, you can use the self-hosted version — step-by-step instructions for launching n8n for free on your own server or locally on your computer are available here: https://cpa.rip/en/ai/n8n/.
You will also need to connect the following keys:
- Apify API
- OpenAI API
- Gemini API
- Google Sheets OAuth (for the self-hosted version)
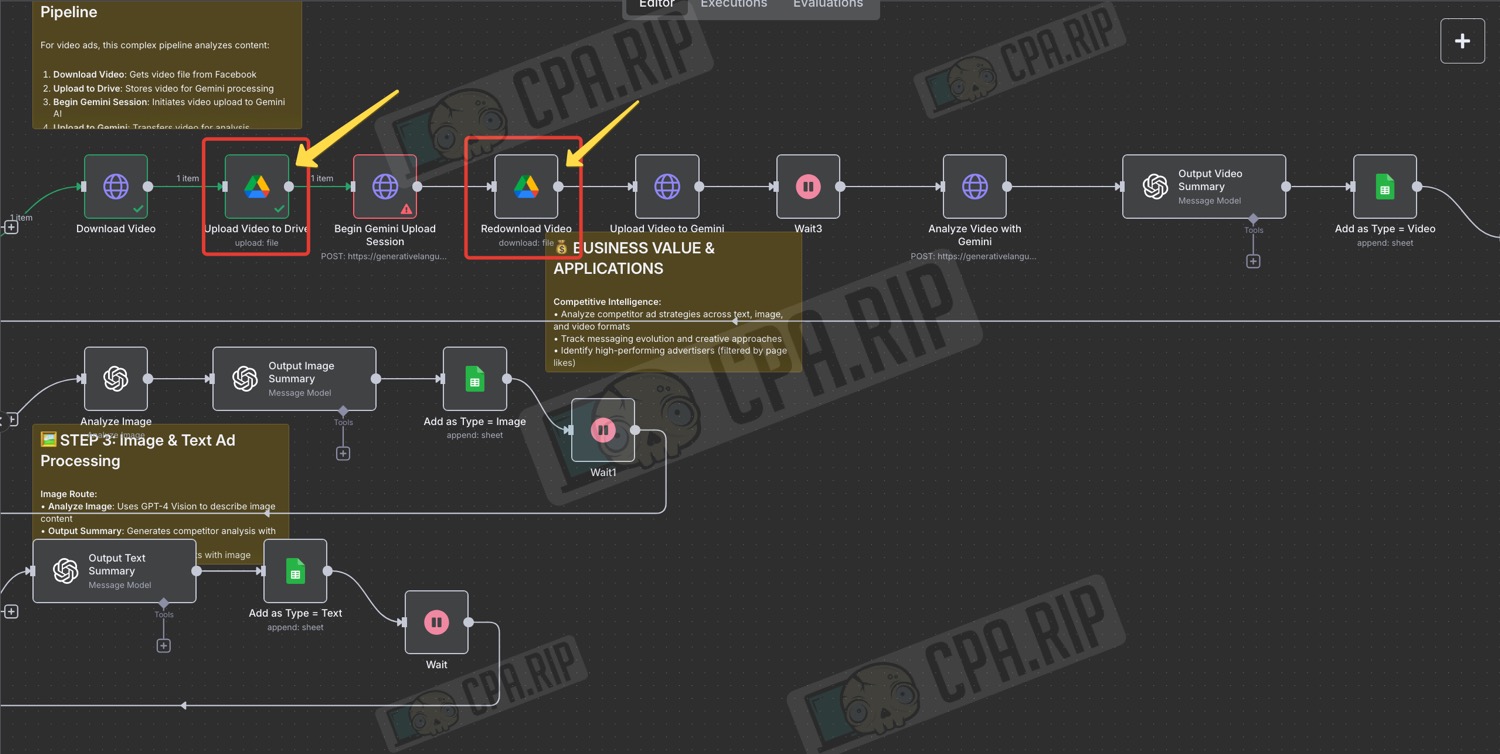
How it works
This is a ready-to-use tool that automatically collects competitors’ adverts on Facebook and turns them into ideas for your own creatives. First, it retrieves adverts from the Facebook Ad Library via Apify using specified keys, filtering by the number of likes. It then determines the type of creative: video, image, or text. It sends this to the appropriate processing workflow. Videos are analysed via Gemini, whilst images and text are analysed via OpenAI.
It then breaks down the collected adverts from a strategic perspective (offer, triggers, presentation) and, based on this, generates:
- a brief competitive analysis
- a rewritten version of the advert
- prompts for recreating the creative (images and videos)
All results are compiled in Google Sheets, forming a database of ‘working’ adverts and ideas.
Step by step, it looks like this:
- We launch the project and enter a keyword, page, or niche via the form.
- Via Apify, the workflow retrieves adverts from the Meta Ad Library.
- Ads are categorised by type:
- image
- video
- text
- OpenAI analyzes text and images:
- hook
- offer
- CTA
- psychological triggers
- Gemini analyzes videos (scene, text, meaning of the video).
- Generation of new creatives — AI can rewrite the ad text or suggest new options.
- The results are compiled in Google Sheets:
- ad text
- visual description
- CTA
- ideas for new creatives.
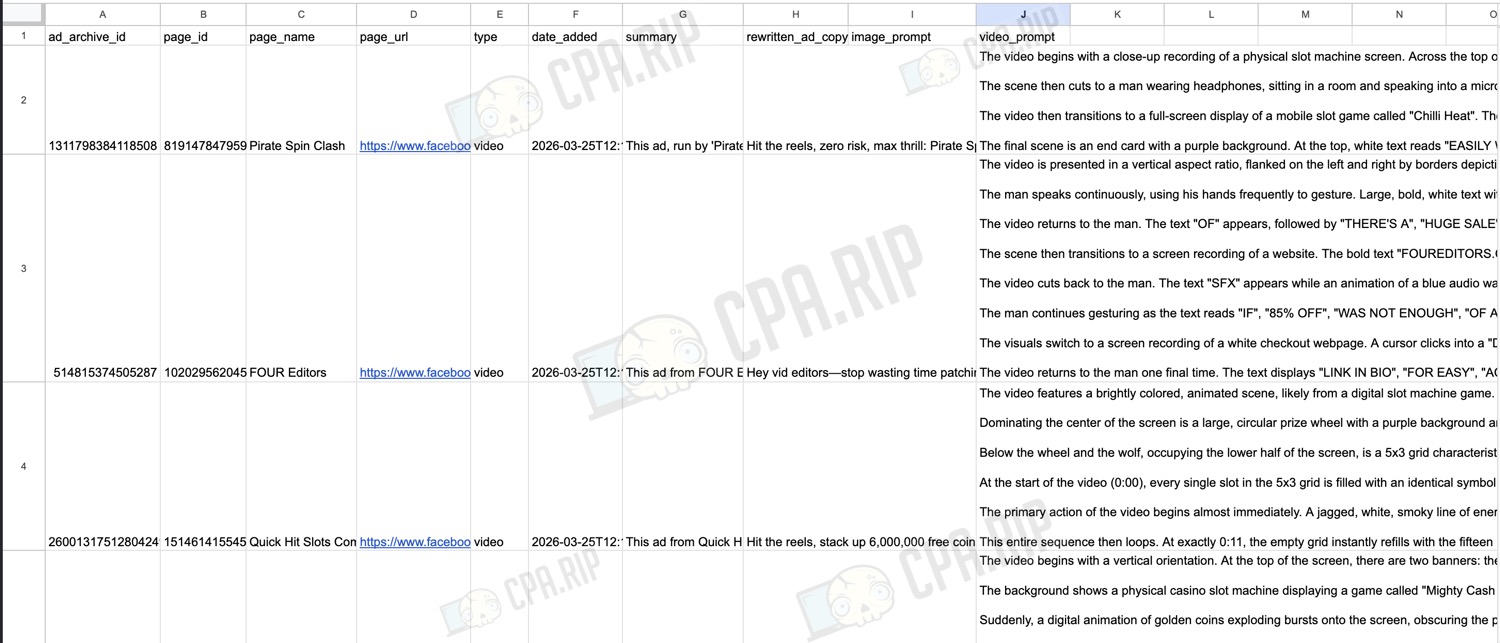
Result in the spreadsheet (for the query ‘slots’):
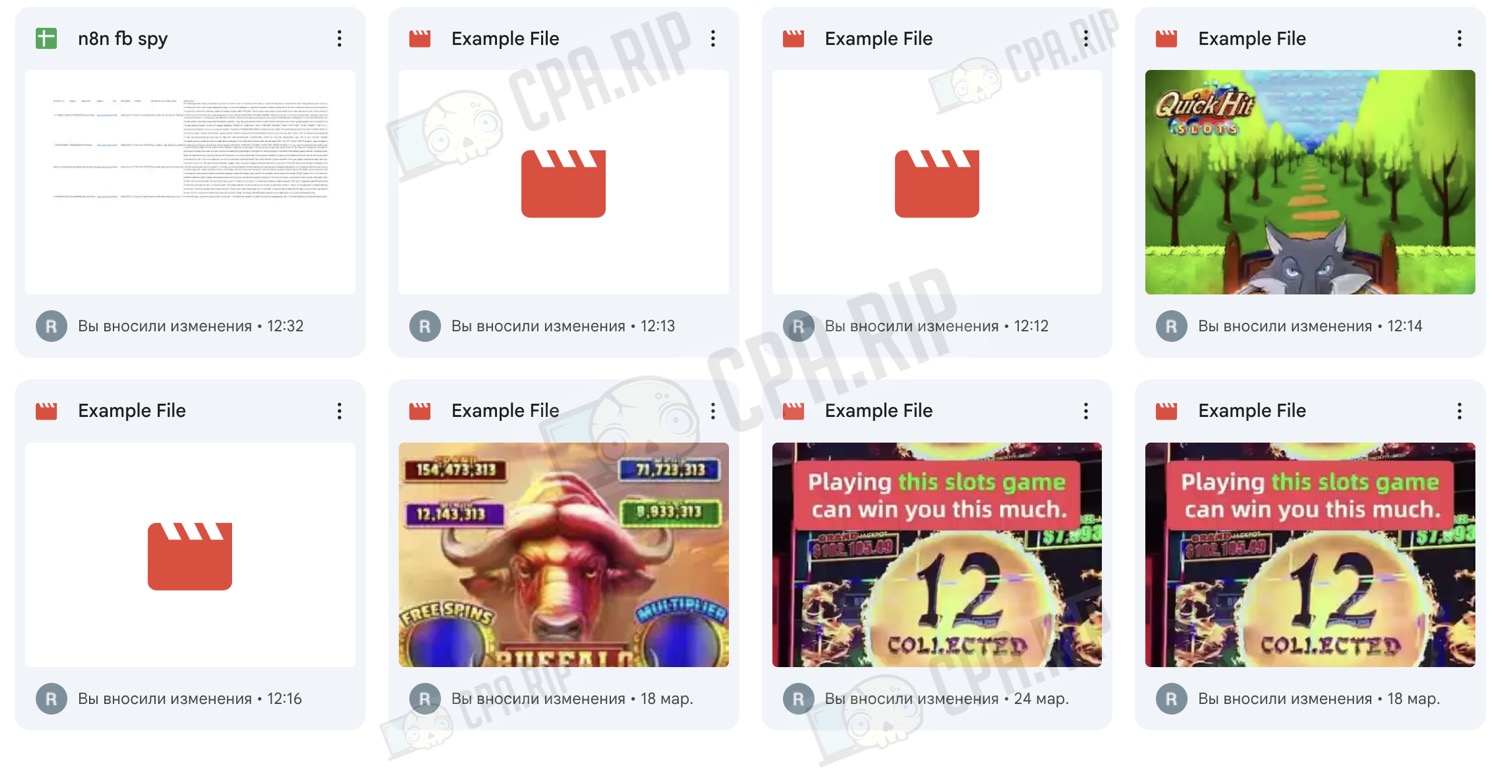
Files in Google Drive:
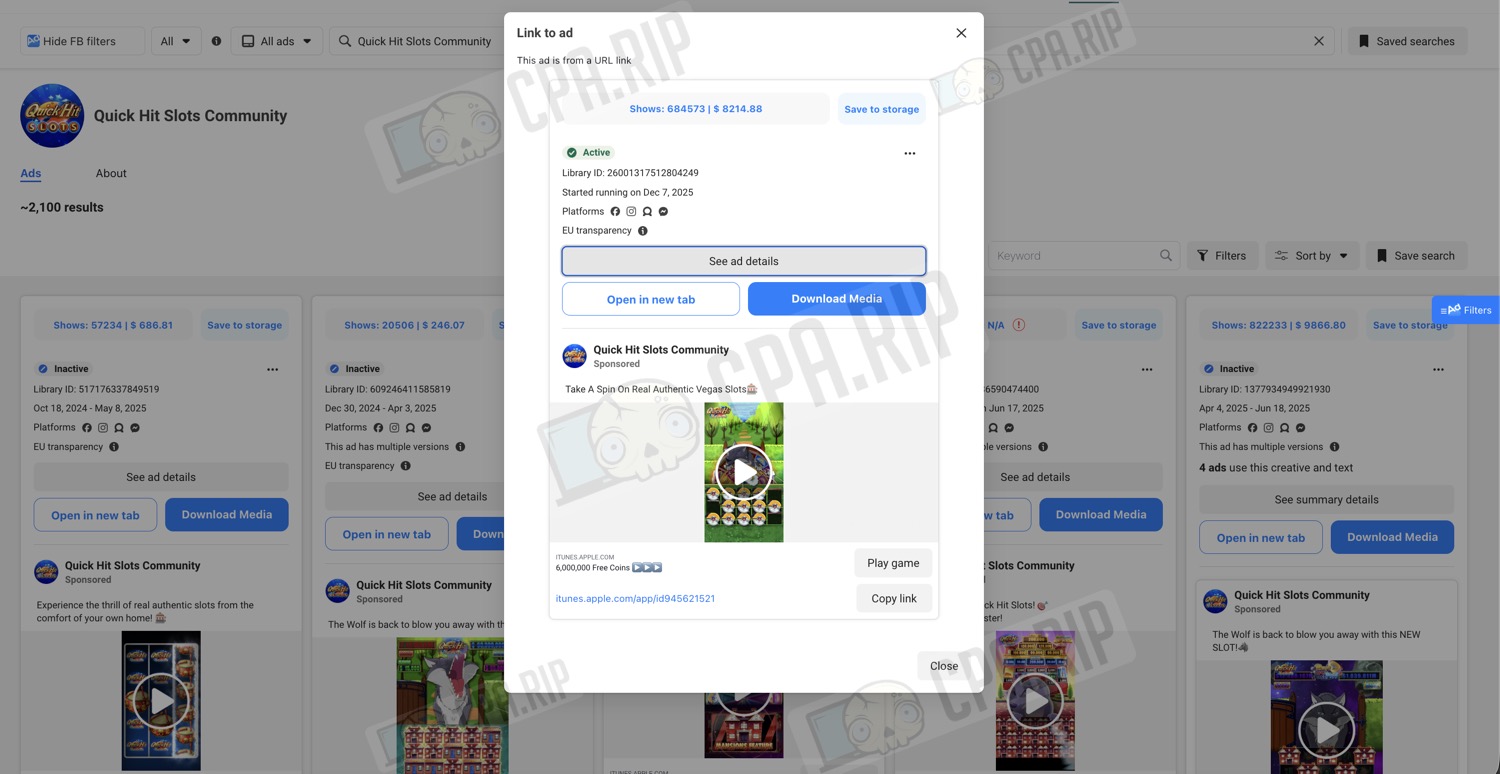
Creative in the Facebook Ads Library:
Prompt for generating a similar video:
Этот рекламный ролик от Quick Hit Slots Community (WMS Industries Inc.), размещенный в Facebook, Instagram, Messenger и Audience Network, представляет собой видео с прямым откликом, продвигающее их мобильную игру в слоты (iOS), ориентированную на взрослую аудиторию от 18 до 65 лет и старше на основных европейских рынках (в частности, во Франции, Германии и Великобритании). Реклама подчеркивает аутентичность и азарт, визуально имитируя игровой процесс в Лас-Вегасе. В основе креатива лежит яркий, мультяшный интерфейс слота: путь к горизонту, вращающееся колесо призов и заметный, анимированный мультяшный волк. Волк выпускает белый, дымчатый энергетический луч, испаряя всю сетку символов пилы в драматическом, каскадном эффекте — анимационный цикл, создающий гипнотическое, почти ритуализированное зрелище разрушения и обновления. Визуальный язык во многом заимствует классические мотивы казино (яркие цвета, металлическая отделка, увеличенные значки), но волк и пила добавляют современный, слегка сюрреалистический оттенок. Текст минималистичен и броский: «Попробуйте сыграть в настоящие аутентичные слоты Вегаса🎰», с броским заголовком, обещающим «6 000 000 бесплатных монет ▶️▶️▶️», и заметным призывом к действию «Играть в игру», ведущим в App Store. Никаких оговорок нет, а данные таргетинга показывают преобладание мужчин, особенно в возрастной группе 25-44 лет, но со значительным охватом всех возрастных групп. Формальная креативная стратегия опирается на зрелищность и повторение, усиливая основные механики слотов (ожидание, циклы вознаграждения), используя волка в качестве центрального элемента для энергии и драматизма. Никакого закадрового голоса или повествования — чисто визуальное повествование, разработанное для быстро прокручиваемых мобильных лент.
An example of new text generated by a neural network:
Вращайте барабаны, соберите 6 000 000 бесплатных монет и окунитесь в атмосферу Вегаса — никаких перелетов, никаких очередей, только чистый игровой процесс. Волк в городе: один глубокий вдох, игровое поле очищено, символы исчезают в мгновение ока. Касайтесь колеса, гоняйтесь за азартом и выигрывайте джекпоты прямо с дивана. Скачайте сейчас, вращайте барабаны, выигрывайте, повторяйте.
Original video:
Prompt for generating a similar video:
"The video features a brightly colored, animated scene, likely from a digital slot machine game. In the top left corner, a logo reads ""Quick Hit SLOTS"" with ""Quick Hit"" in stylized red and yellow letters and ""SLOTS"" below it in smaller text. The background depicts a cartoonish landscape consisting of a path made of yellow rectangular blocks stretching toward a light blue horizon dotted with fluffy clouds. The path is flanked on both sides by rows of simple, round-canopied green trees set on a vibrant green field.

Dominating the center of the screen is a large, circular prize wheel with a purple background and gold trim. Various segments on the wheel contain different graphics and text. Positioned directly above this wheel, with its front paws resting on the top edge, is a large, grey, cartoon wolf. The wolf's head is prominent, with its mouth wide open in a roar or howl, clearly showing sharp white teeth and a pink tongue.

Below the wheel and the wolf, occupying the lower half of the screen, is a 5x3 grid characteristic of a slot machine interface. The grid consists of fifteen rectangular slots with dark backgrounds and metallic-looking borders.

At the start of the video (0:00), every single slot in the 5x3 grid is filled with an identical symbol. This symbol looks like a circular saw blade. It has a grey, jagged, toothed outer edge. Inside the jagged edge is a circular design with a red top half, a yellow bottom half, a black horizontal line dividing them, and a grey center circle containing a smaller yellow circle.

The primary action of the video begins almost immediately. A jagged, white, smoky line of energy shoots downwards from the open mouth of the wolf, directly toward the grid of saw blades. As this white energy makes contact, it causes the saw blade symbols to vanish in a rapid, cascading sequence. The destruction of the symbols starts near the top center of the grid and sweeps downwards and outwards. As each individual saw blade symbol disappears, it is momentarily replaced by a small white puff of smoke and a brief flash of light, revealing the empty, dark slot behind it. By the 0:06 mark, all fifteen saw blade symbols have been ""blown away,"" leaving the entire 5x3 grid completely empty. The wolf remains in its open-mouthed pose, and the prize wheel behind it appears to rotate slowly.

This entire sequence then loops. At exactly 0:11, the empty grid instantly refills with the fifteen identical saw blade symbols. Immediately following this, the wolf again exhales the white, smoky energy trail. The exact same cascading animation occurs, with the symbols turning into puffs of smoke and vanishing from top to bottom, outwards from the center. By 0:18, the grid is once again completely empty, and it remains in this state until the video ends."
Configuring Parsing
In an automation template that has already been installed and configured, you must set the parsing parameters before each run. Let’s look at how and where to do this.
Configuring search key and country
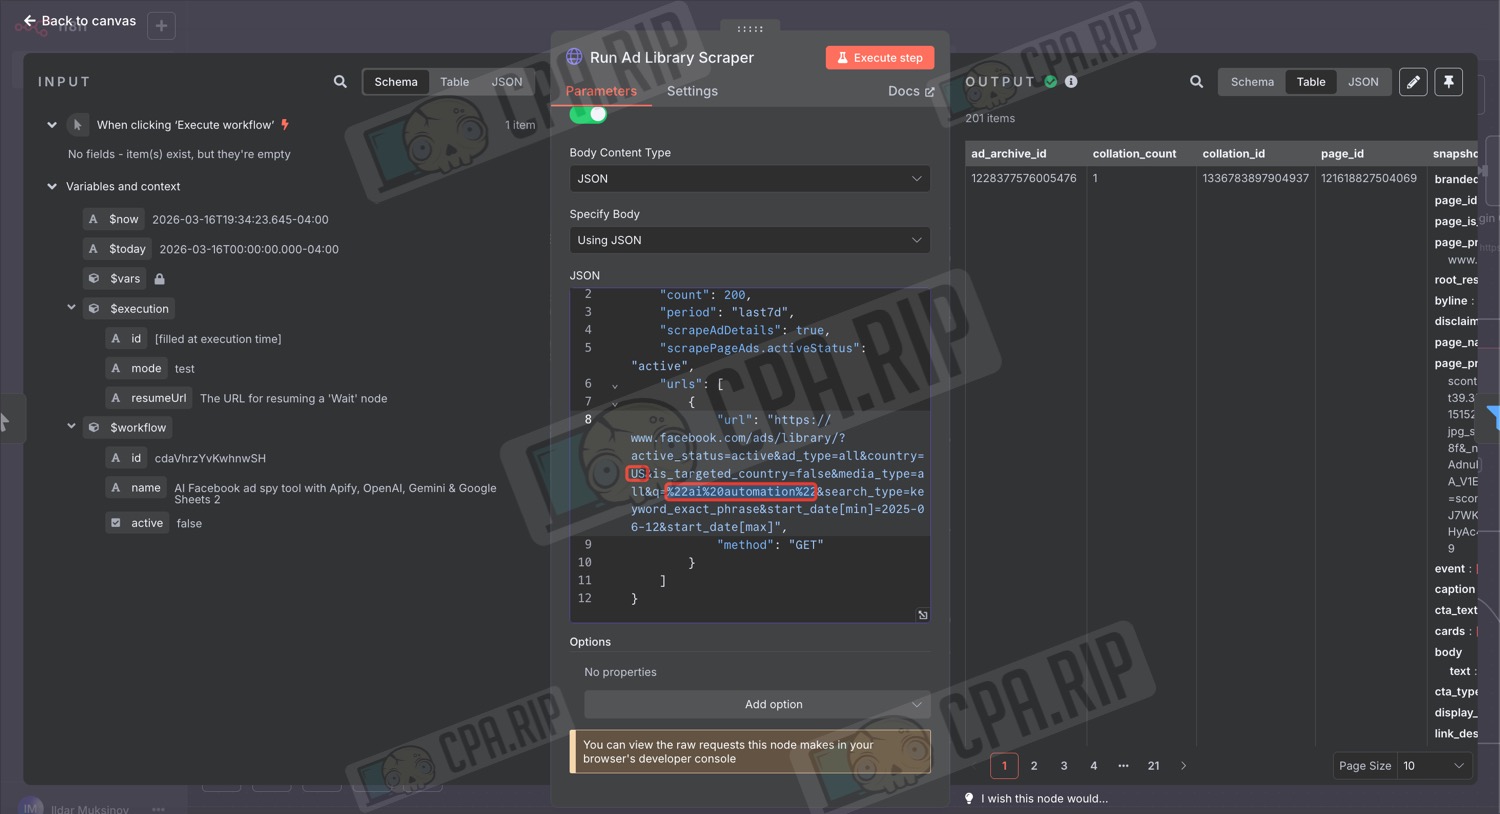
- Double-click the ‘Run Ad Library Scraper’ node
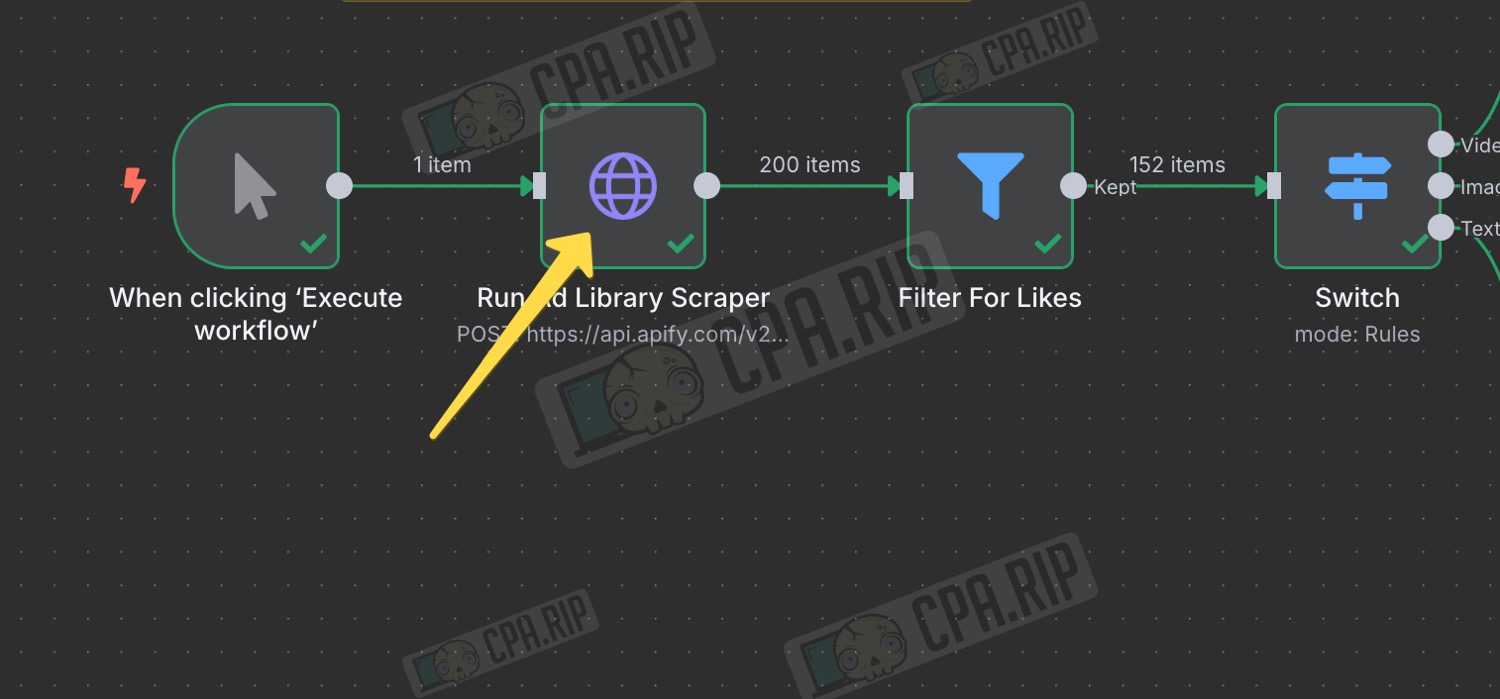
- In the JSON field, replace the two-letter country code and the search query in the highlighted sections
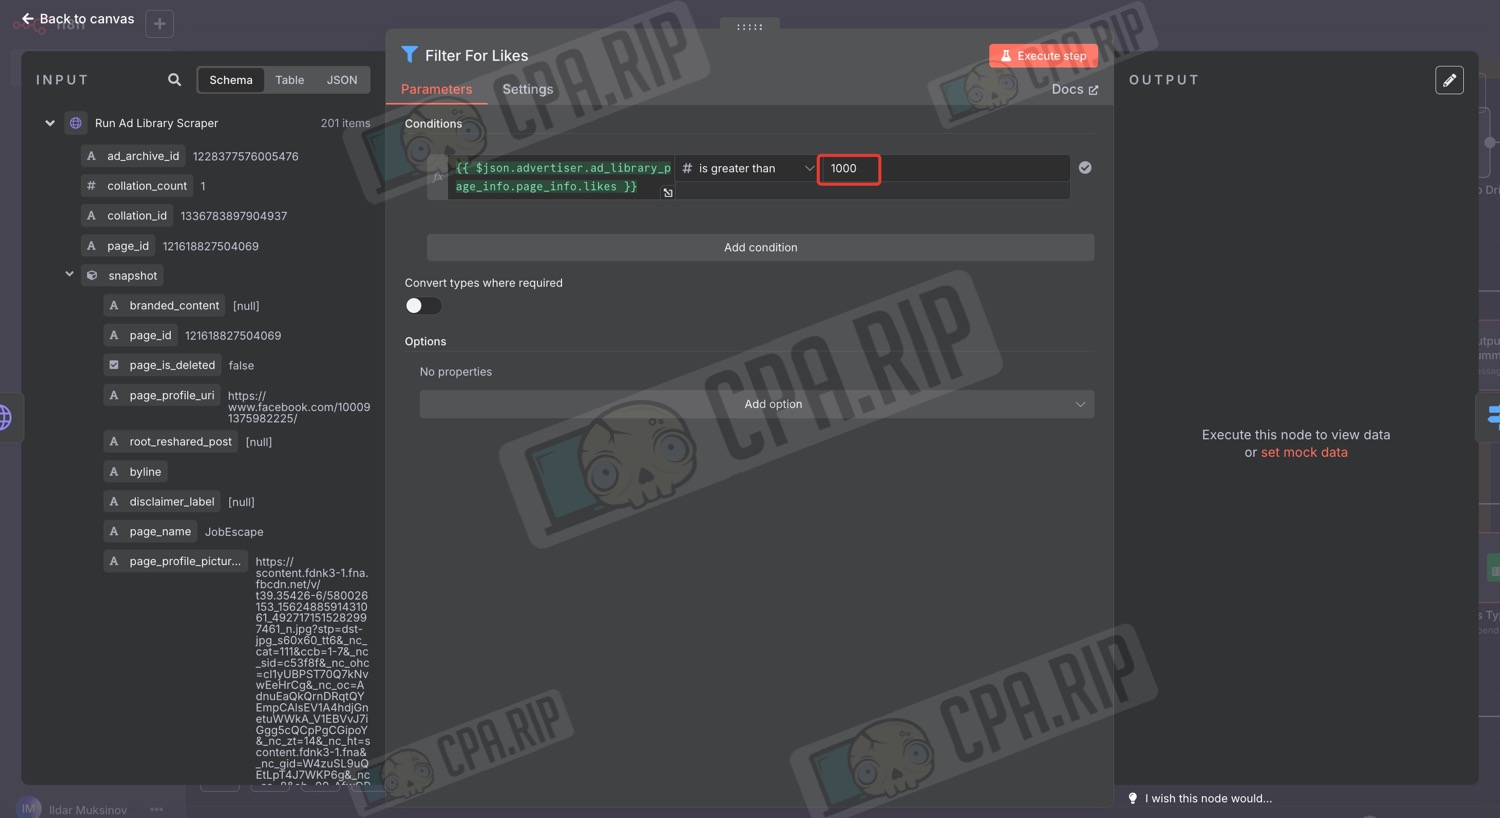
Filter by number of likes
- Open the ‘Filter For Likes’ node
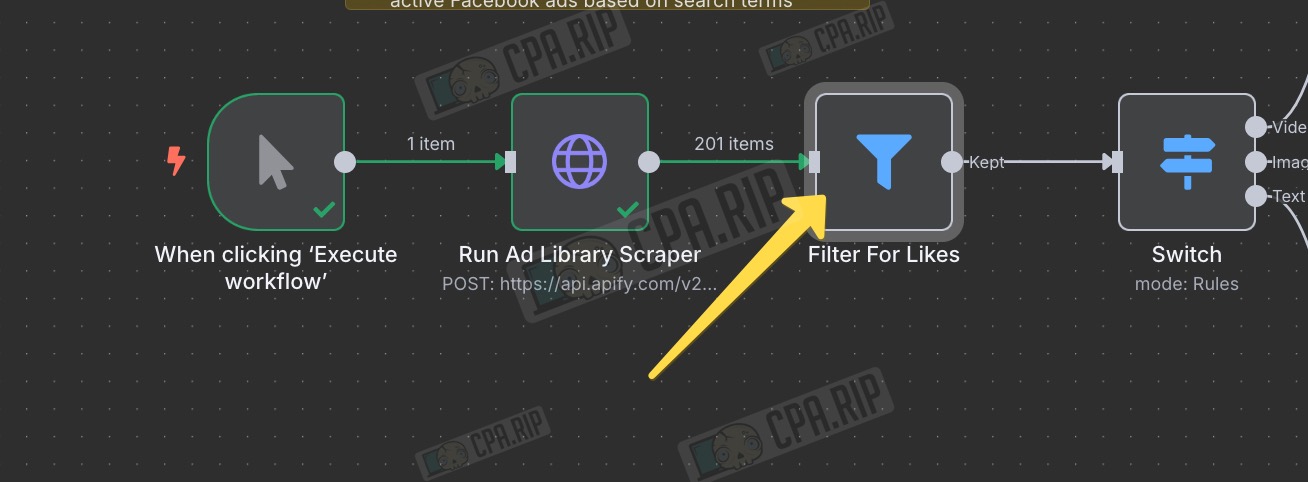
- In the field shown in the screenshot, change the minimum number of likes for an advert to the number you require (the project author recommends setting it to 1000+)
Configuring prompts
You can also tweak the prompts to suit your needs depending on your niche. This is done in the nodes where Gemini and OpenAI are used.
Importing automation template into n8n
Now that we’ve covered how it works and the results you’ll get, let’s take a detailed look at how to import the template into your local n8n instance and how to get it ready for use.
Manually copying the template
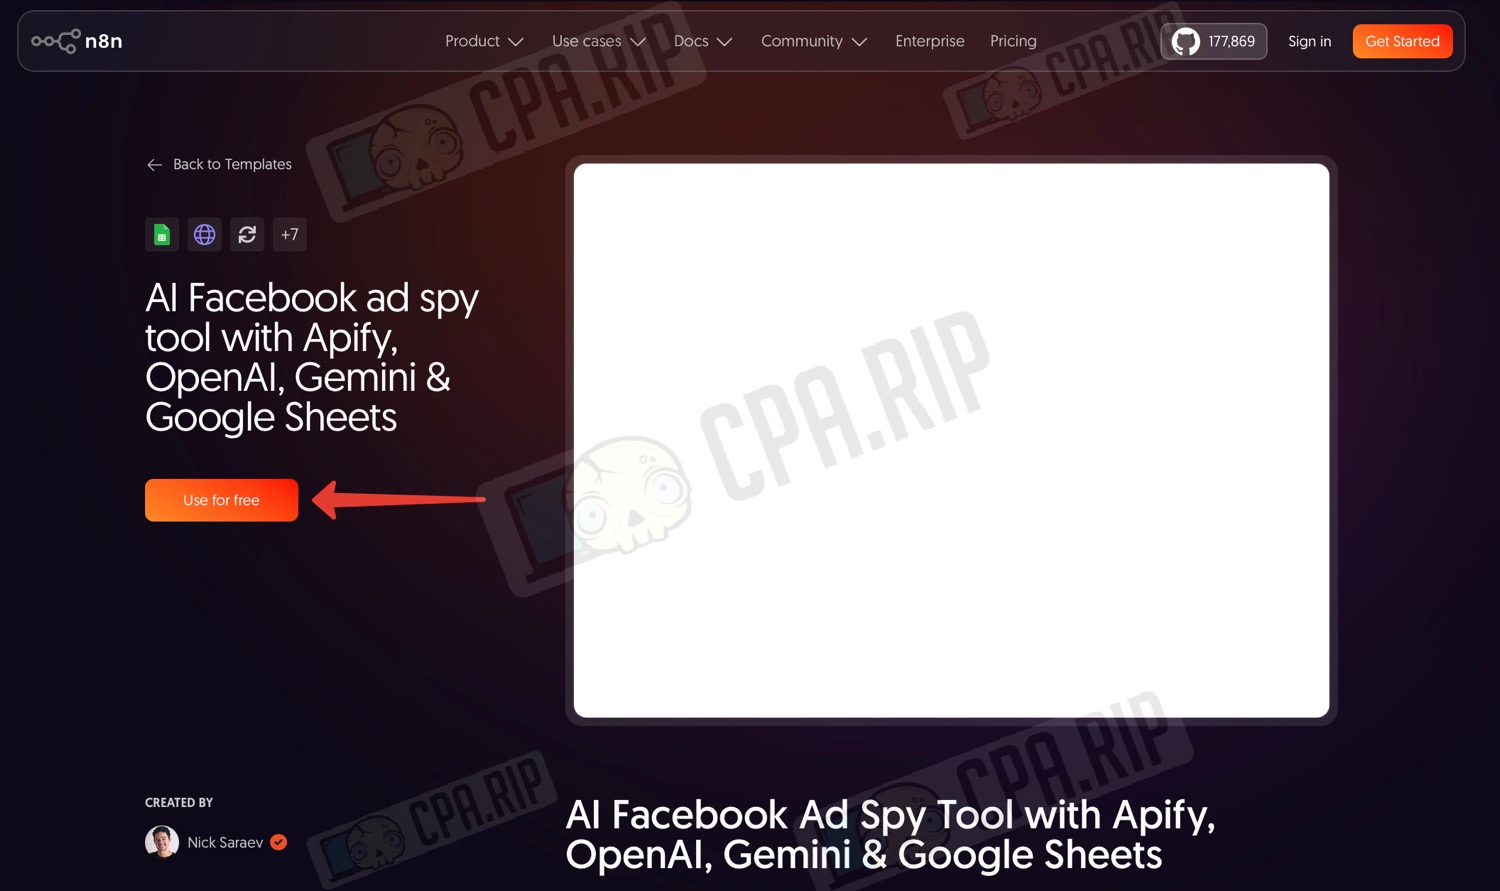
- Go to the template’s page: https://n8n.io/workflows/5417-ai-facebook-ad-spy-tool-with-apify-openai-gemini-and-google-sheets/
- Click ‘Use for free’
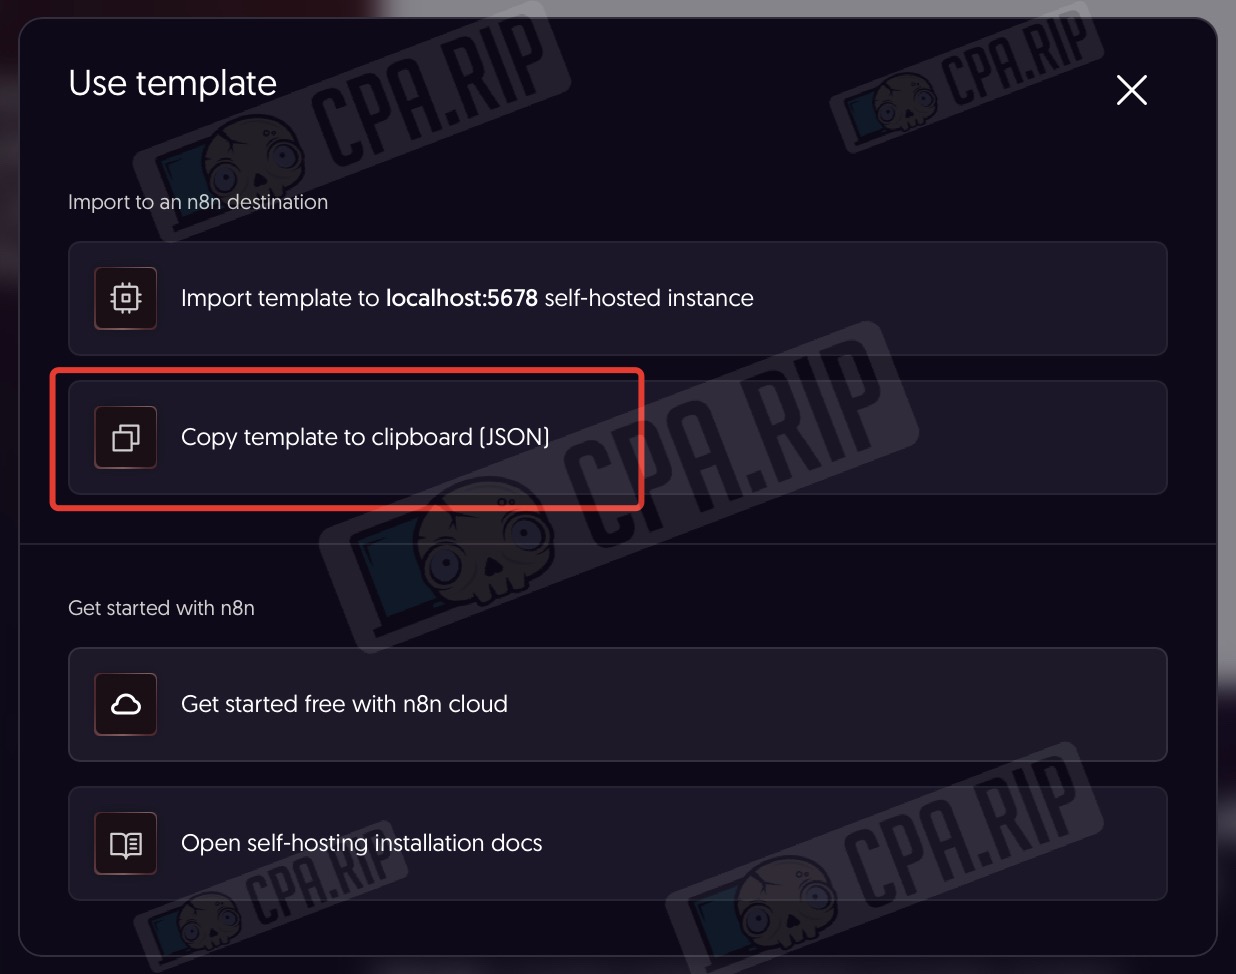
- Click ‘Copy template to clipboard (JSON)’
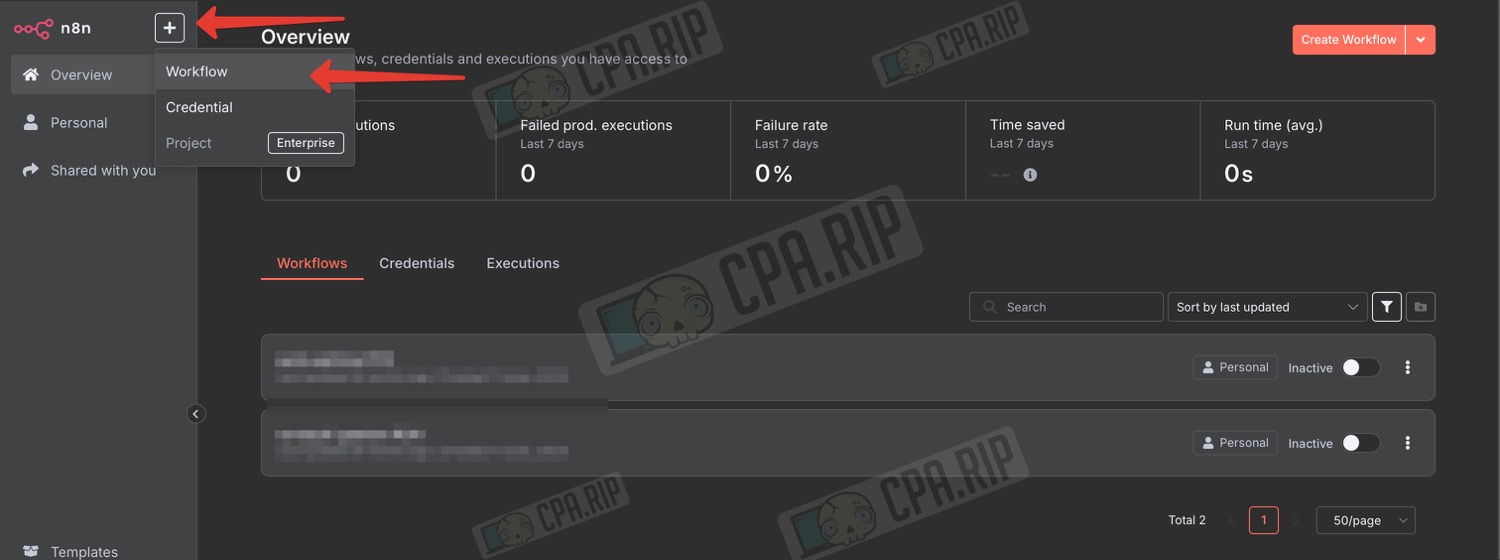
- Go to your n8n workspace
- Click ‘+’
- Select ‘Workflow’
- On the page that opens, paste the copied template (Command+V on macOS or Ctrl+V on Windows)
The template has been pasted; you can now start configuring it.
Automatic template addition
If your browser is already authorised in a locally configured n8n instance, it will offer the option to import it there.
- Go to the template page: https://n8n.io/workflows/5417-ai-facebook-ad-spy-tool-with-apify-openai-gemini-and-google-sheets/
- Click ‘Use for free’
- Click ‘Import template to localhost:5678 self-hosted instance’

In the next step, you will be prompted to set up your credentials straight away:
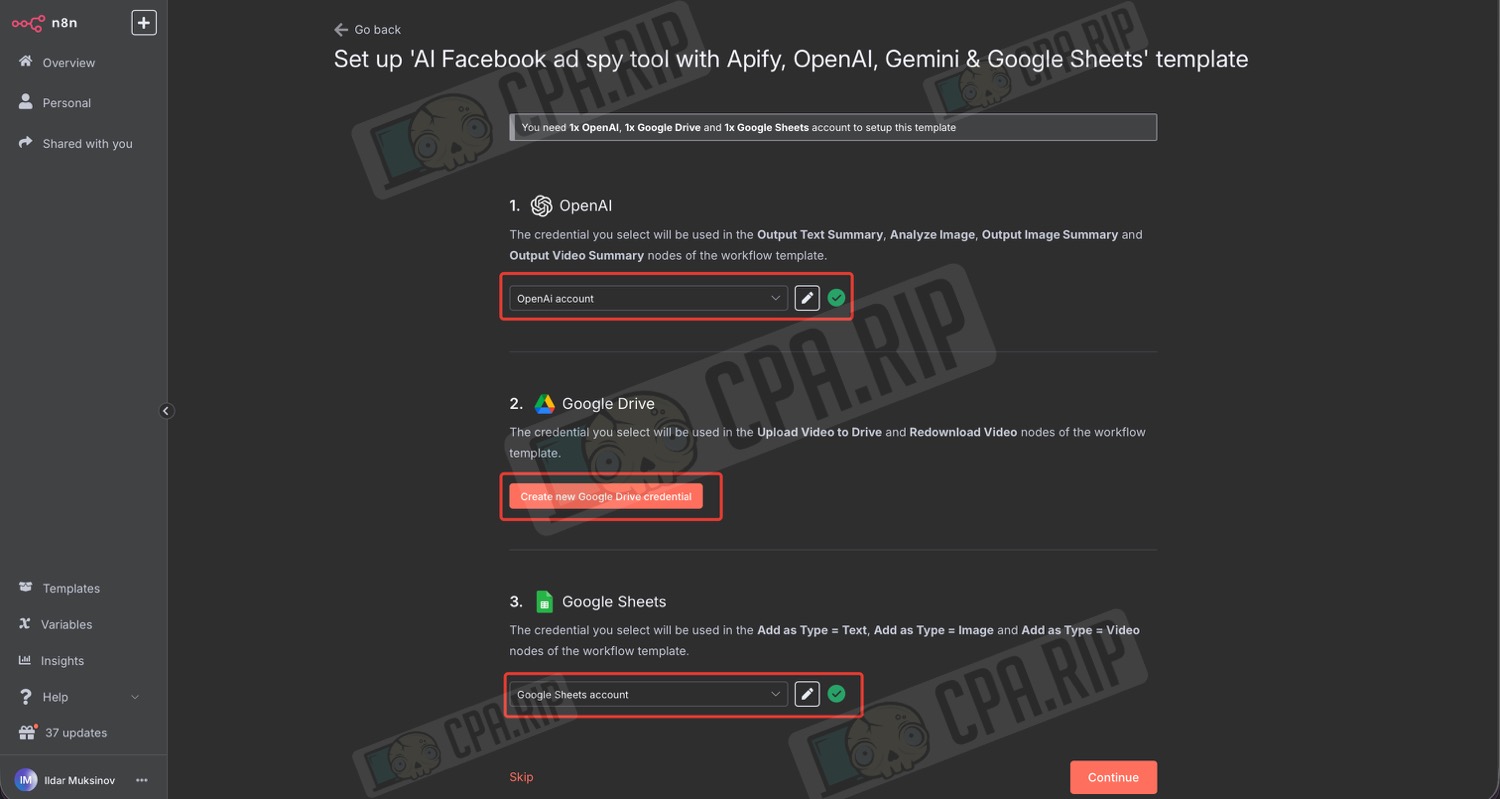
In n8n, credentials are the data used for authentication with third-party services. In other words, these are usernames, tokens, and keys that allow workflows to connect to the APIs of other services.
You can skip this step for now by clicking ‘Skip’ — we’ll cover configuring n8n credentials separately.
The template has been imported; you can now start configuring it.
Spreadsheet preparation
The parsing results will be compiled into a Google spreadsheet. It must contain columns with the following names:
- ad_archive_id — Unique Facebook ad identifier
- page_id — ID of the advertiser’s Facebook page
- page_name — The advertiser’s business name
- page_url — Link to the advertiser’s Facebook page
- type — Ad format (text, image, or video)
- date_added — Date the ad was analysed
- summary — Detailed analysis of competitor ads
- rewritten_ad_copy — AI-generated version of the ad text
- image_prompt — Description for recreating ad images
- video_prompt — Description for recreating ad videos
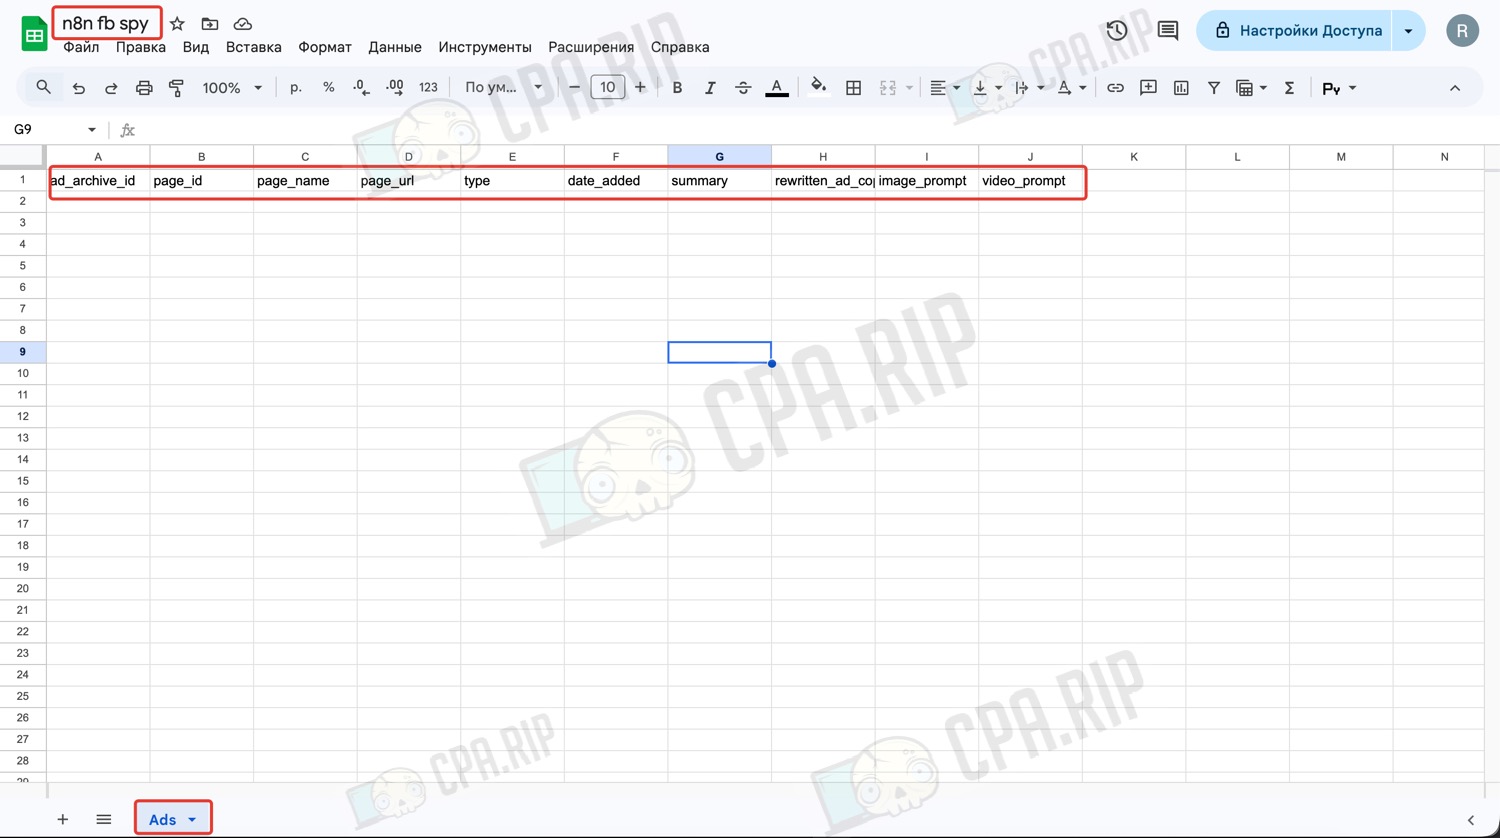
This table must be specified in Google Sheets.
Preparing API tokens
To configure the credentials for the services used in this automation template, you need to obtain their API tokens.
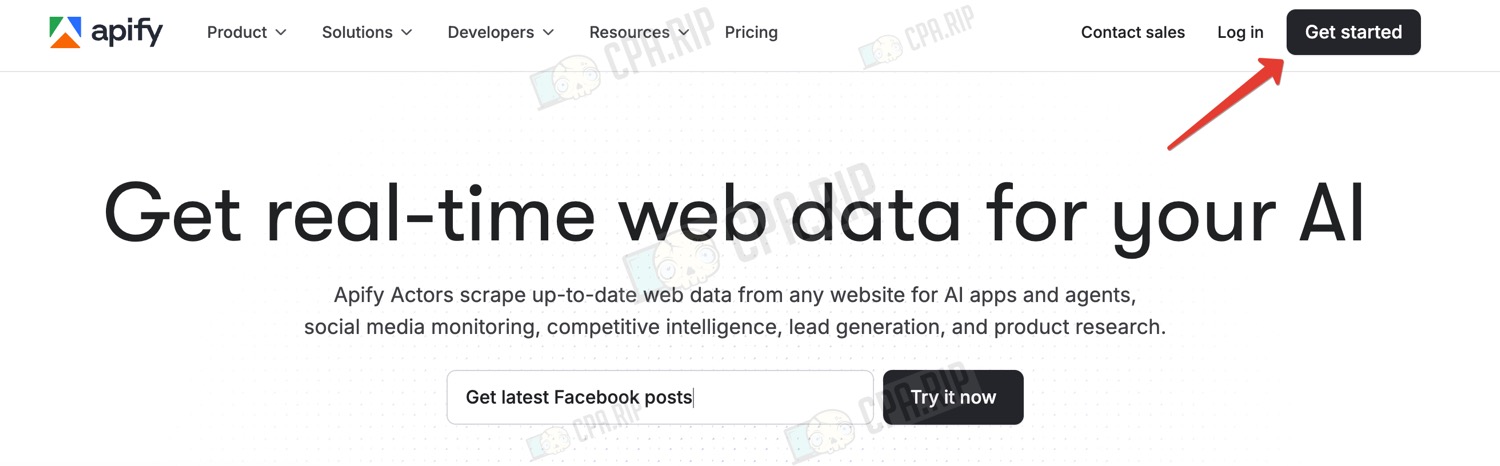
Apify API token
Data is collected from the Facebook Ads Library based on search queries using the Apify scraper; the free plan is sufficient to get started, but you will need to pay for further use.

- Go to https://apify.com/
- Click ‘Get started’
- Sign in to Apify, for example, using your Google account
- Go to the settings page by clicking ‘Settings’ in the left-hand menu
- Go to the ‘API & integrations’ tab
- Copy the API token from the ‘Default API token created on sign up’ field or create a new one by clicking ‘Create a new token’
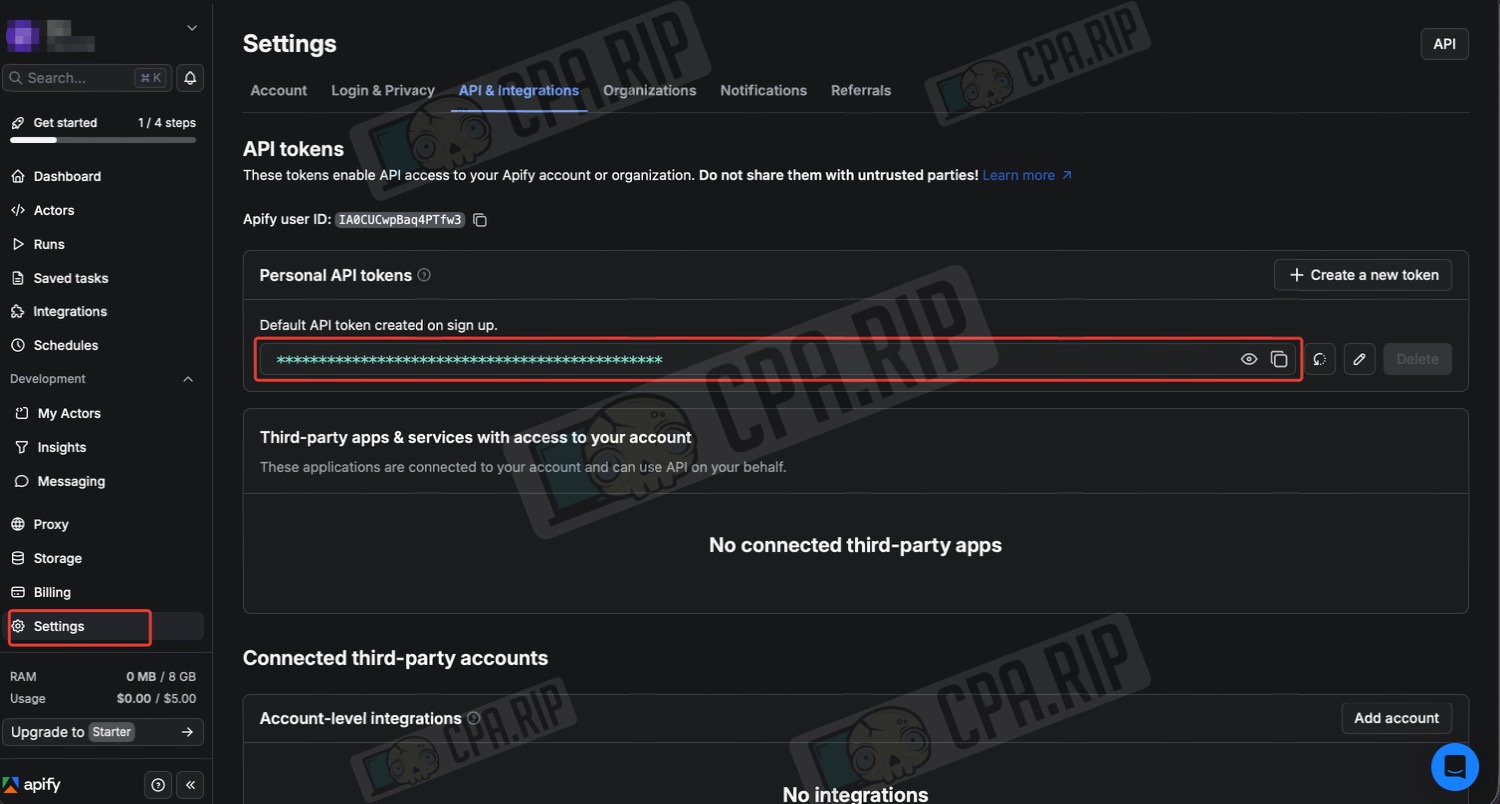
The Apify token is ready.
OpenAI API key
Image and text processing in adverts is carried out using Chat GPT (GPT-4 Vision).
- Log in to the page https://platform.openai.com/ using your OpenAI account
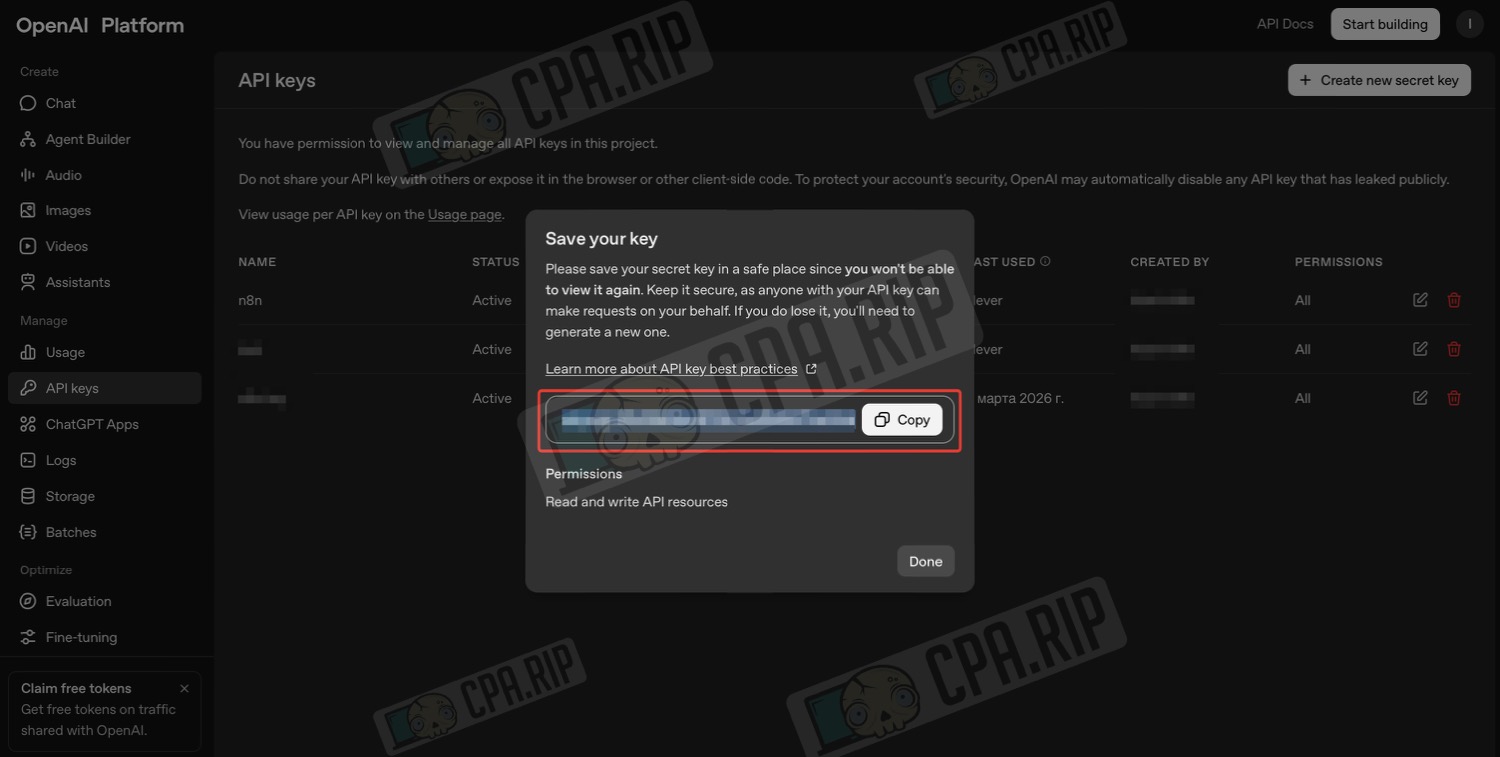
- Go to the ‘API keys’ page
- Click ‘Create new secret key’
- Enter a name in the ‘Name’ field
- Click ‘Create secret key’

- Copy the key you have created
Store your secret key in a safe place, as you will no longer be able to view it.
- ou will also need to top up your balance on the billing page: https://platform.openai.com/settings/organization/billing/overview
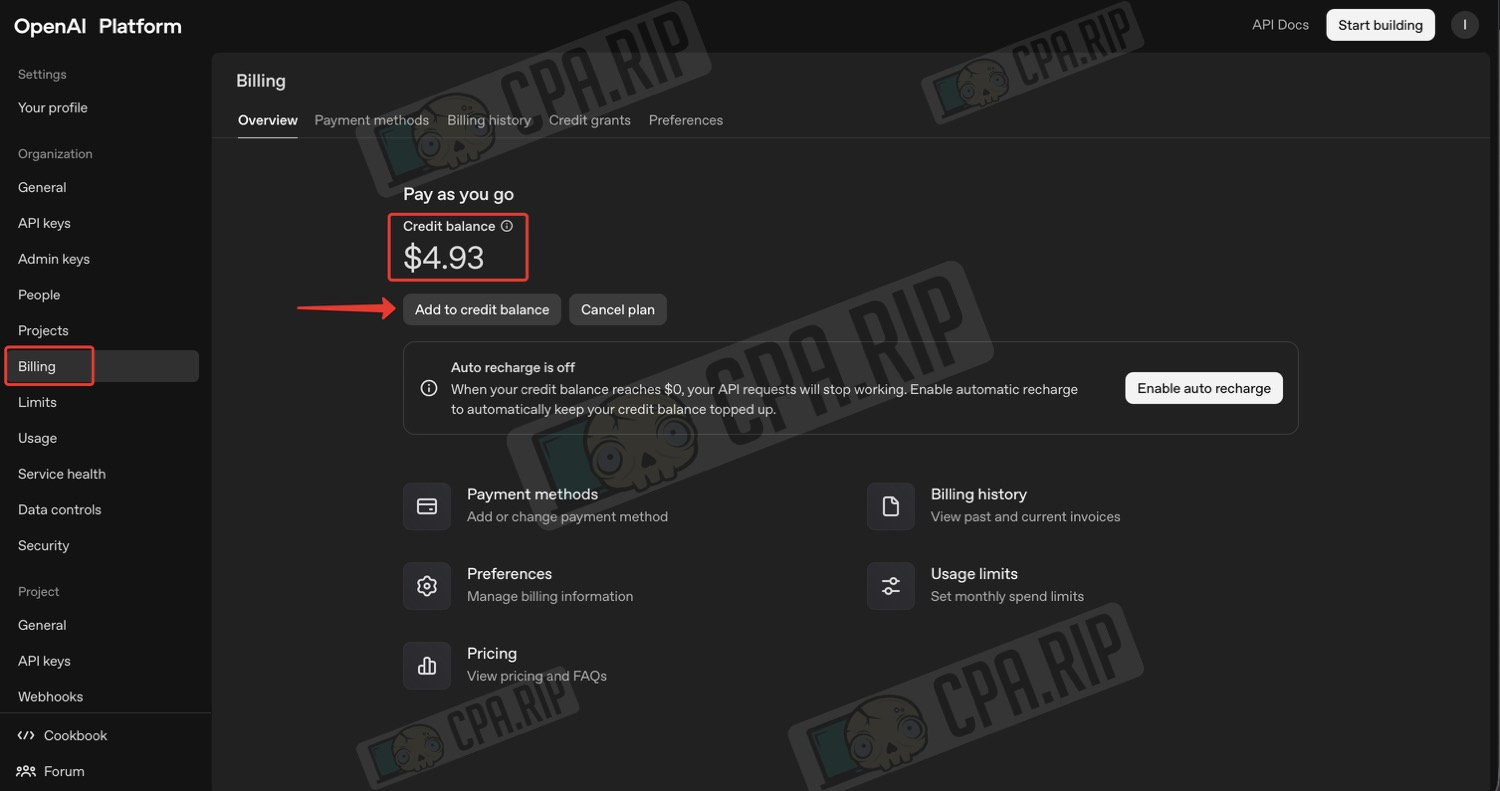
To top up your balance for OpenAI and other services, you can use the card payment services from our selection: https://cpa.rip/en/finance/bank-cards/
Gemini API key
Gemini AI is used to process video adverts.
To use Gemini, you must launch the project from an IP address in a supported country!
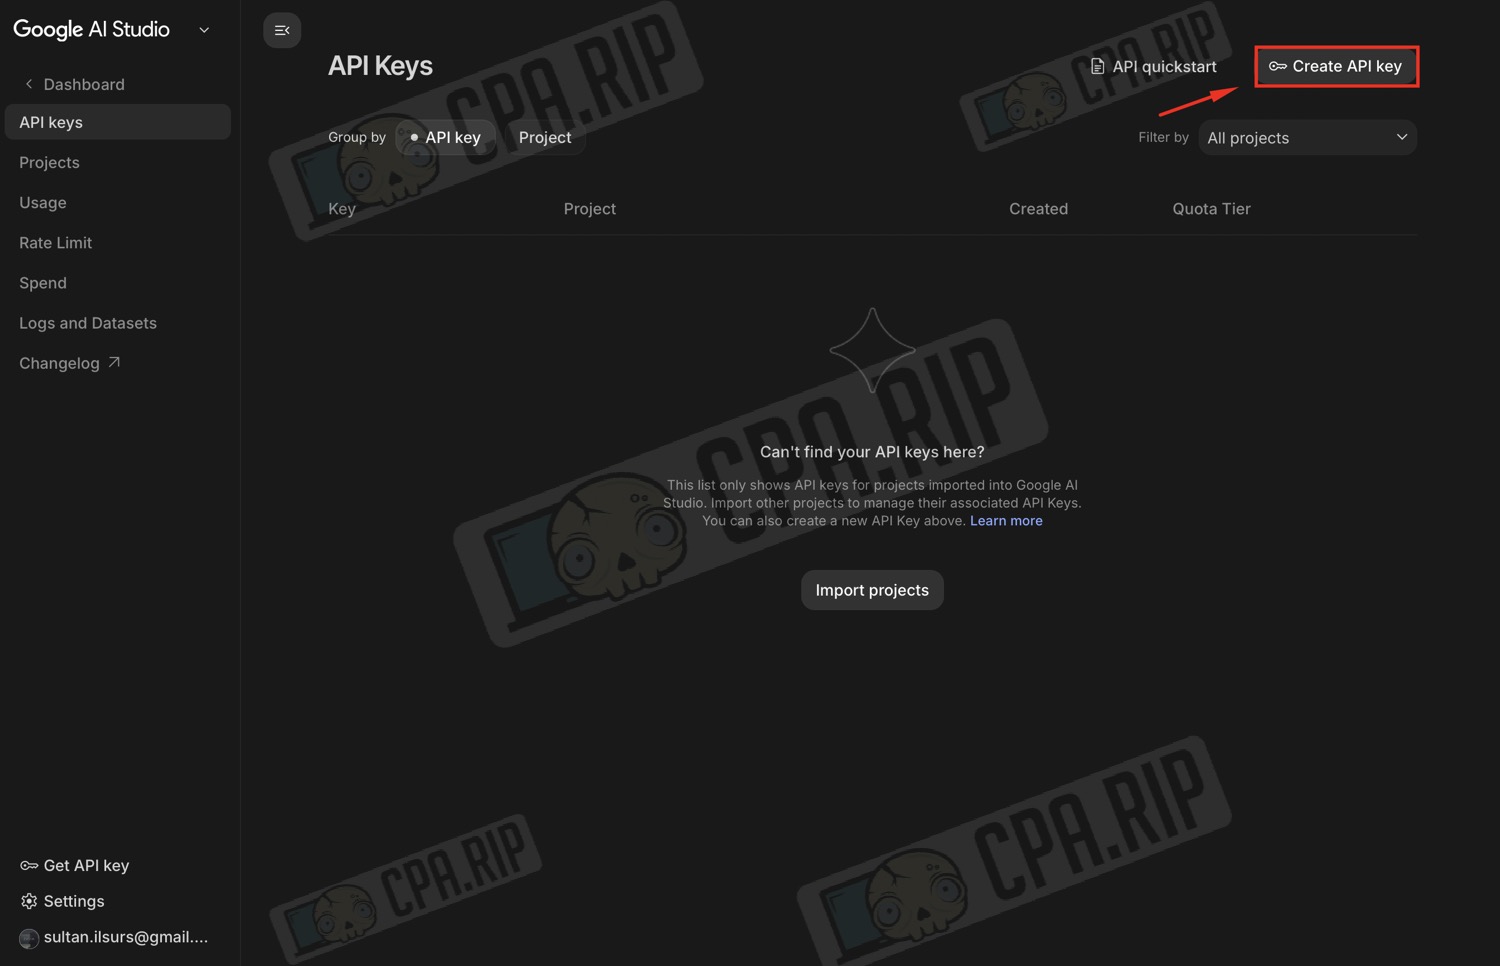
- Go to Google AI Studio https://aistudio.google.com/app/apikey
- Sign in to your Google account; a standard Gmail account will suffice.
- Click ‘Create API key’.
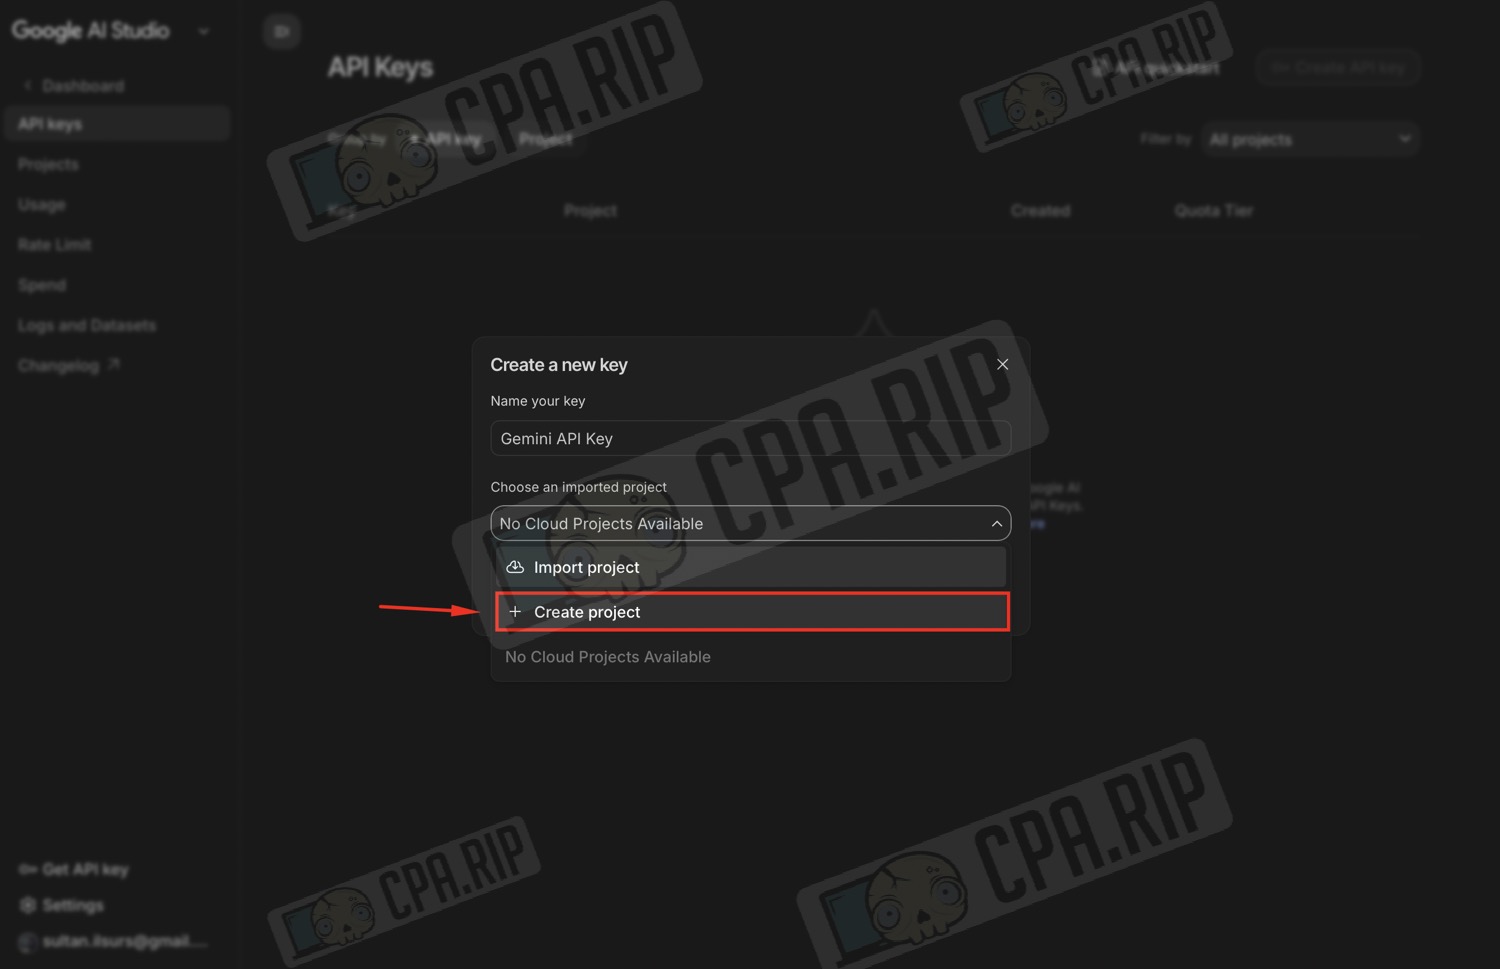
- Select the ‘Create project’ option
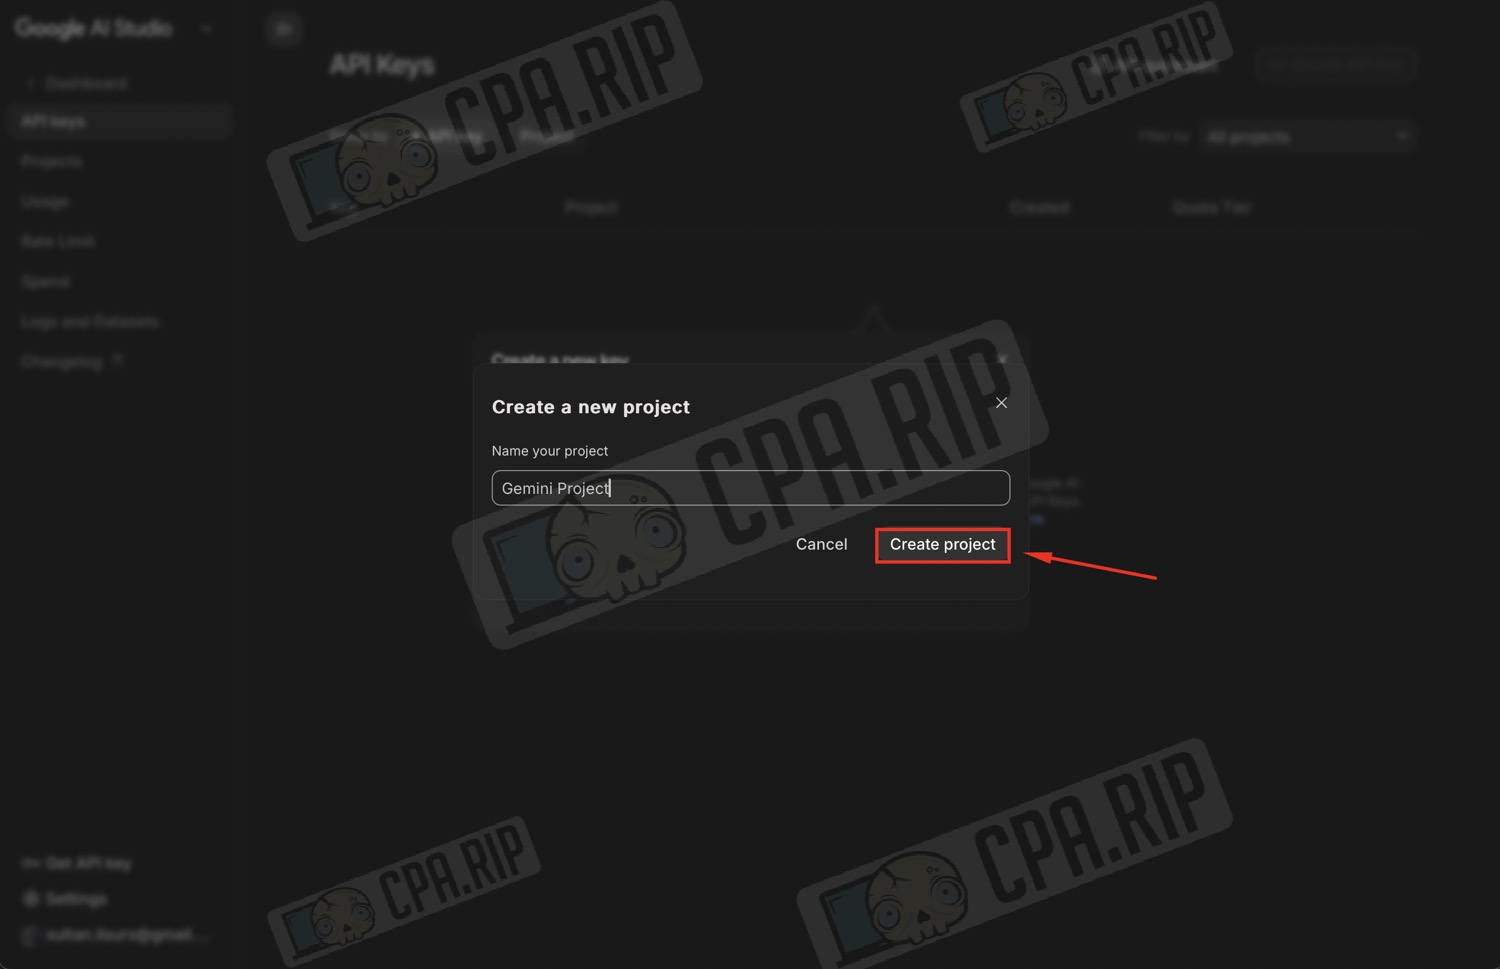
- Enter a project name
- And click ‘Create project’
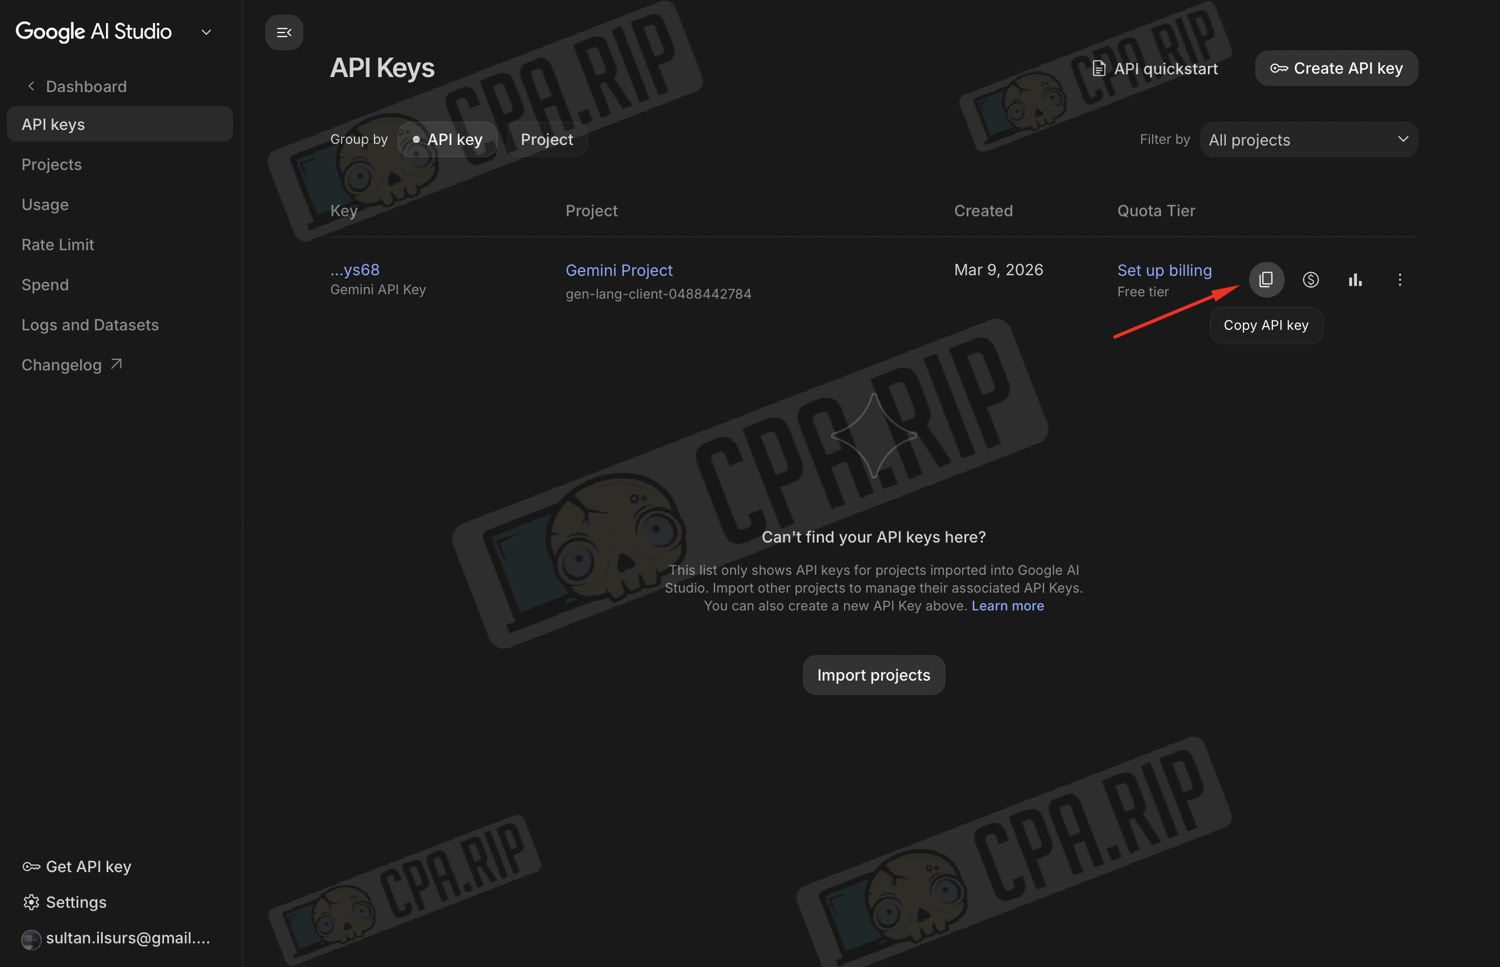
- Copy the generated key
Don’t forget to top up your balance!
Google Drive OAuth2 / Google Sheets OAuth2
Access to Google Drive and Google Sheets is required to save the results of your ad analysis. In n8n, both sets of credentials are obtained via the same Google OAuth from the Google Cloud Console.
These instructions are only for n8n running locally or on your own server! On n8n Cloud, simply log in using your Google account credentials.
- Go to https://console.cloud.google.com/
- Log in using your Google account
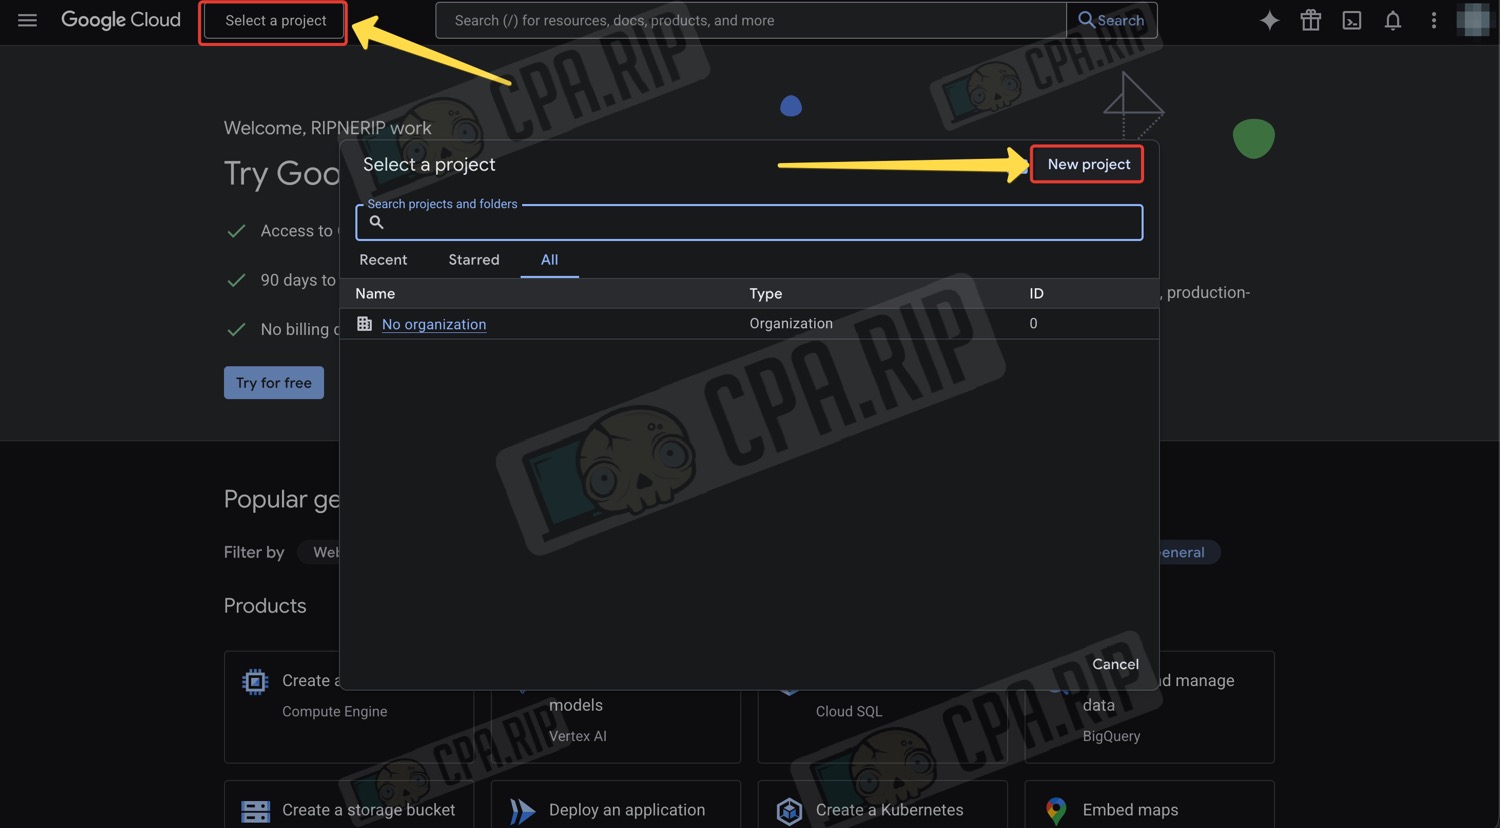
- In the top-left corner, click ‘Select a project’
- In the pop-up window, click ‘New project’
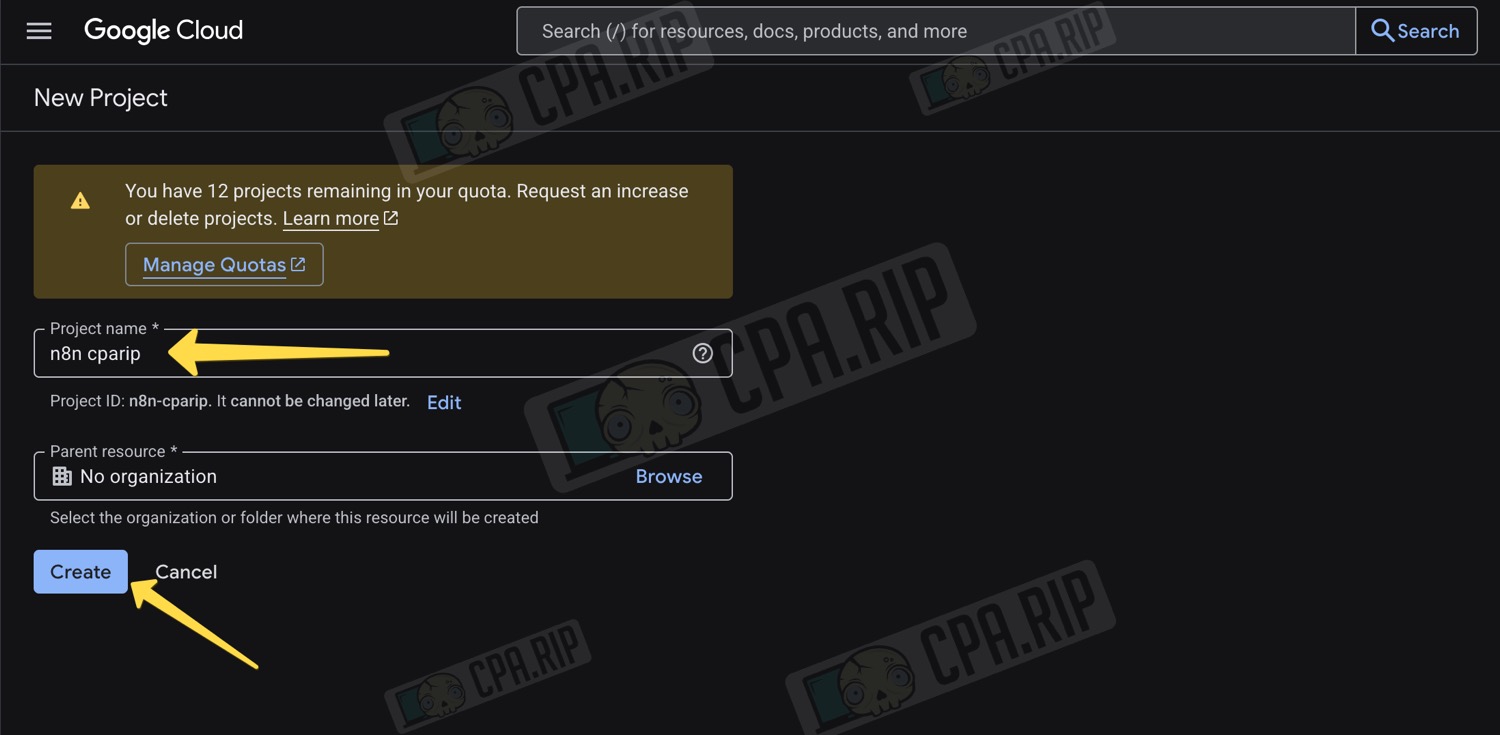
- Enter a project name and click ‘Create’
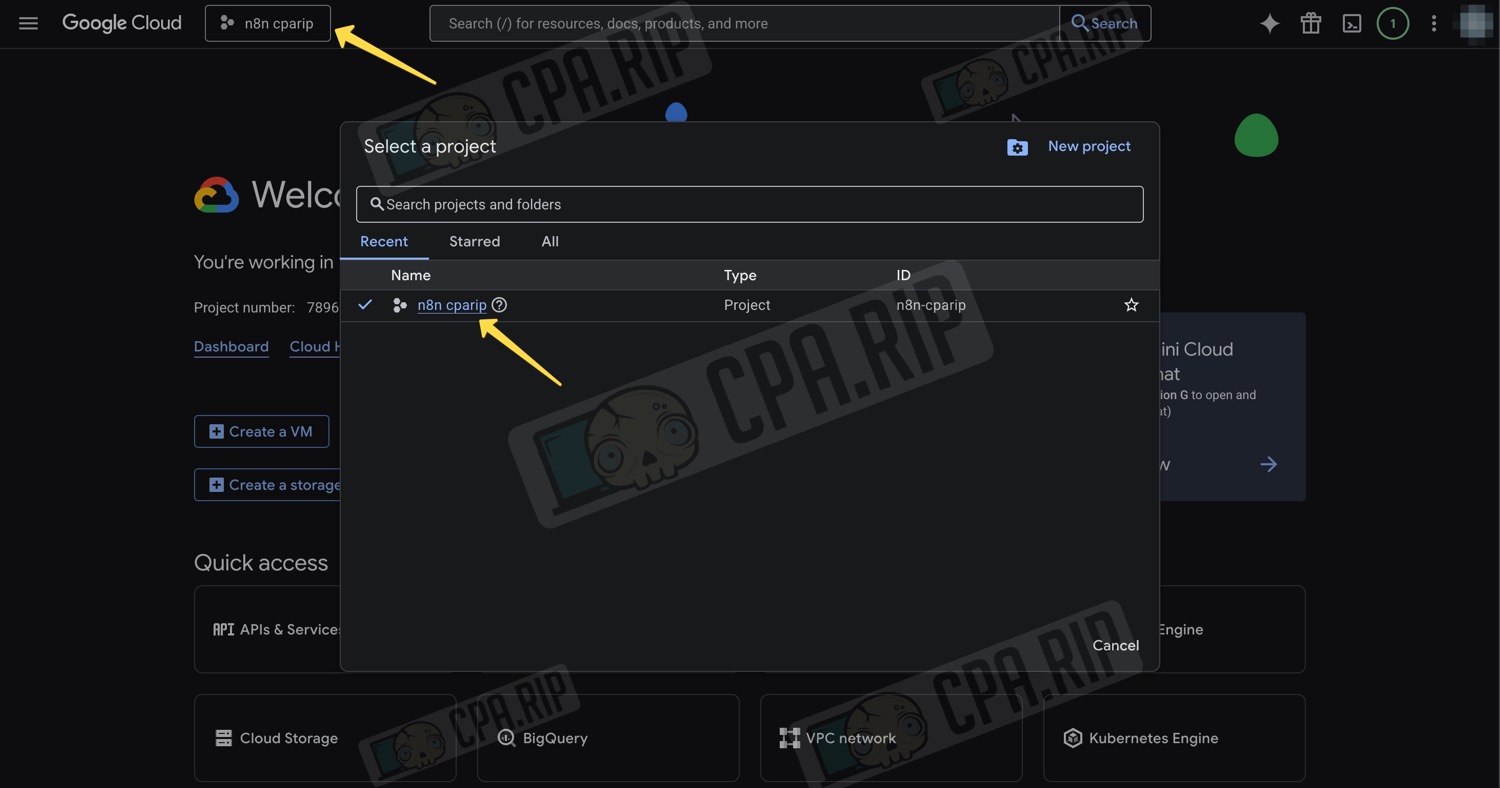
- To select the correct project, you may need to click the ‘Create/Select project’ button again and choose the one you just created from the list
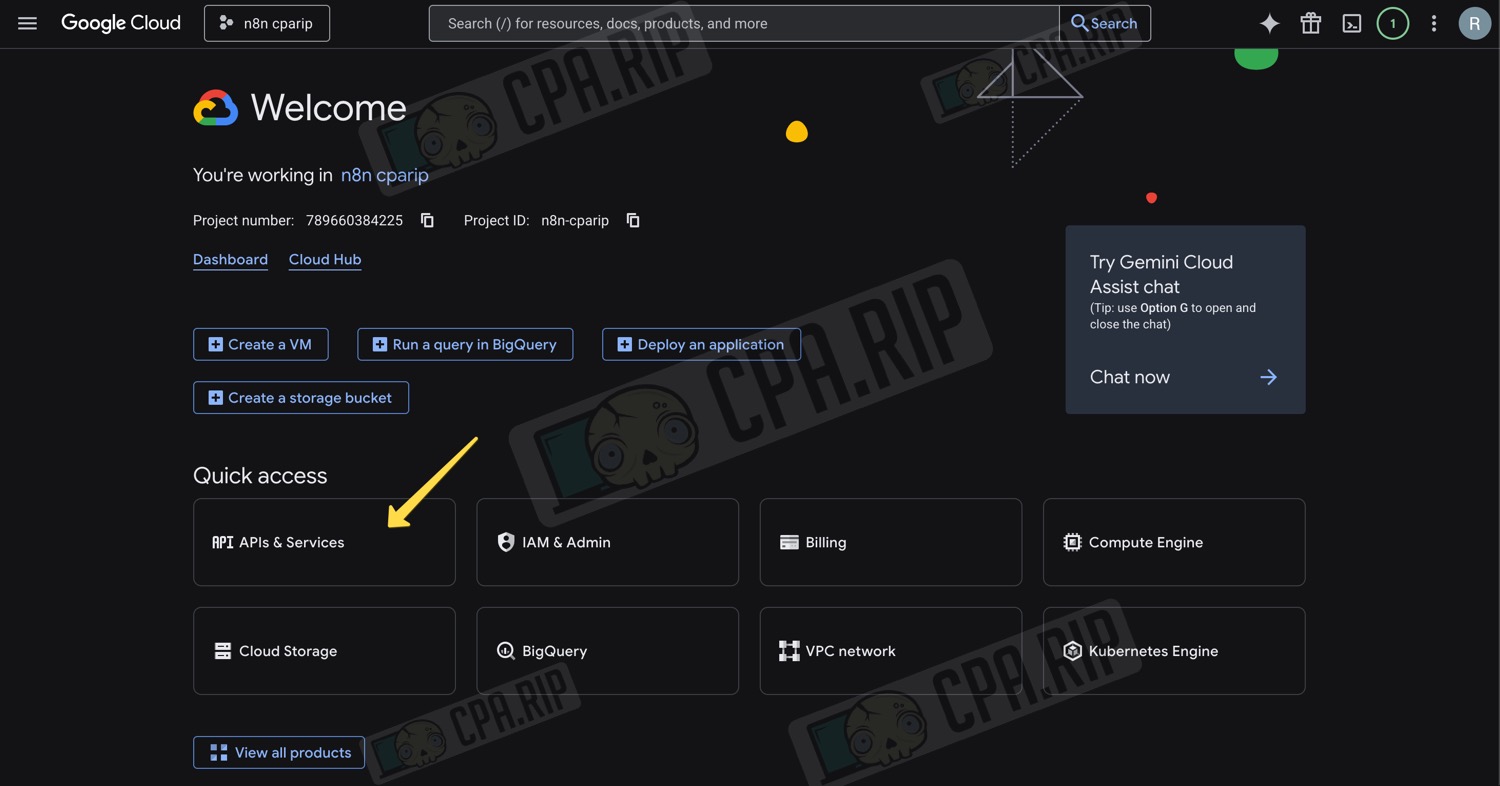
- In the dashboard, click ‘APIs & Services’
If a particular button is not visible in the dashboard, look for it in the left-hand side menu.
- In the next step, click ‘Library’ in the side menu
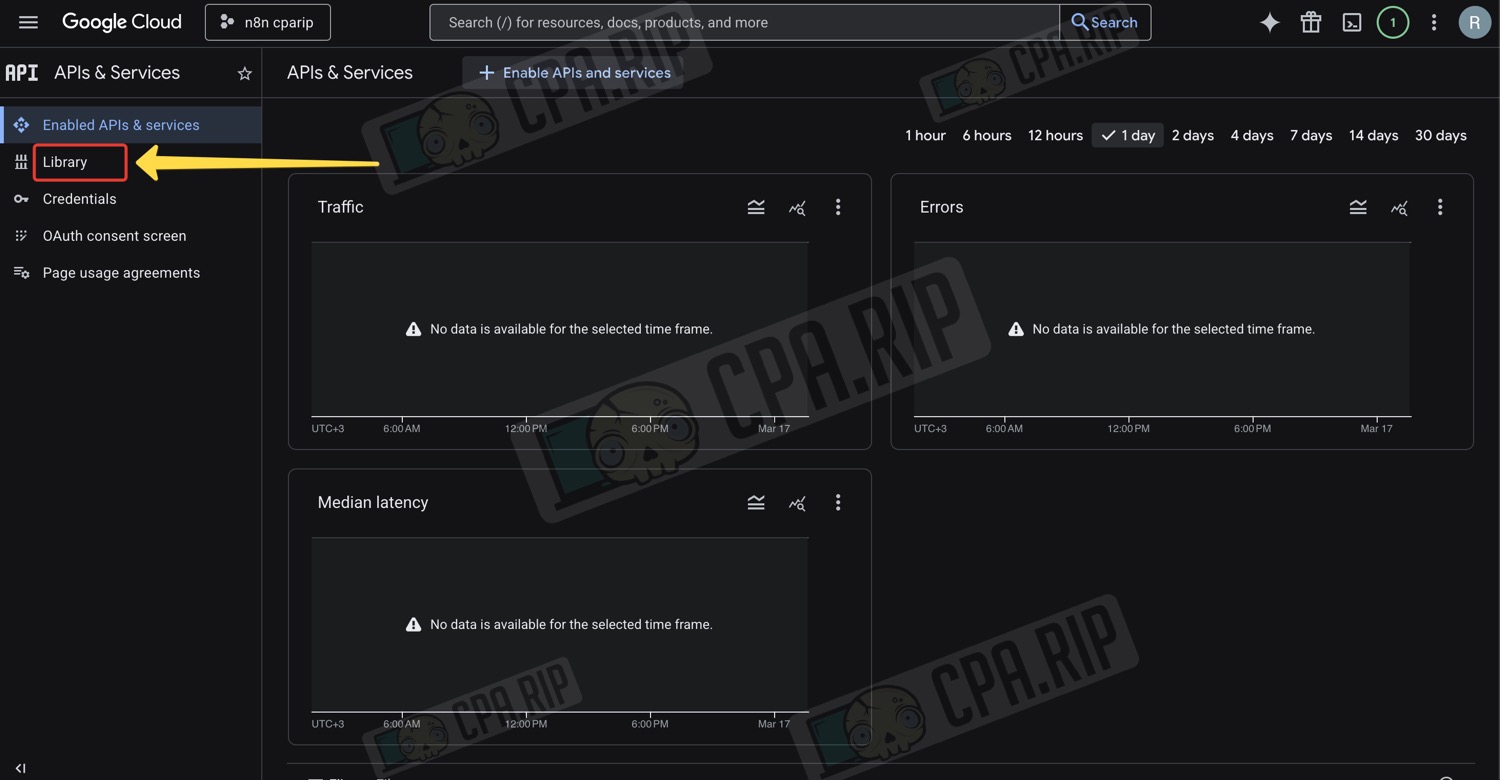
All the necessary Google services are connected from the library. For this project, you need Google Drive and Google Sheets.
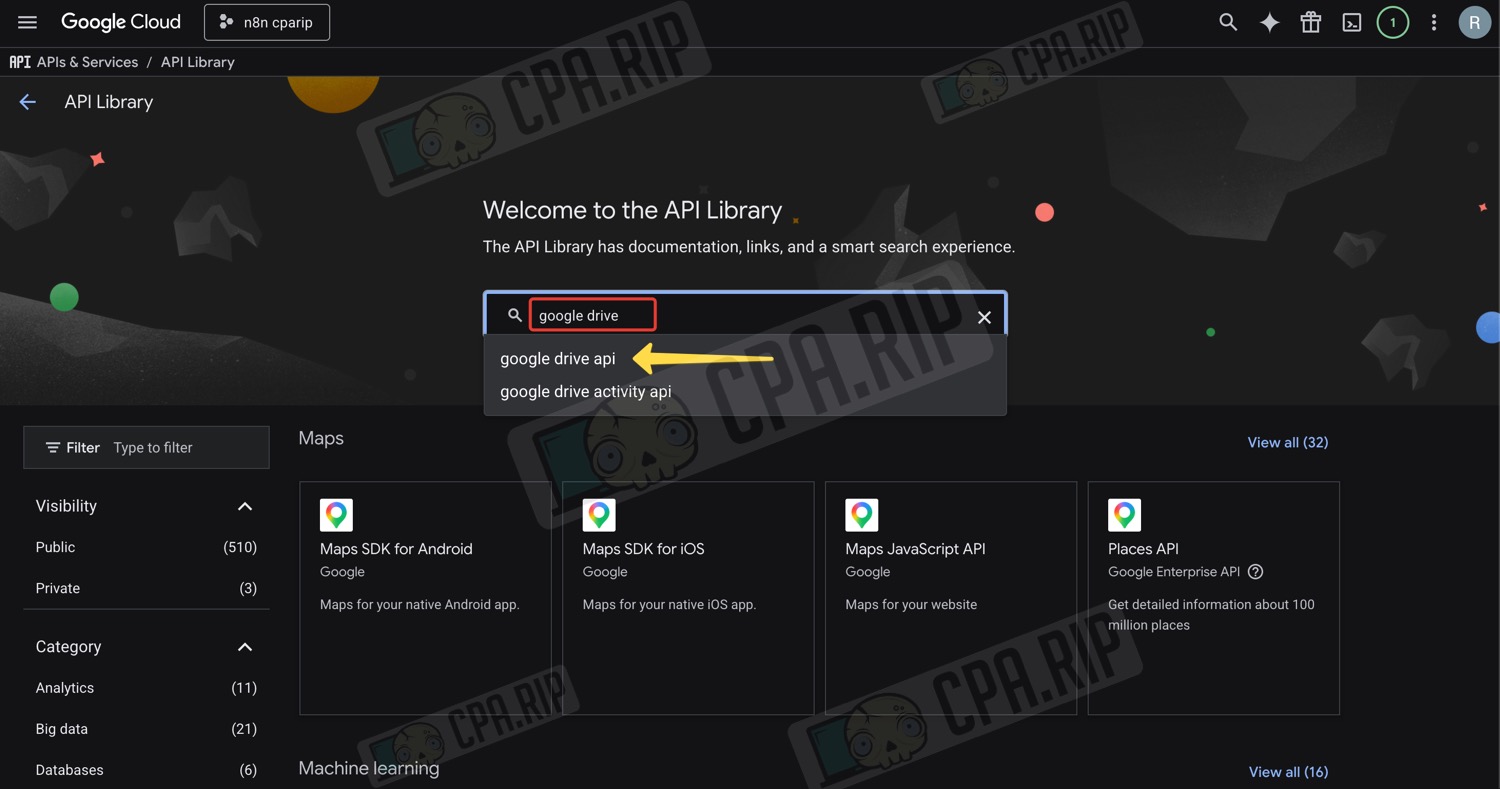
- Enter ‘Google Drive’ in the search field and click ‘google drive api’ in the drop-down list
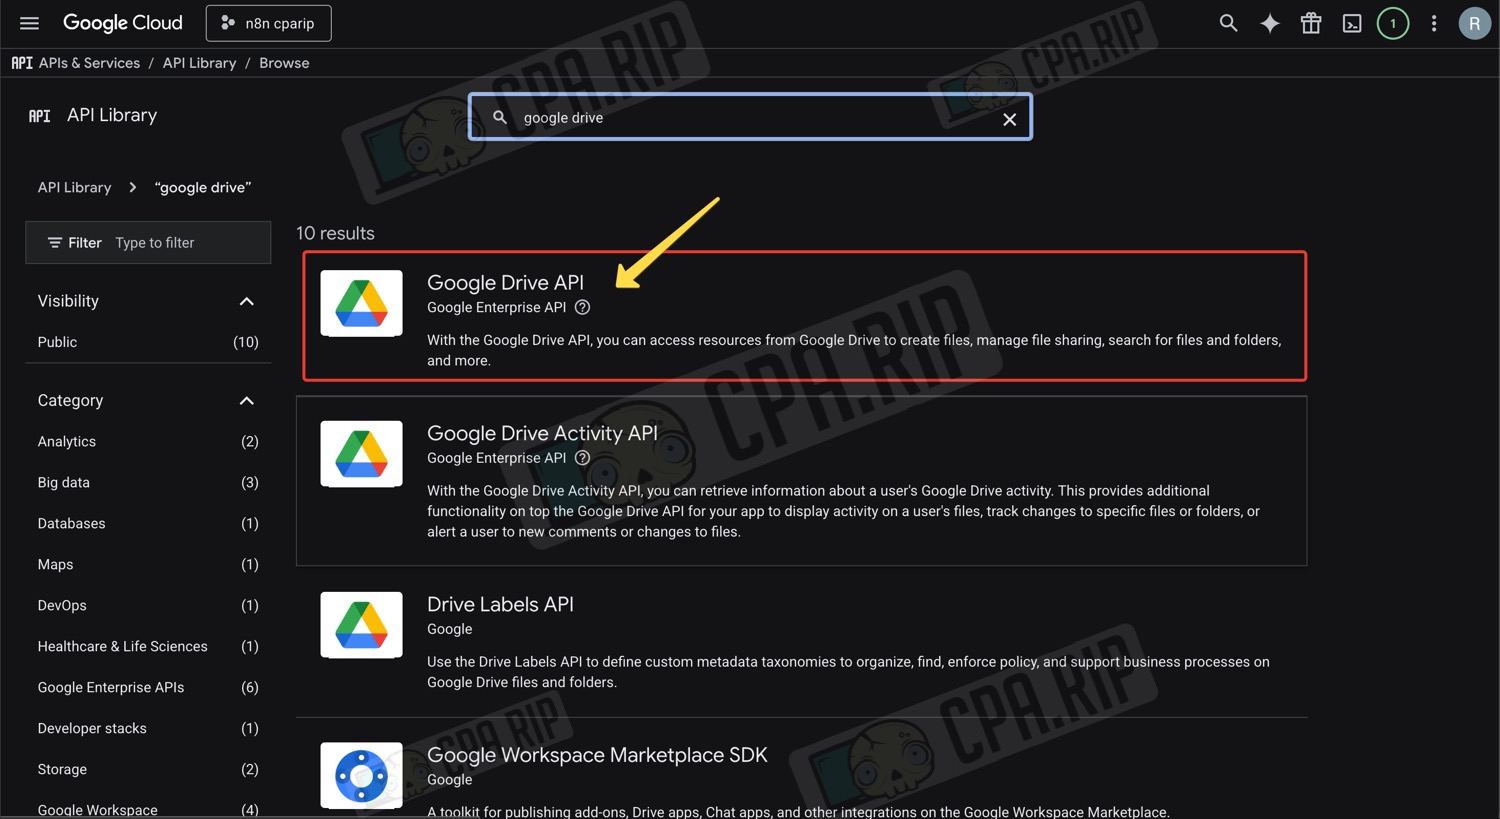
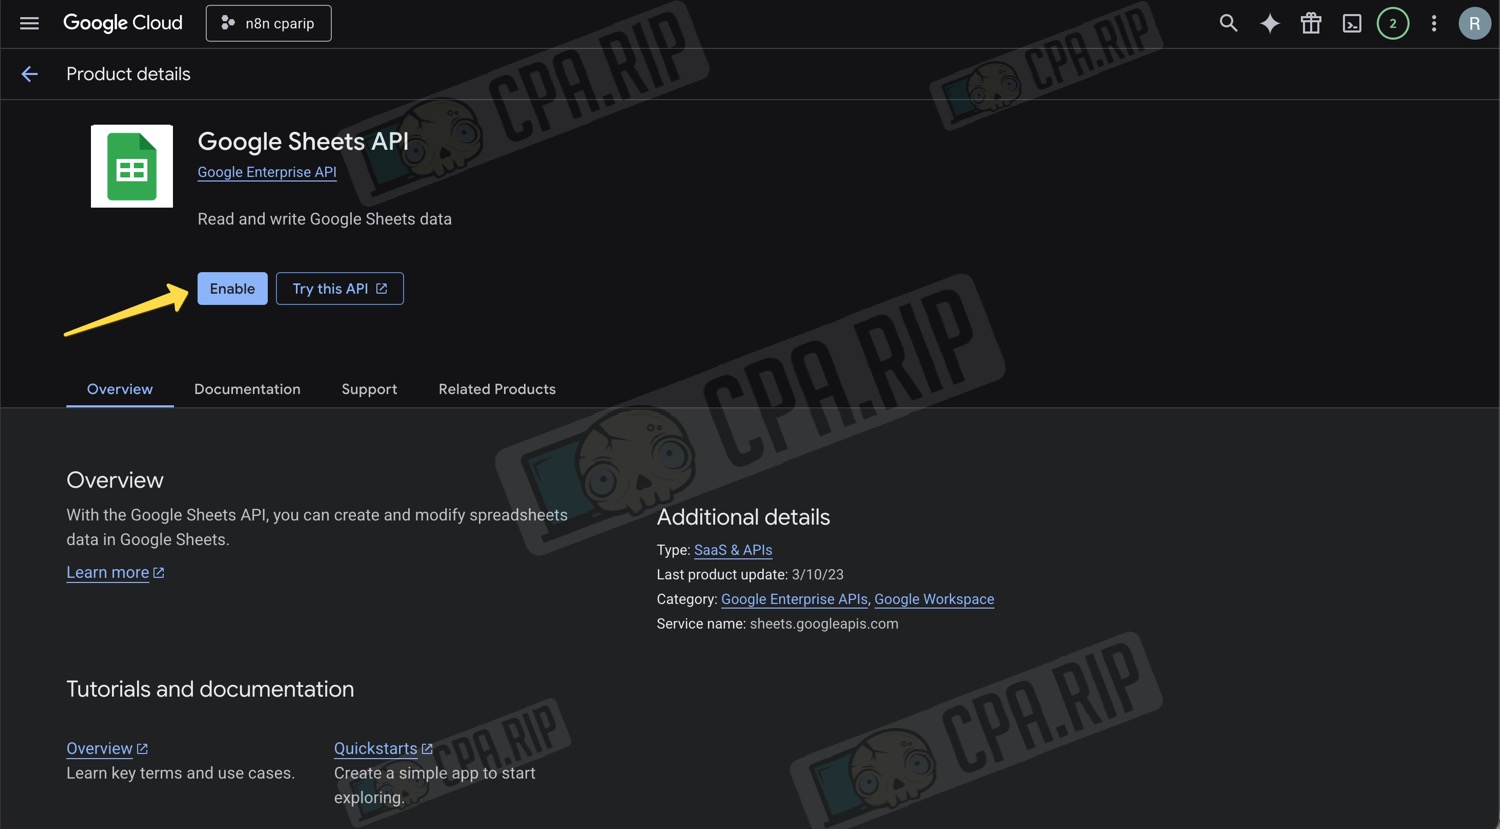
- Click on ‘Google Drive API’
- Click ‘Enable’
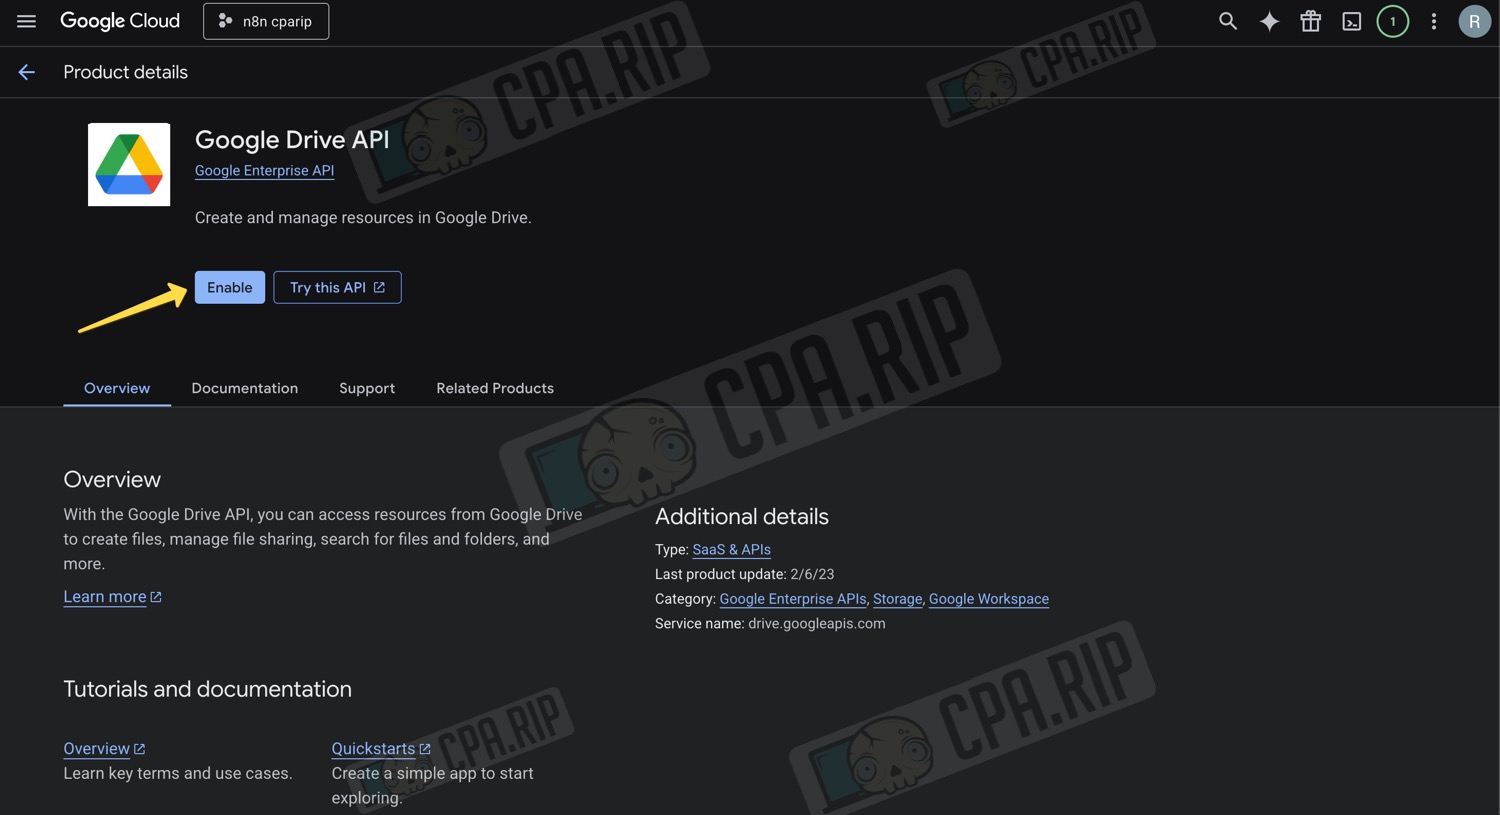
- Return to the library, find and connect to the ‘Google Sheets API’
- Next, in the side menu, click ‘OAuth consent screen’
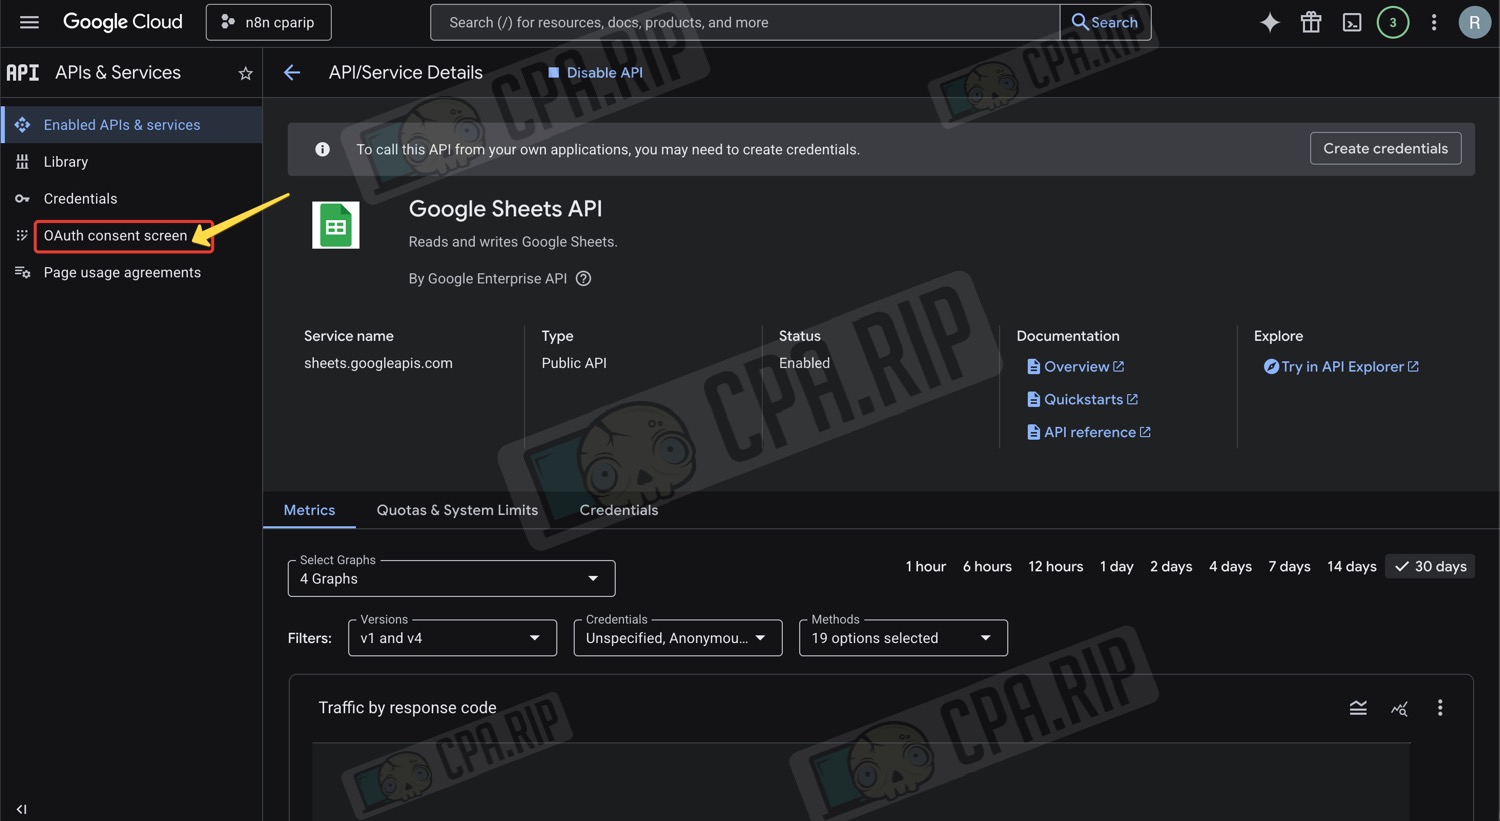
You can connect other Google services in the same way, such as Calendar, YouTube, etc.
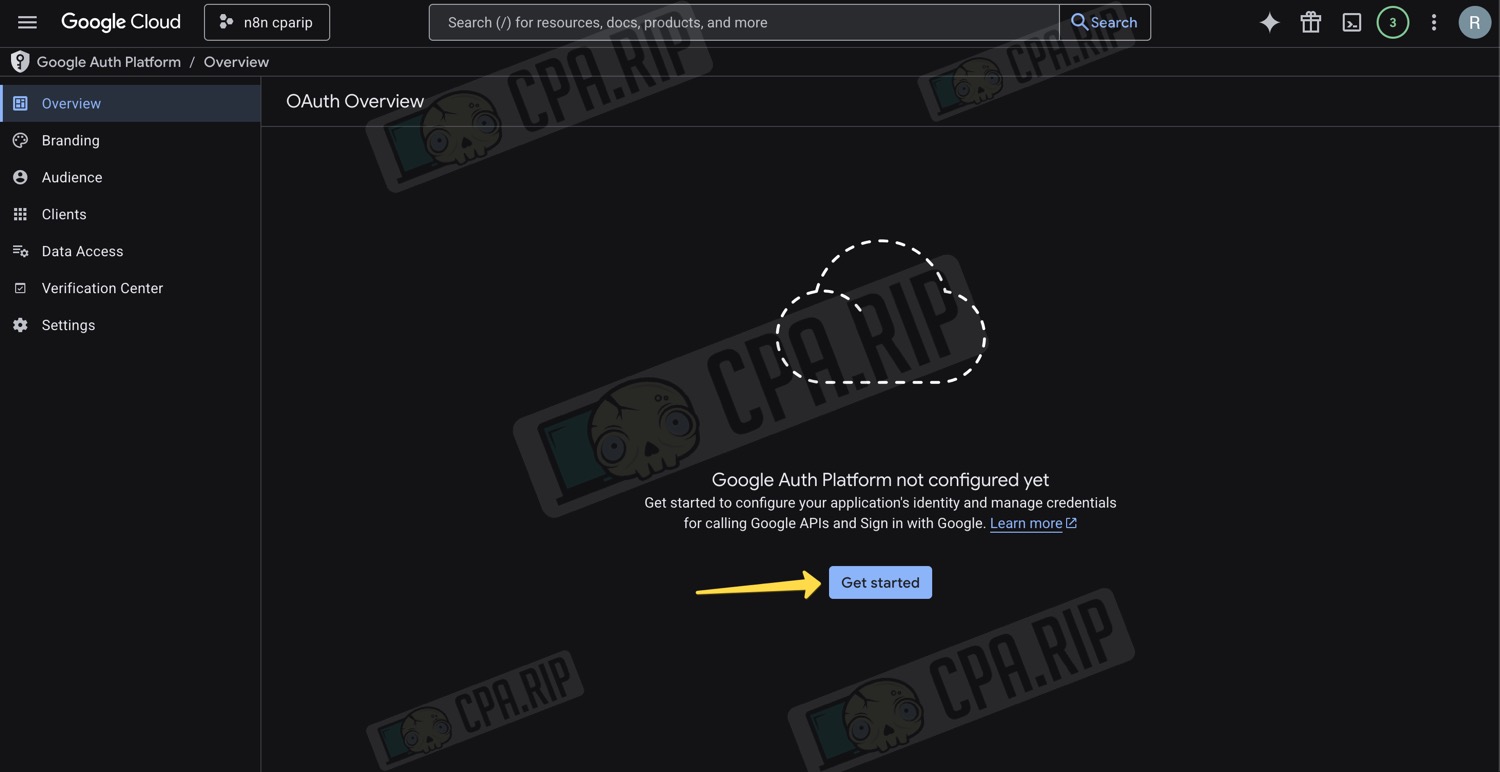
- Click ‘Get started’
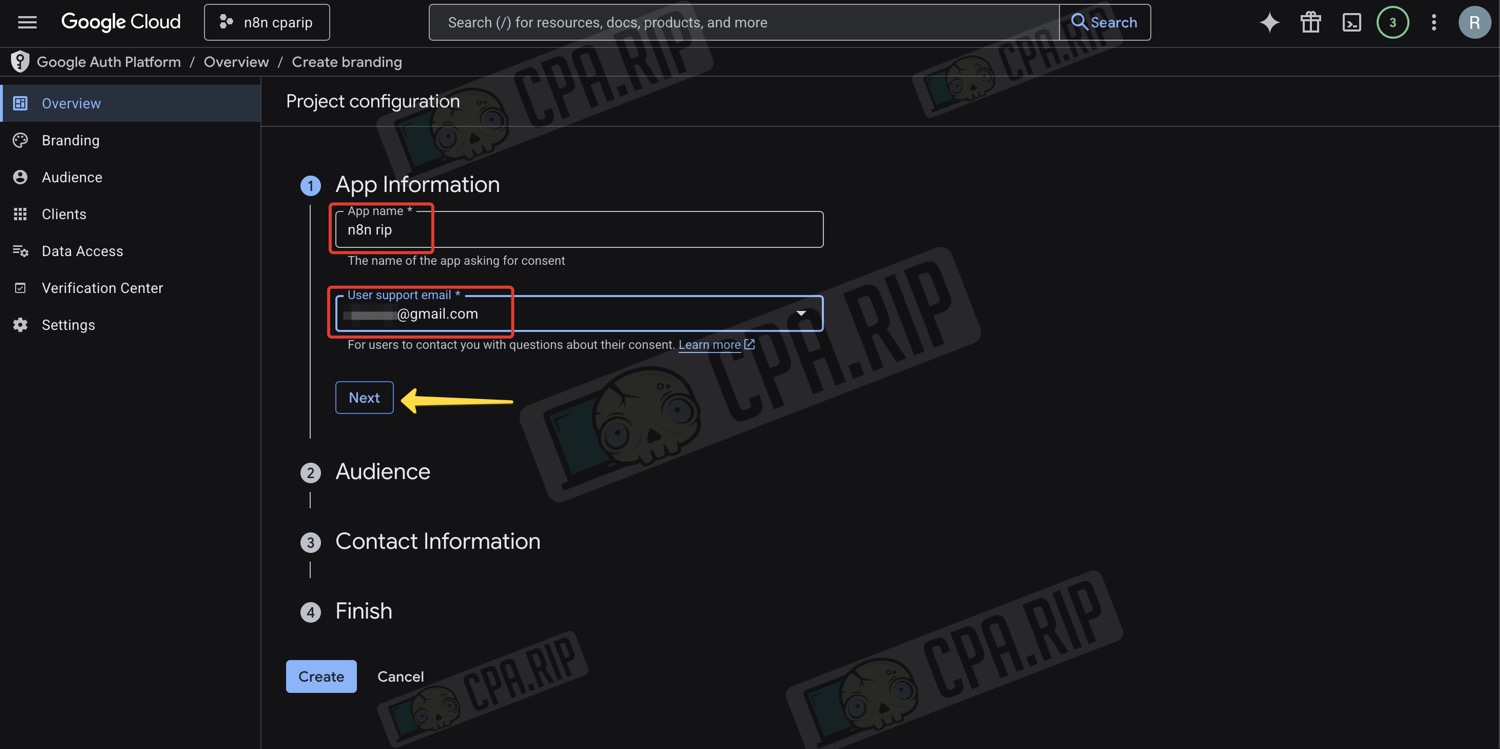
- Enter a name in the ‘App name’ field
- Enter your email address in the ‘User support email’ field
- Click ‘Next’
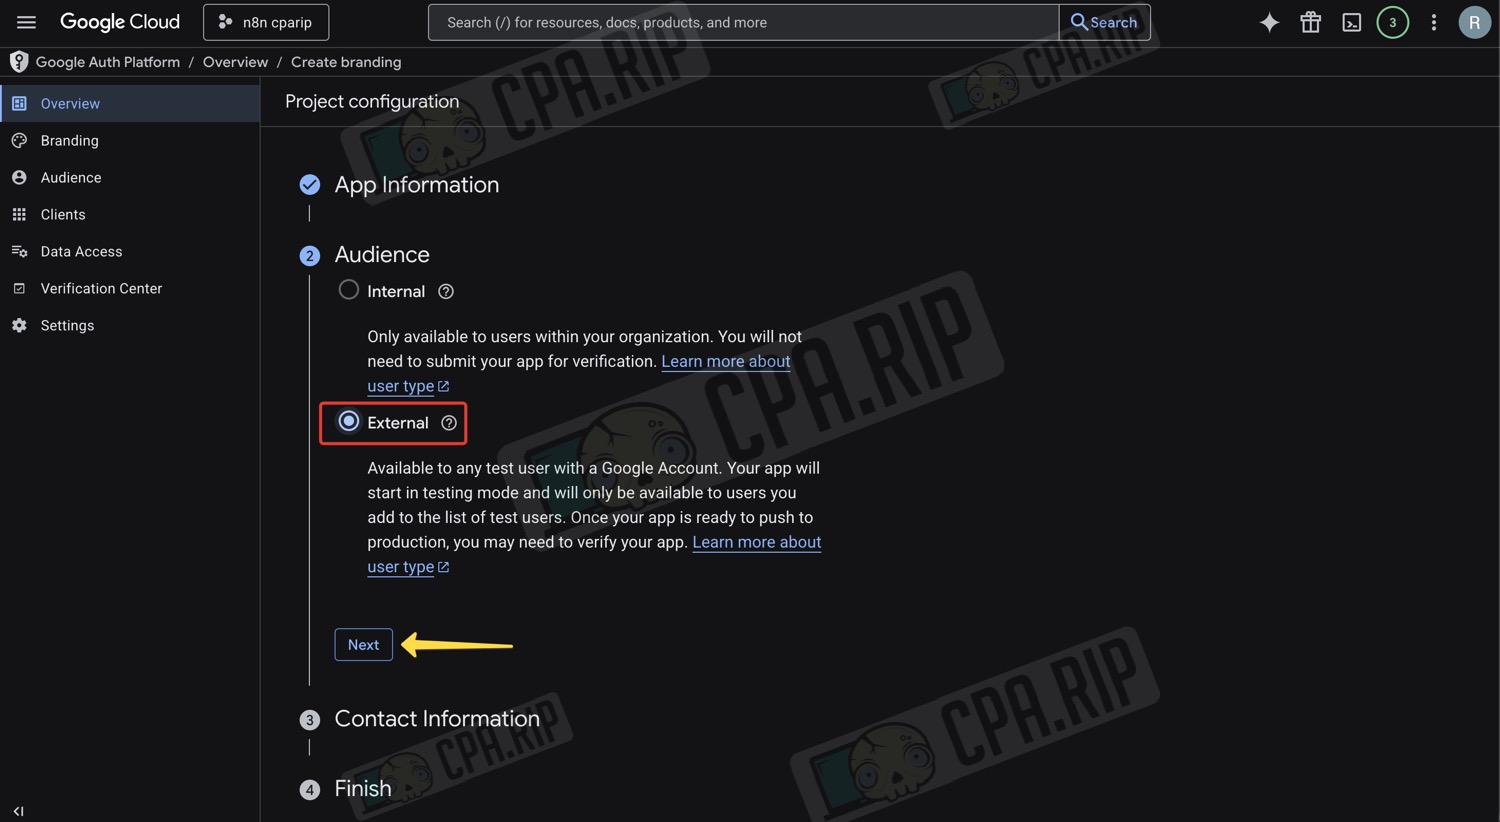
- Select ‘External’
- Click ‘Next’
- Enter your email address again
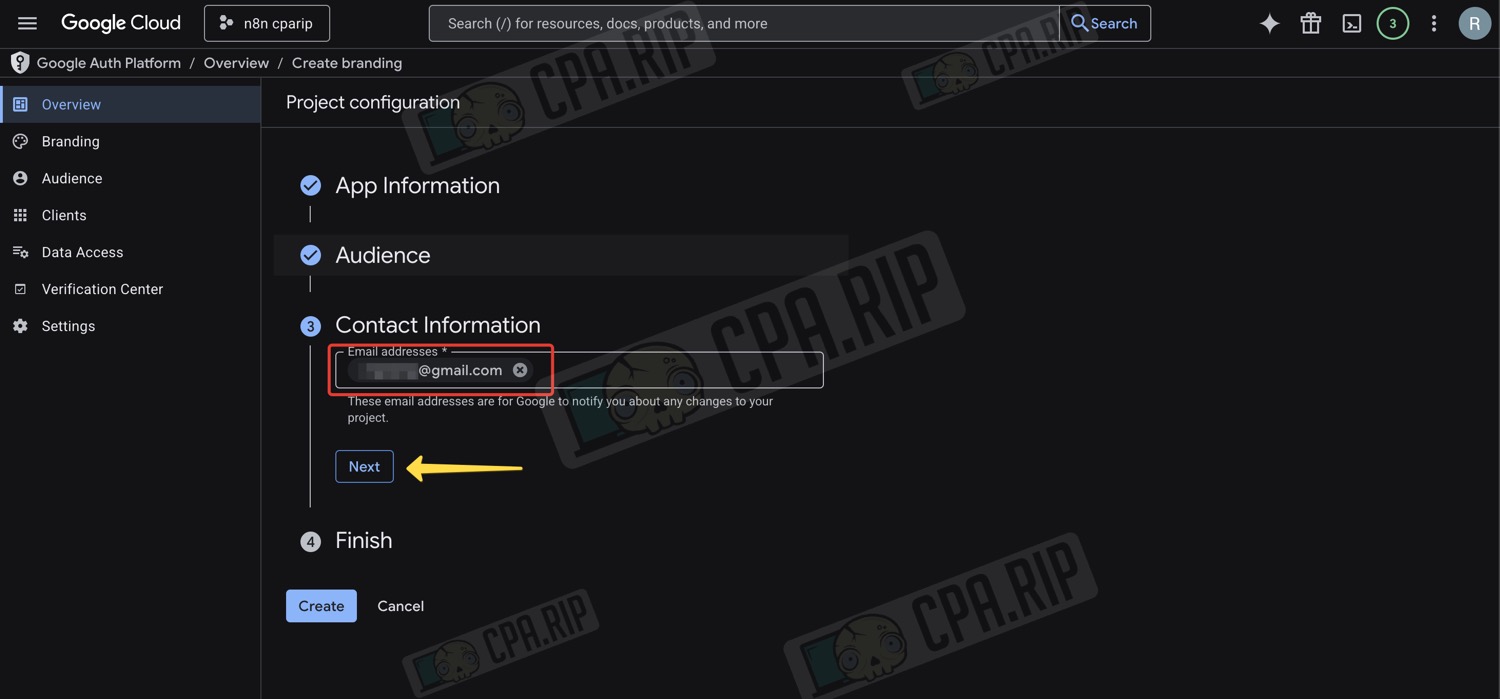
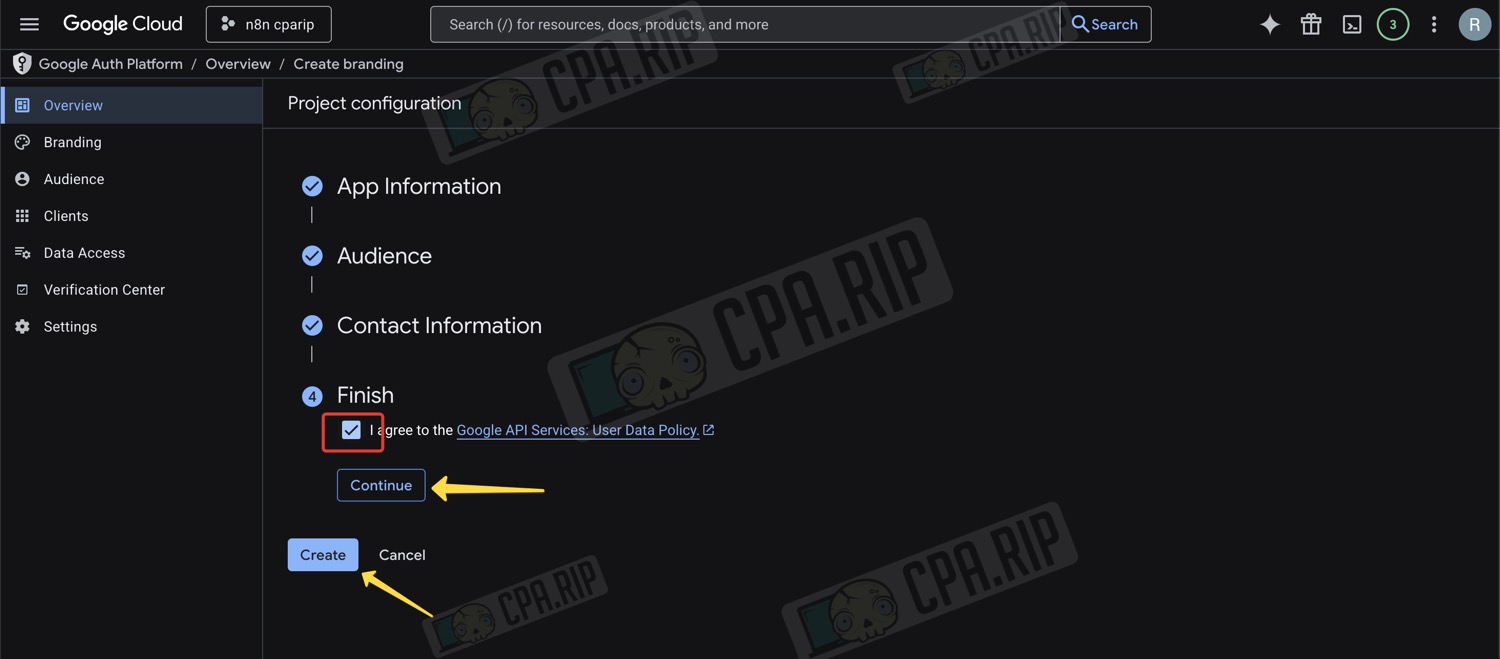
- Tick the box next to ‘I agree…’
- Click ‘Continue’
- Click ‘Create’
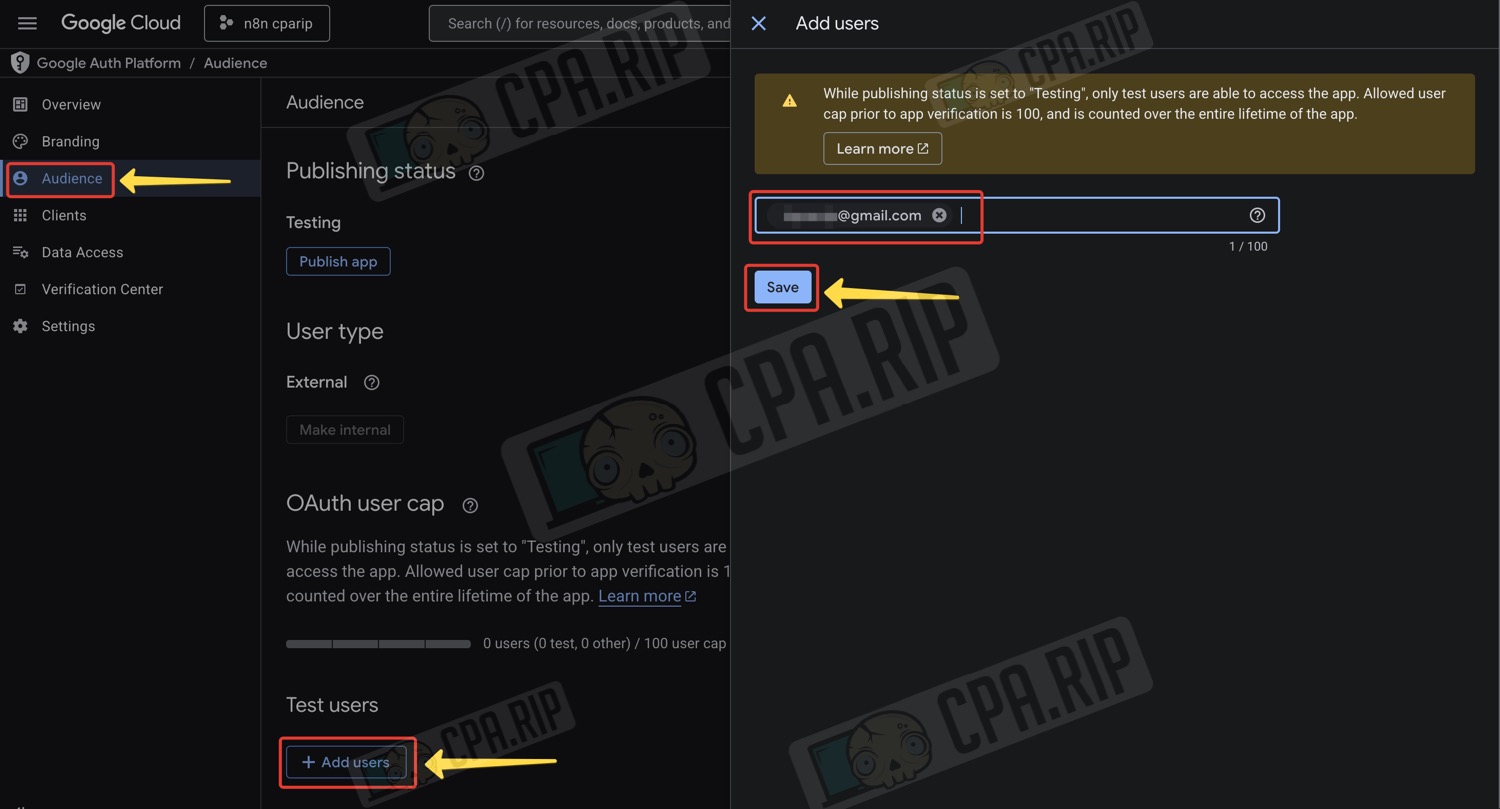
- In the side menu, click ‘Audience’
- Click ‘Add users’
- A panel will appear on the right; enter your email address there
- Click ‘Save’
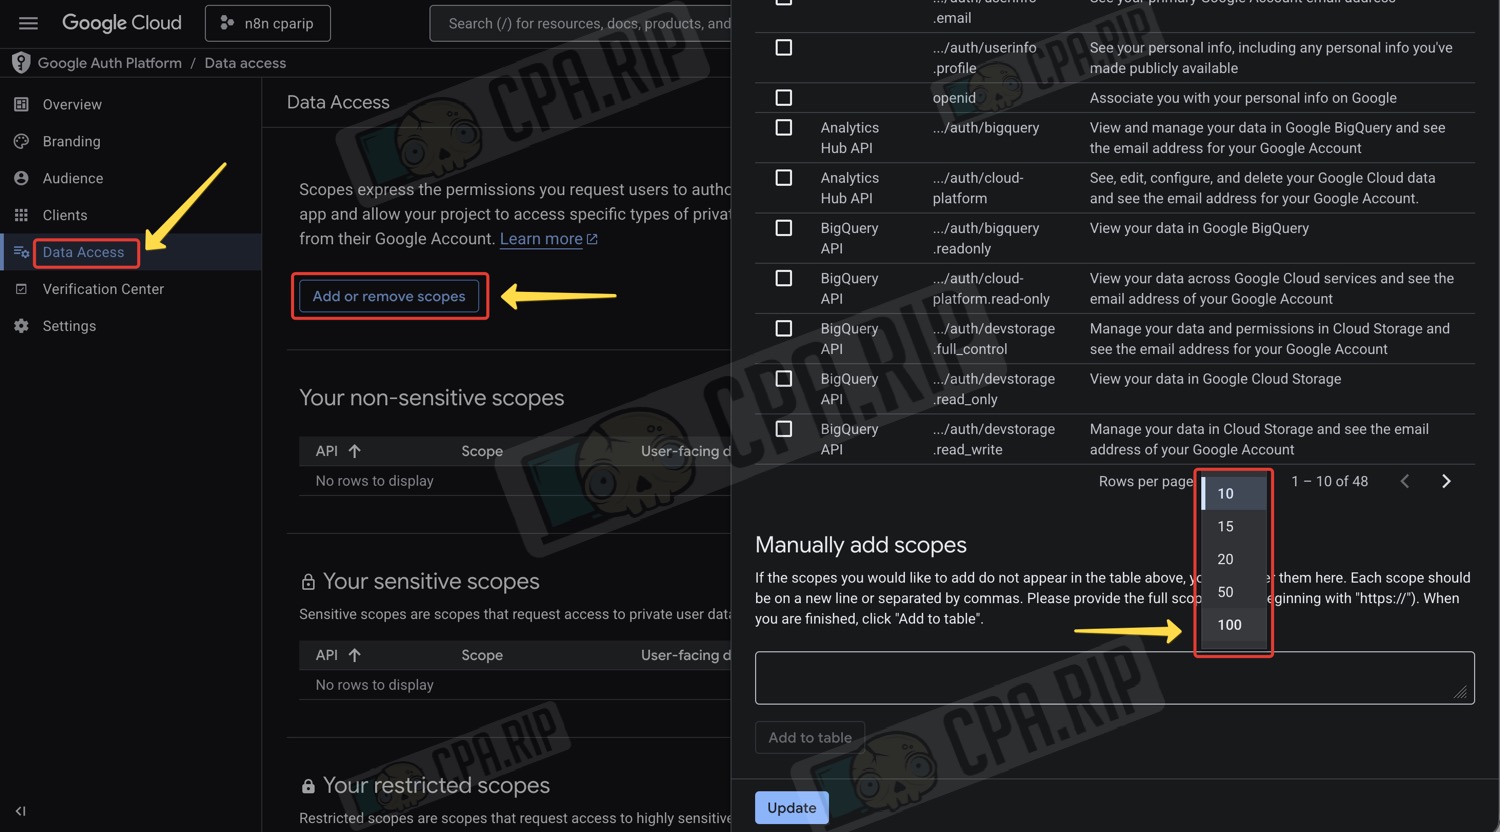
- In the side menu, click ‘Data Access’
- Click ‘Add or remove scopes’
- A panel will appear on the right showing a list of permissions; select ‘Show 100’ to view the full list
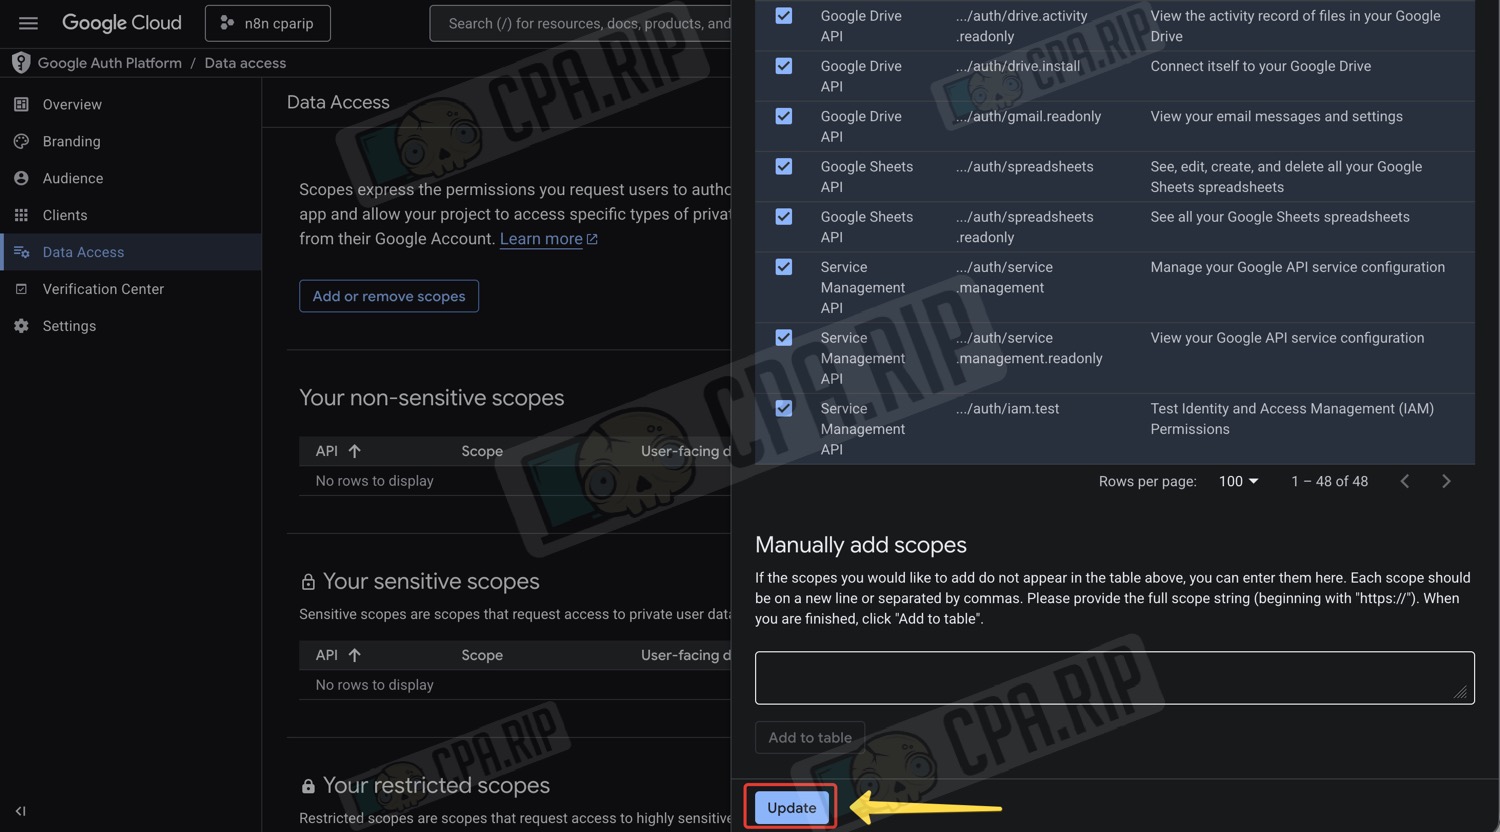
- Tick the box at the top of the list to select all permissions

- Scroll down and click ‘Update’
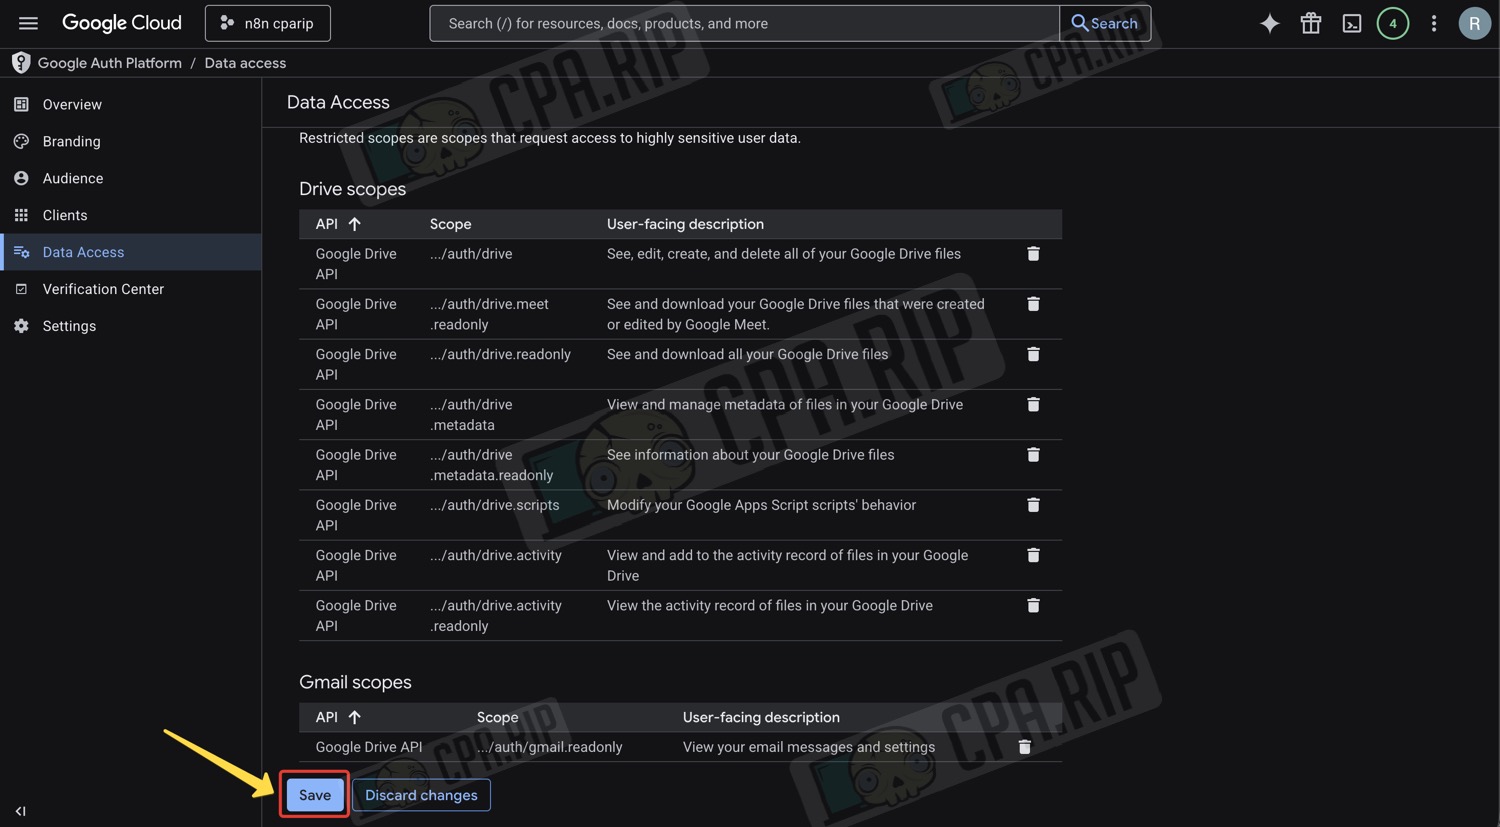
- Click ‘Save’
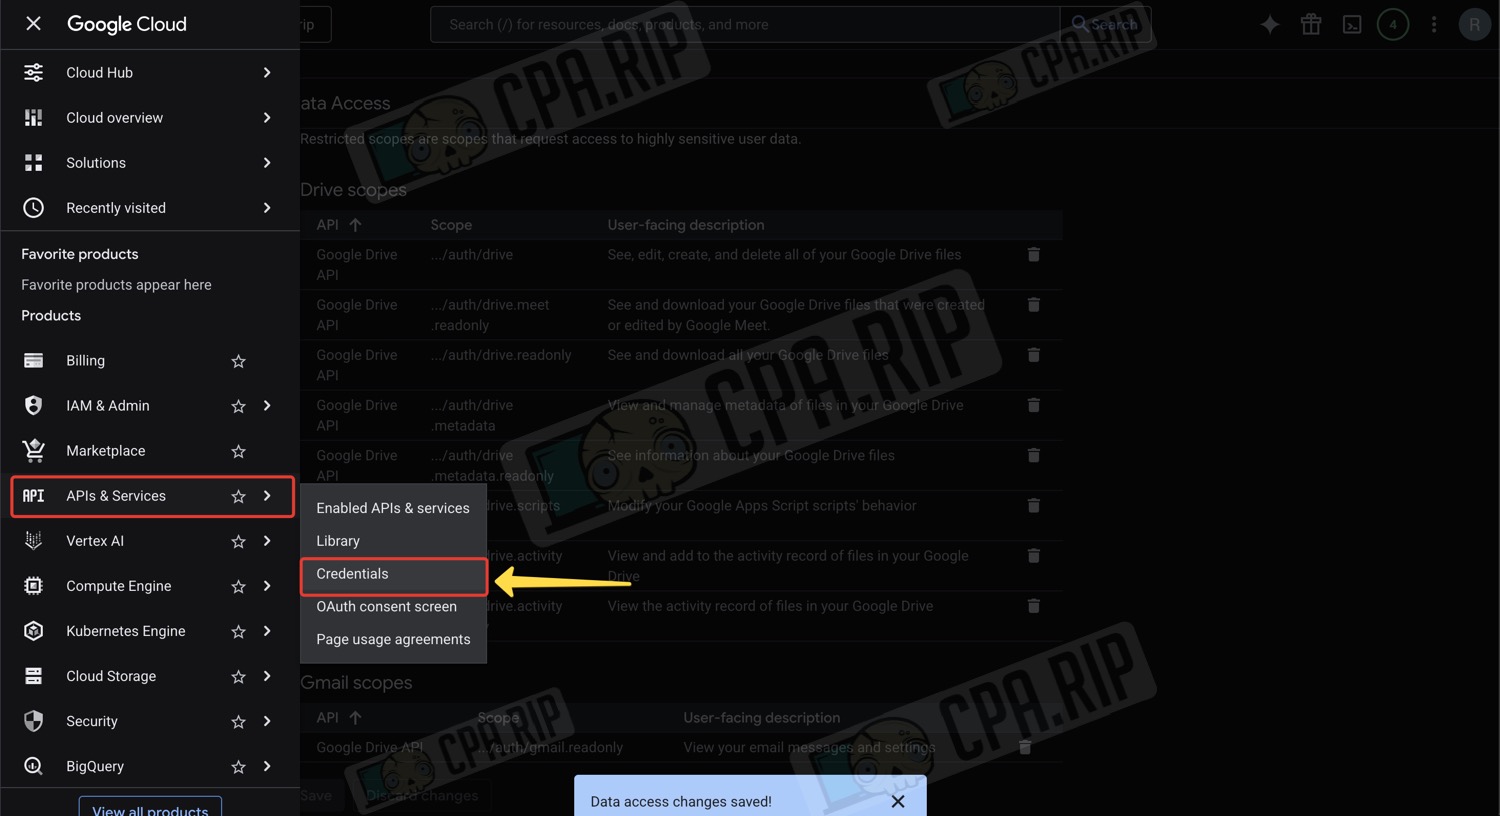
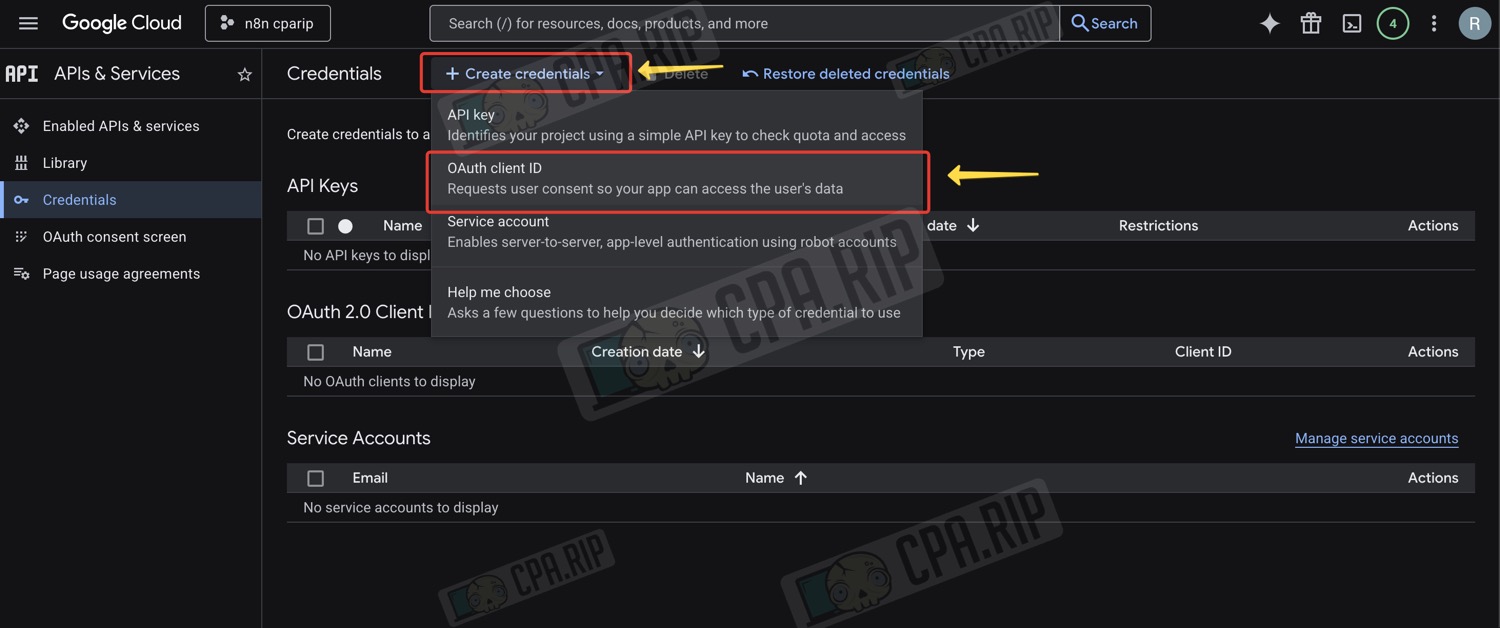
- In the main side menu, go to ‘APIs & Services’ — ‘Credentials’
- At the top, click ‘Create credentials’
- Select ‘OAuth client ID’ from the list
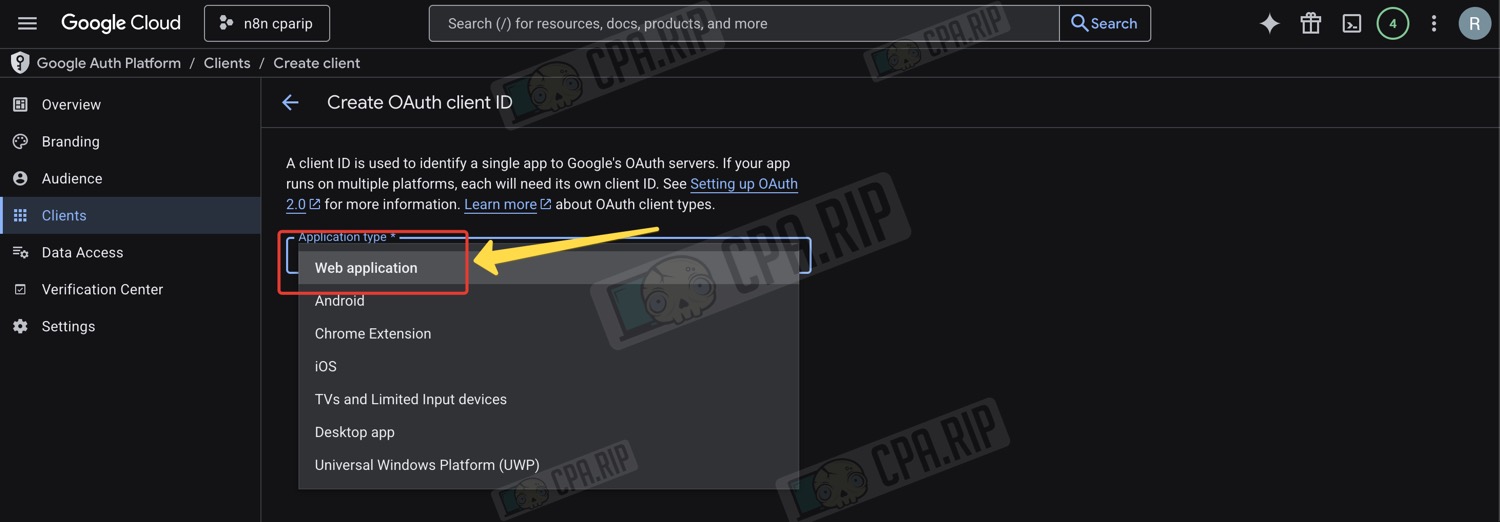
- For ‘Application type’, select ‘Web application’
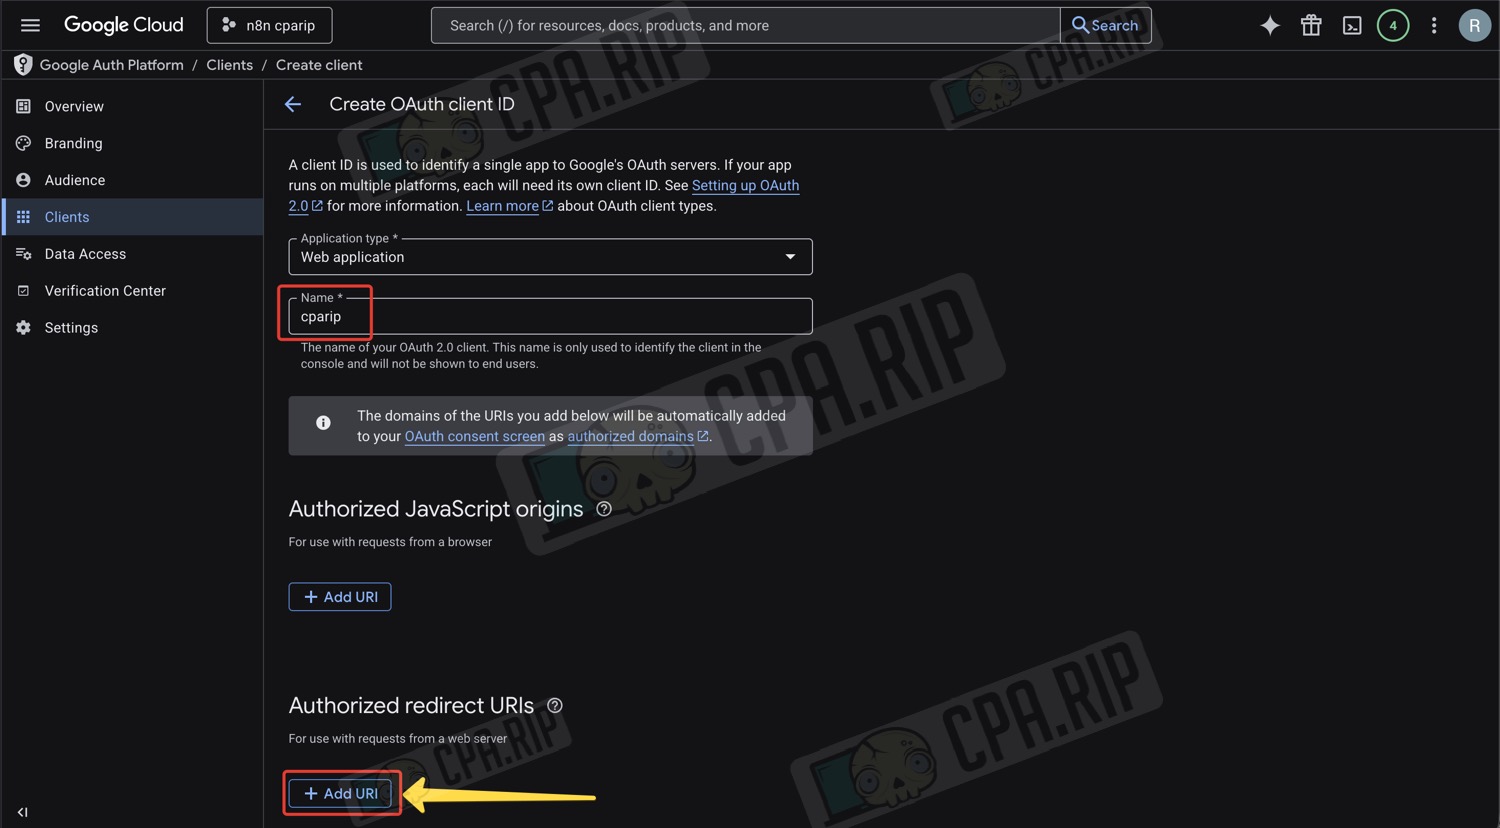
- Enter a name
- Click ‘Add URI’
- Return to n8n
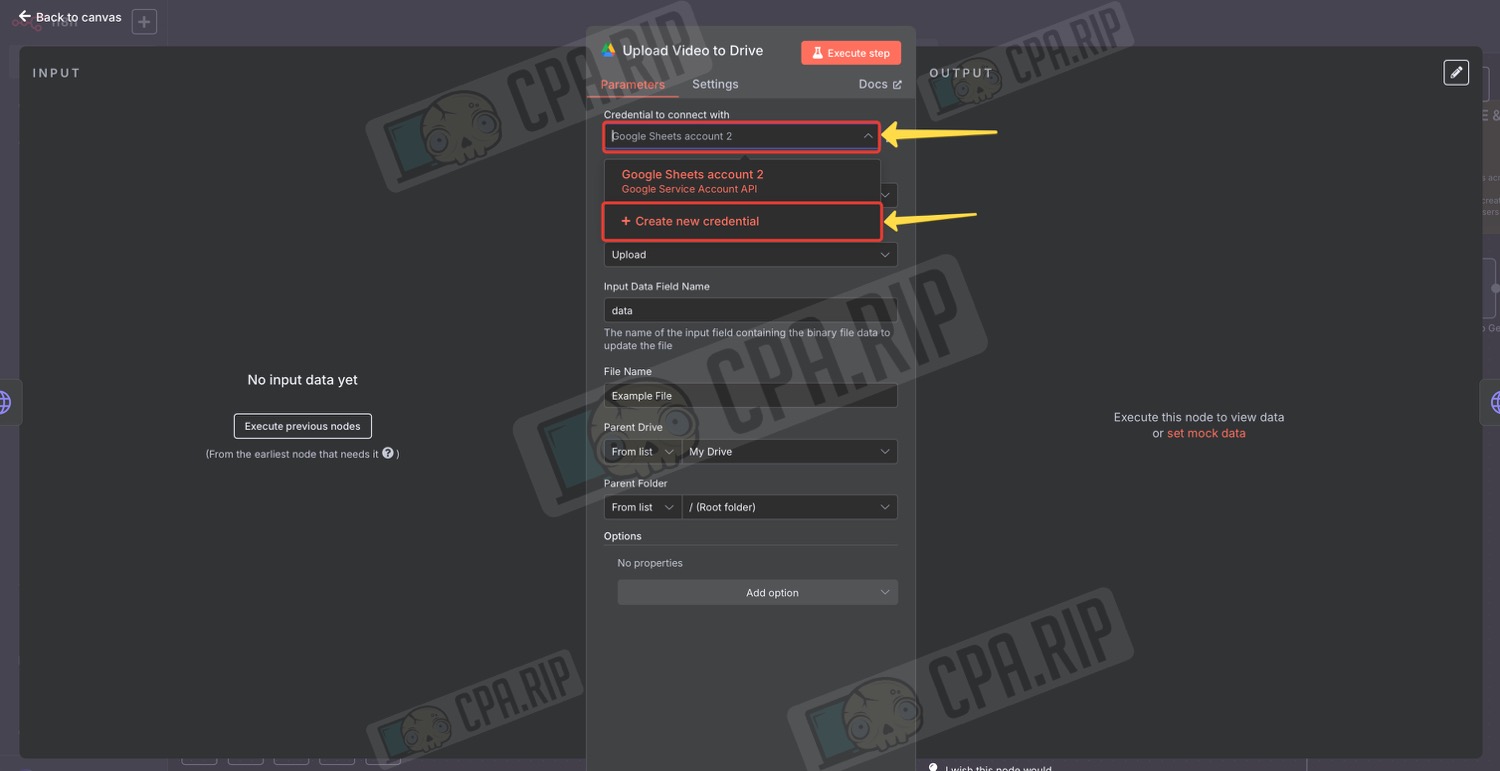
- Open any node in the project with Google credentials
- In the ‘Credential to connect with’ field, select ‘Create new credential’
- Copy the link from the ‘OAuth Redirect URL’ field
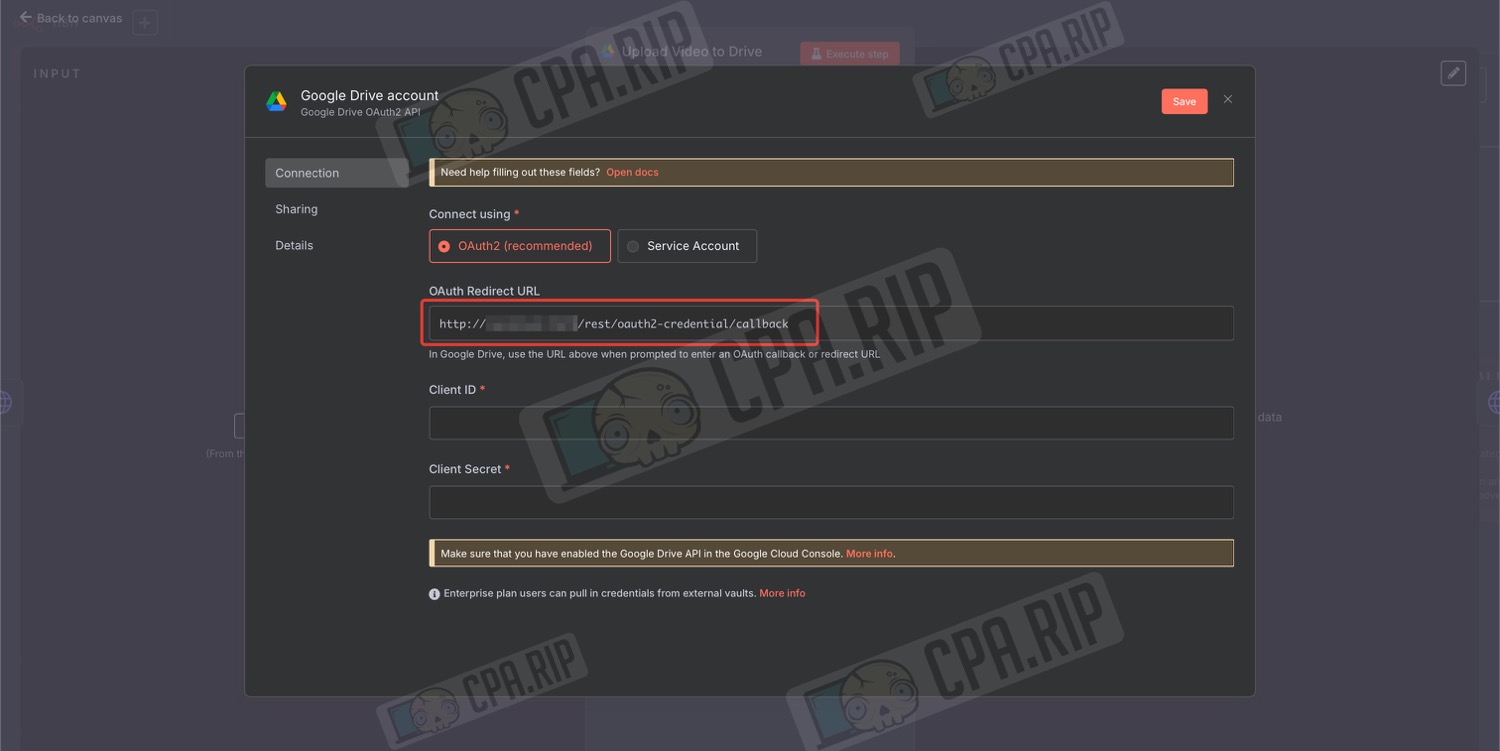
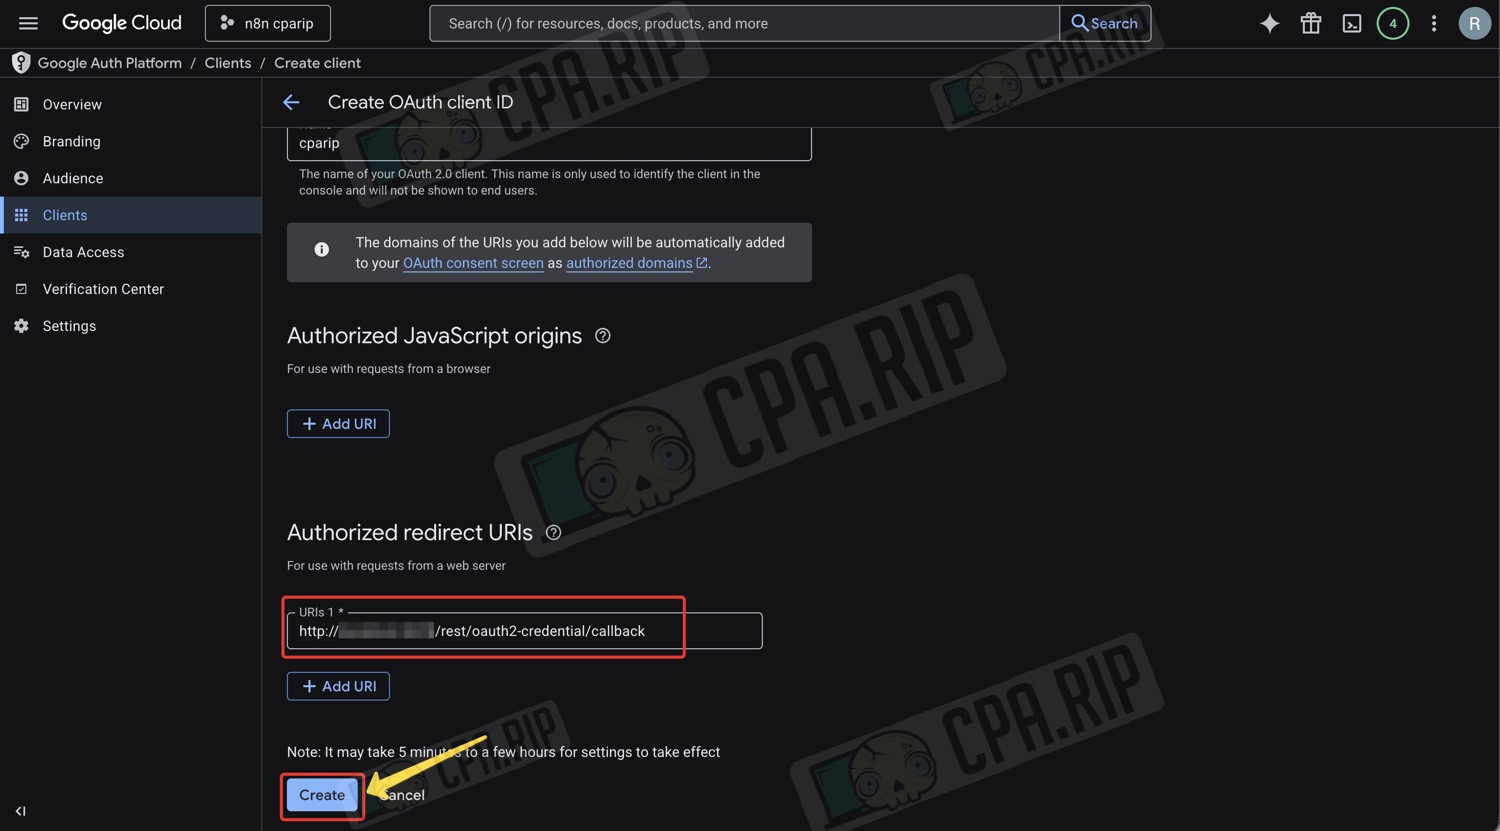
- Return to Google Cloud
- Paste the link you copied into the field shown in the screenshot
- Click ‘Create’
- From the modal window, copy the ‘Client ID’ and ‘Client secret’
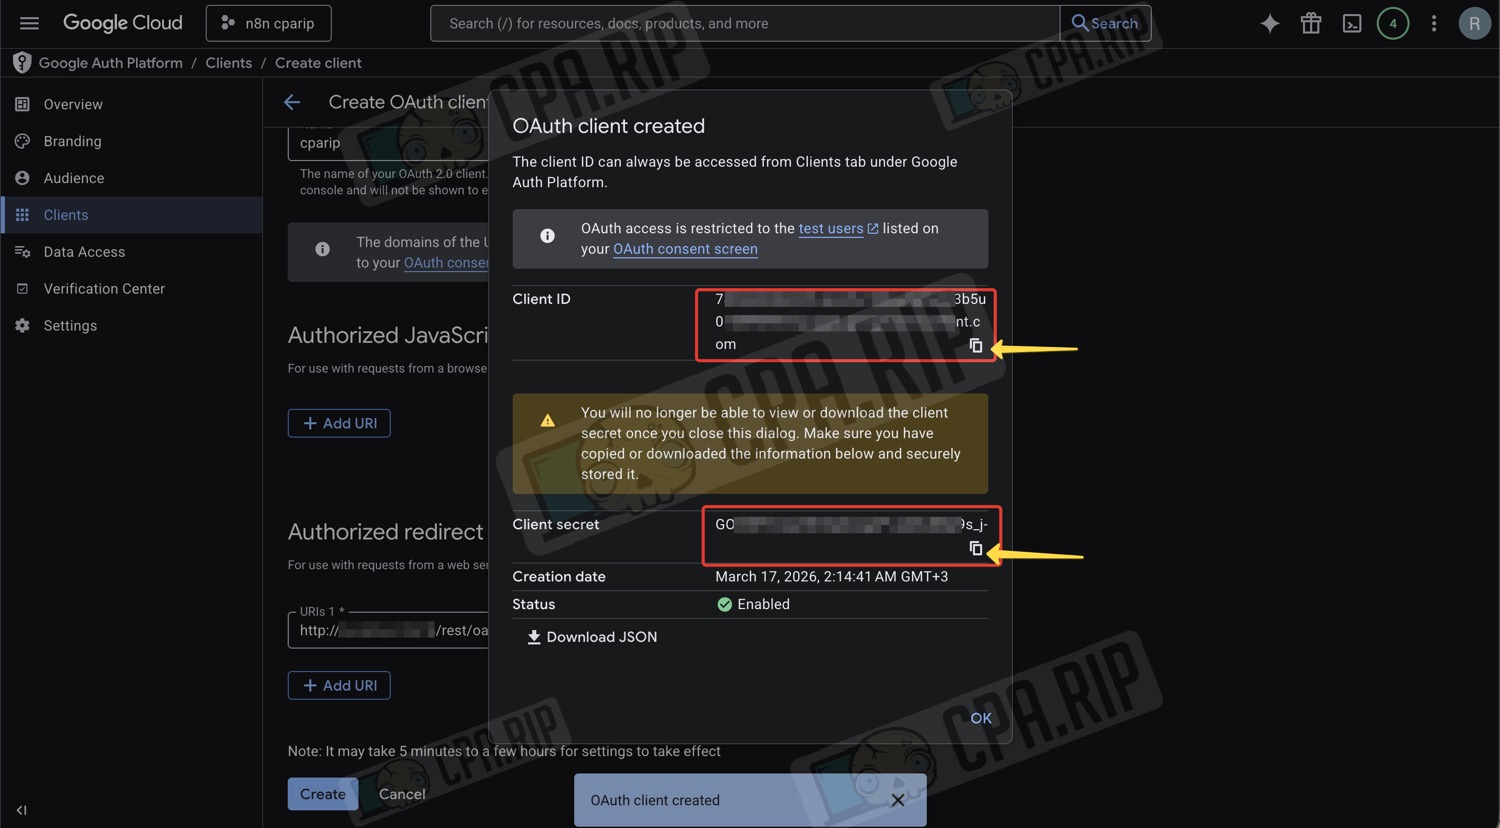
The tokens you receive will only be valid for 7 days, after which you will need to manually perform a Reconnect.
Configuring n8n credentials
You now need to configure the credentials in the project using the API keys you have received.
Apify credentials
- Double-click on the ‘Run Ad Library Scraper’ node
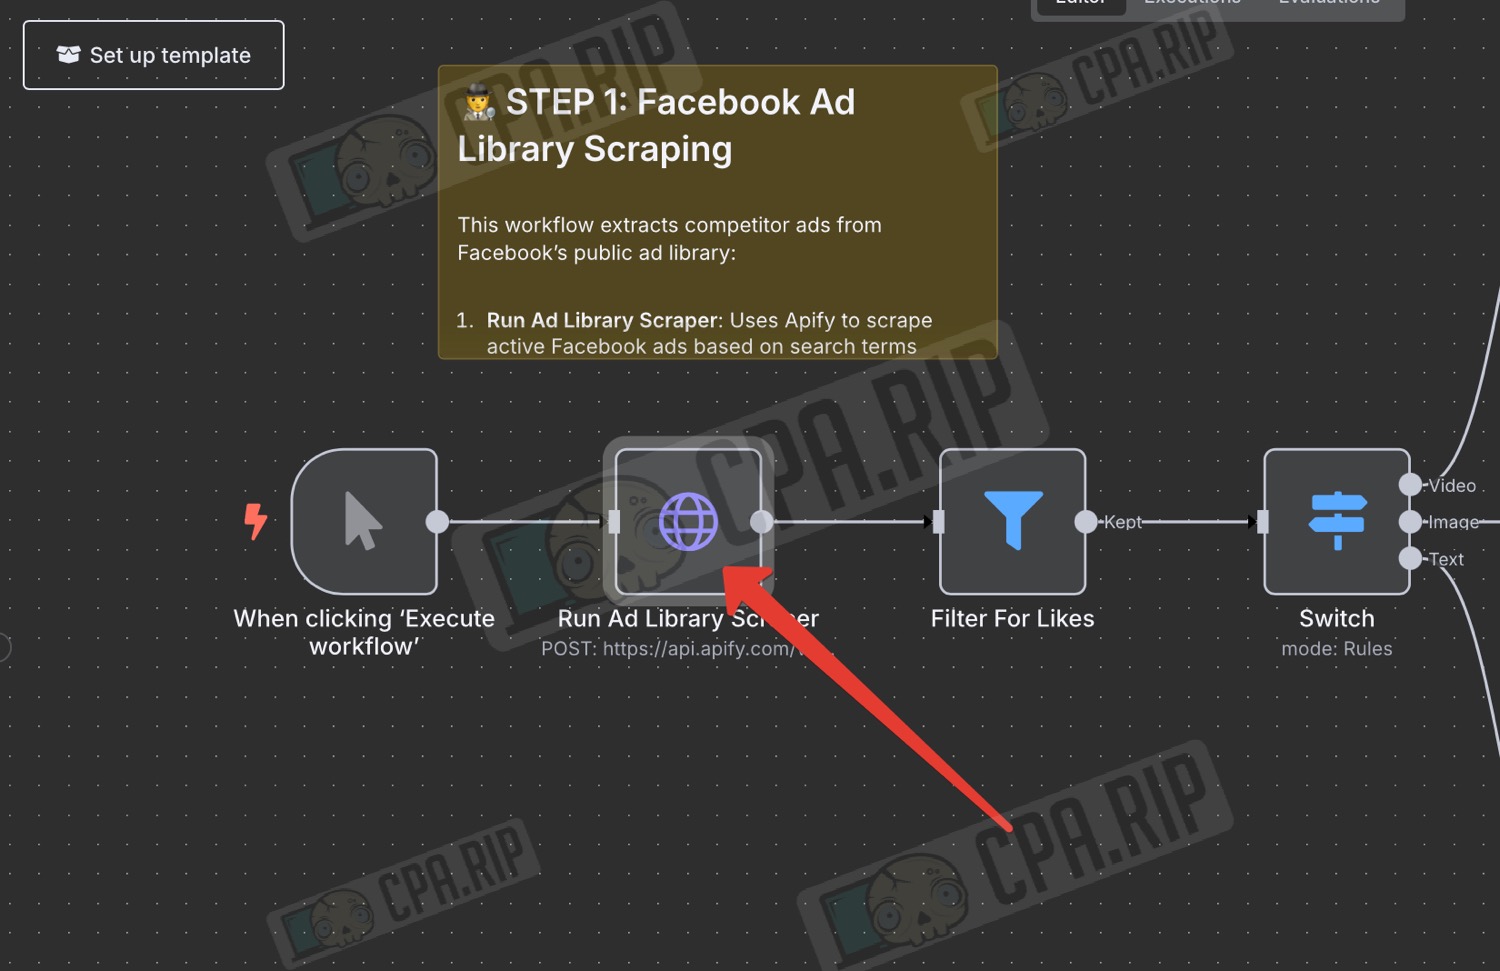
- In the settings window that opens, locate the ‘Value’ field under ‘Header Parameters’
- After the word ‘Bearer’, followed by a space, enter the Apify API token you obtained earlier in place of ‘<yourApiKey>’
- You can click ‘Execute step’ to test whether this node works; the result will be displayed in the ‘OUTPUT’ section on the right
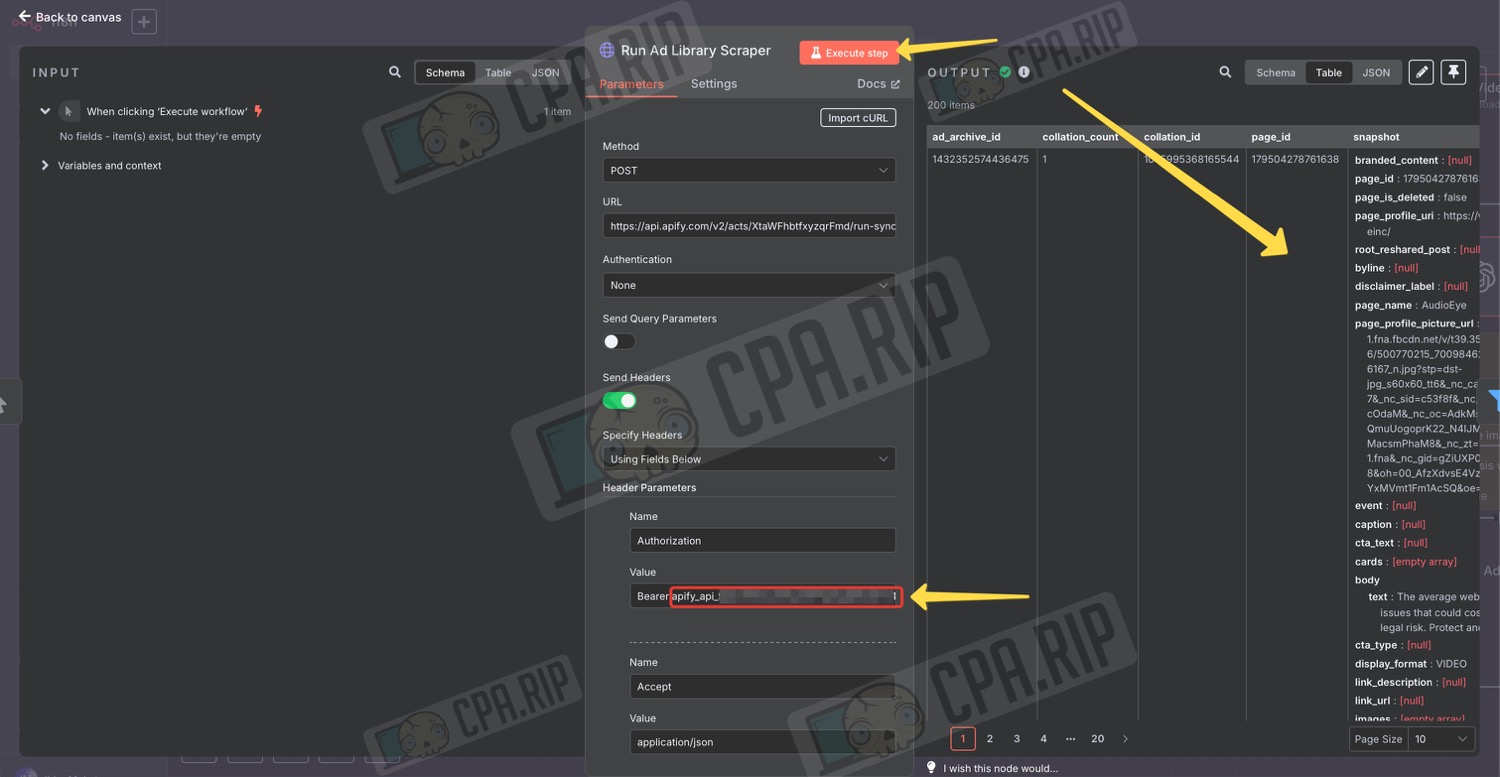
- Close the settings window by clicking ‘Back to canvas’
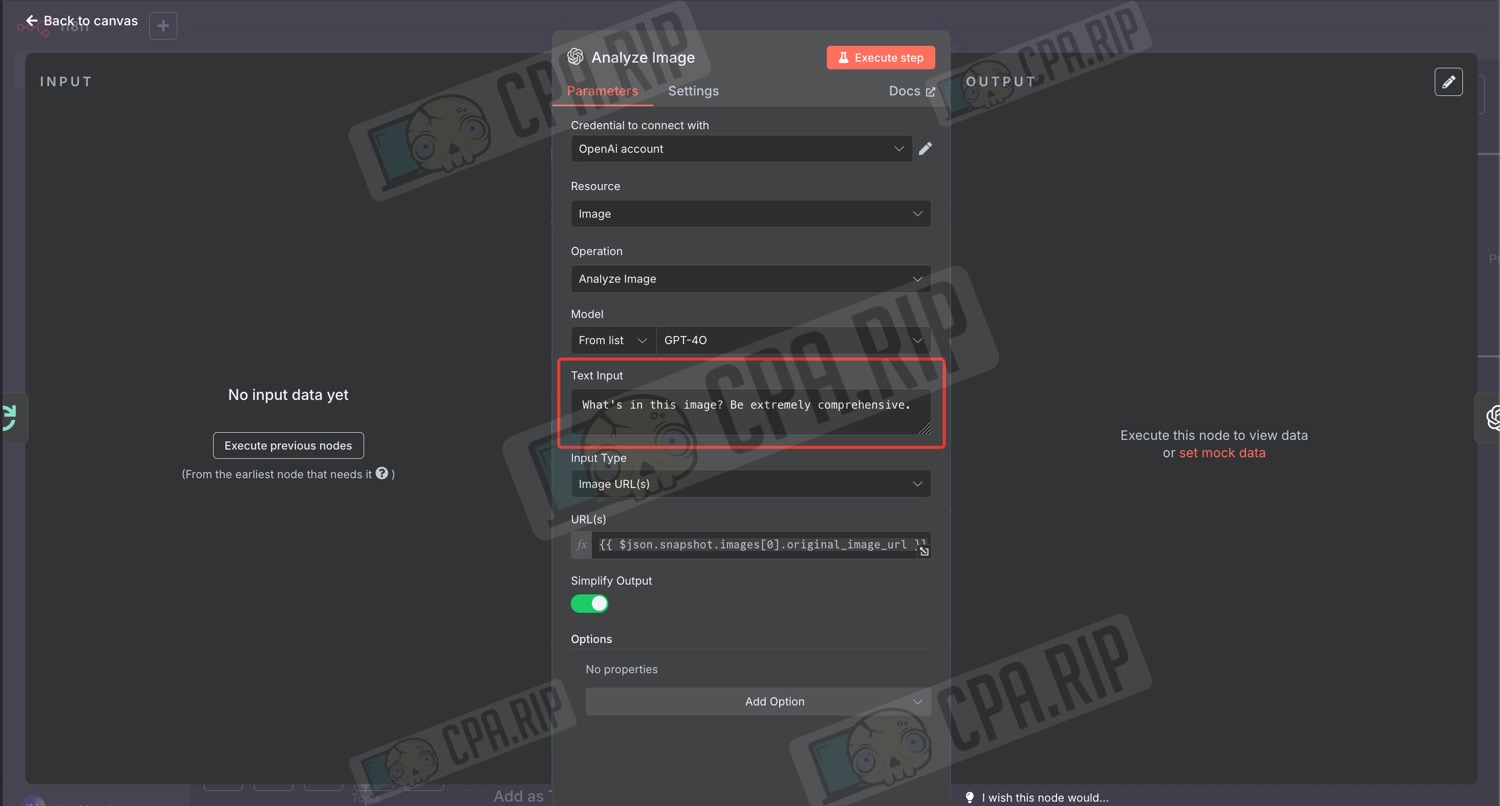
OpenAI credentials
- Find a node with the OpenAI icon, for example ‘Analyze Image’, and double-click on it
- Click on the ‘Credential to connect with’ field
- Click ‘Create new credential’
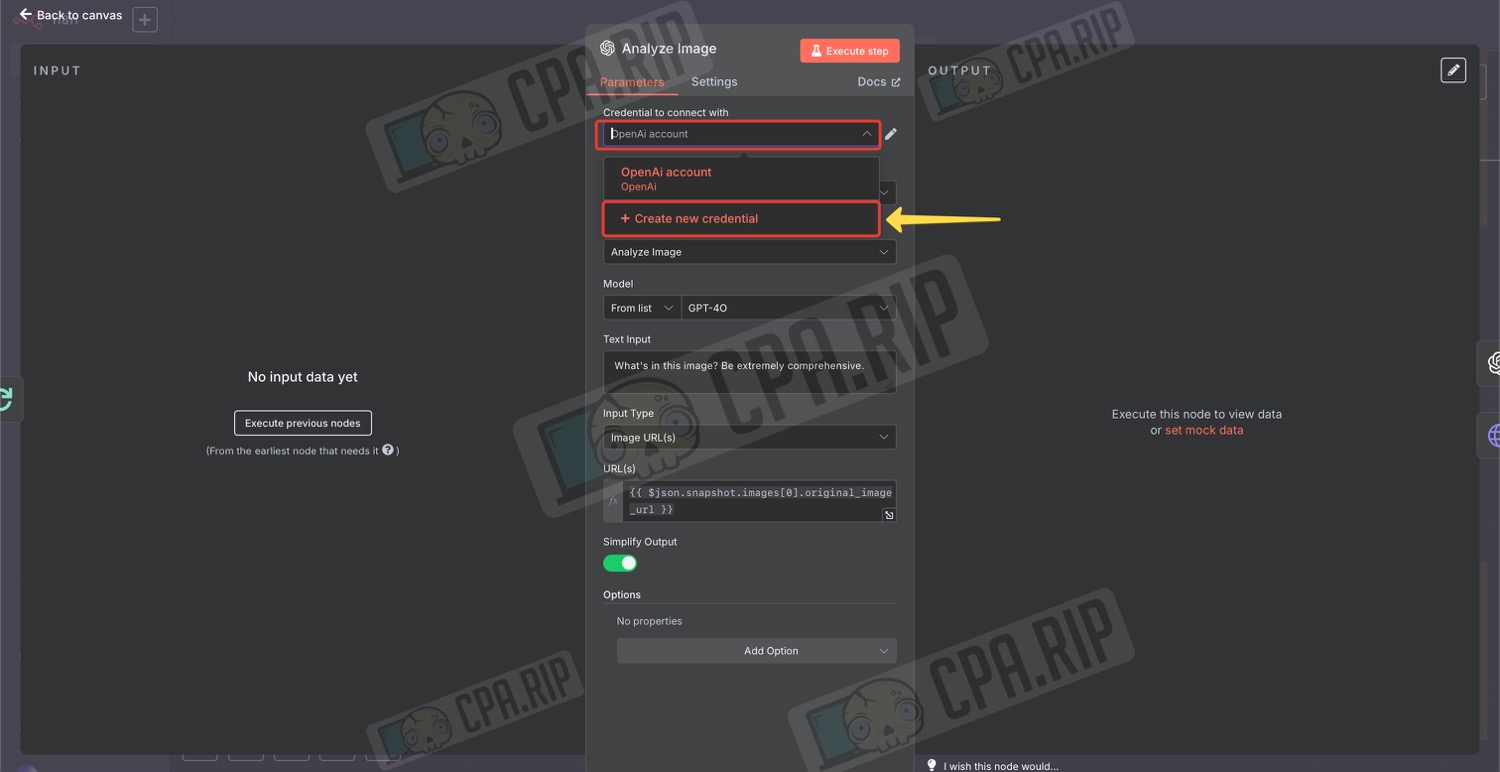
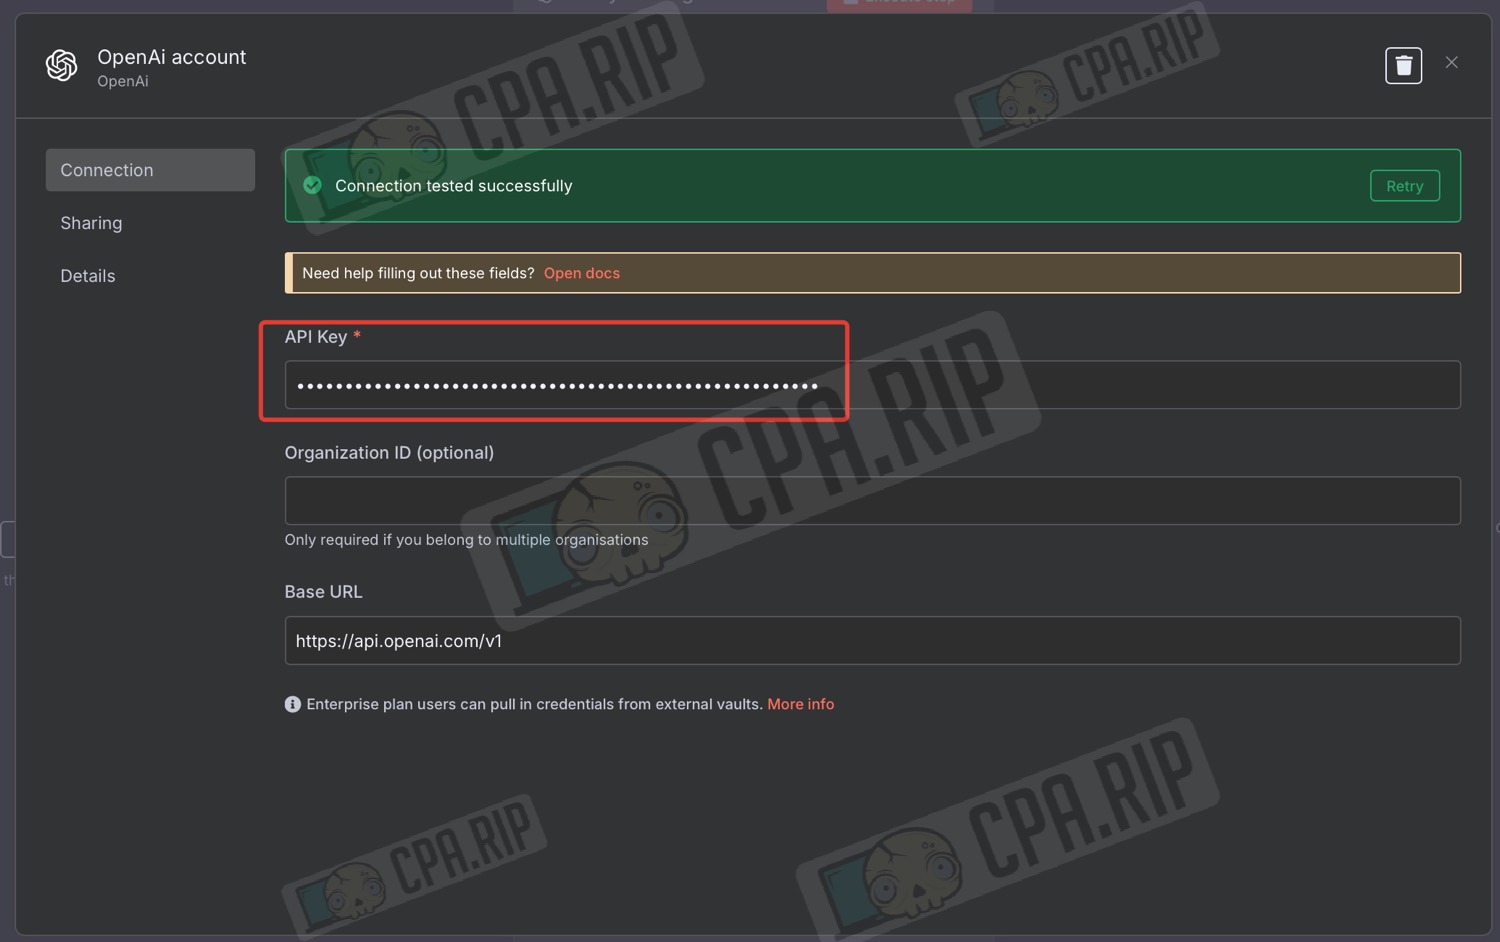
- Next, in the ‘API Key’ field, enter the OpenAI API key you obtained earlier
Gemini Credentials
The Gemini API key must be added to the following nodes:
- ‘Begin Gemini Upload Session’
- ‘Upload Video to Gemini’
- ‘Analyze Video with Gemini’
- To do this, double-click on the node
- In the settings window, in the ‘Value’ field under ‘Query Parameters’, replace <yourApiKey> with the Gemini API key you obtained earlier
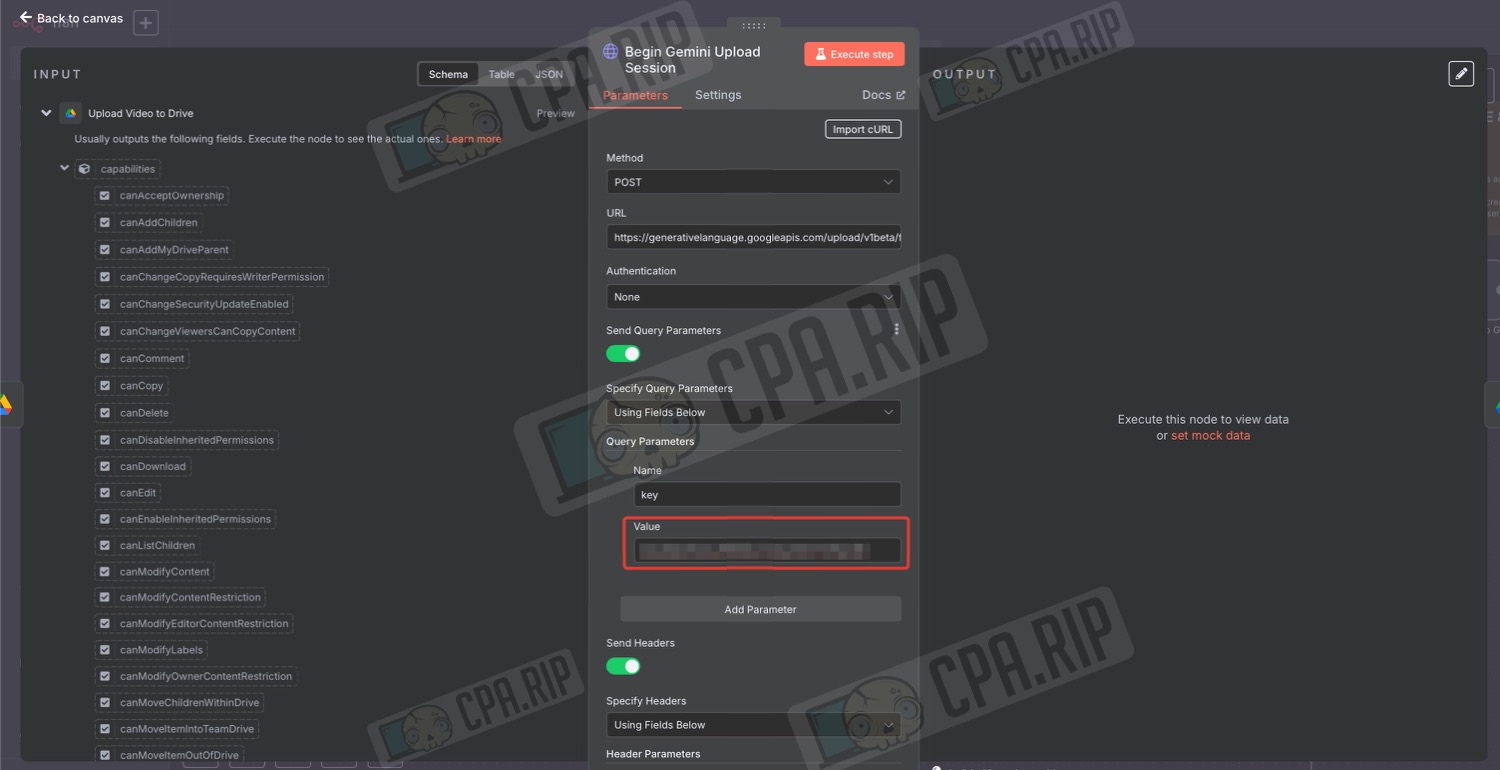
- Do the same for all the necessary nodes.
The following error may occur:
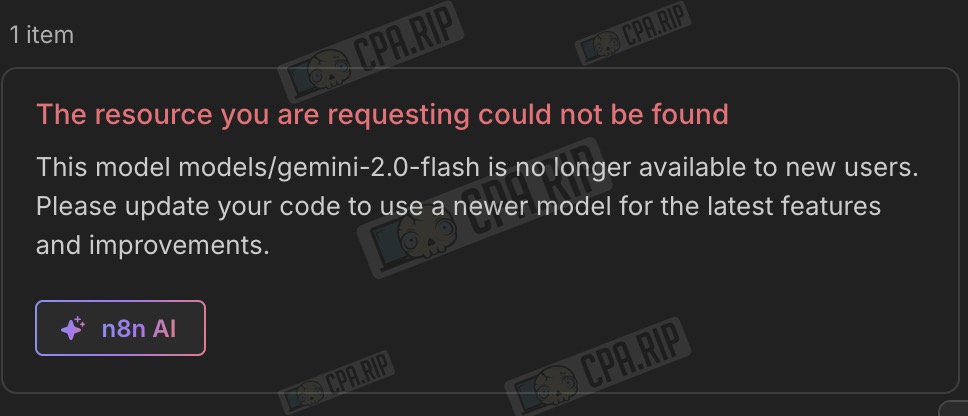
To resolve the issue, you need to replace the URL with the Gemini model available to you:
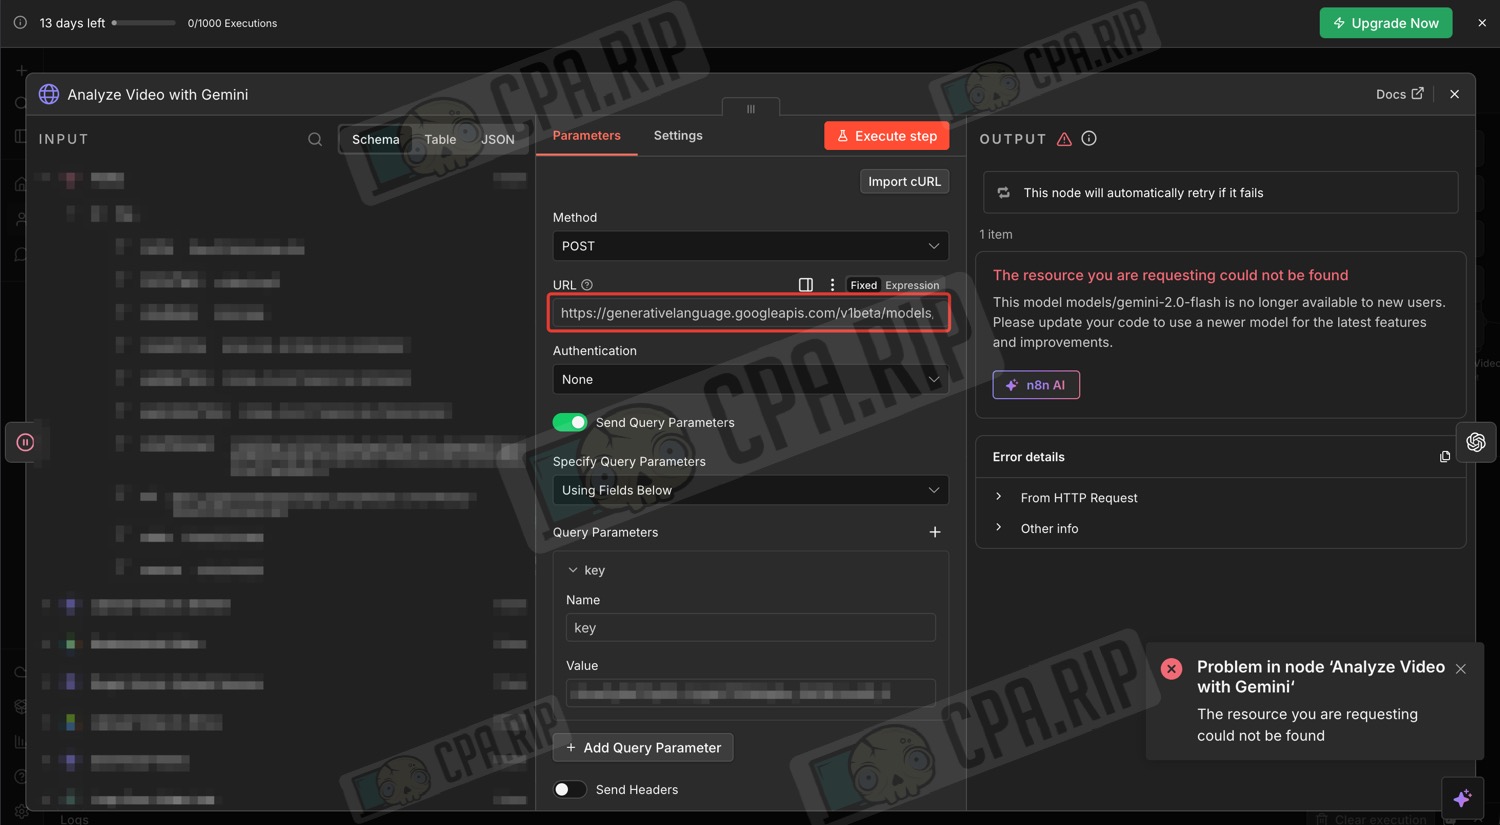
- Follow the link (from a supported country!), substituting your API key: https://generativelanguage.googleapis.com/v1beta/models?key=YOUR_API_KEY — information on available models will open.
- Substitute the name of a supported model from the list, for example, gemini-3.1-pro-preview, into the link https://generativelanguage.googleapis.com/v1beta/models/MODEL_NAME:generateContent.
- Replace the link in the node with the one you have obtained.
Google credentials
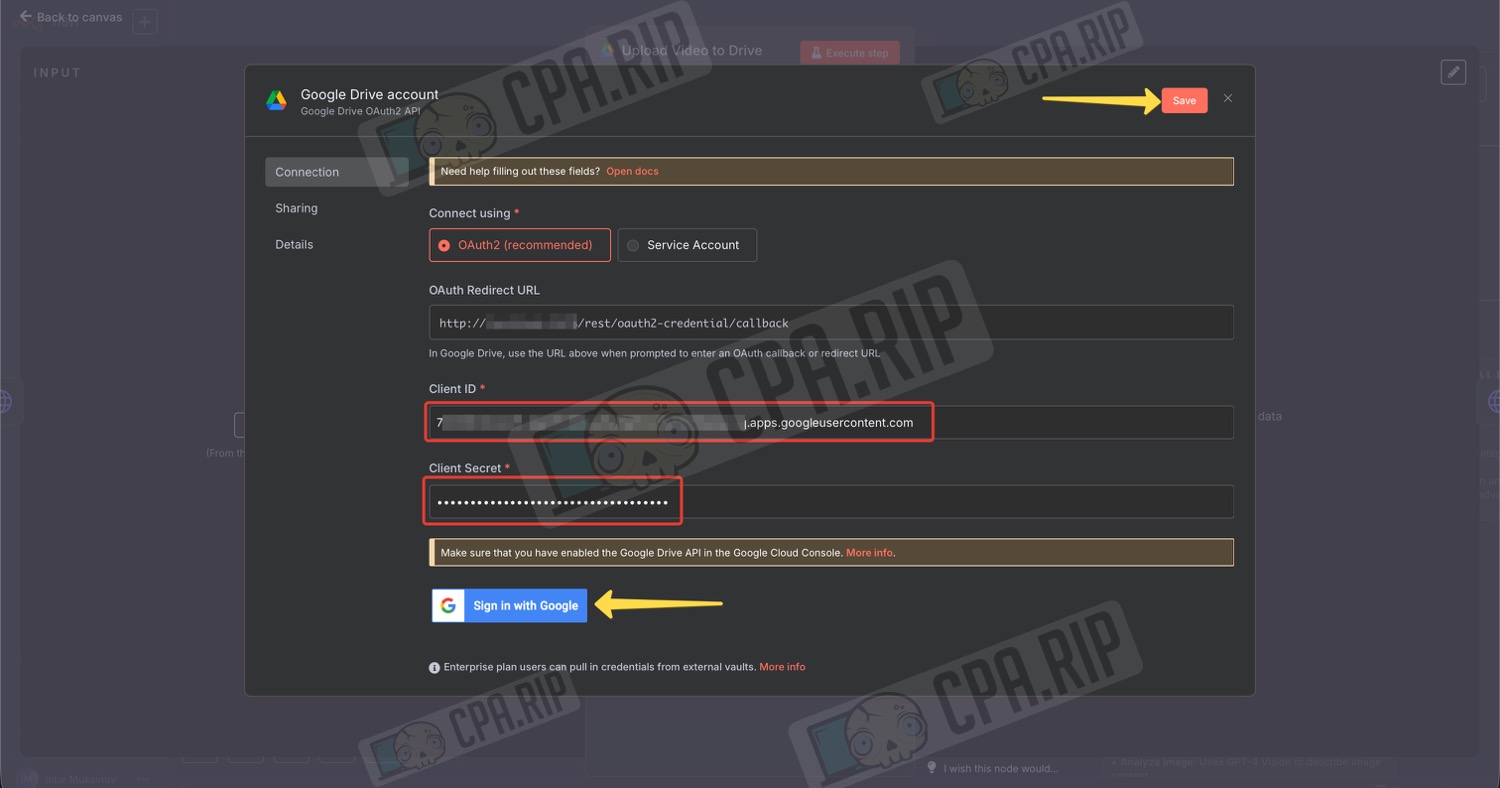
- Find the Google Drive node in the project
- Double-click to open it
- Enter the ‘Client ID’ and ‘Client Secret’ obtained from the Google Cloud Console
- Click ‘Save’
- Click ‘Sign in with Google’
In n8n cloud, simply click the ‘Sign in with Google’ button to log in.
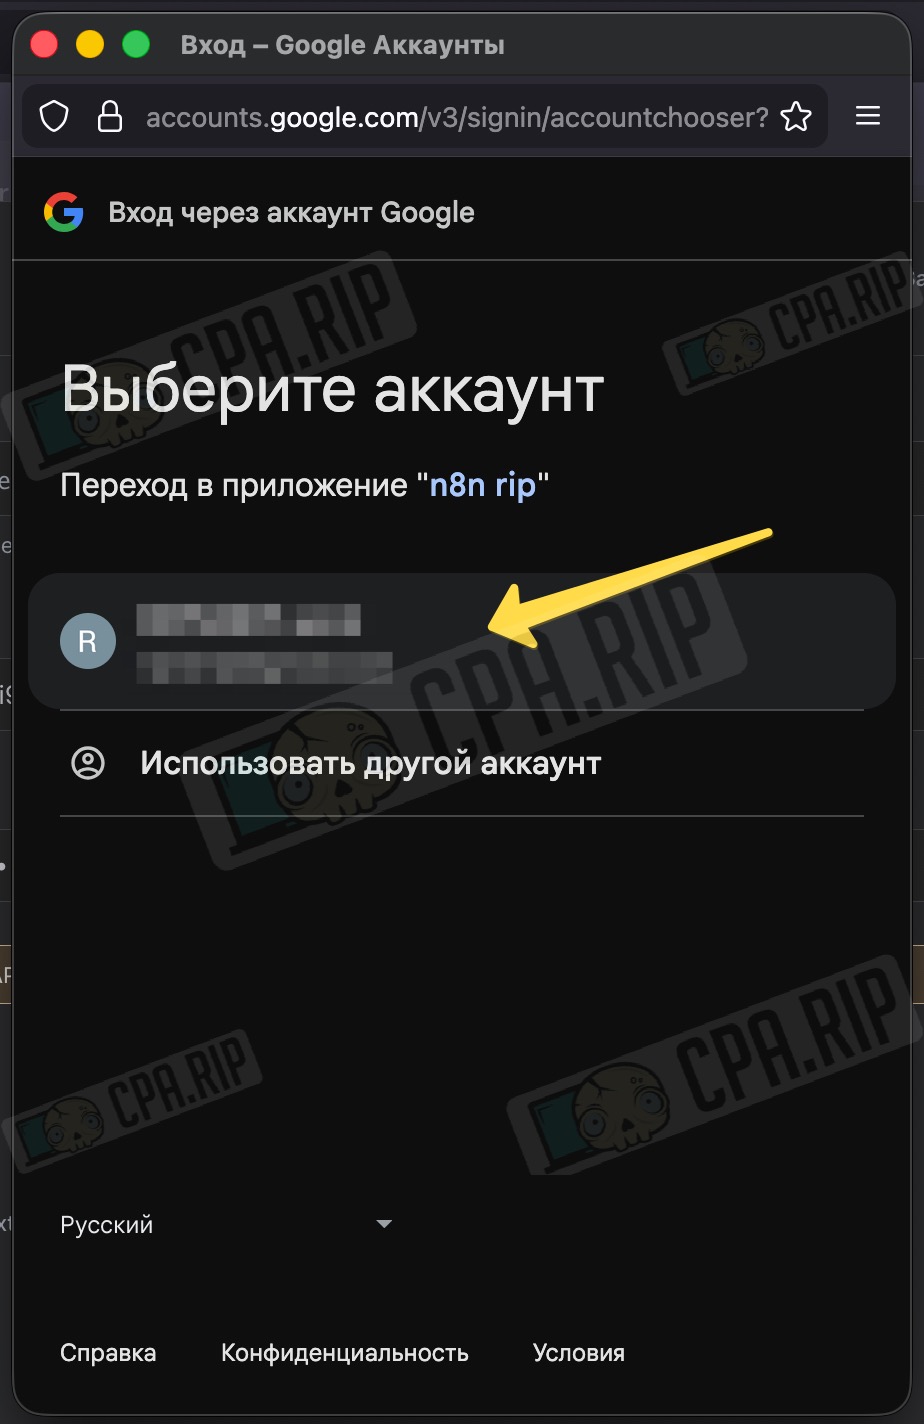
- In the pop-up window, select your account
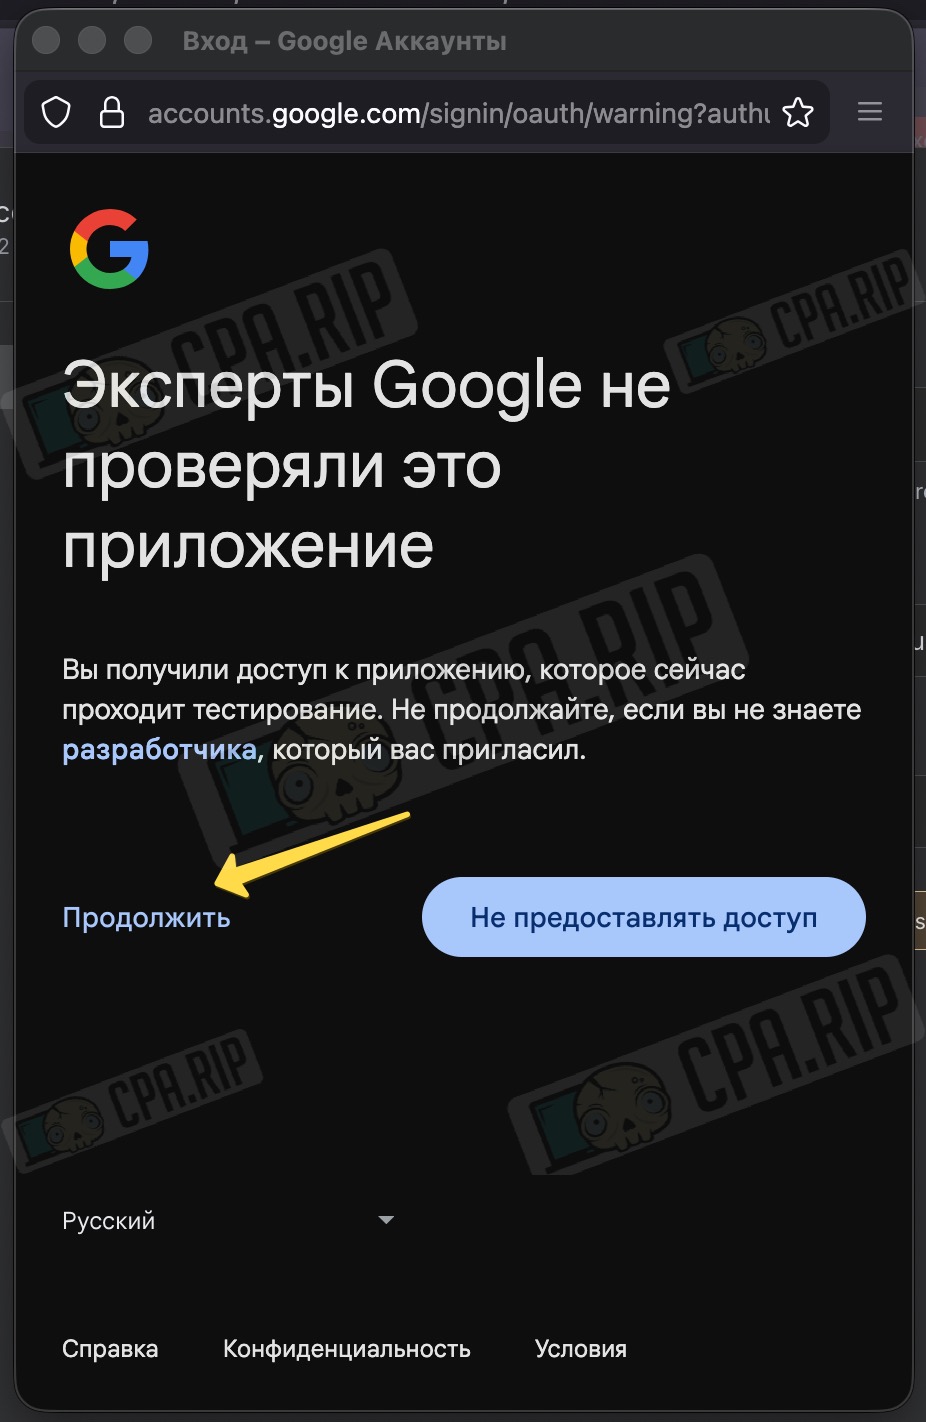
- Click ‘Continue’
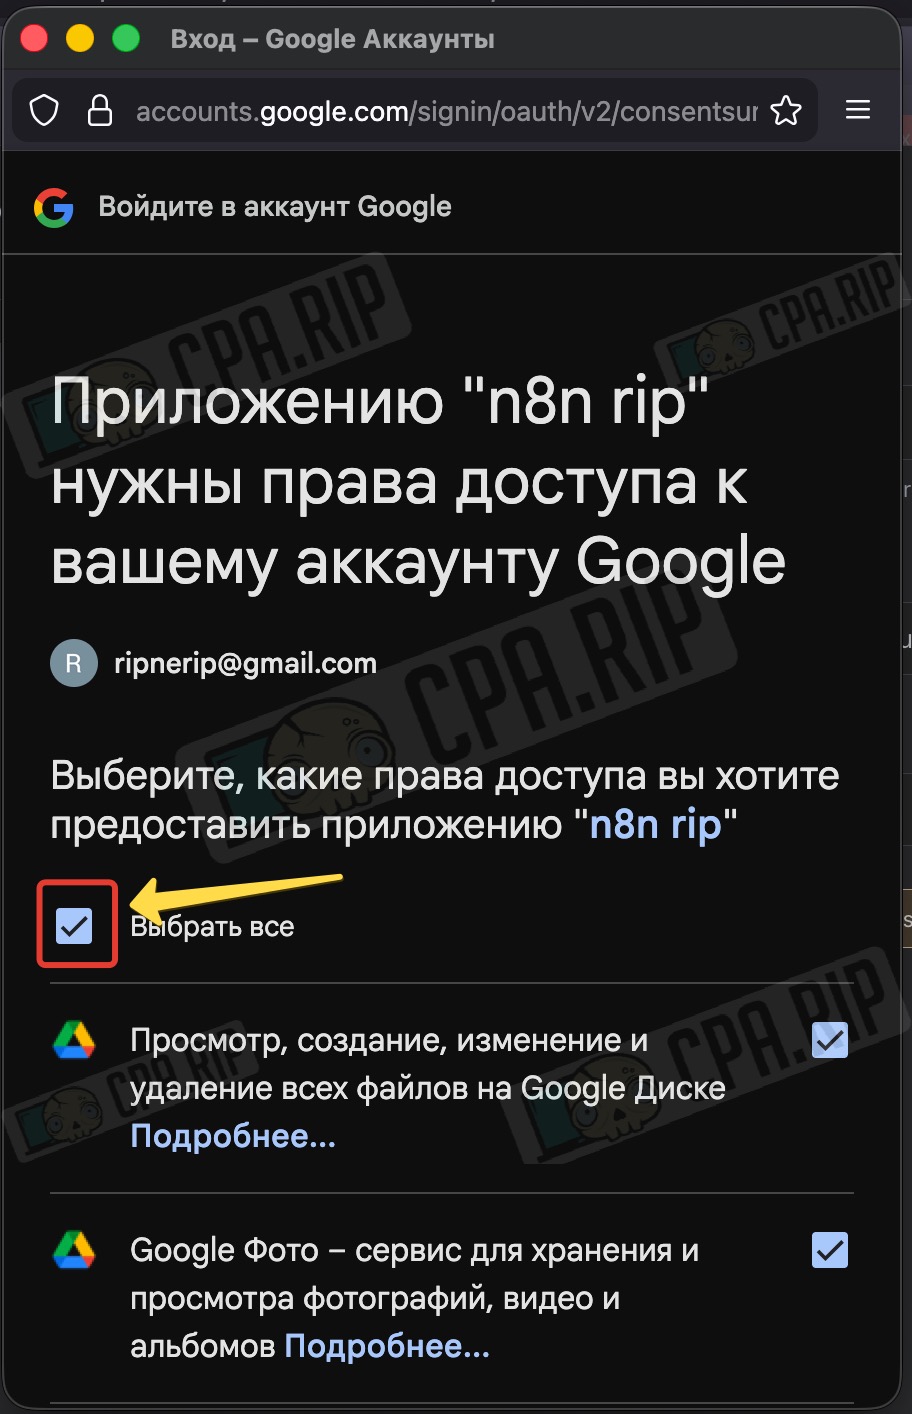
- Tick the ‘Select all’ box to grant all the necessary permissions
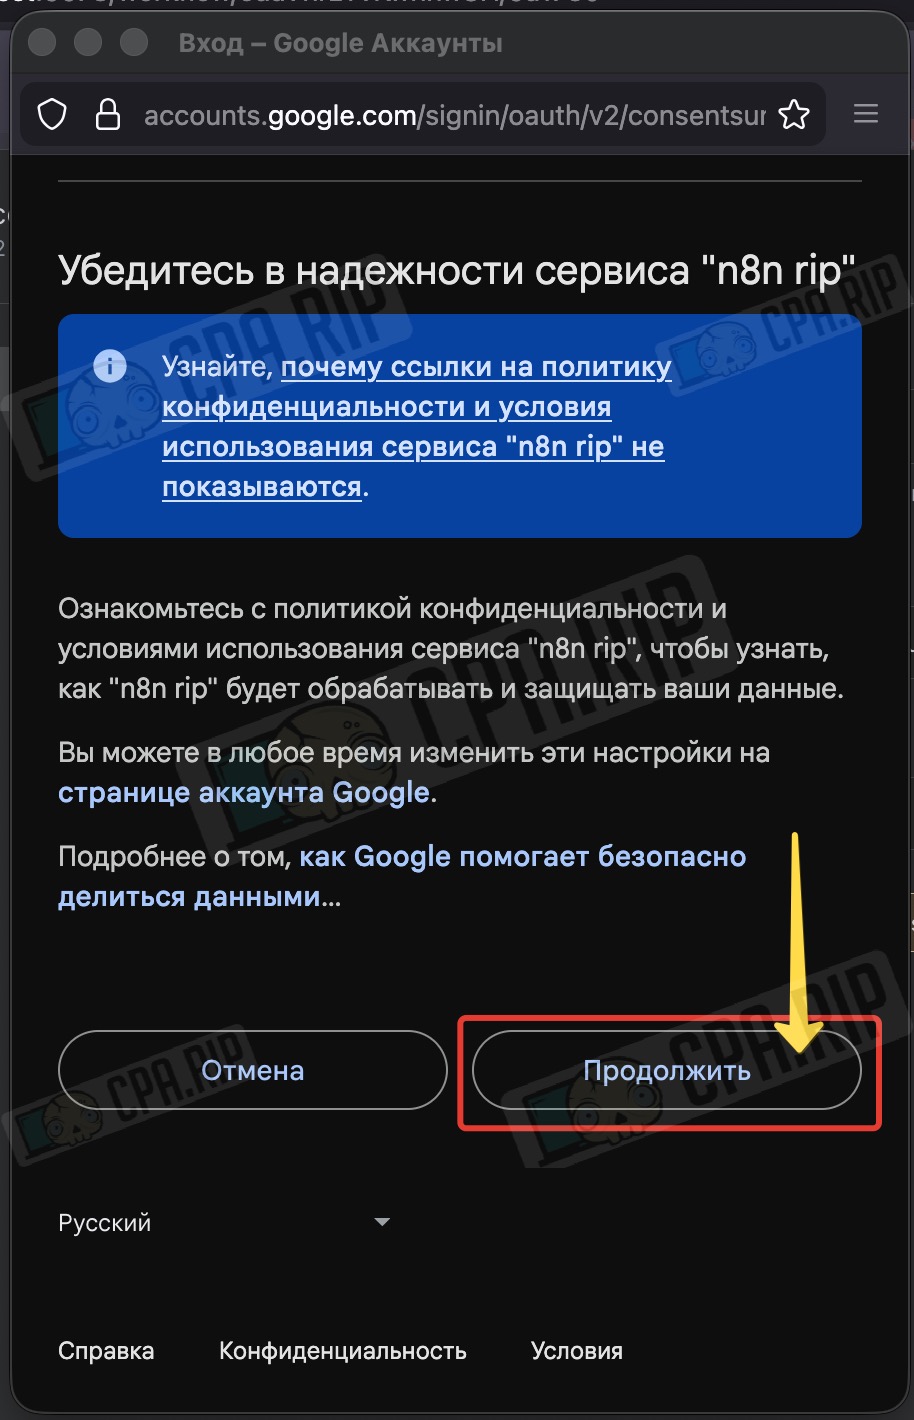
- Click ‘Continue’
- If the connection is successful, you will see the following message:
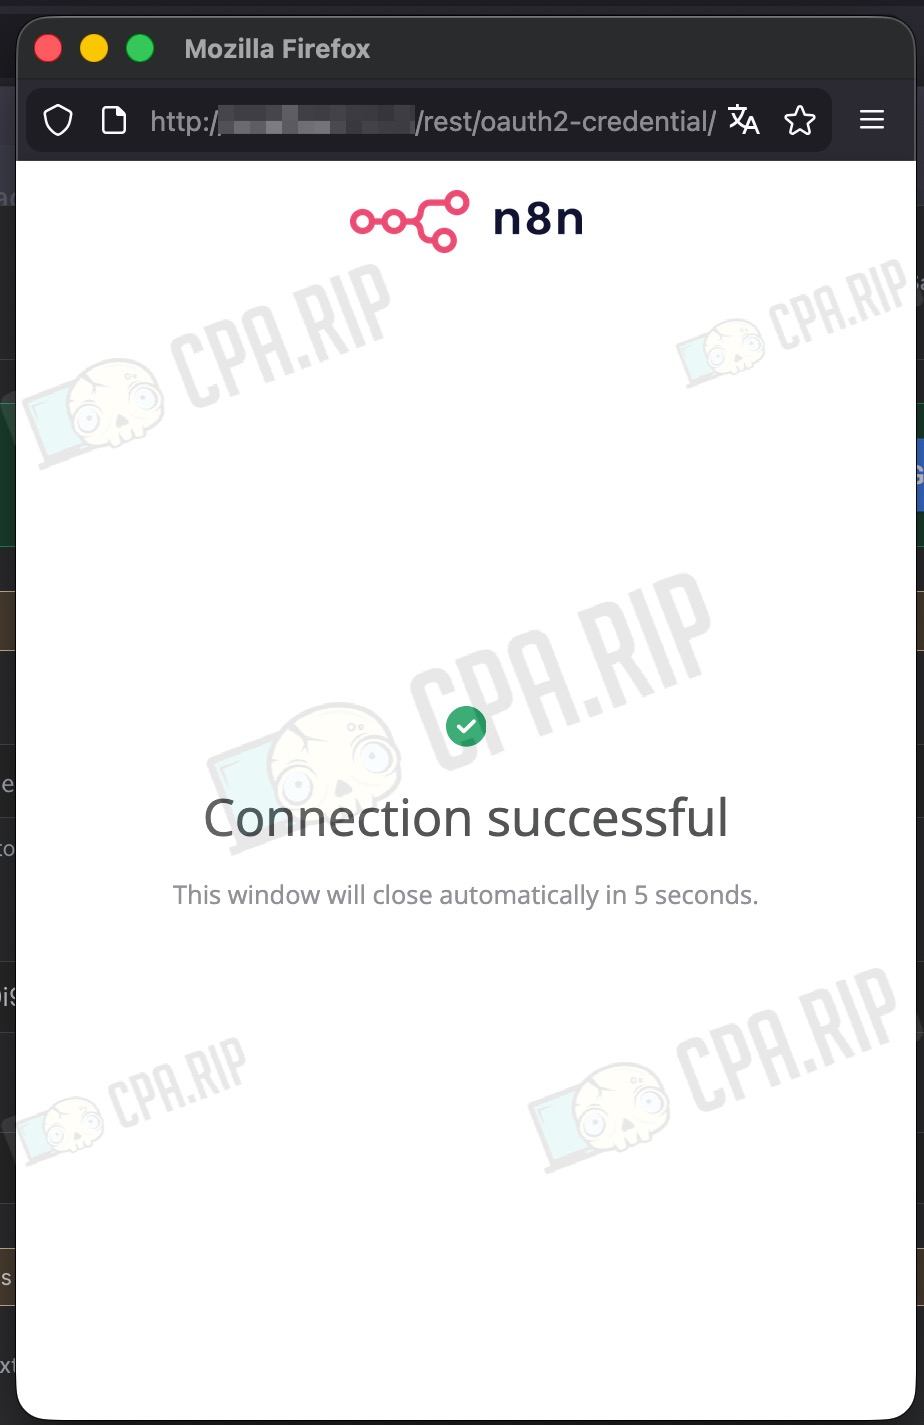
As mentioned earlier, connection to Google services is made via the same Google OAuth; in other words, by setting up credentials for Google Drive now, we have already configured Google Sheets.
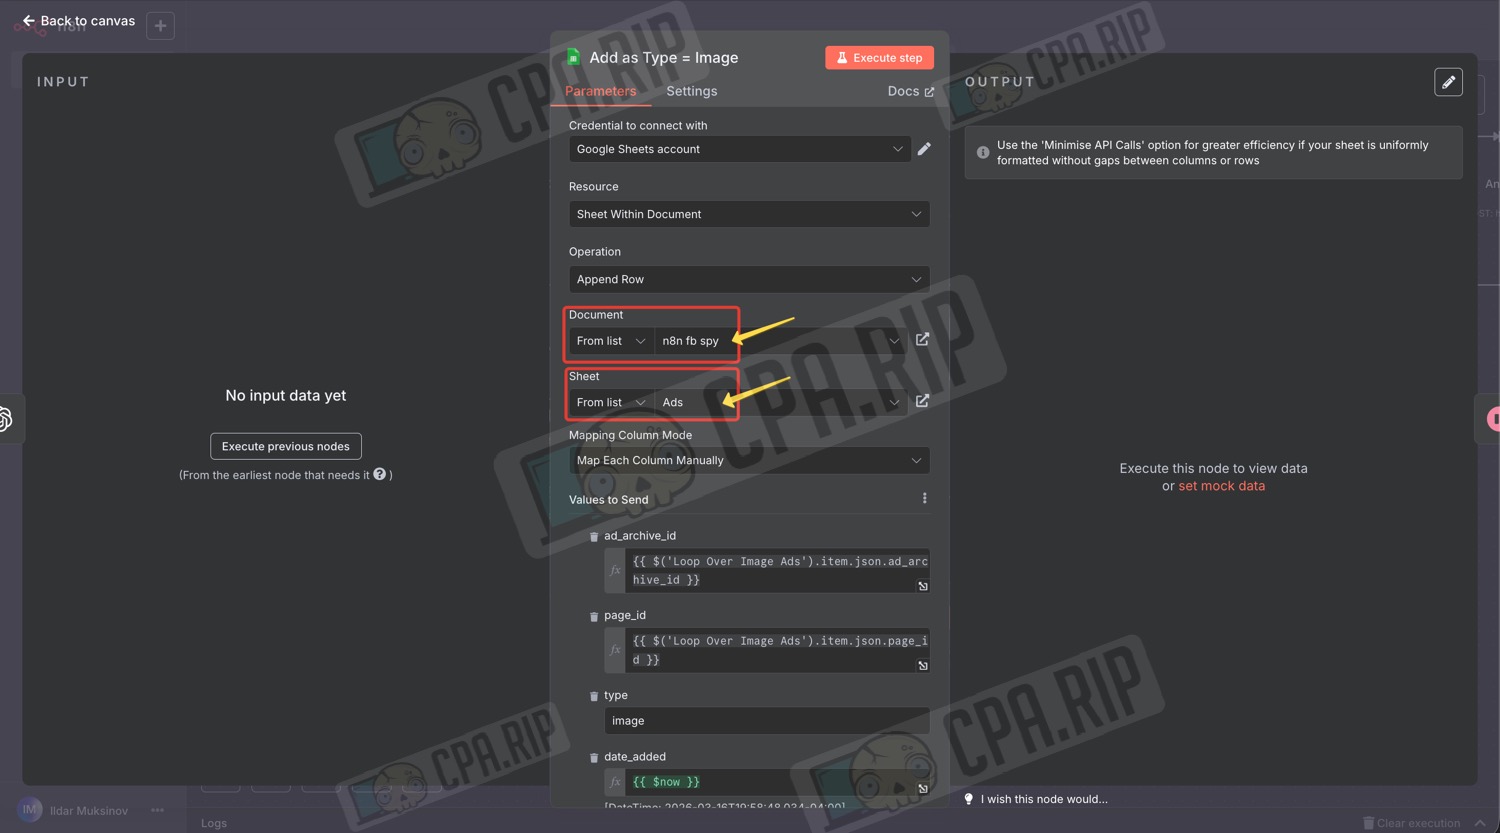
Next, in the nodes with Google Sheets, you need to specify the spreadsheet for recording results, which we prepared earlier.
- To do this, open all the nodes with Google Sheets one by one

- Under ‘Credential to connect with’, ‘Google Sheets account’ must be selected
- Under ‘Document’, select the spreadsheet you prepared for the project from the drop-down list of spreadsheets in your Google account
- Under ‘Sheet’, select the required sheet from this document
- Click the button with three dots next to ‘Value to Send’
- In the drop-down menu, click ‘Refresh Column List’
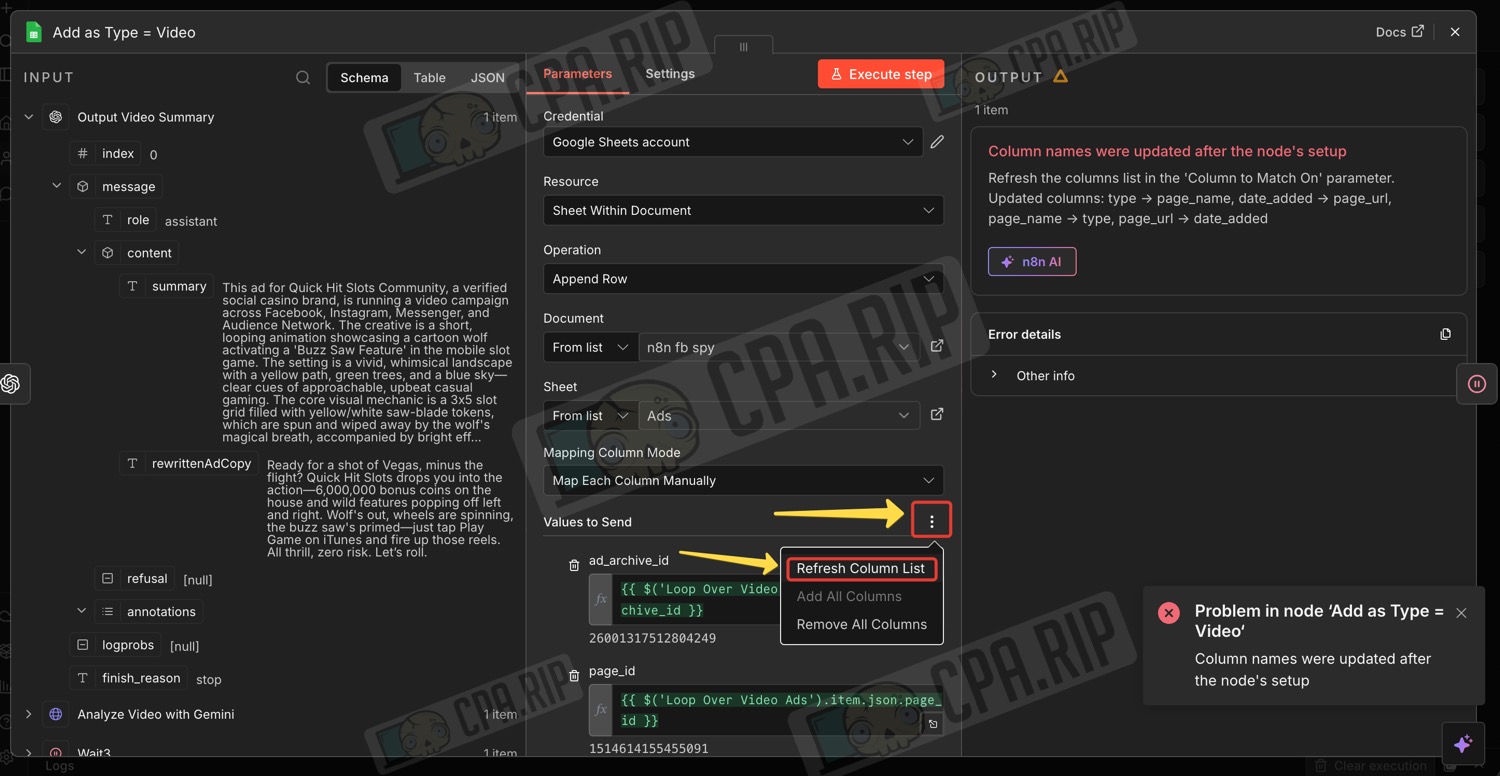
If necessary, do the same for the remaining table nodes.
Running the parsing project
Once all credentials have been configured, return to the parsing settings and run the project by clicking ‘Execute workflow’
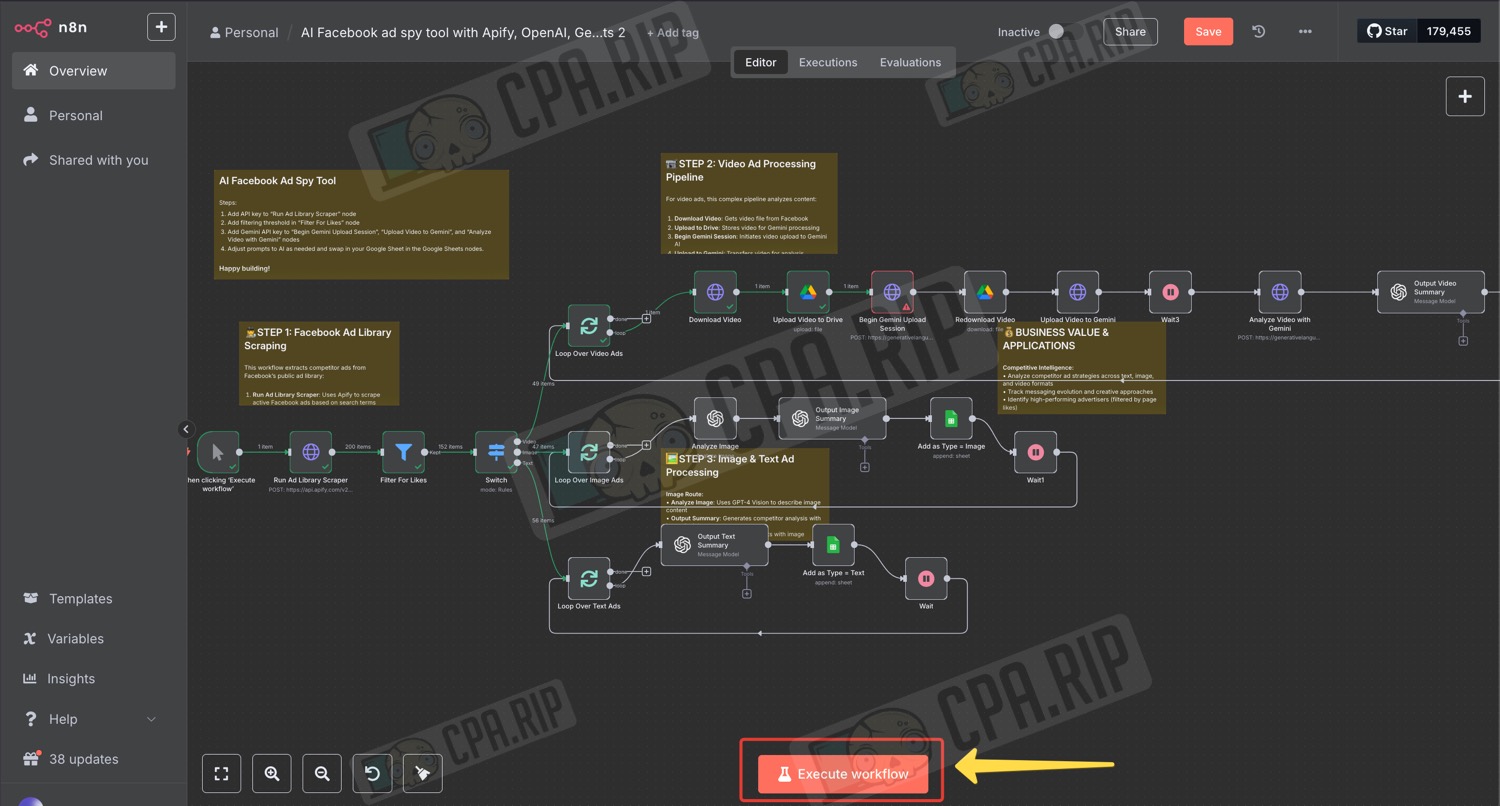
The results will be saved in the Google Sheet specified in the project. If you wish, you can customise the project to suit your needs by expanding its functionality.