Customise the transfer of only approved leads (specifically “sales”) from Keitaro 10.2 beta to Facebook Ads. In some cases it may be useful to send “sales” not “requests”.
Preparing a campaign in Keitaro
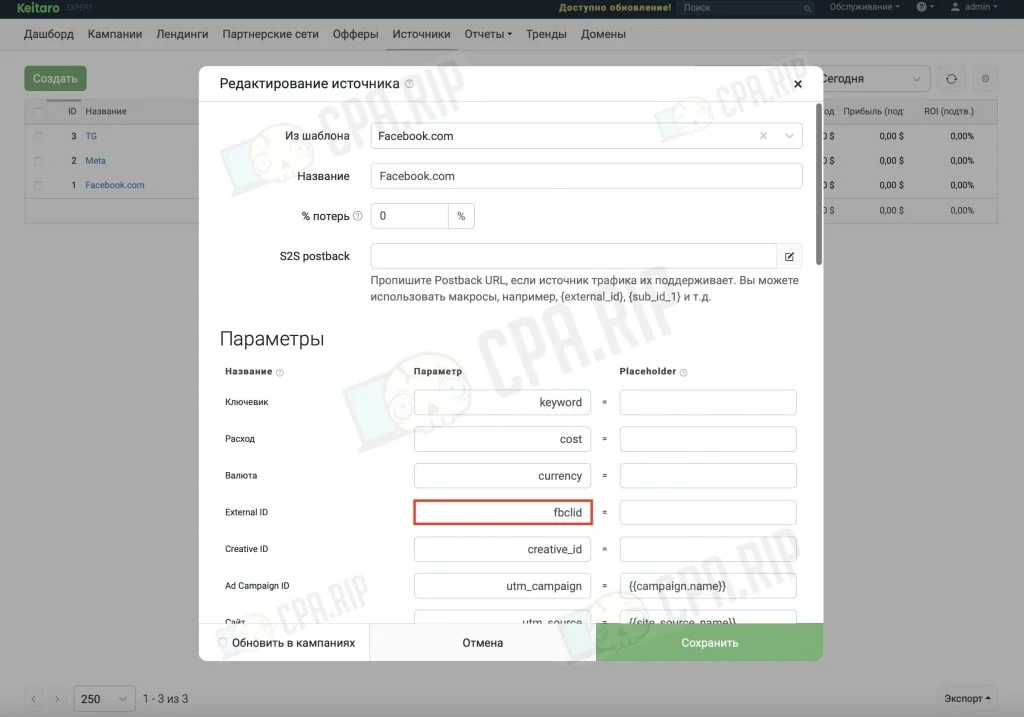
Create a “Facebook” source in Keitaro and make sure you have the fbclid parameter. Using the {fbclid} value is optional as Facebook automatically passes this parameter.
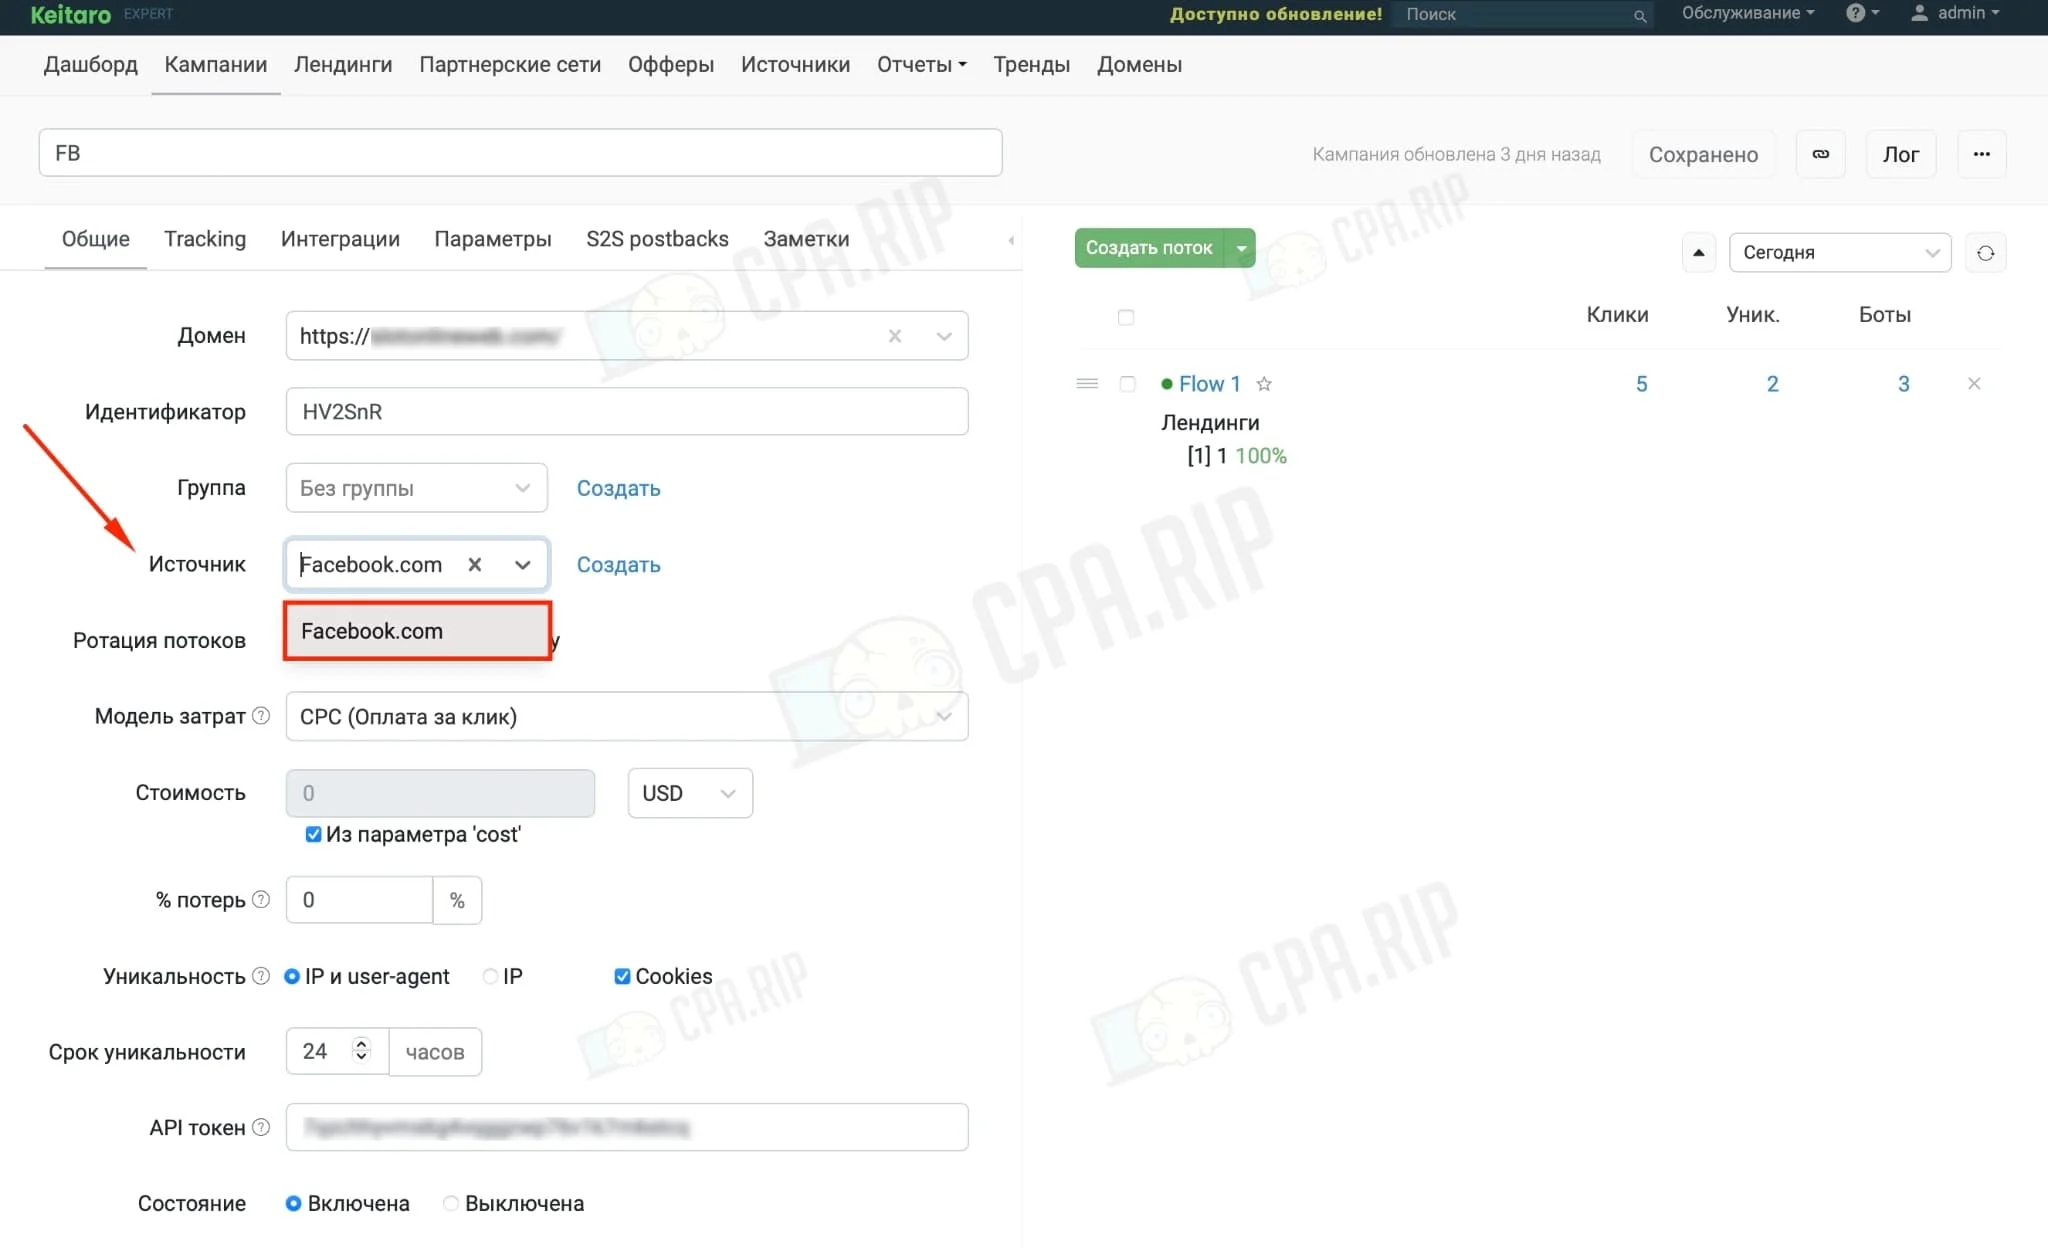
Create a campaign in Keitaro and specify the created “Facebook” course, don’t forget to save the campaign:
Keitaro Promo code for 22% off – CPARIP
Connecting your Facebook account to Keitaro
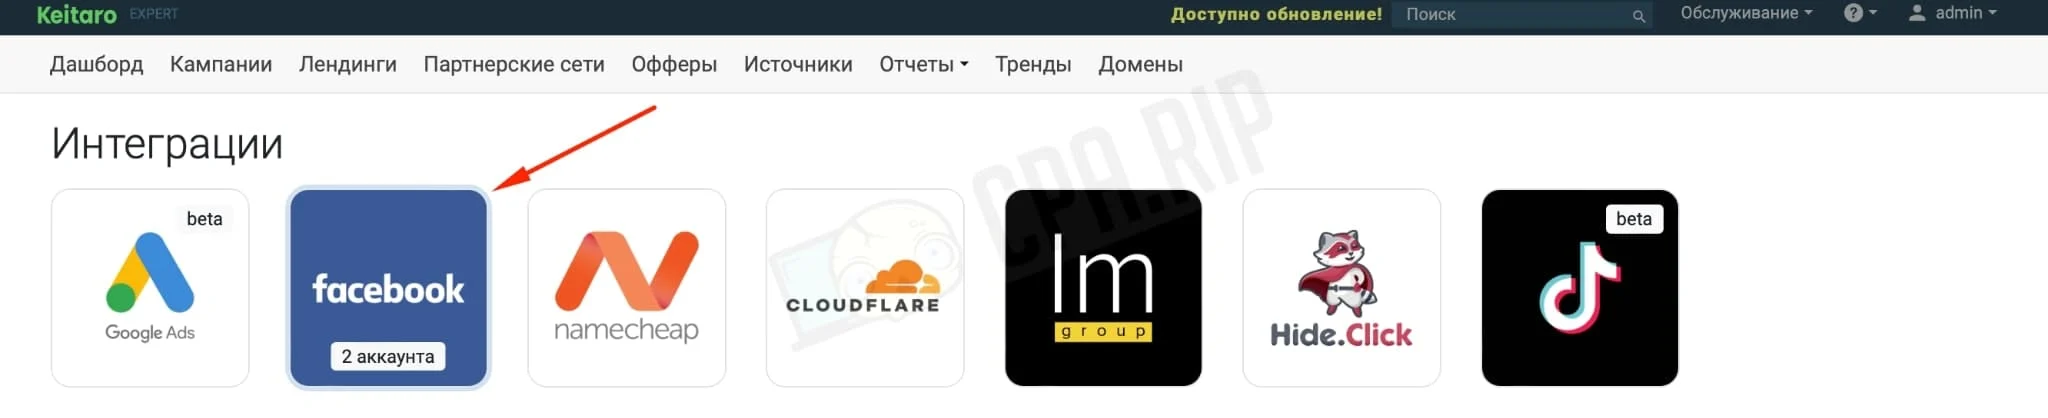
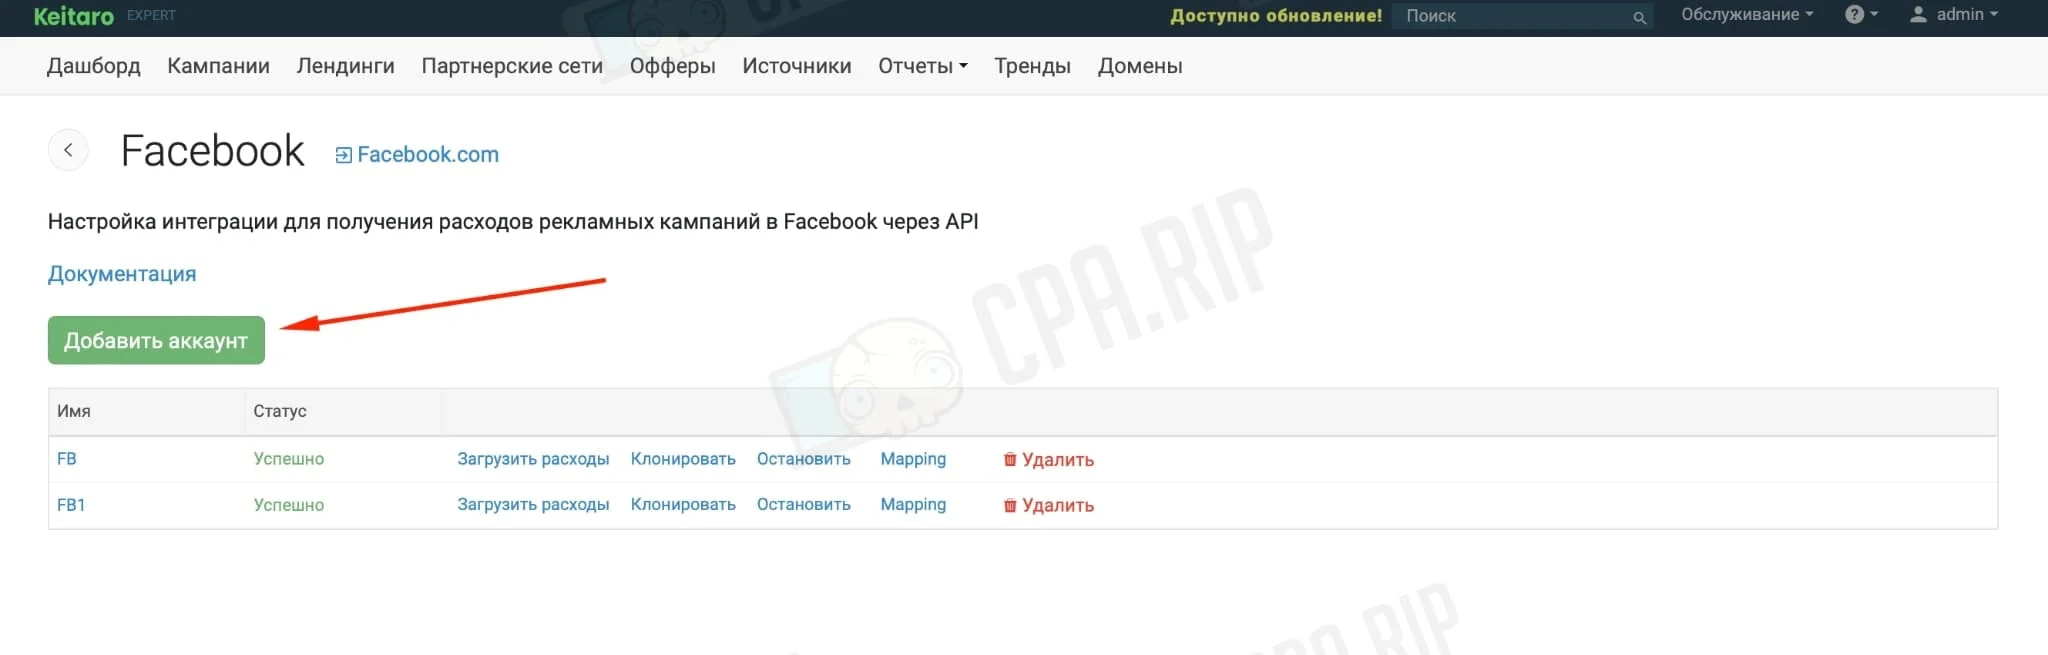
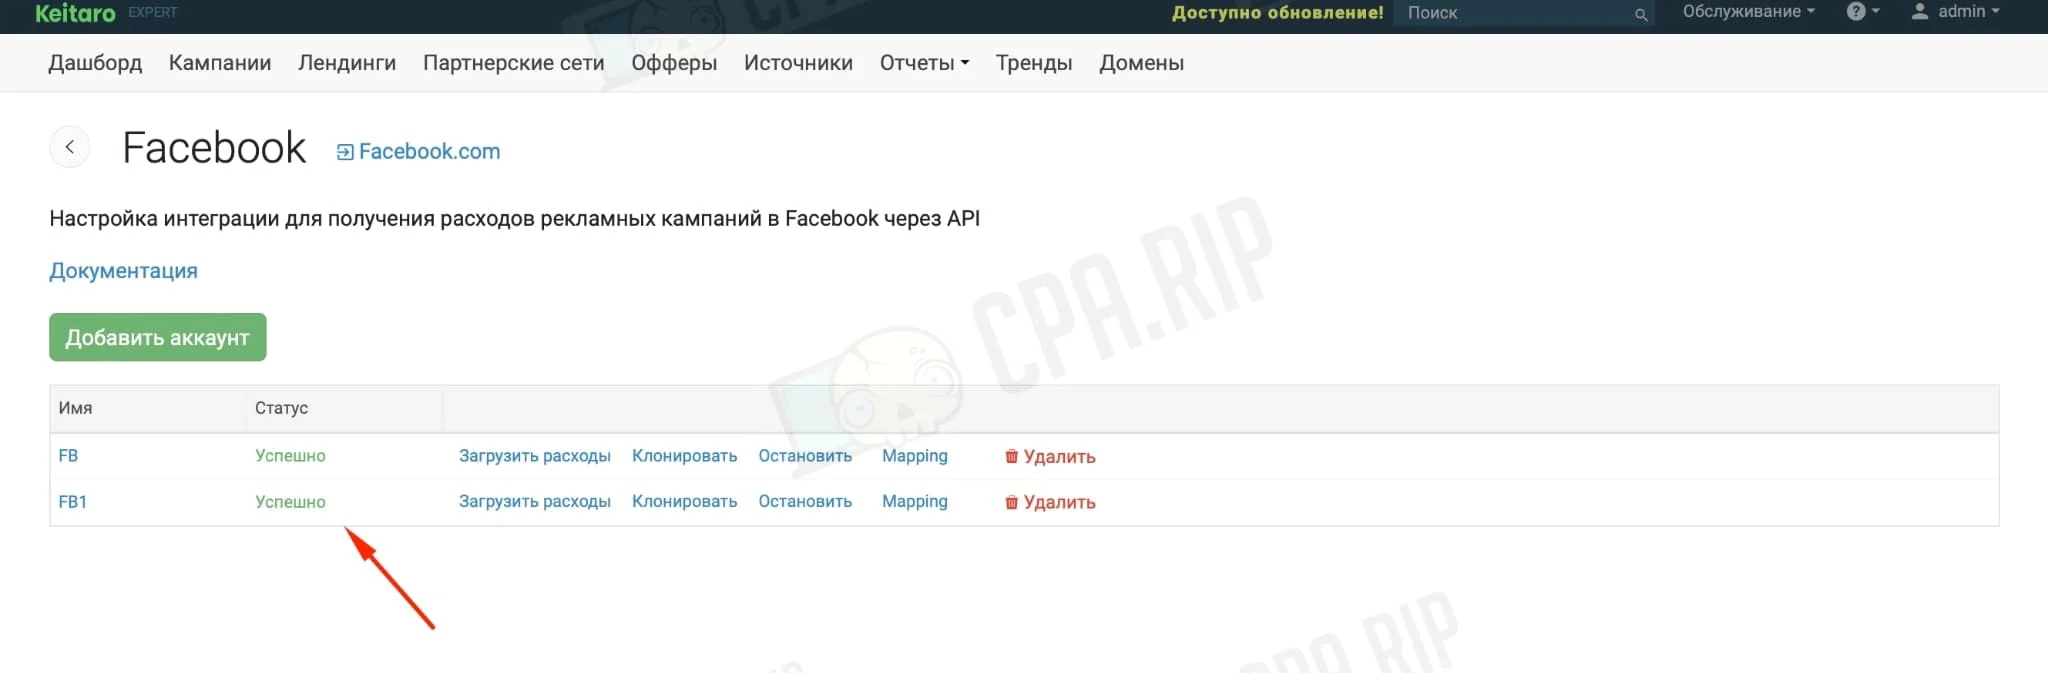
Open “Maintenance → Integrations” in Keitaro, select Facebook integration:
Click “Add Account”:
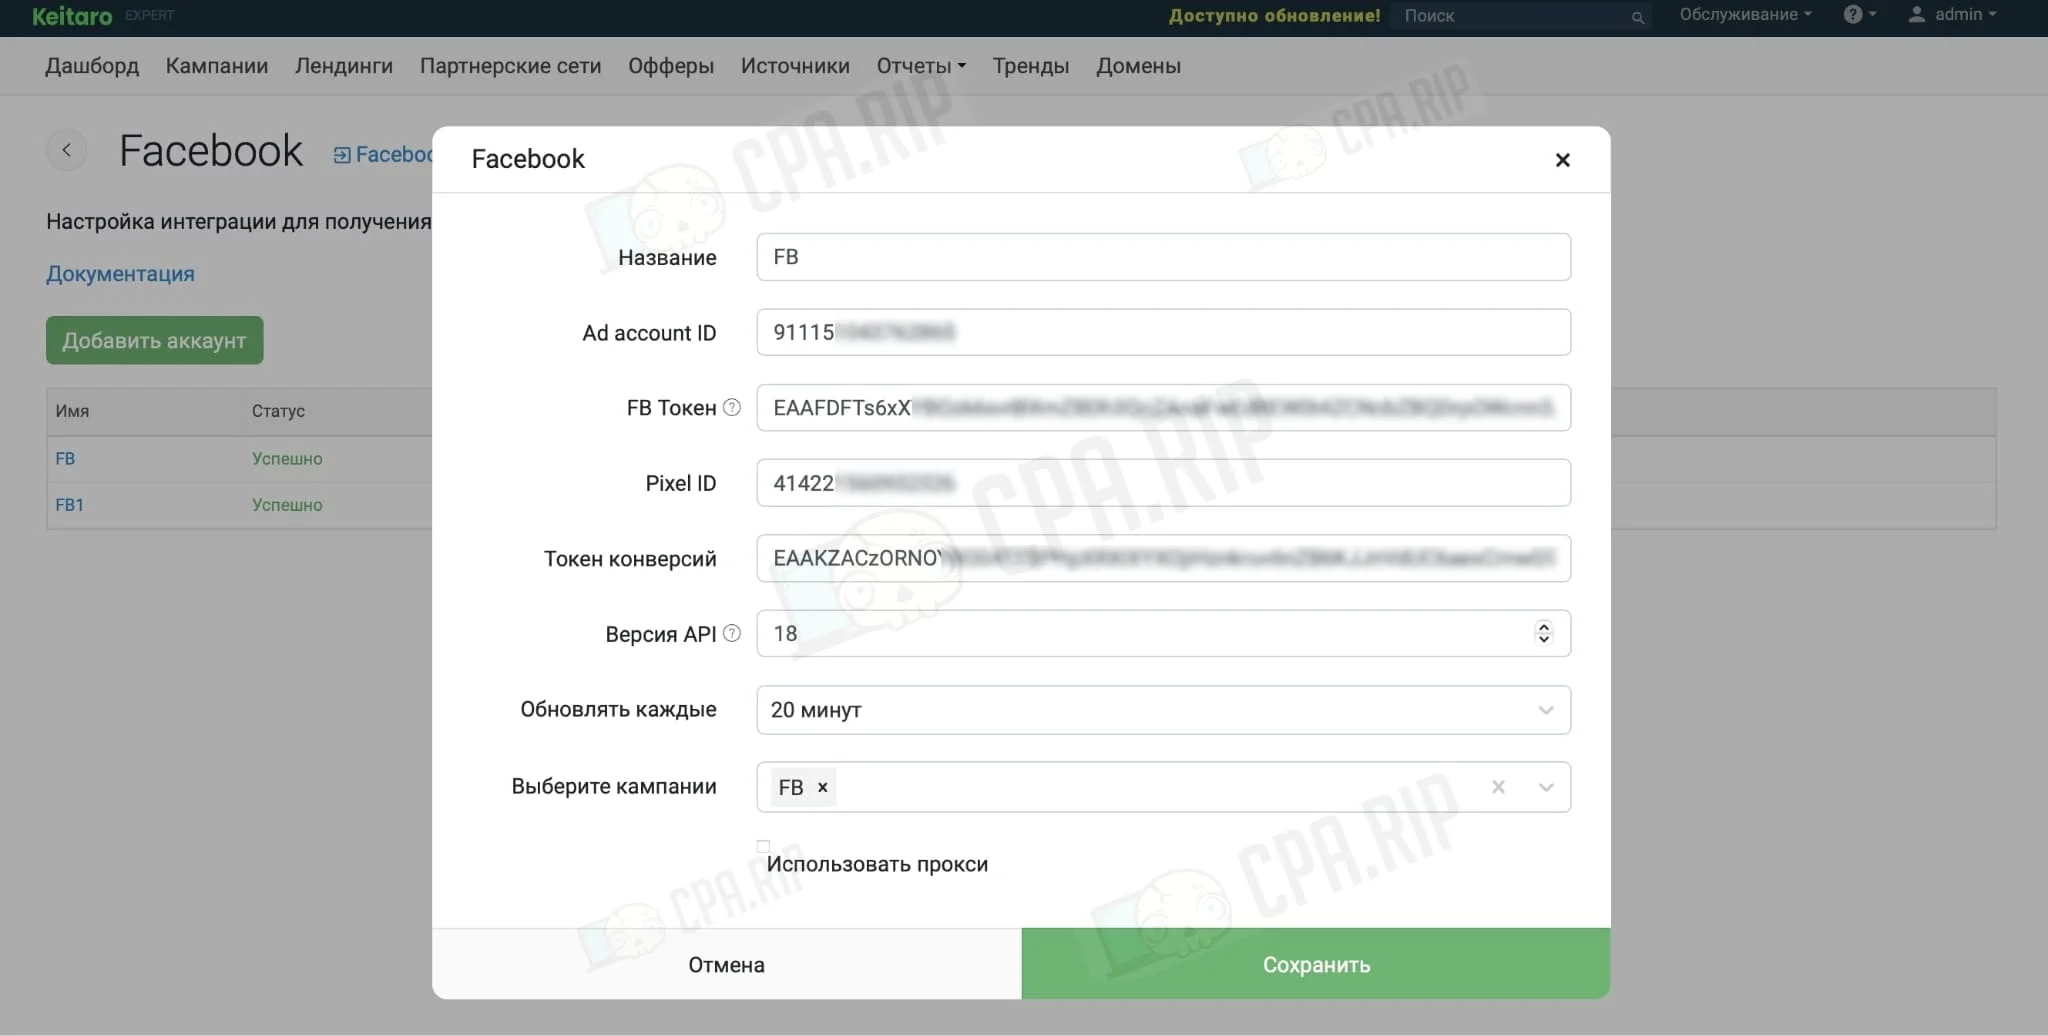
Fill in all the required items:

- Name. Enter any account name for convenience;
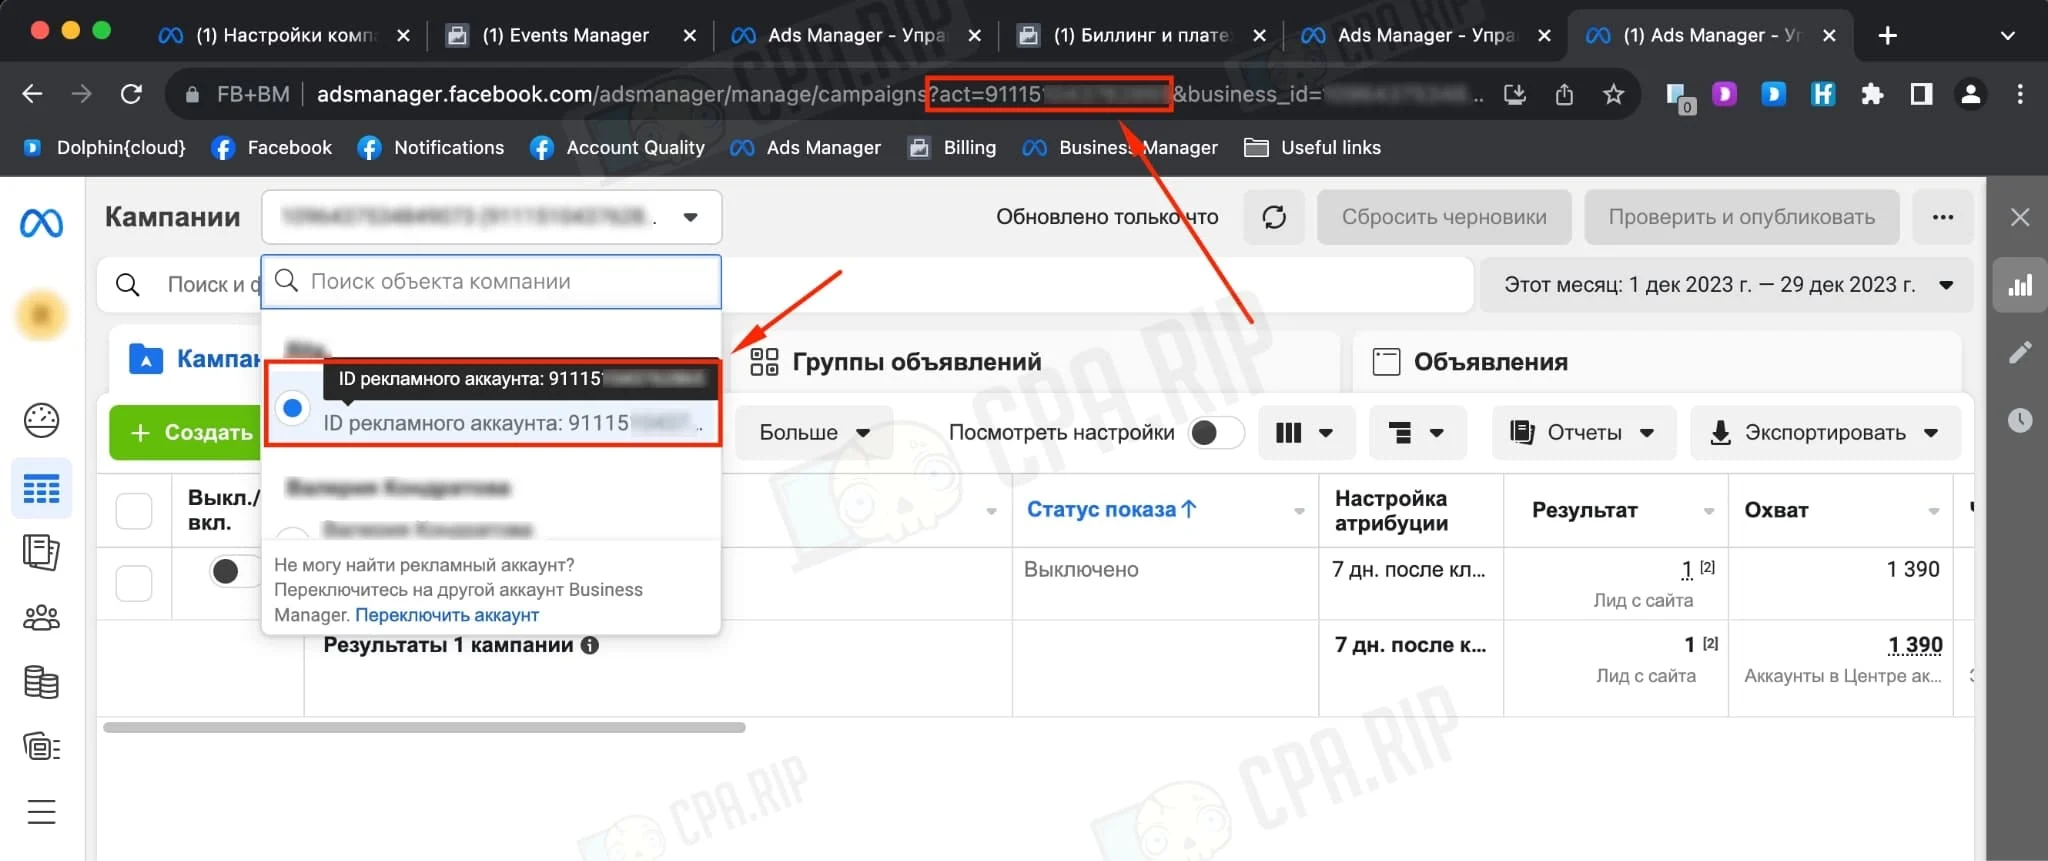
- Ad account ID. Located in the Facebook ad account:
- FB Token. We got the token via the app, instructions on how to get the token here.
- Pixel ID. It is used to send conversions via API.
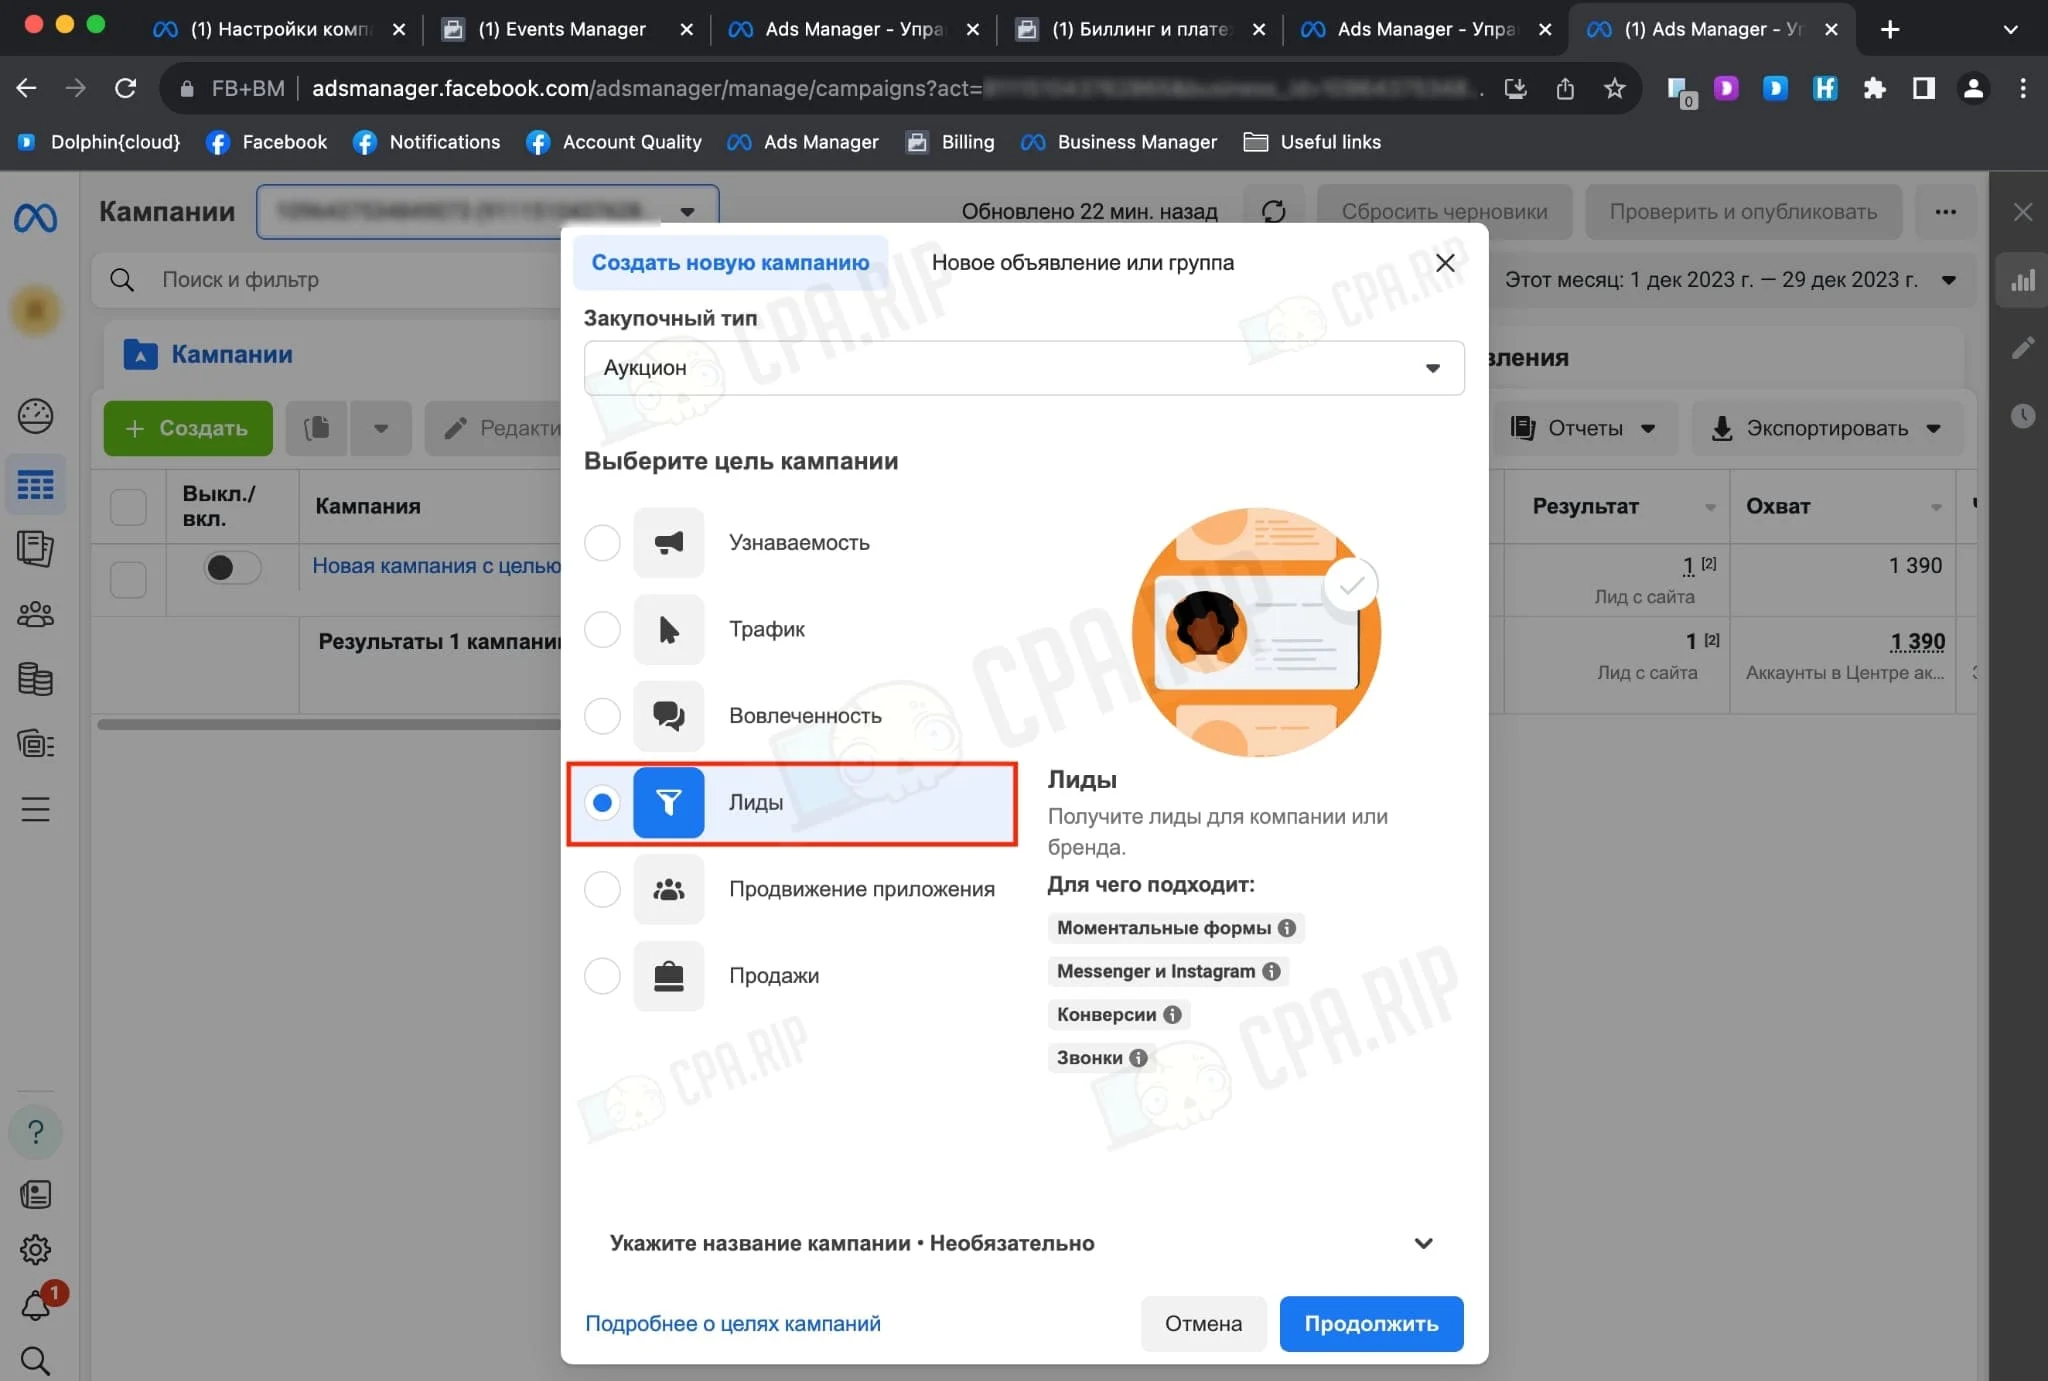
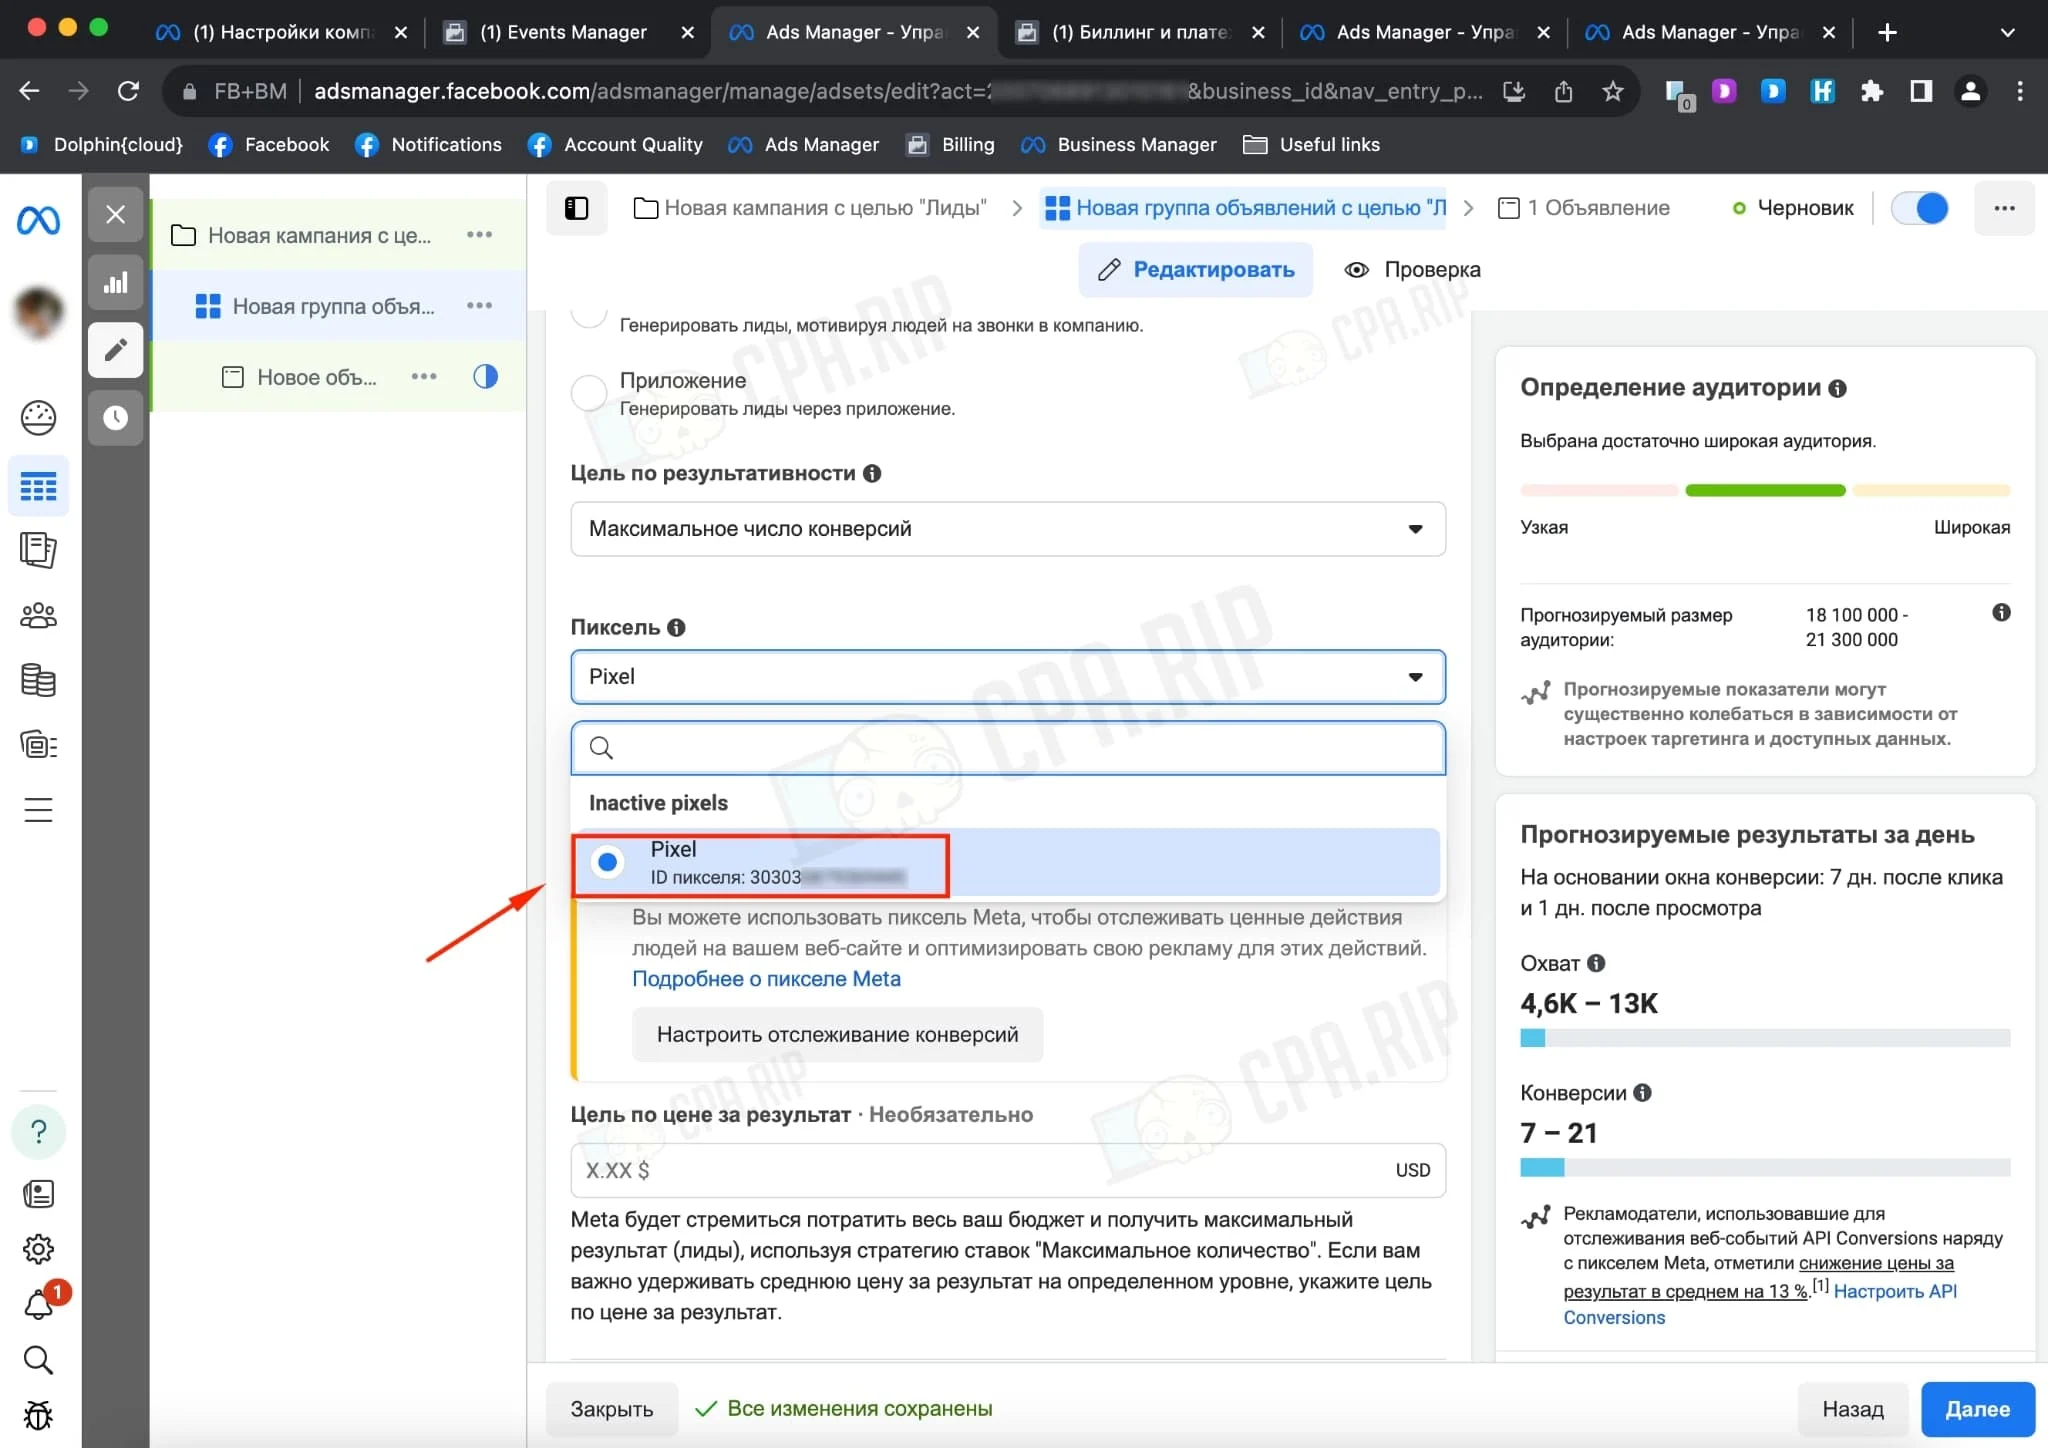
You need to log in to your Facebook ads account via Business manager and create a campaign choosing leads:
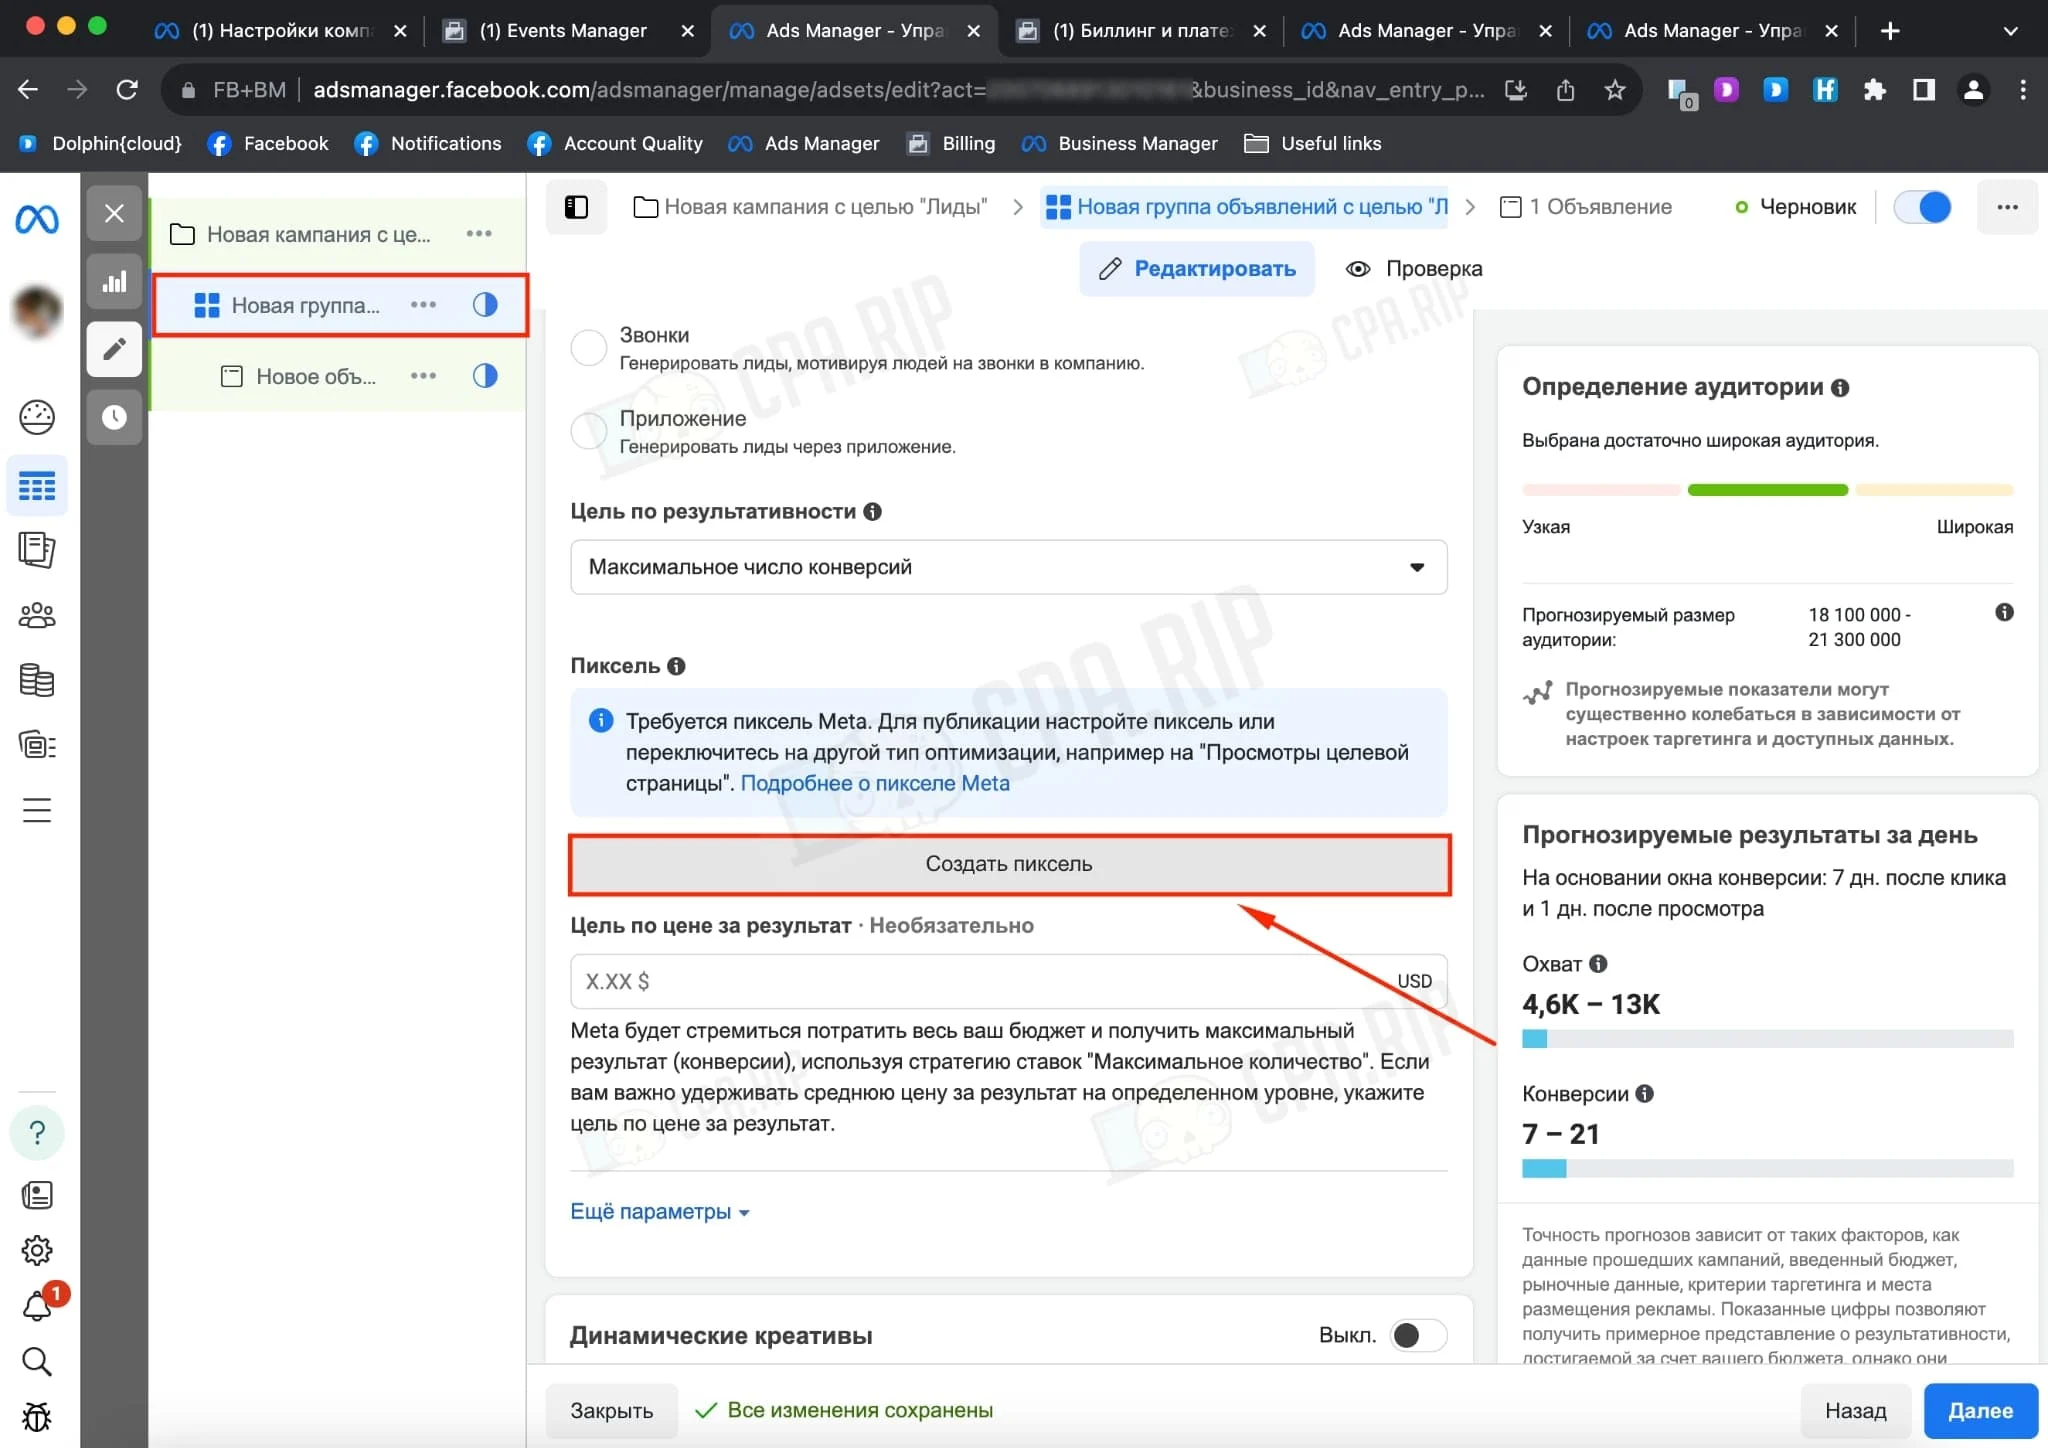
Create a pixel in the announcement group:
Select the created pixel and copy the pixel ID:
- Conversion Token. To send conversions via API.
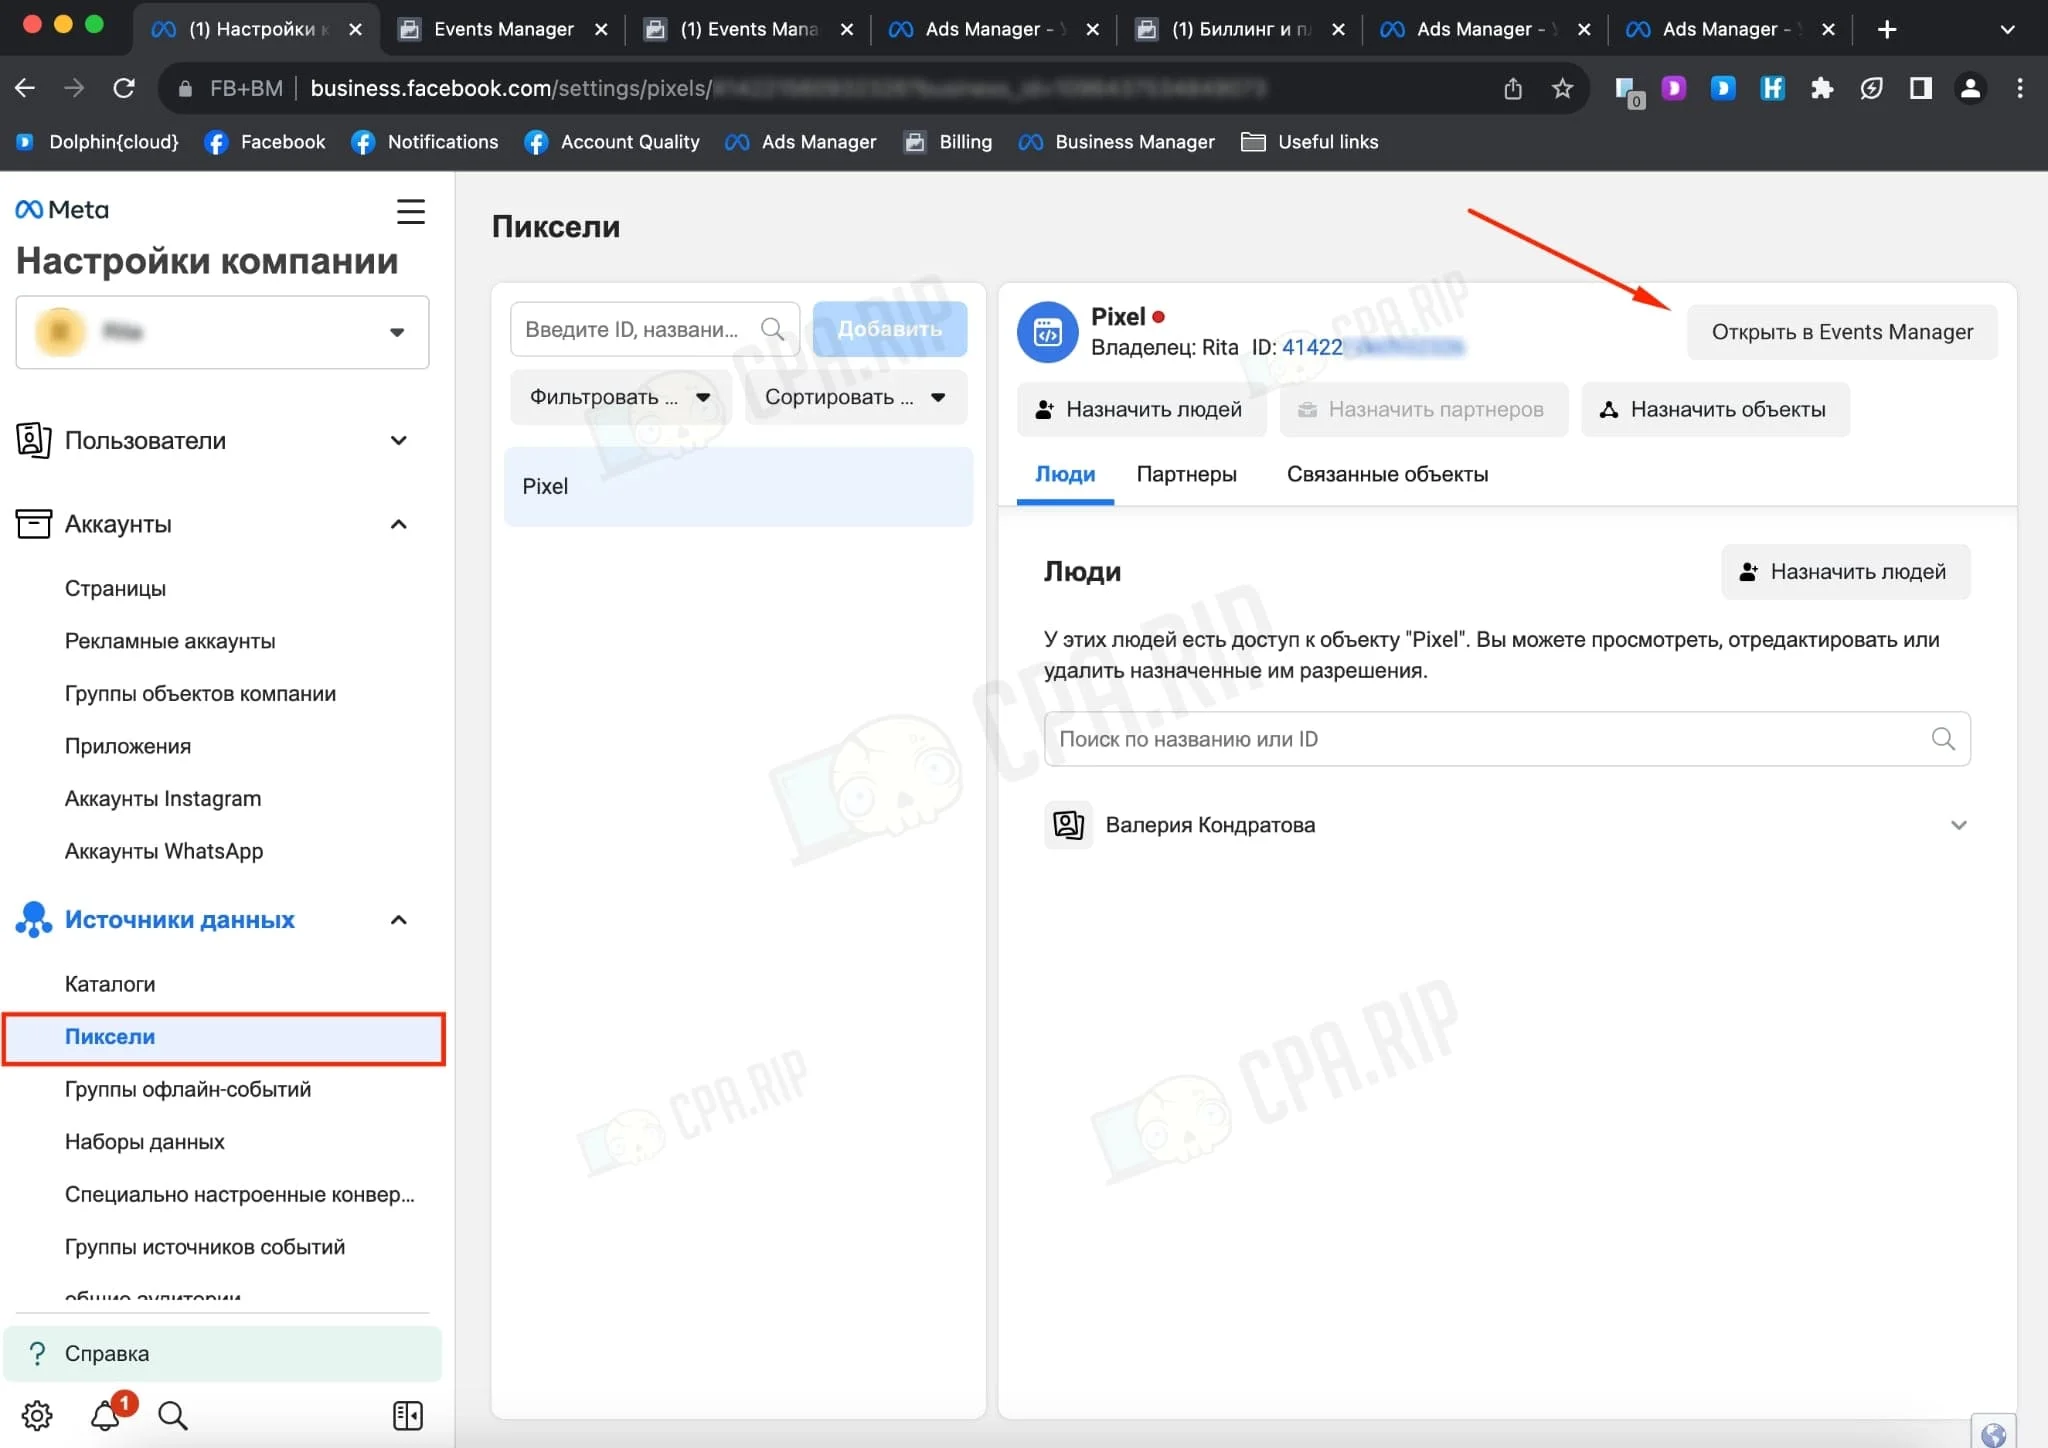
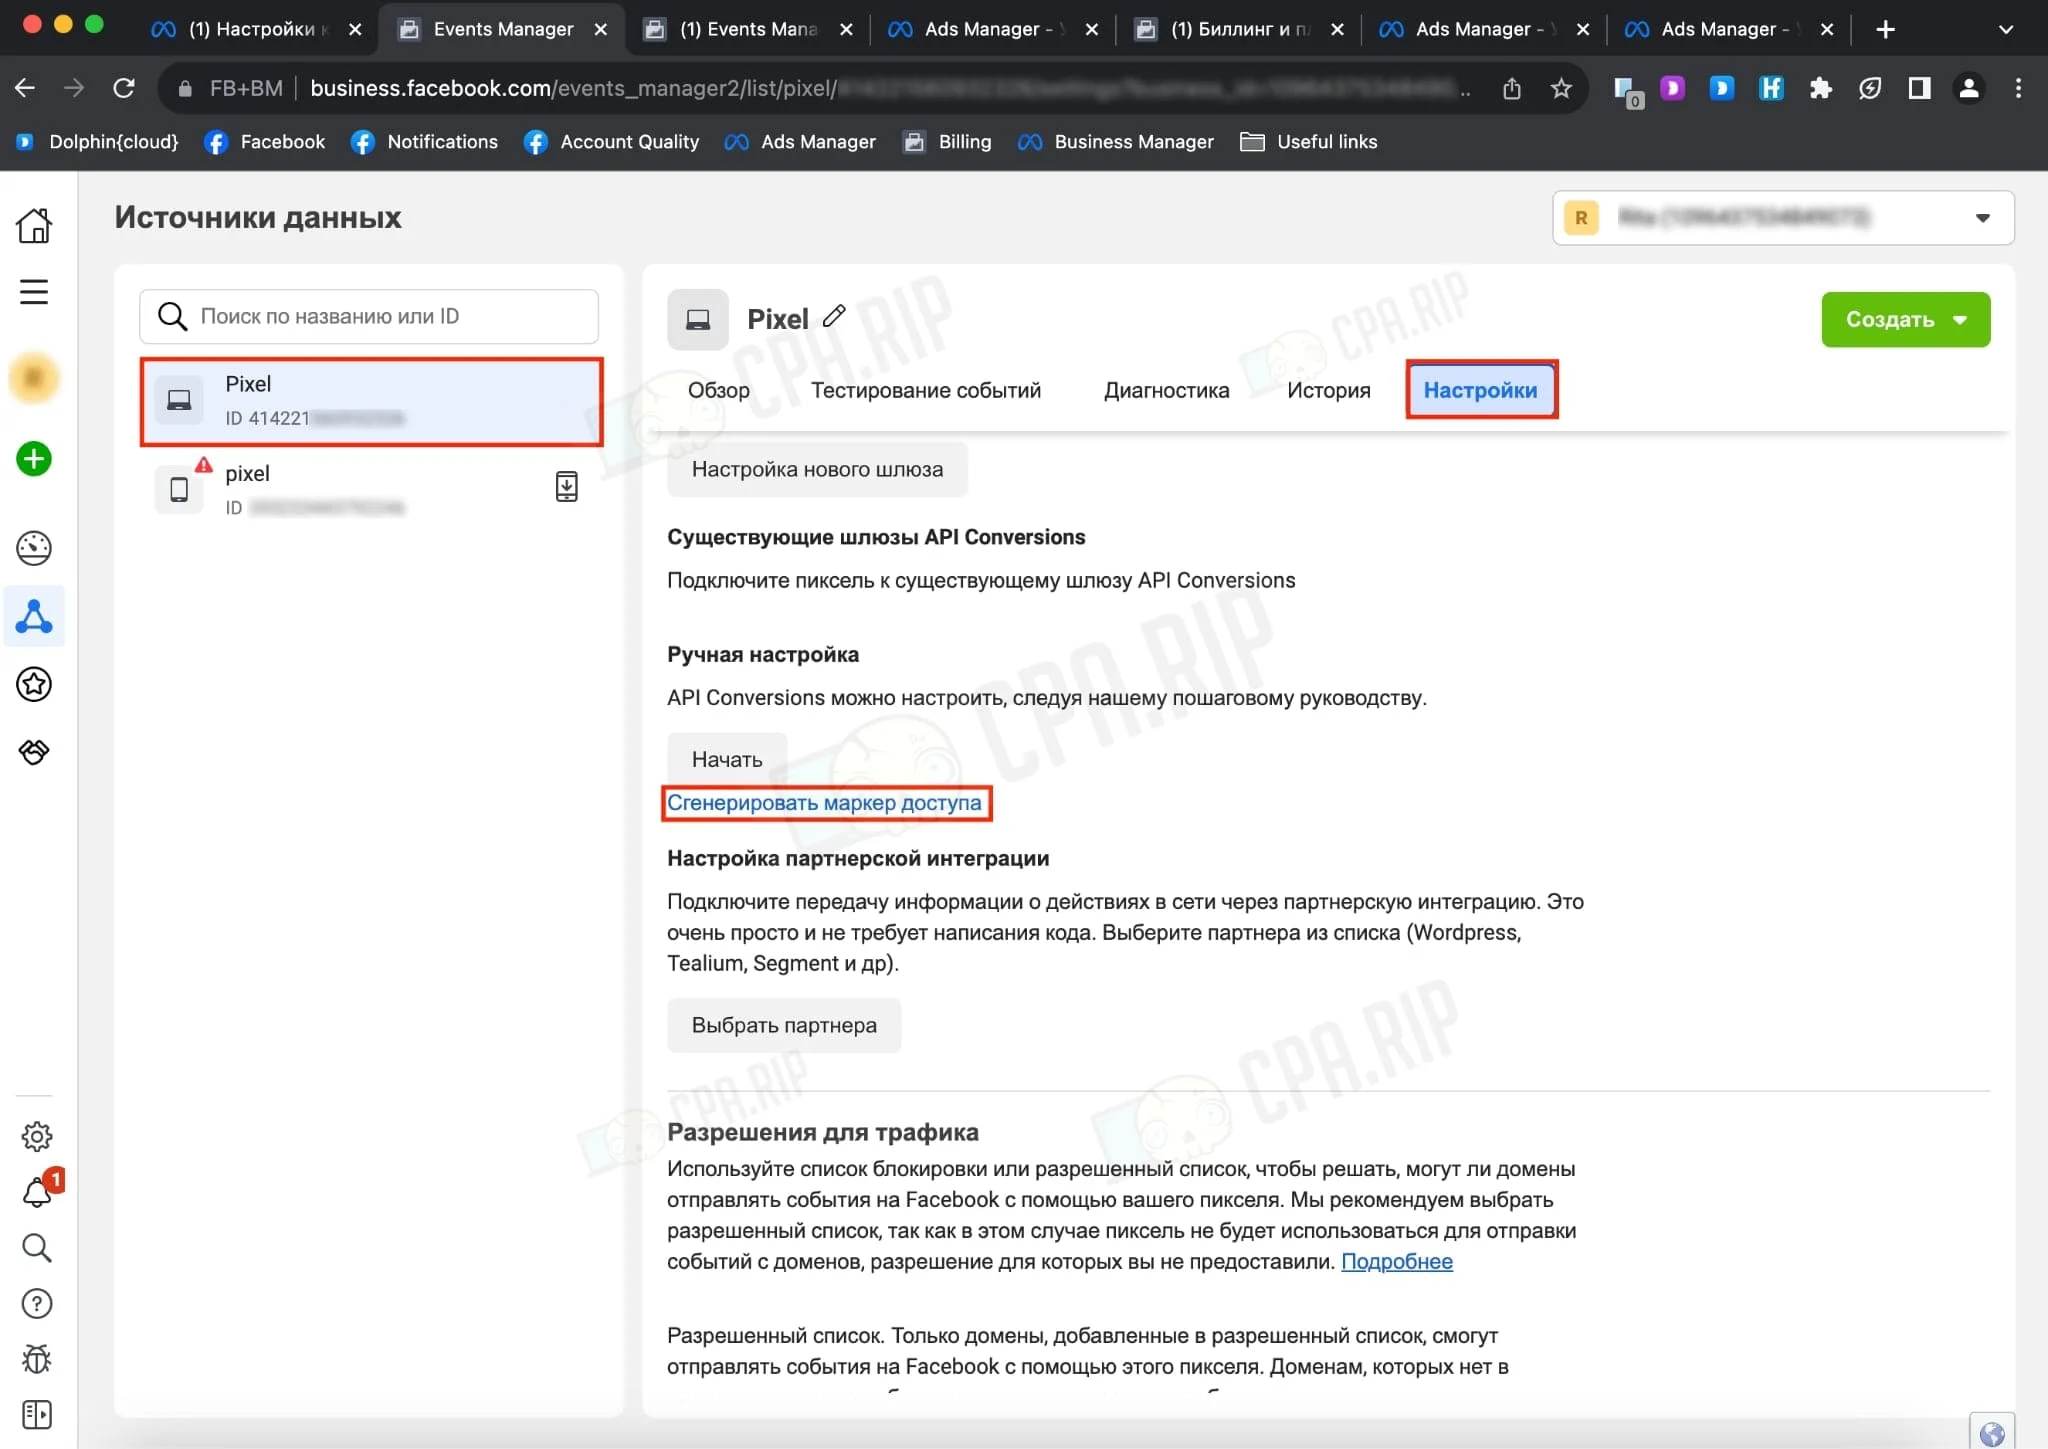
First, we need to generate it. We will need the created Business Manager. Go to “Business Manager Settings → Data Sources →Pixels → Open in Events Manager”:
Select the pixel we need, go to “Settings → Manual Customization”. Click on “Generate access token”. Copy the created conversion token:
- API version. Leave it as standard.
- Update every. Update the integration with the Facebook account in the interval.
- Select campaigns. Each Facebook integration can be linked to one or more campaigns. We’ve linked it to our created campaign.
- Use a proxy. You can decide whether to use a proxy or not. We haven’t used it.
The end result should be as follows:
Click on “Save” and the account status should be indicated as – “Successful”:
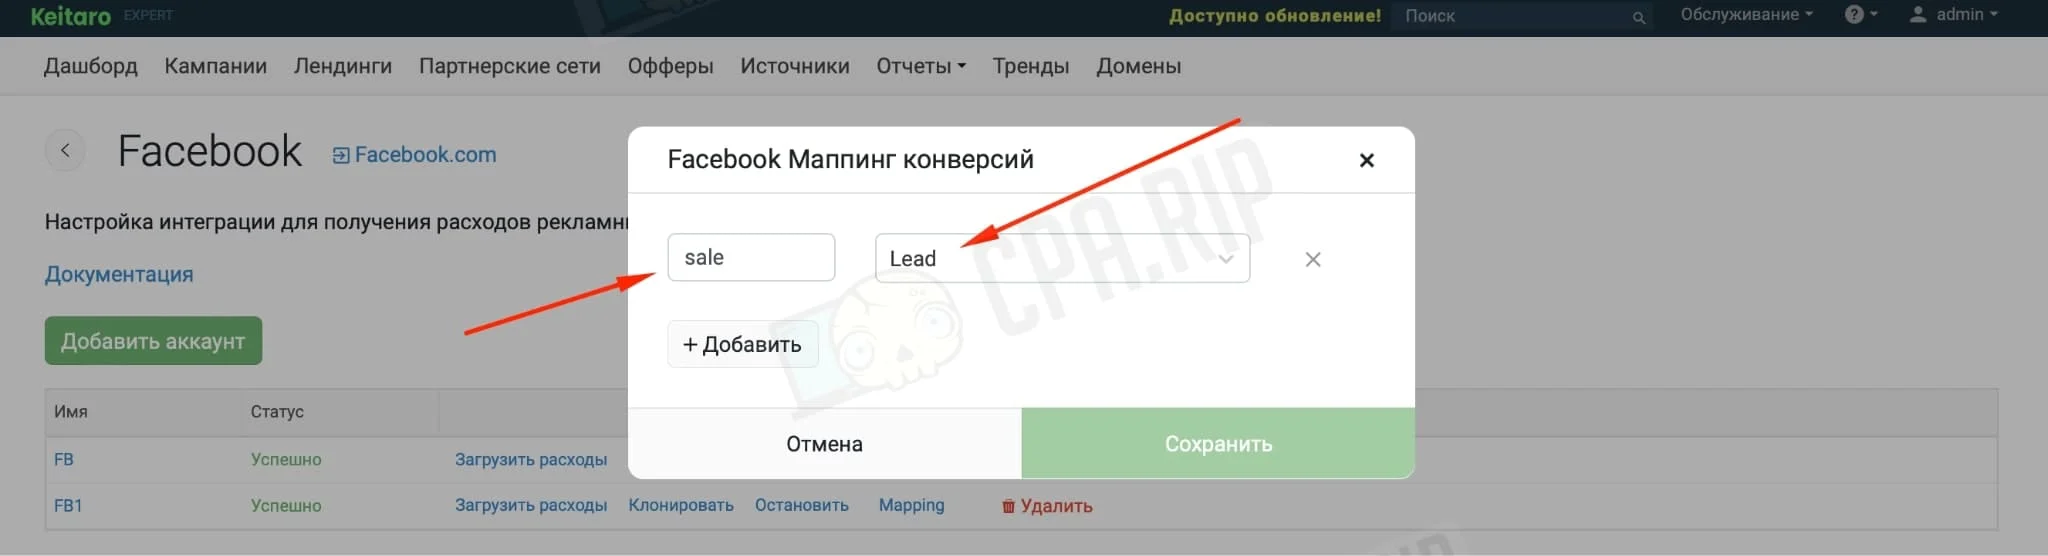
Click on “Mapping” as we only want to pass conversions to Facebook. Specify “sale” in the status field and select the campaign event, which is “Lead” in our case:
Add the customised settings into Facebook Ads
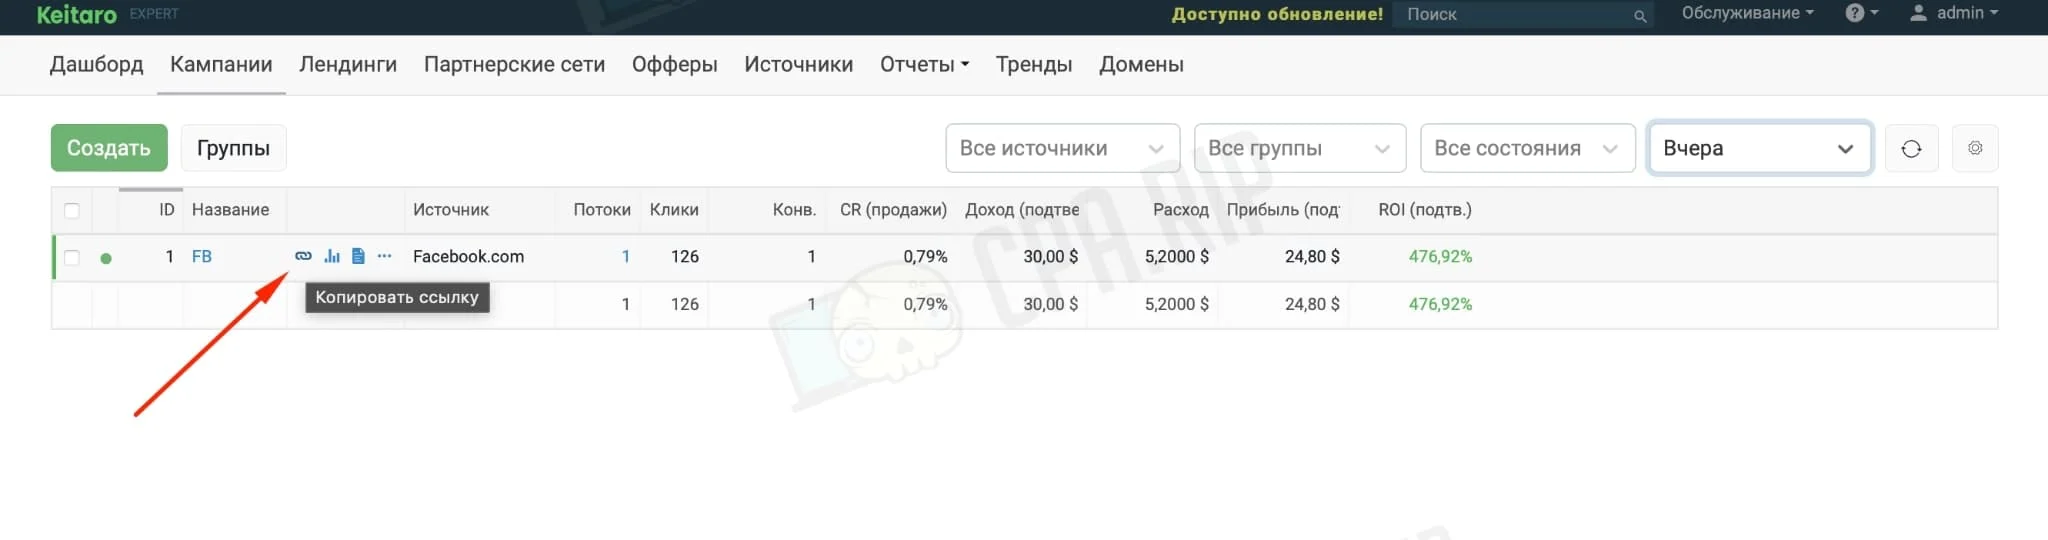
Copy the link from the created Keitaro campaign:
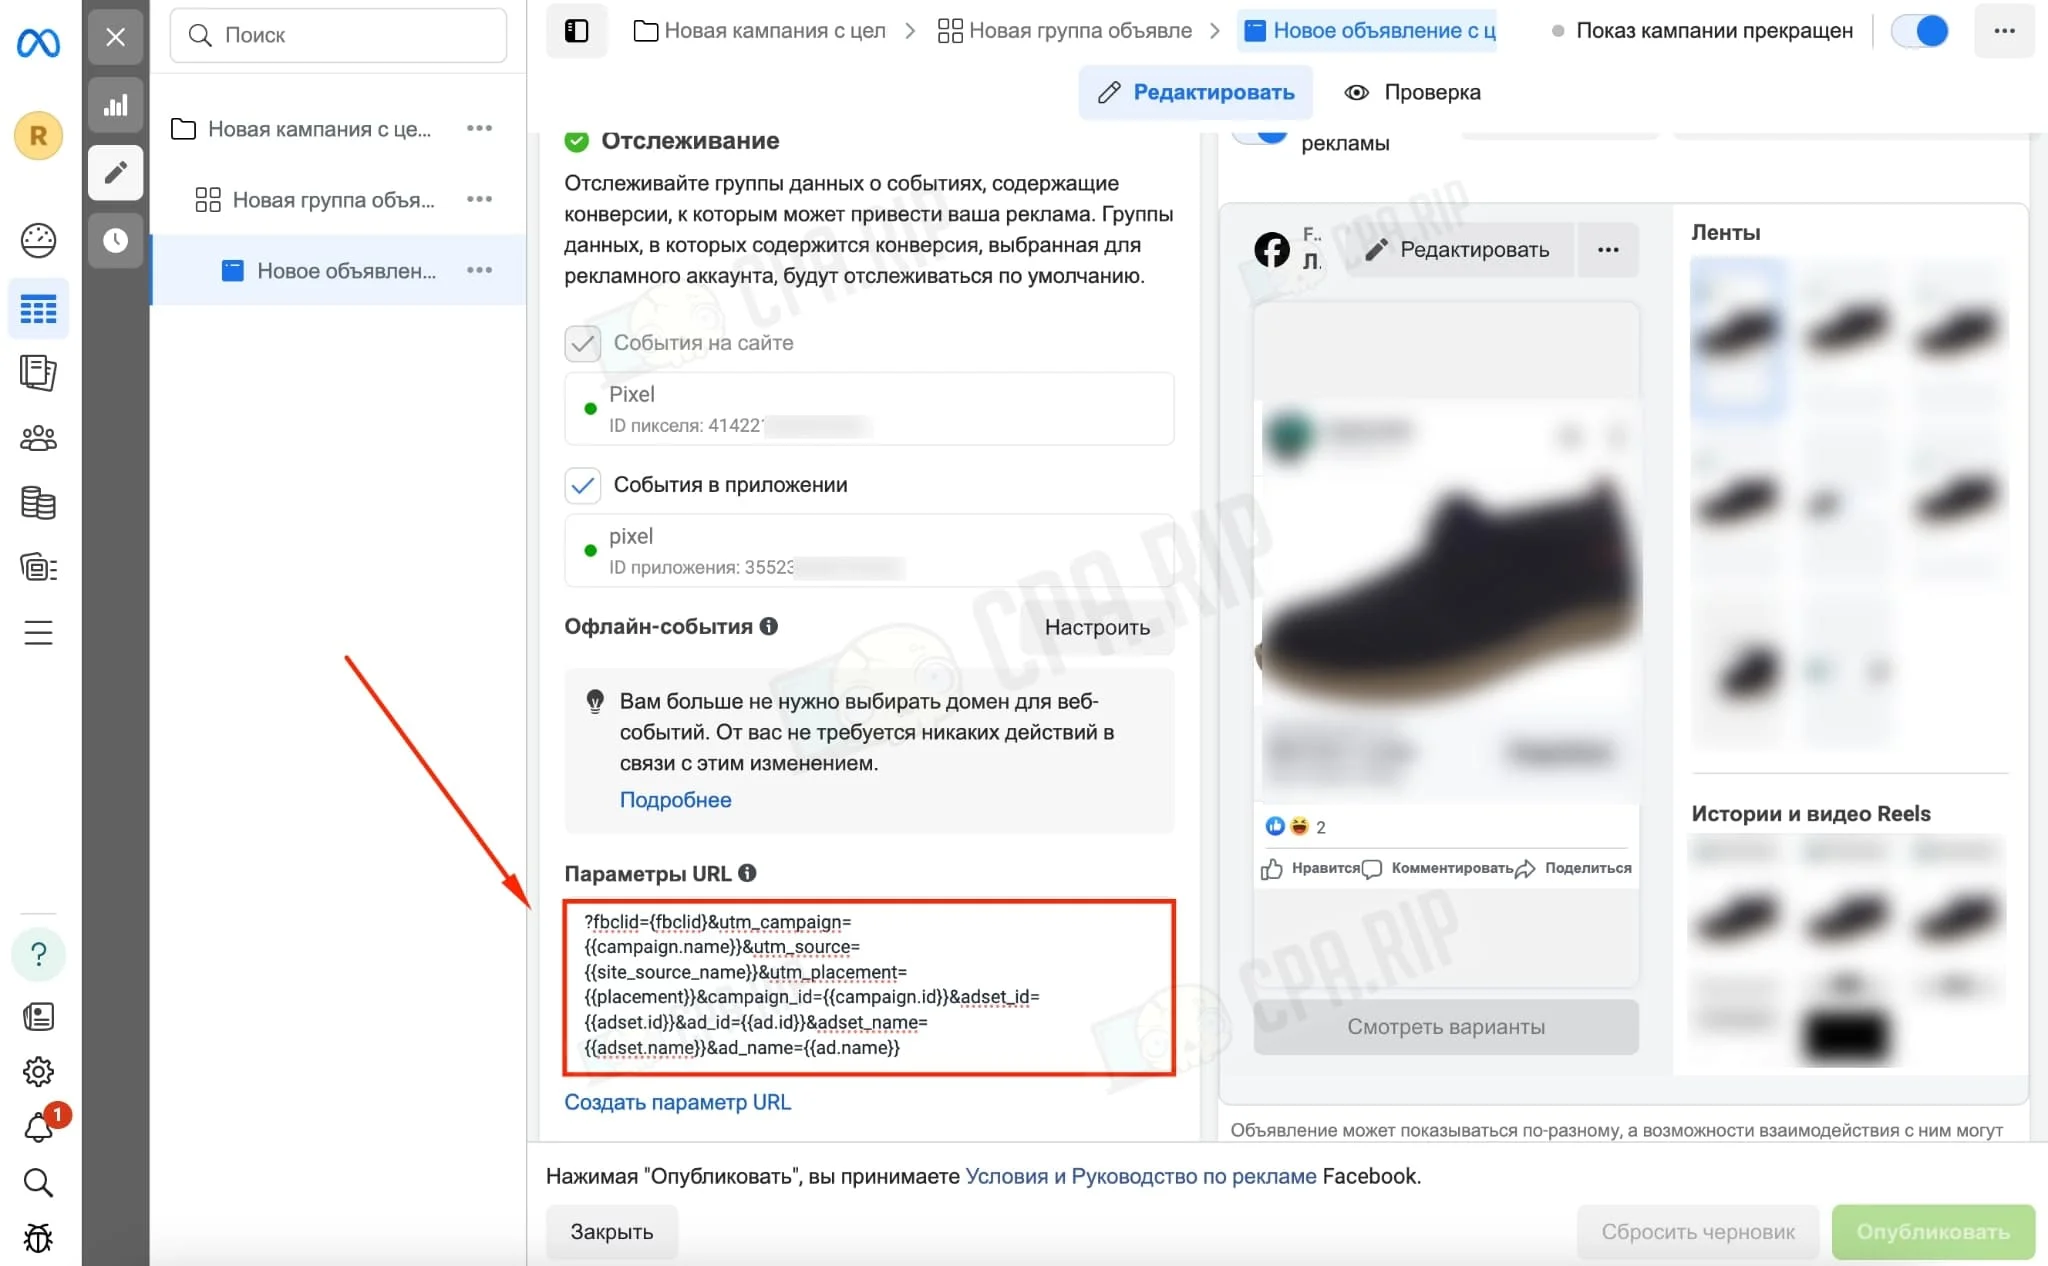
In the “Ads” tab specify the link with the ID:
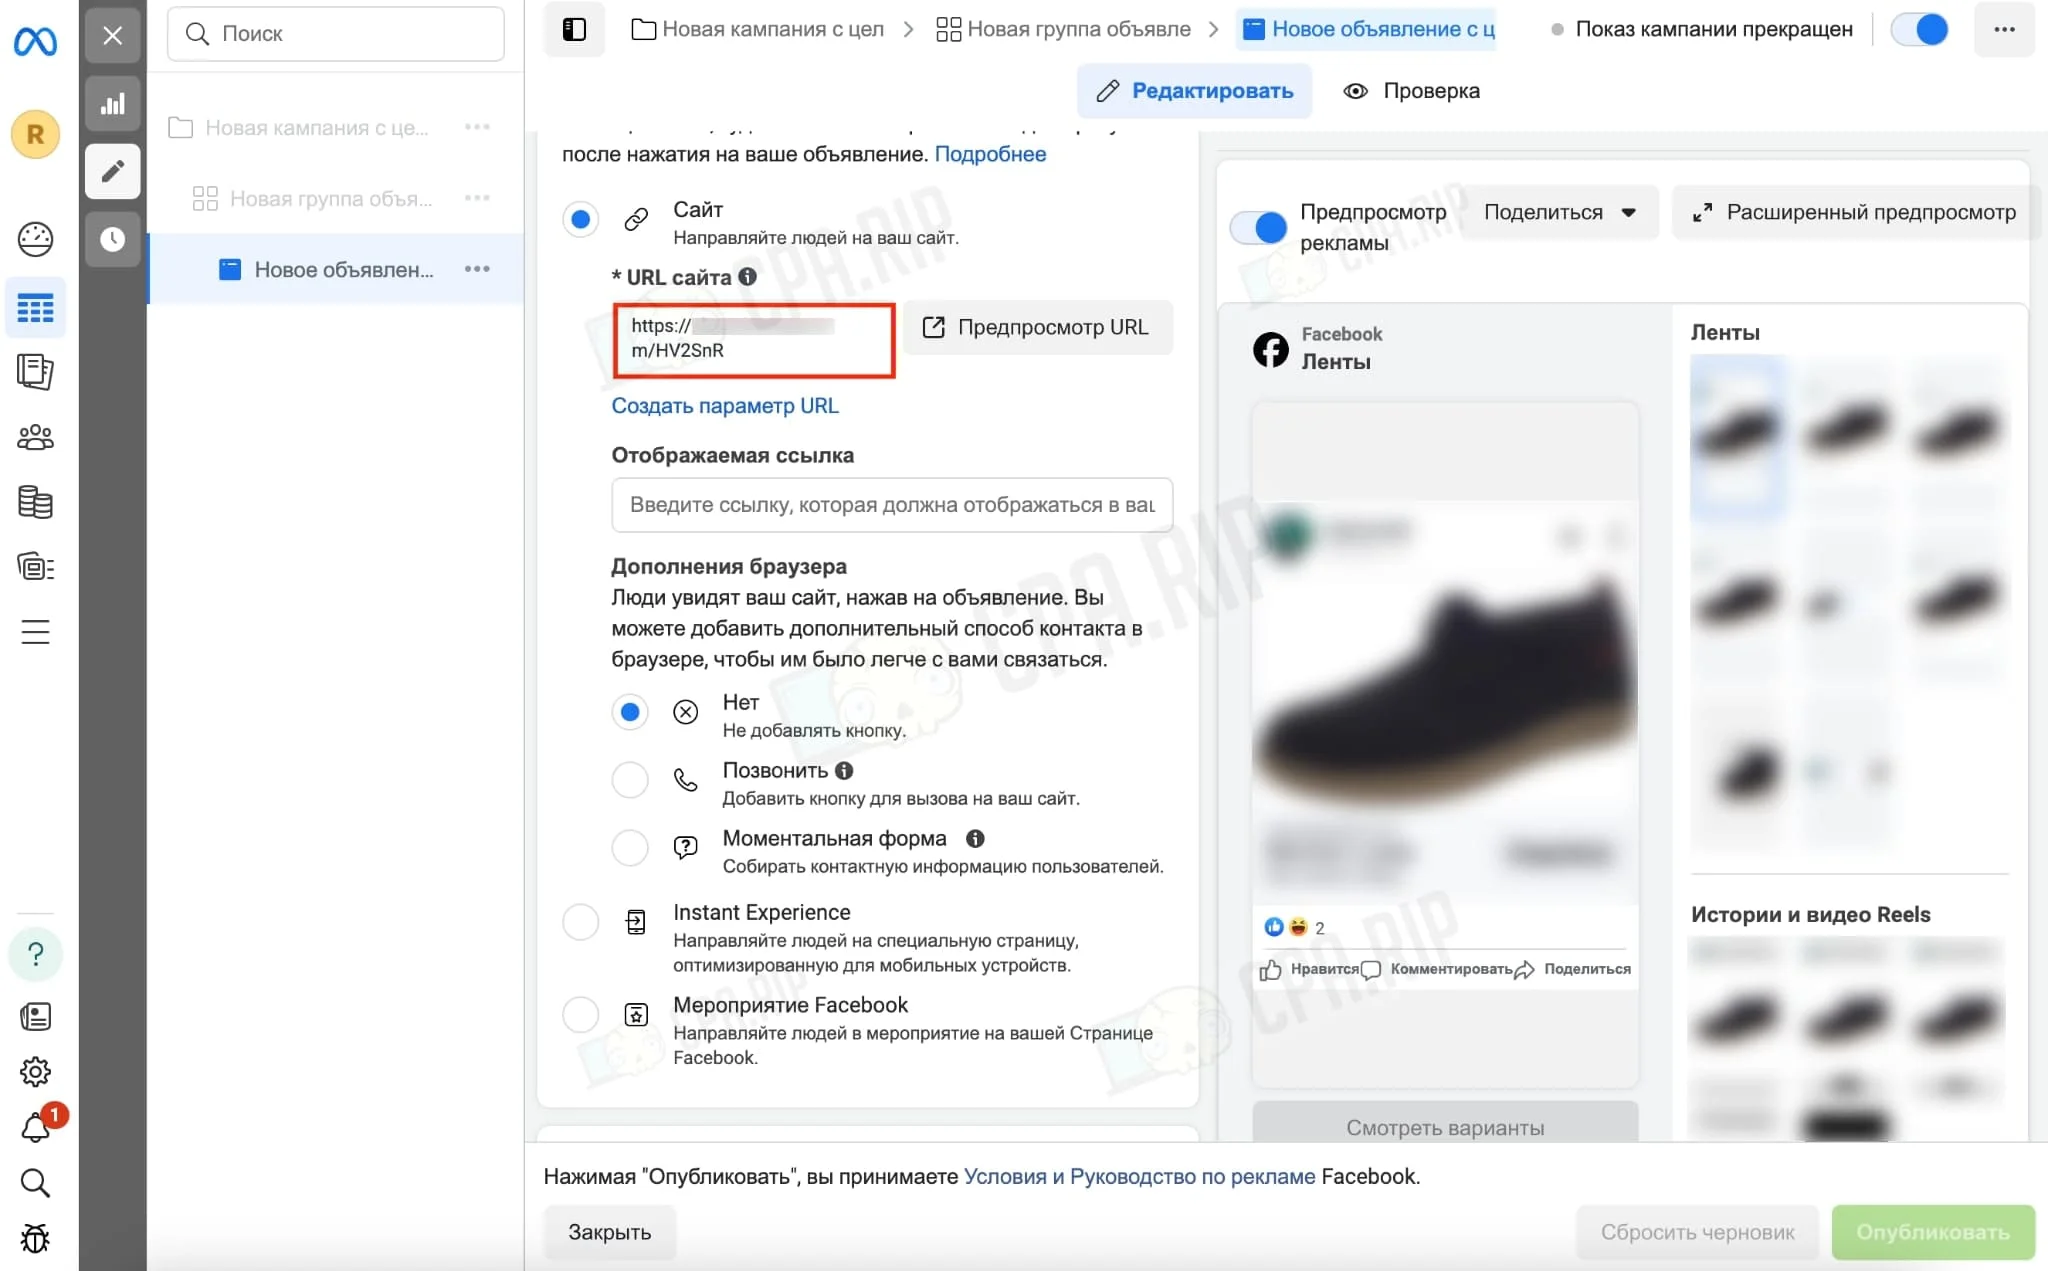
In the “Tracking” section fill in the “URL Settings” from the link:
After all settings are complete, publish the campaign.
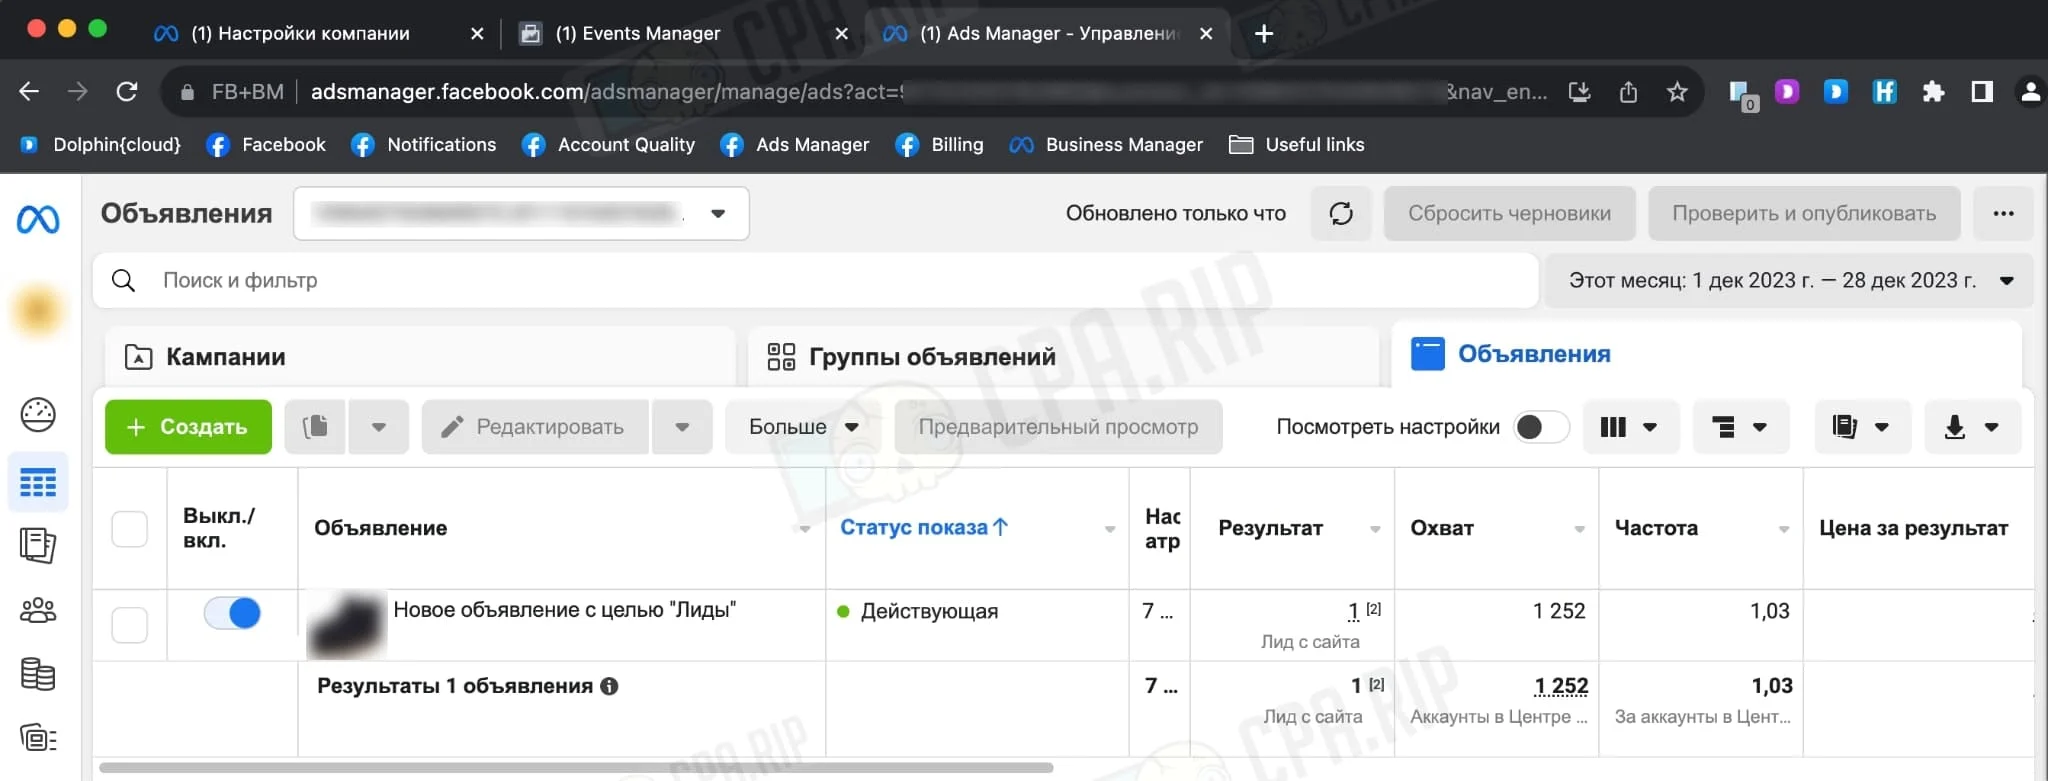
When the campaign becomes active and conversions appear in the tracker, they will be shown in the Facebook campaign. Check the conversions in the “Result” tab: