Today, you’re going to find out how to launch ads with Facebook Business Manager, which they sell at every corner. With Facebook Business Manager, you can run ads in any vertical.
First, you need to learn what a Business Manager is and what types are there.
What is the Facebook Business Manager?
Facebook Business Manager (hereinafter – BM) is an official Facebook tool that allows you to manage all your fanpages, ad accounts, employees, and even fake profiles from one place (Facebook tactfully calls it “shared logins”).
There are three types of Business Managers:
- BM with a $50 limit. It means that you can spend the maximum daily advertising budget of $50 and you can’t create additional ad accounts in BM.
- BM with a $250 limit. It means that you can spend the maximum daily advertising budget of $250 and you can create 4 additional ad accounts with the same limit in BM.
- Verified BM. It means that you have an unlimited advertising budget and you can create 80 additional ad accounts.
The majority of people choose BM $250, since the price is justified, and you can create 4 additional ad accounts with a $250 limit, which is more than enough. So, let’s follow a step-by-step illustrated guide on how to work with these BMs.
How to purchase a BM?
Seek a valid BM store (https://cpa.rip/links/), and make your choice. Ideally, the package should include:
- BM ID (you don’t always get it. You’ll need it only to check the BM validity)
- The primary invitation link to BM
- The secondary invitation link to BM (as a backup. Sometimes they don’t provide it. If the store is verified, then it’s ok)
Note! After you’ll purchase it and accept the invitation, you MUST delete the former admin. If you can’t do that, contact the seller and ask him to log out of the BM. Read more about deleting administrators in step 7.
Be sure to check the link after purchase here: https://cpa.rip/check-bm/
Step-by-step BM guide
1. After you’ve received the link, go to the account you wish to relate to the BM
2. Insert an invitation link. Then, the window with a company name field will pop up. Type in a company name (choose such a name, so that you won’t confuse your different BMs later). The window looks like this
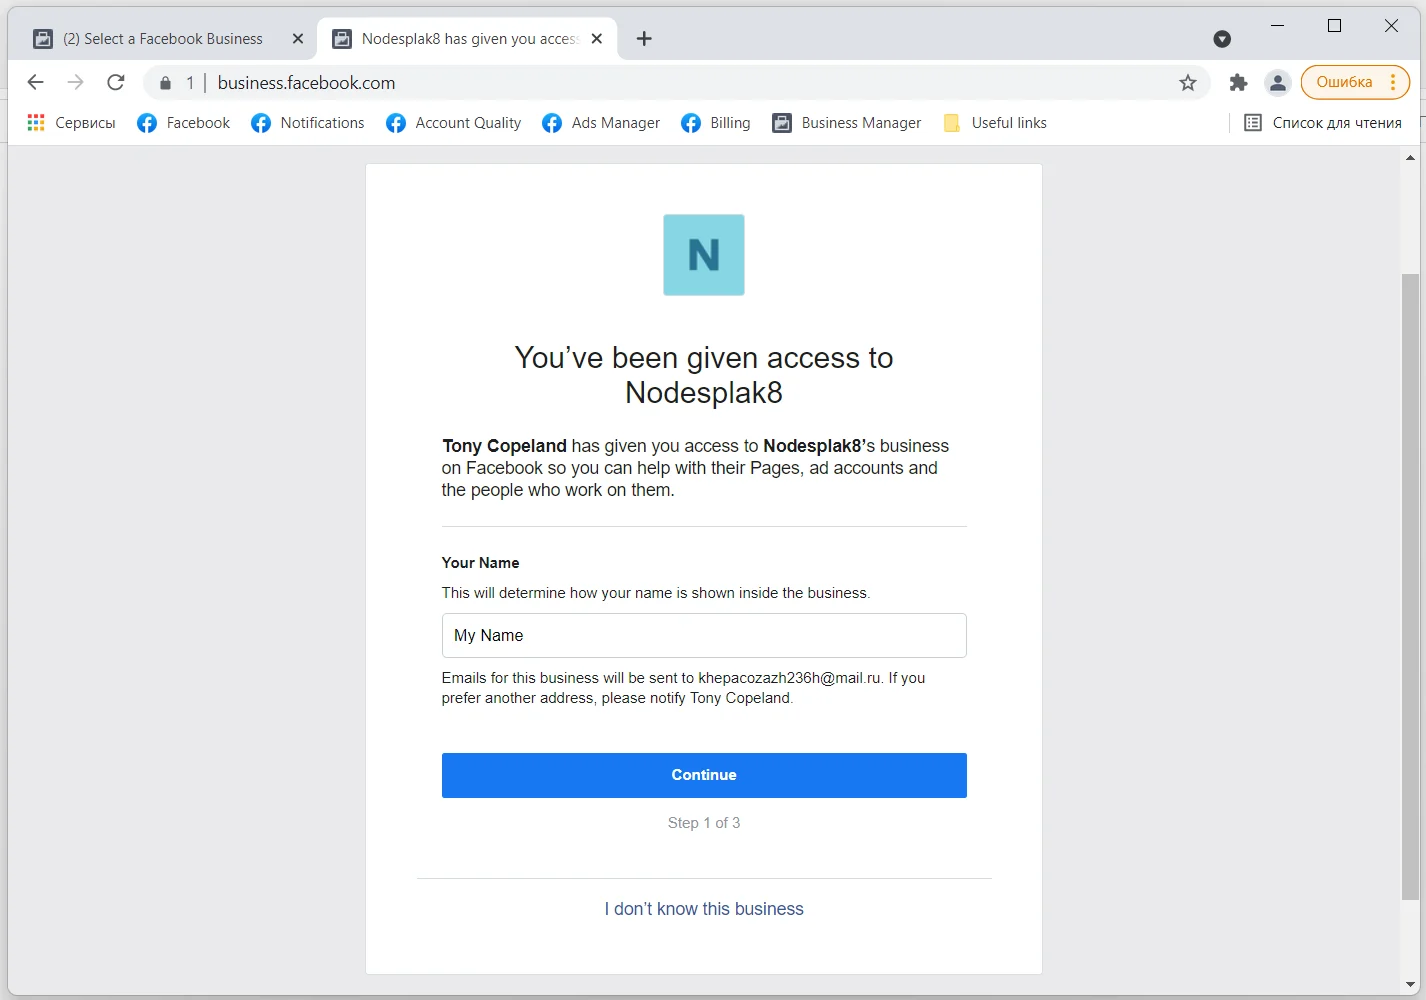
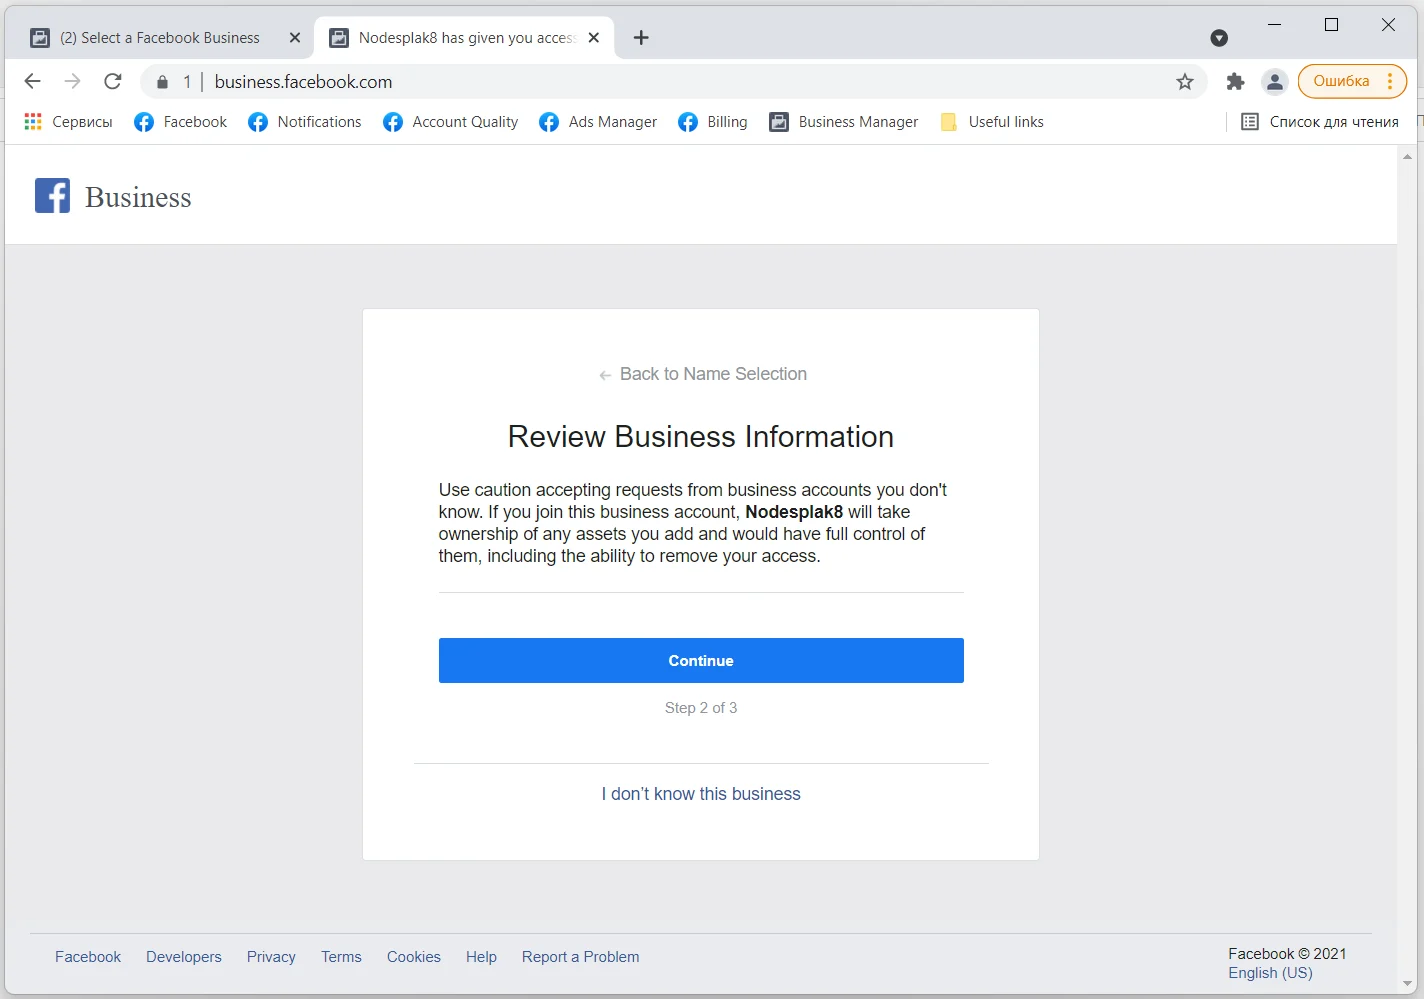
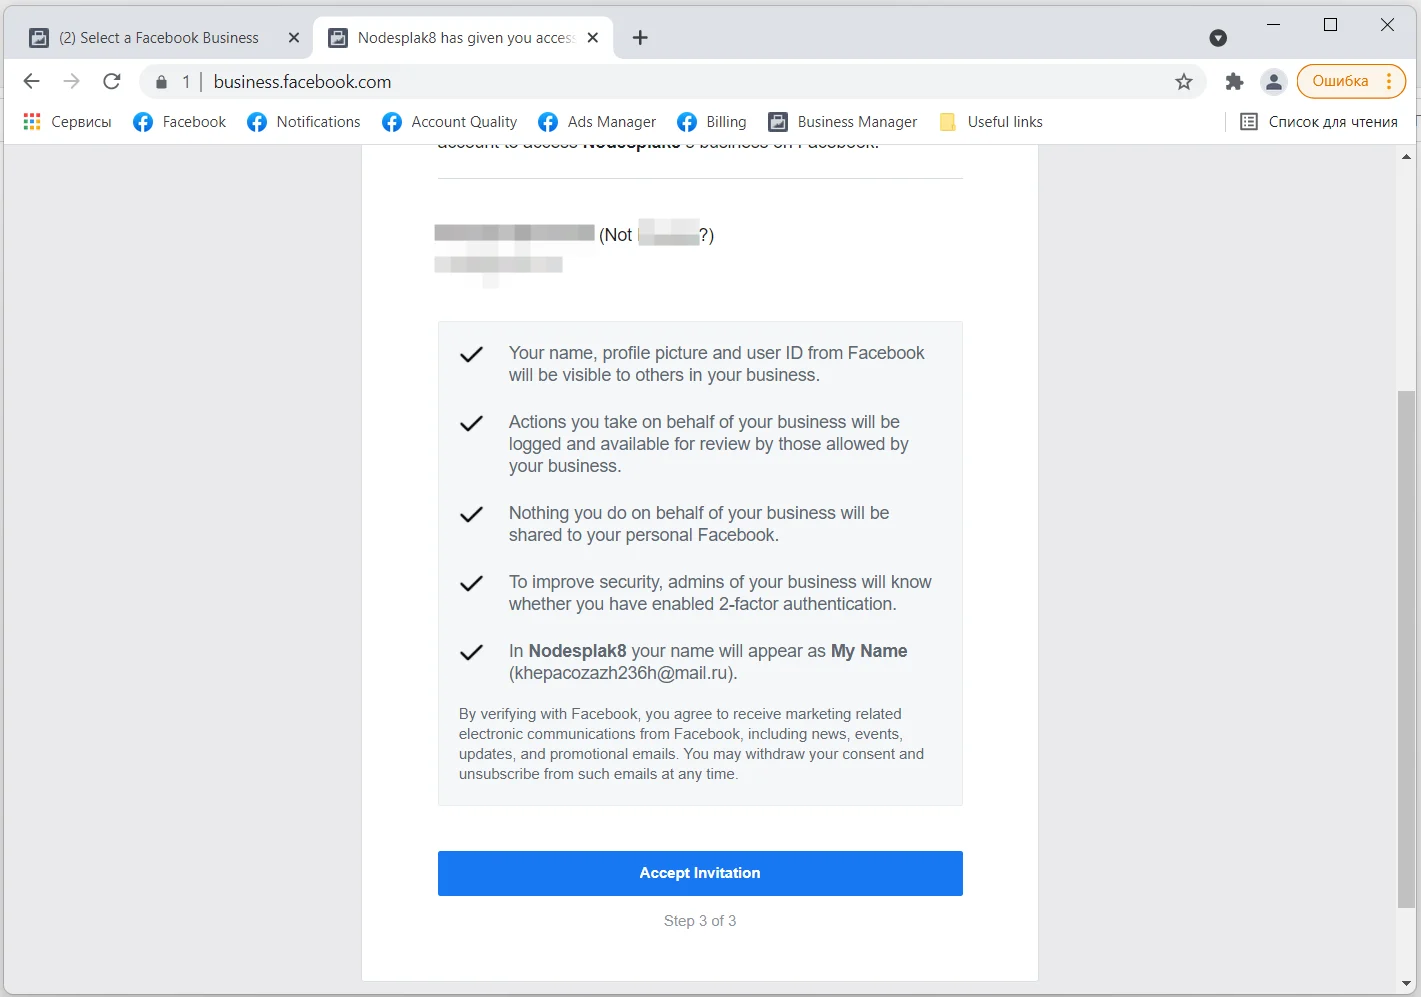
3. After you’ve typed in a company name, you will be forwarded to the next window, where you must enter the account’s password
4. Go to https://business.facebook.com/settings
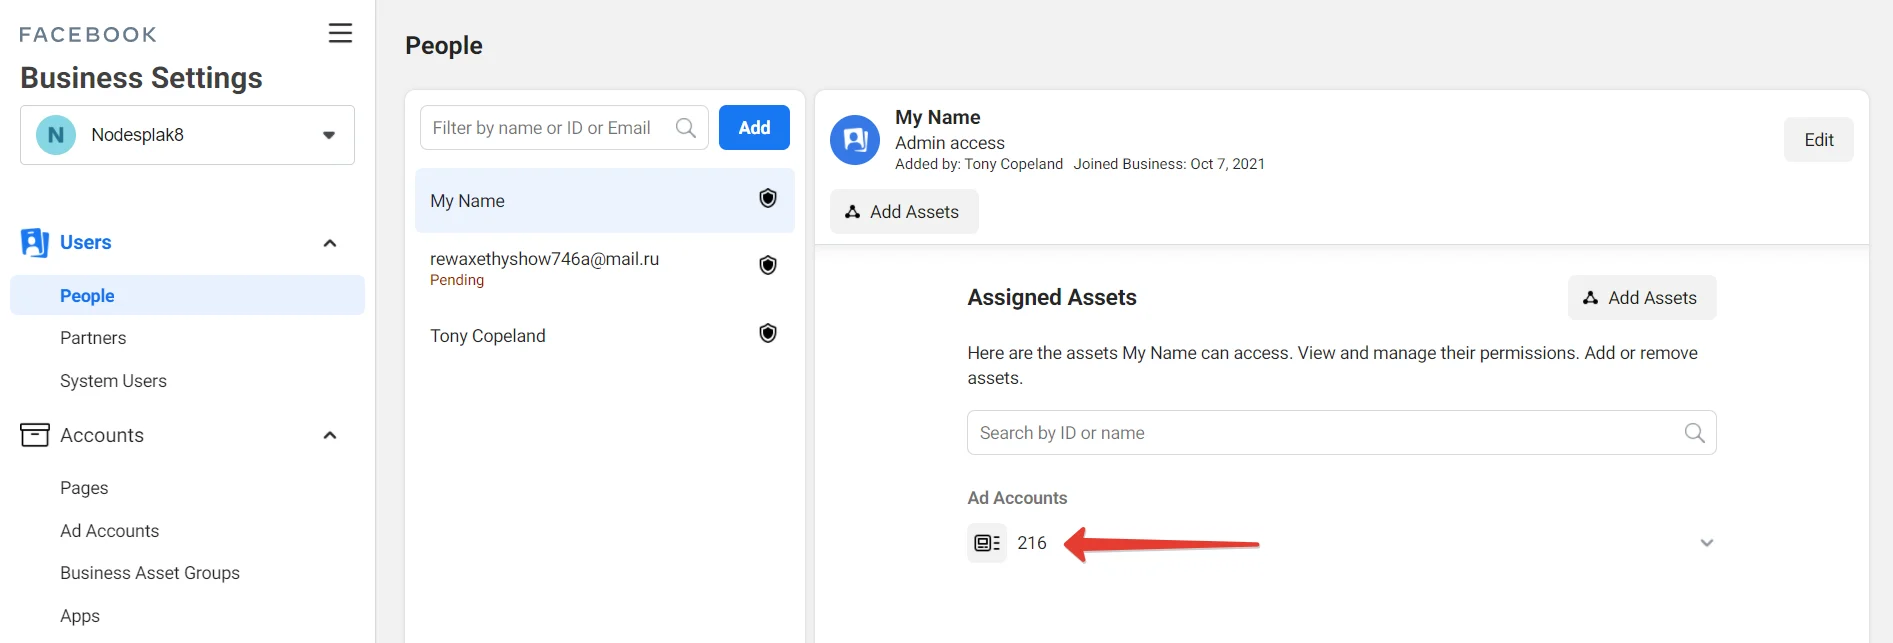
5. In the “Company settings”, add yourself as the manager of the ad account: click “Add objects”, select your BM and give it full access, using the sliders
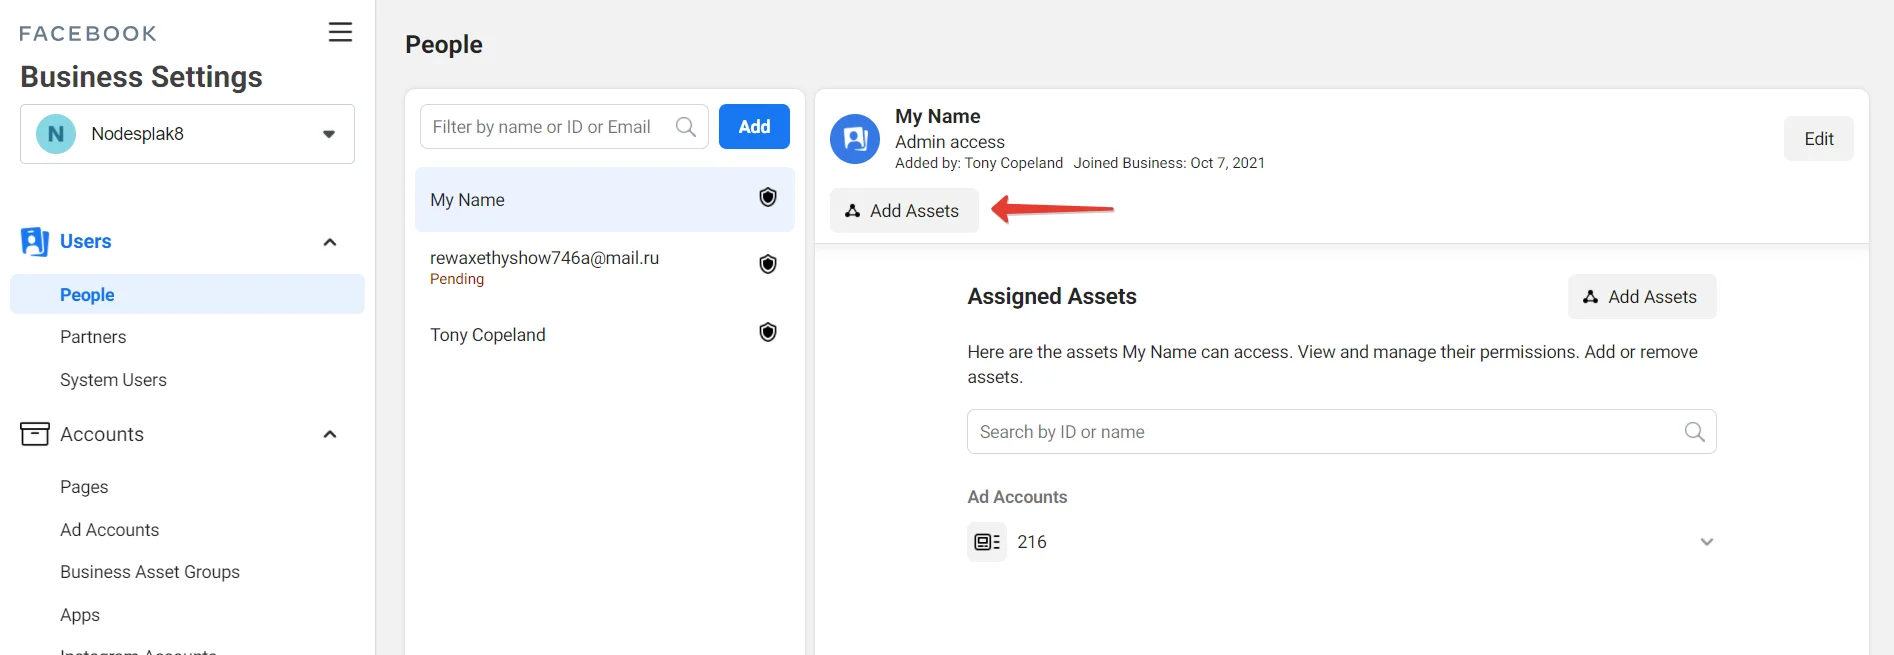
6. Now you can manage the company’s ad account. It should look like this, only with your name on it
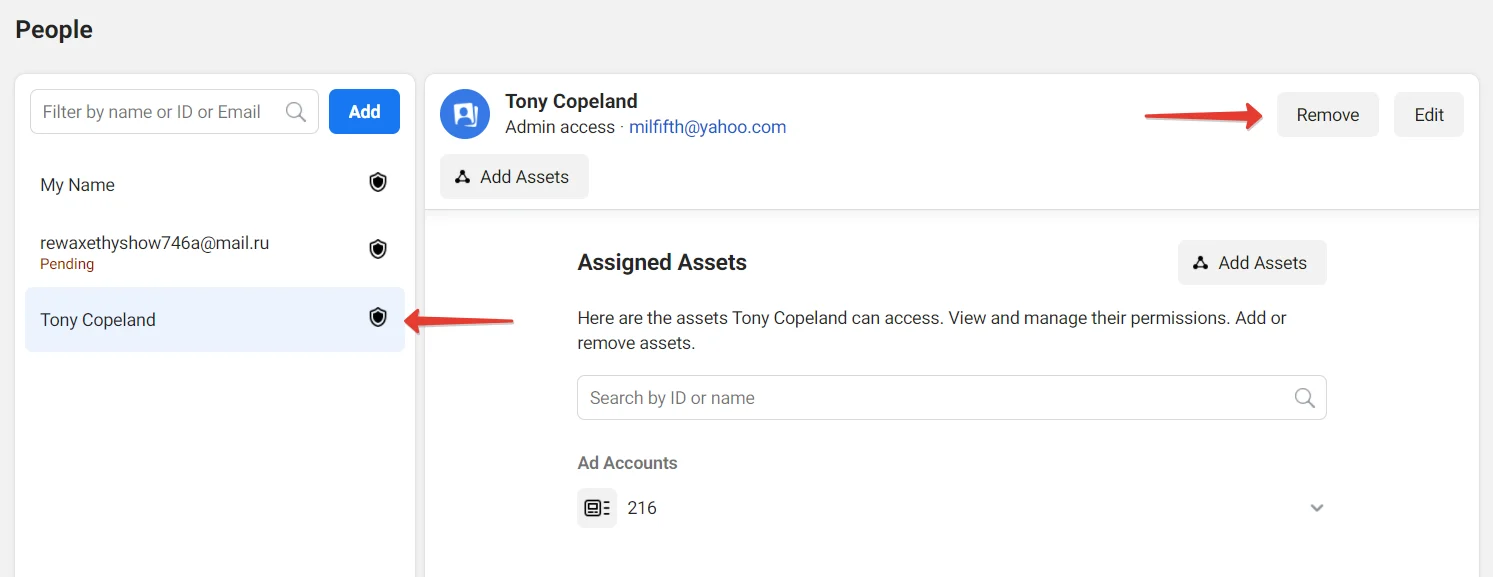
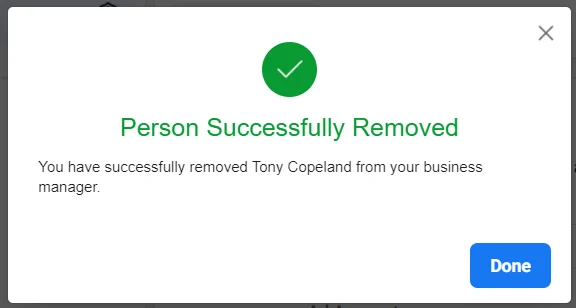
7. After you’ve added yourself, you MUST remove the other admin from BM to protect it from unauthorized access. To do this, choose another administrator, in my case it’s “Lisa Kirkeby”, click on her name, then click “Delete” in the upper right
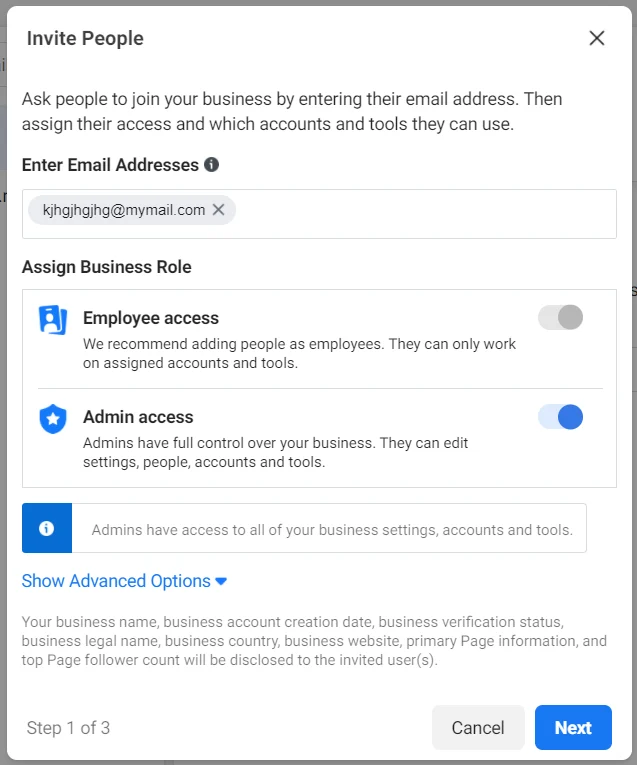
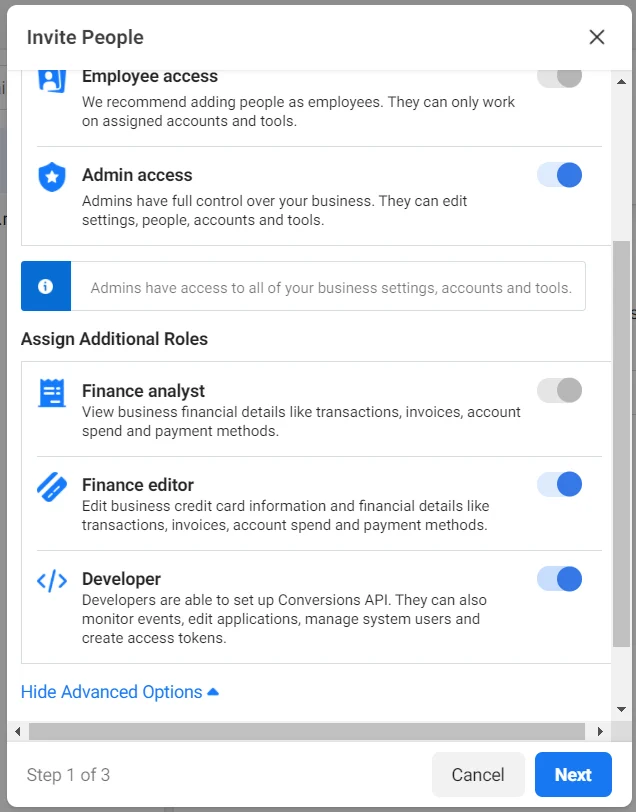
8. Now, when you’ve deleted the administrator, you need to create the backup link, so that if your account is logged out, you can relate the same BM to another account the same way. For this, click “Add”, enter a real or fake email, select all the sliders, click “Show advanced options” and select the sliders once again, giving yourself full access
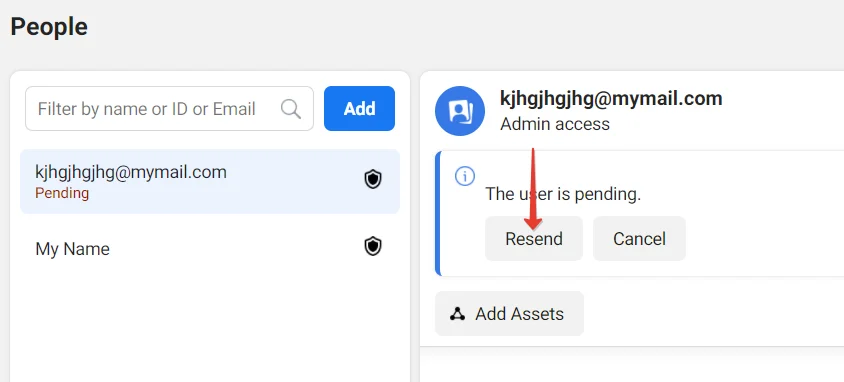
9. Make sure that you did everything according to the illustrations in this guide. Then click on “Resend an email”. A window containing your link will pop up with an offer to copy it. Copy and save it.
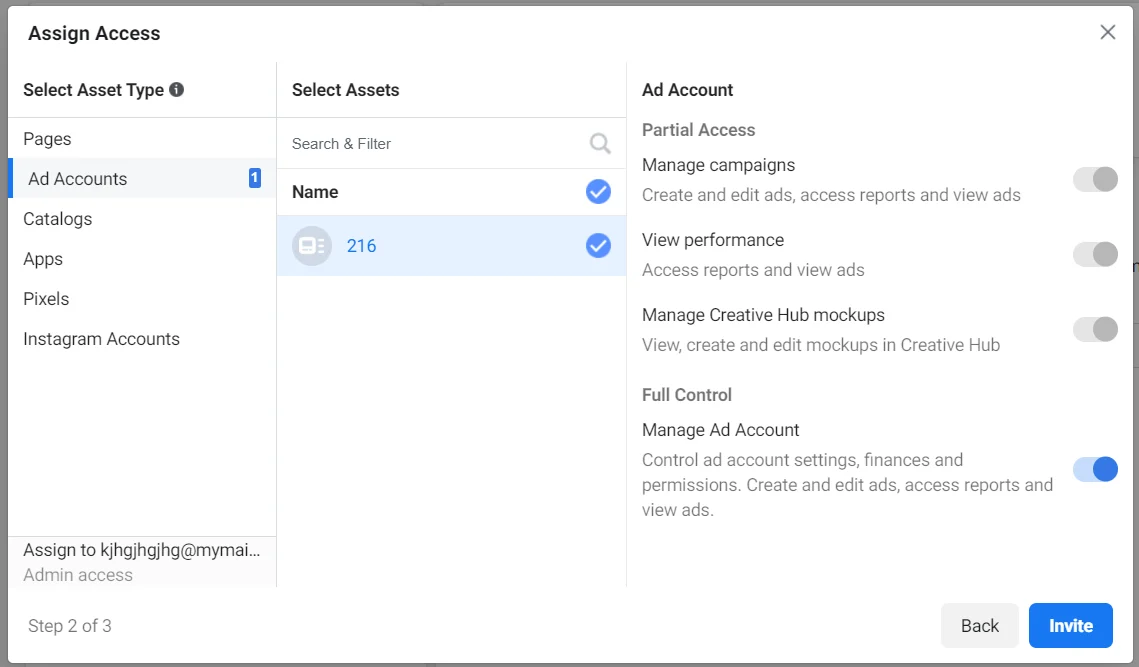
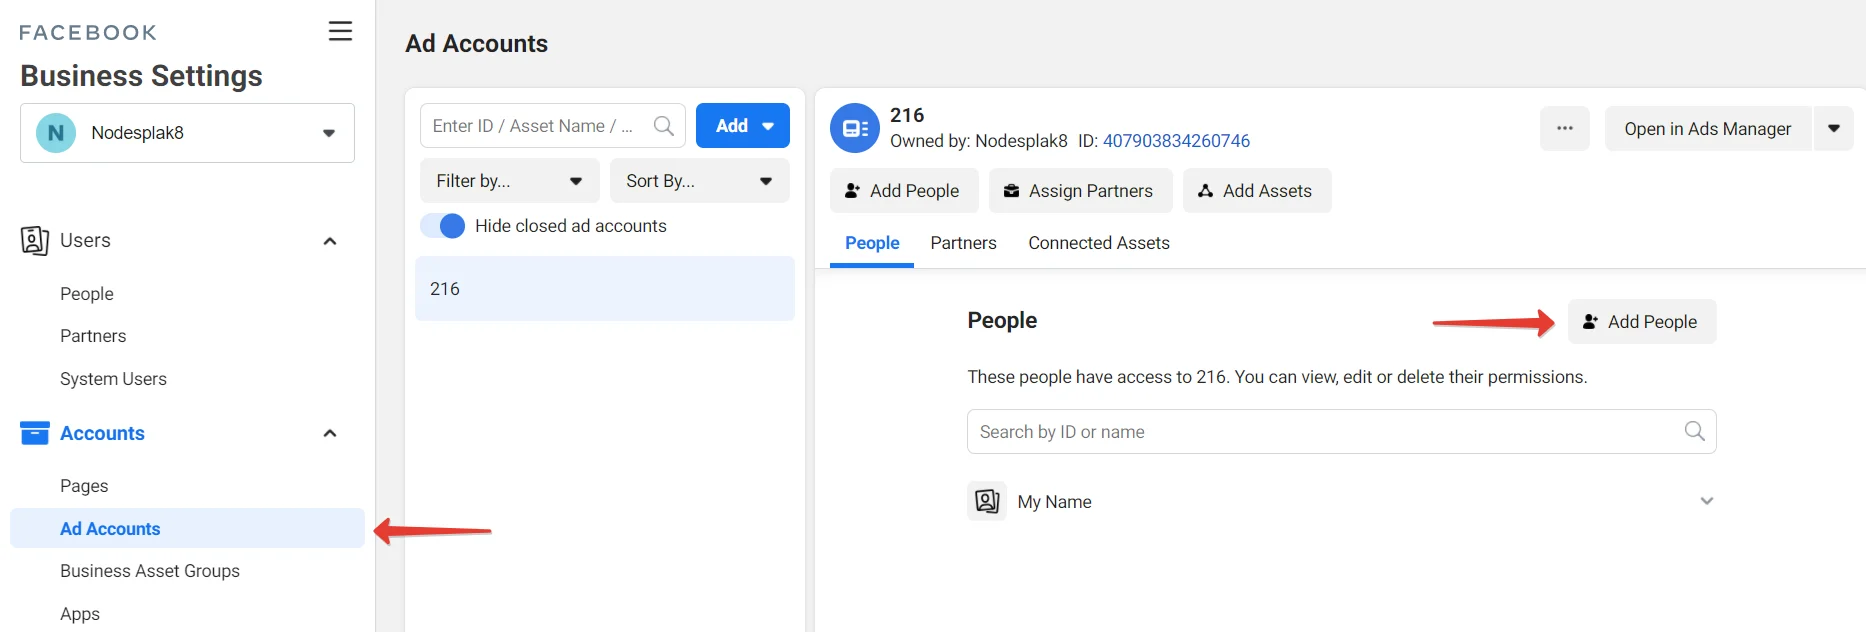
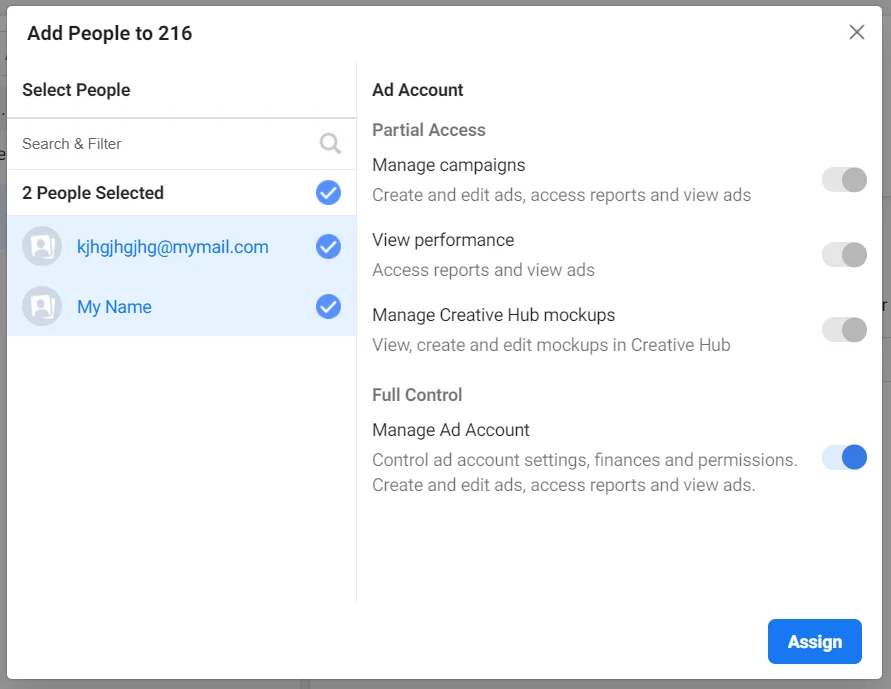
10. Next, go to “Ad accounts”, add your BM and your email in the “Add people” tab. Select the relevant sliders, then click “Assign”
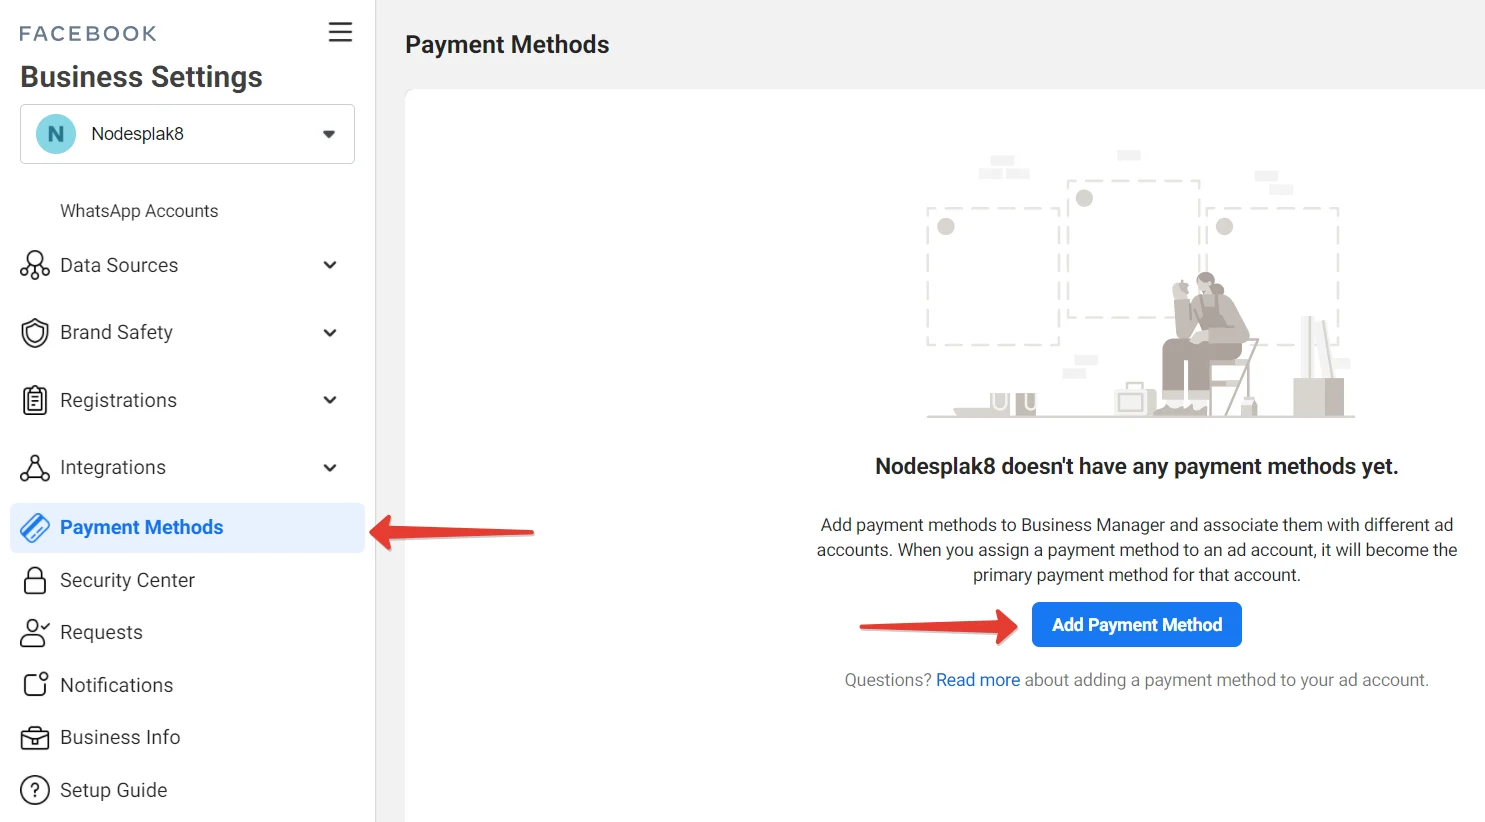
11. Now your BM is ready. But you can still add a bank card so that you can use it with all ad accounts of this BM in the future. To do so, go to the “Payments” tab and click “Add payment method”. Add the card details. Later, when you will be launching an ad, choose “Select a payment method from Business Manager”
That’s it! Now you’ve created the BM and you can run ads with it. I hope this guide will come in handy for both beginners and experienced publishers. Take care!