

![[FBM] CARDS](https://cpa.rip/wp-content/uploads/cr-a1/fbm-cards-v1/fbm-cards-logo.svg)

We tested the local MiniMax H3 model for generating video from a text description or image. We ran it in ComfyUI on rented H100 NVL hardware in RunPod and on NVIDIA DGX Spark. We selected a text encoder to reduce censorship. Below are the test results and a ready-to-use installation script.
Video Generation Results
H100 NVL in RunPod
Text-to-video: generating a 5-second video at 864×480 resolution took 101.26 seconds. The video was generated uncensored, we censored the result ourselves:
Text-to-video: we tested it by generating an iGaming creative:
Image-to-video: we tested generation with voiceover:
NVIDIA DGX Spark
Text-to-video: on DGX Spark, we ran a more demanding task, a 40-second video took 1 hour, 45 minutes, and 27 seconds to generate:
How to Run MiniMax H3 in RunPod
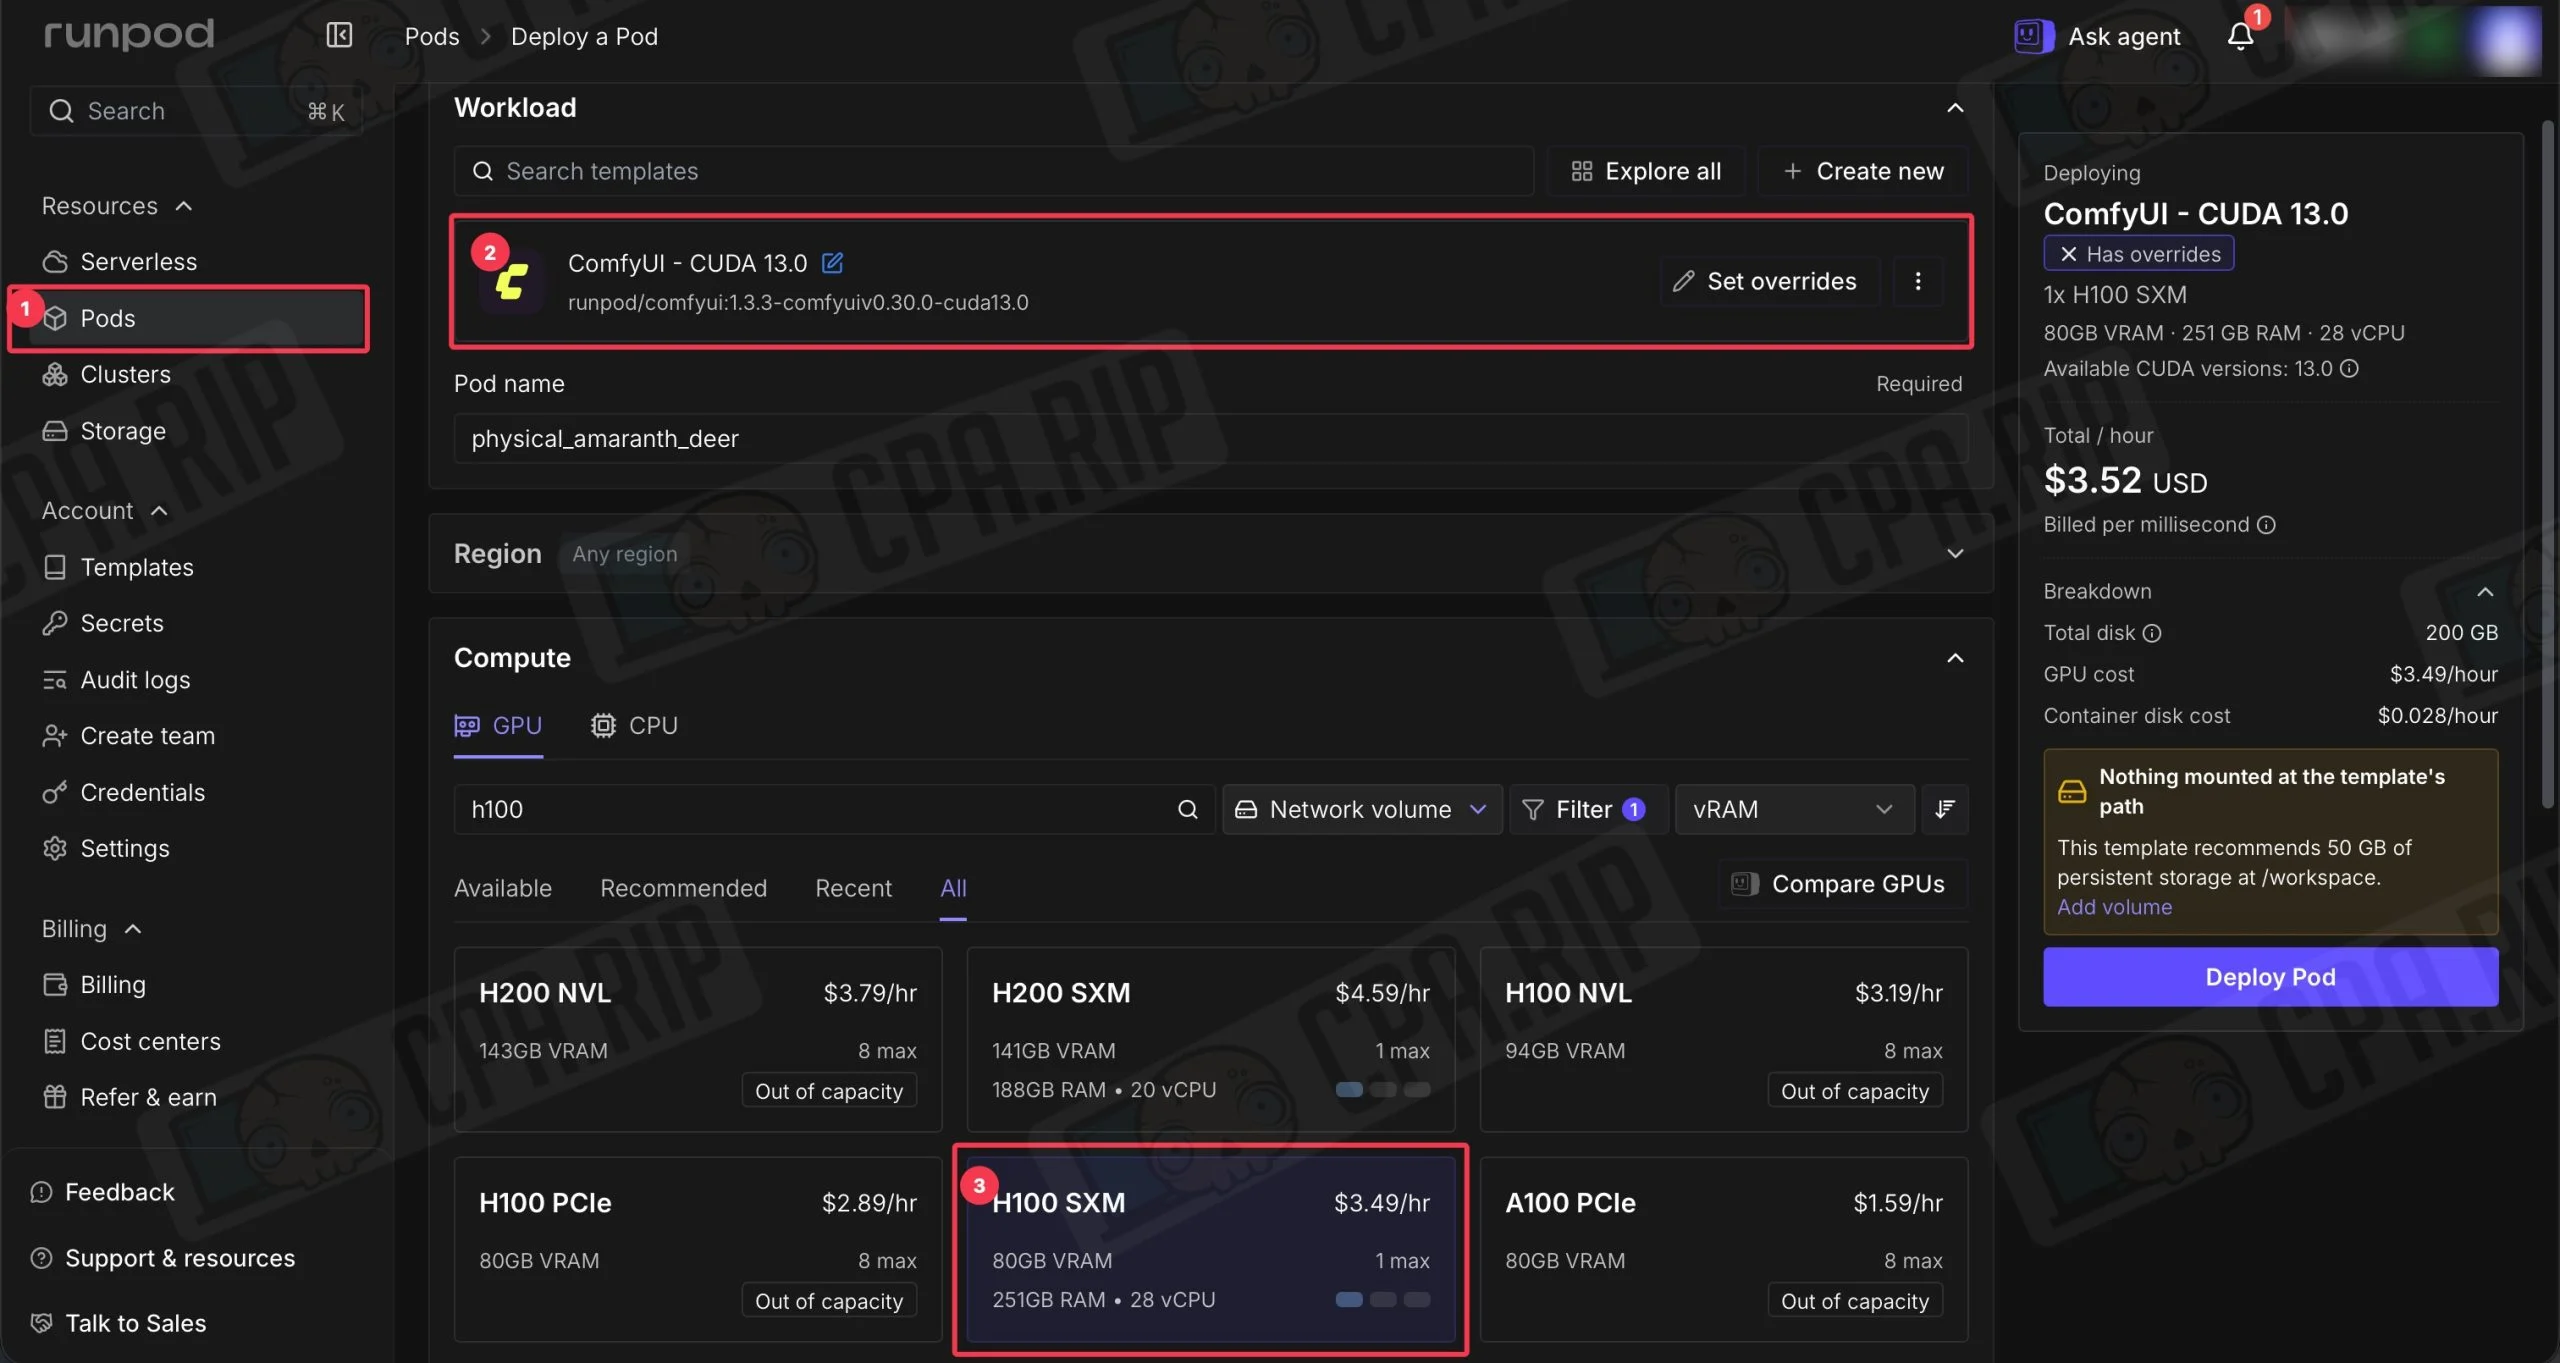
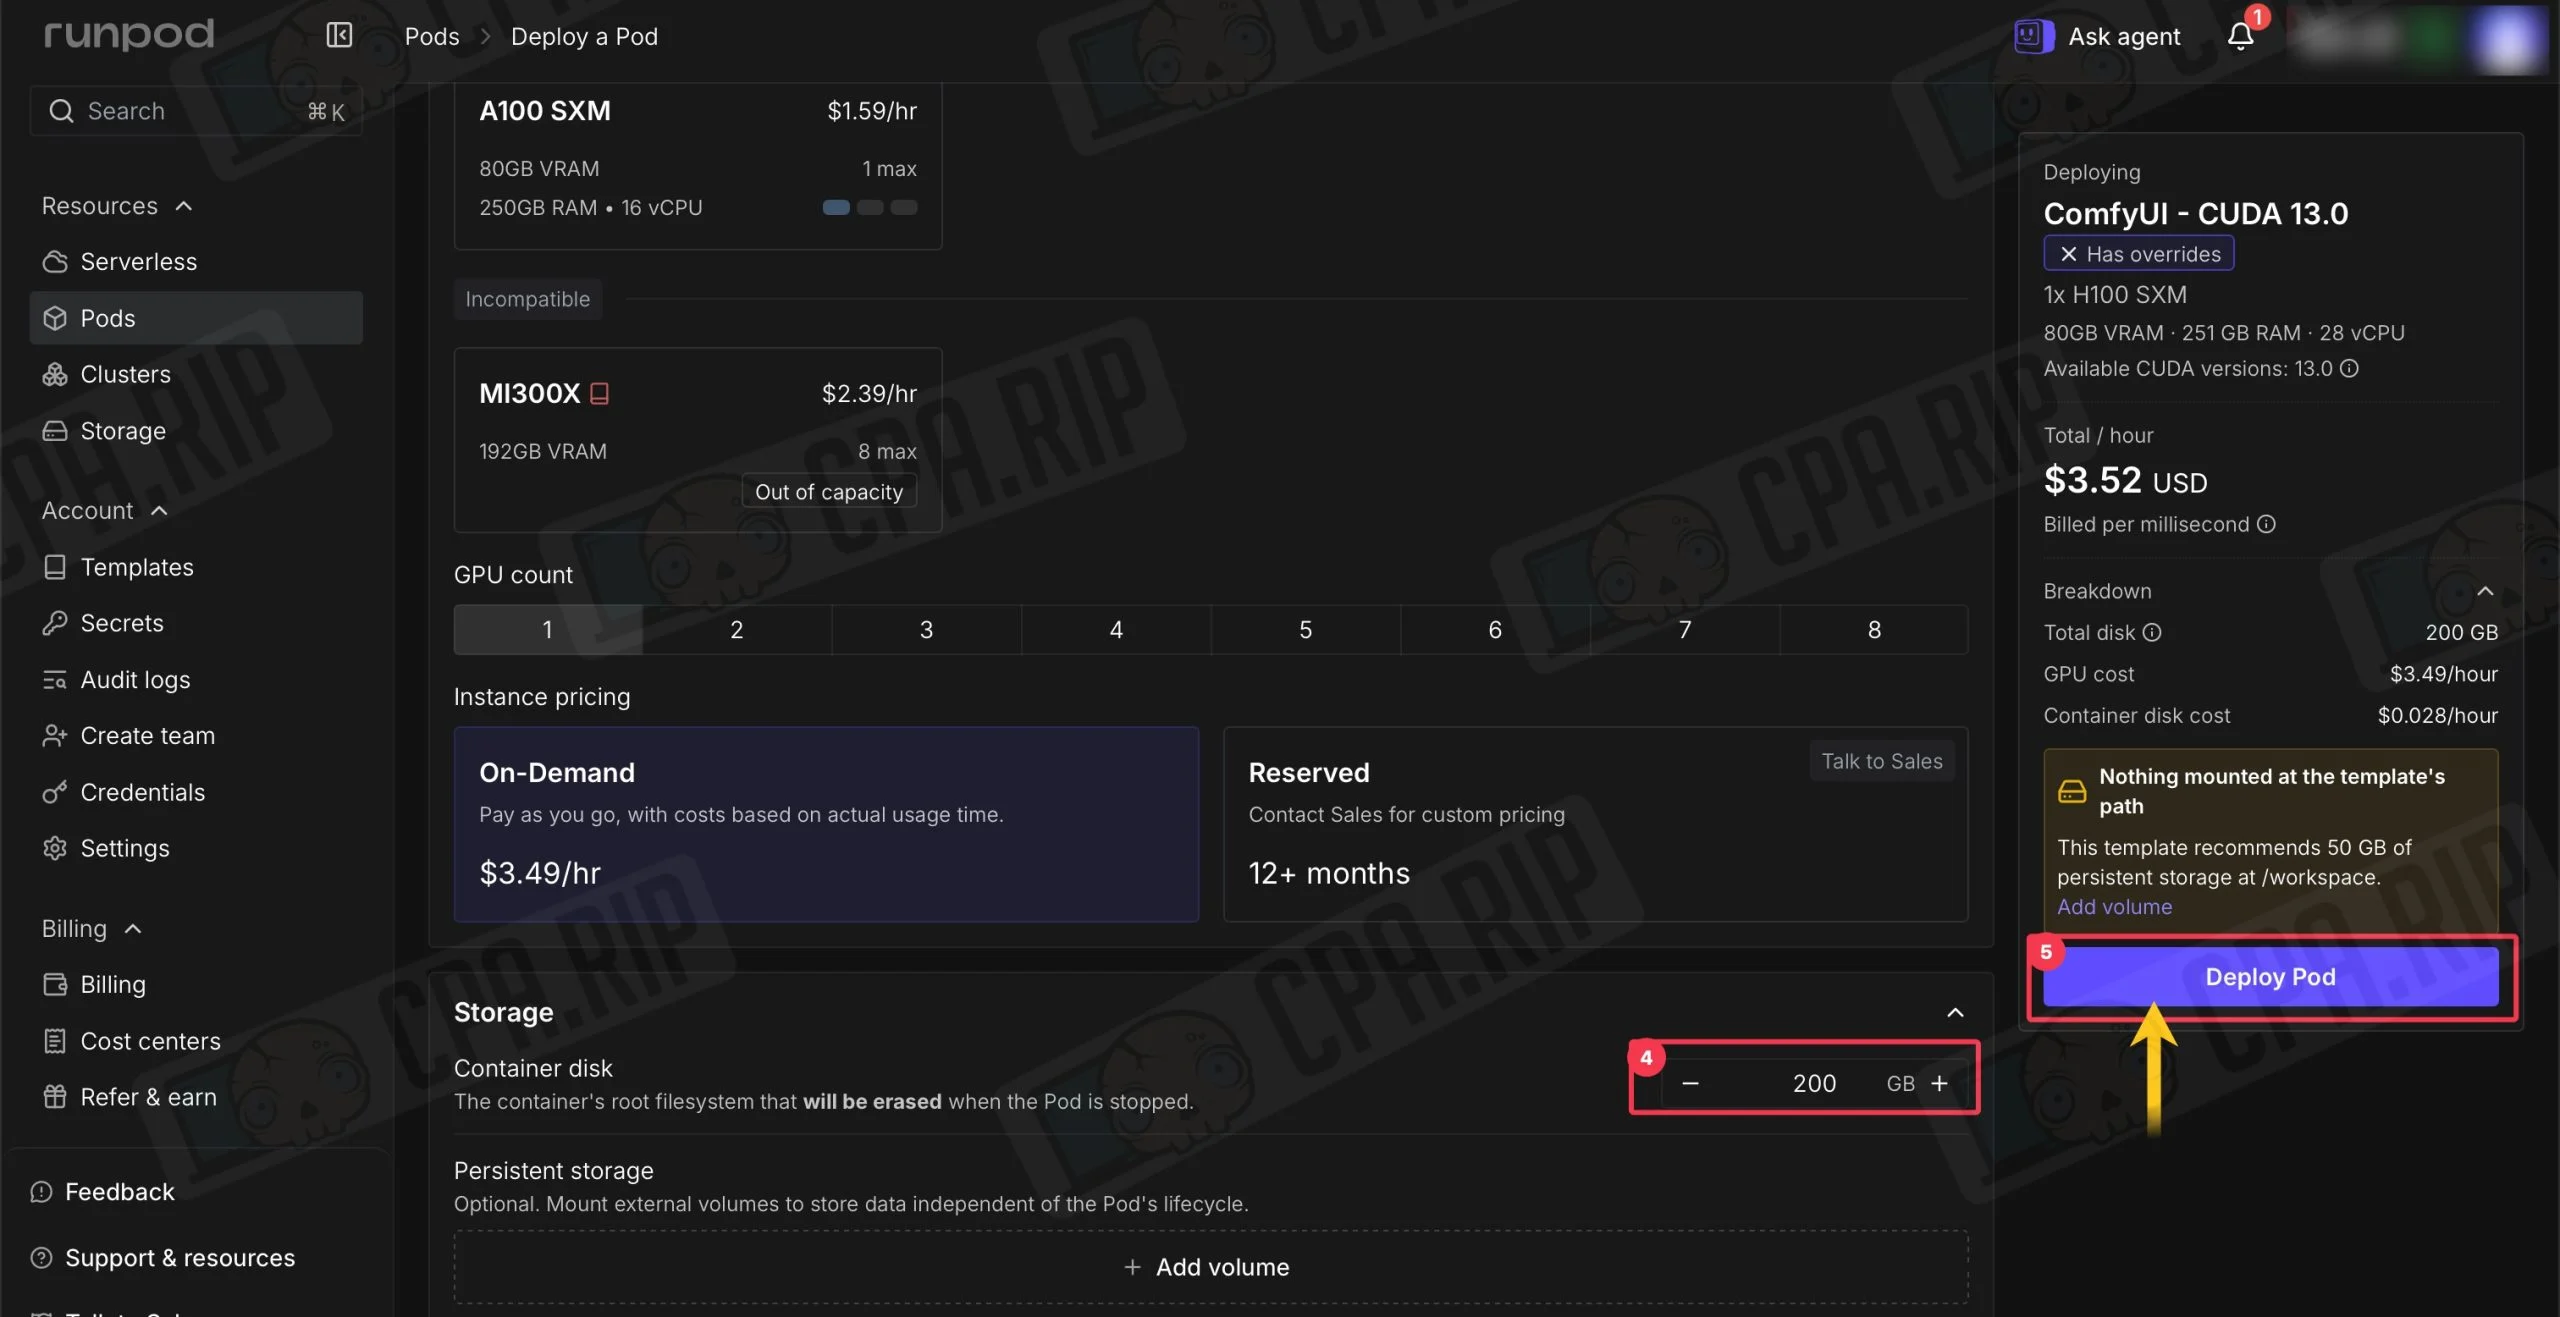
For the test, we used the cloud service RunPod, where you can rent a server with a powerful graphics card and pay only for the time it runs. We selected an H100 SXM with 80 GB of VRAM, a ready-made ComfyUI template, and a 200 GB container disk. At the time of testing, the server cost $3.52 per hour.
IMPORTANT! RunPod charges you for the entire time your Pod is running, including installation time and system idle time. After you finish, you need to download the completed videos and then click Stop. When using Container Disk mode, files are not saved after stopping, so you will need to reinstall the model the next time you launch it.
You can also connect persistent Network Volume storage. Files placed on it will be retained between launches, but you will be charged for the storage even when the server is stopped.
- Register with RunPod using this link: https://www.runpod.io/ (if you register through our link and top up $10, you can receive bonus RunPod credits).
- Top up your balance
- In the side menu, select Pods
- Then select the ComfyUI – CUDA 13.0 template
- Select an available server with a suitable graphics card. We used an H100 SXM with 80 GB of VRAM.
- Set the storage size. You need 200 GB.
- Click Deploy Pod
Usually, server deployment takes around 5 minutes, but it can sometimes take longer. One of our launches took 27 minutes of billable time.
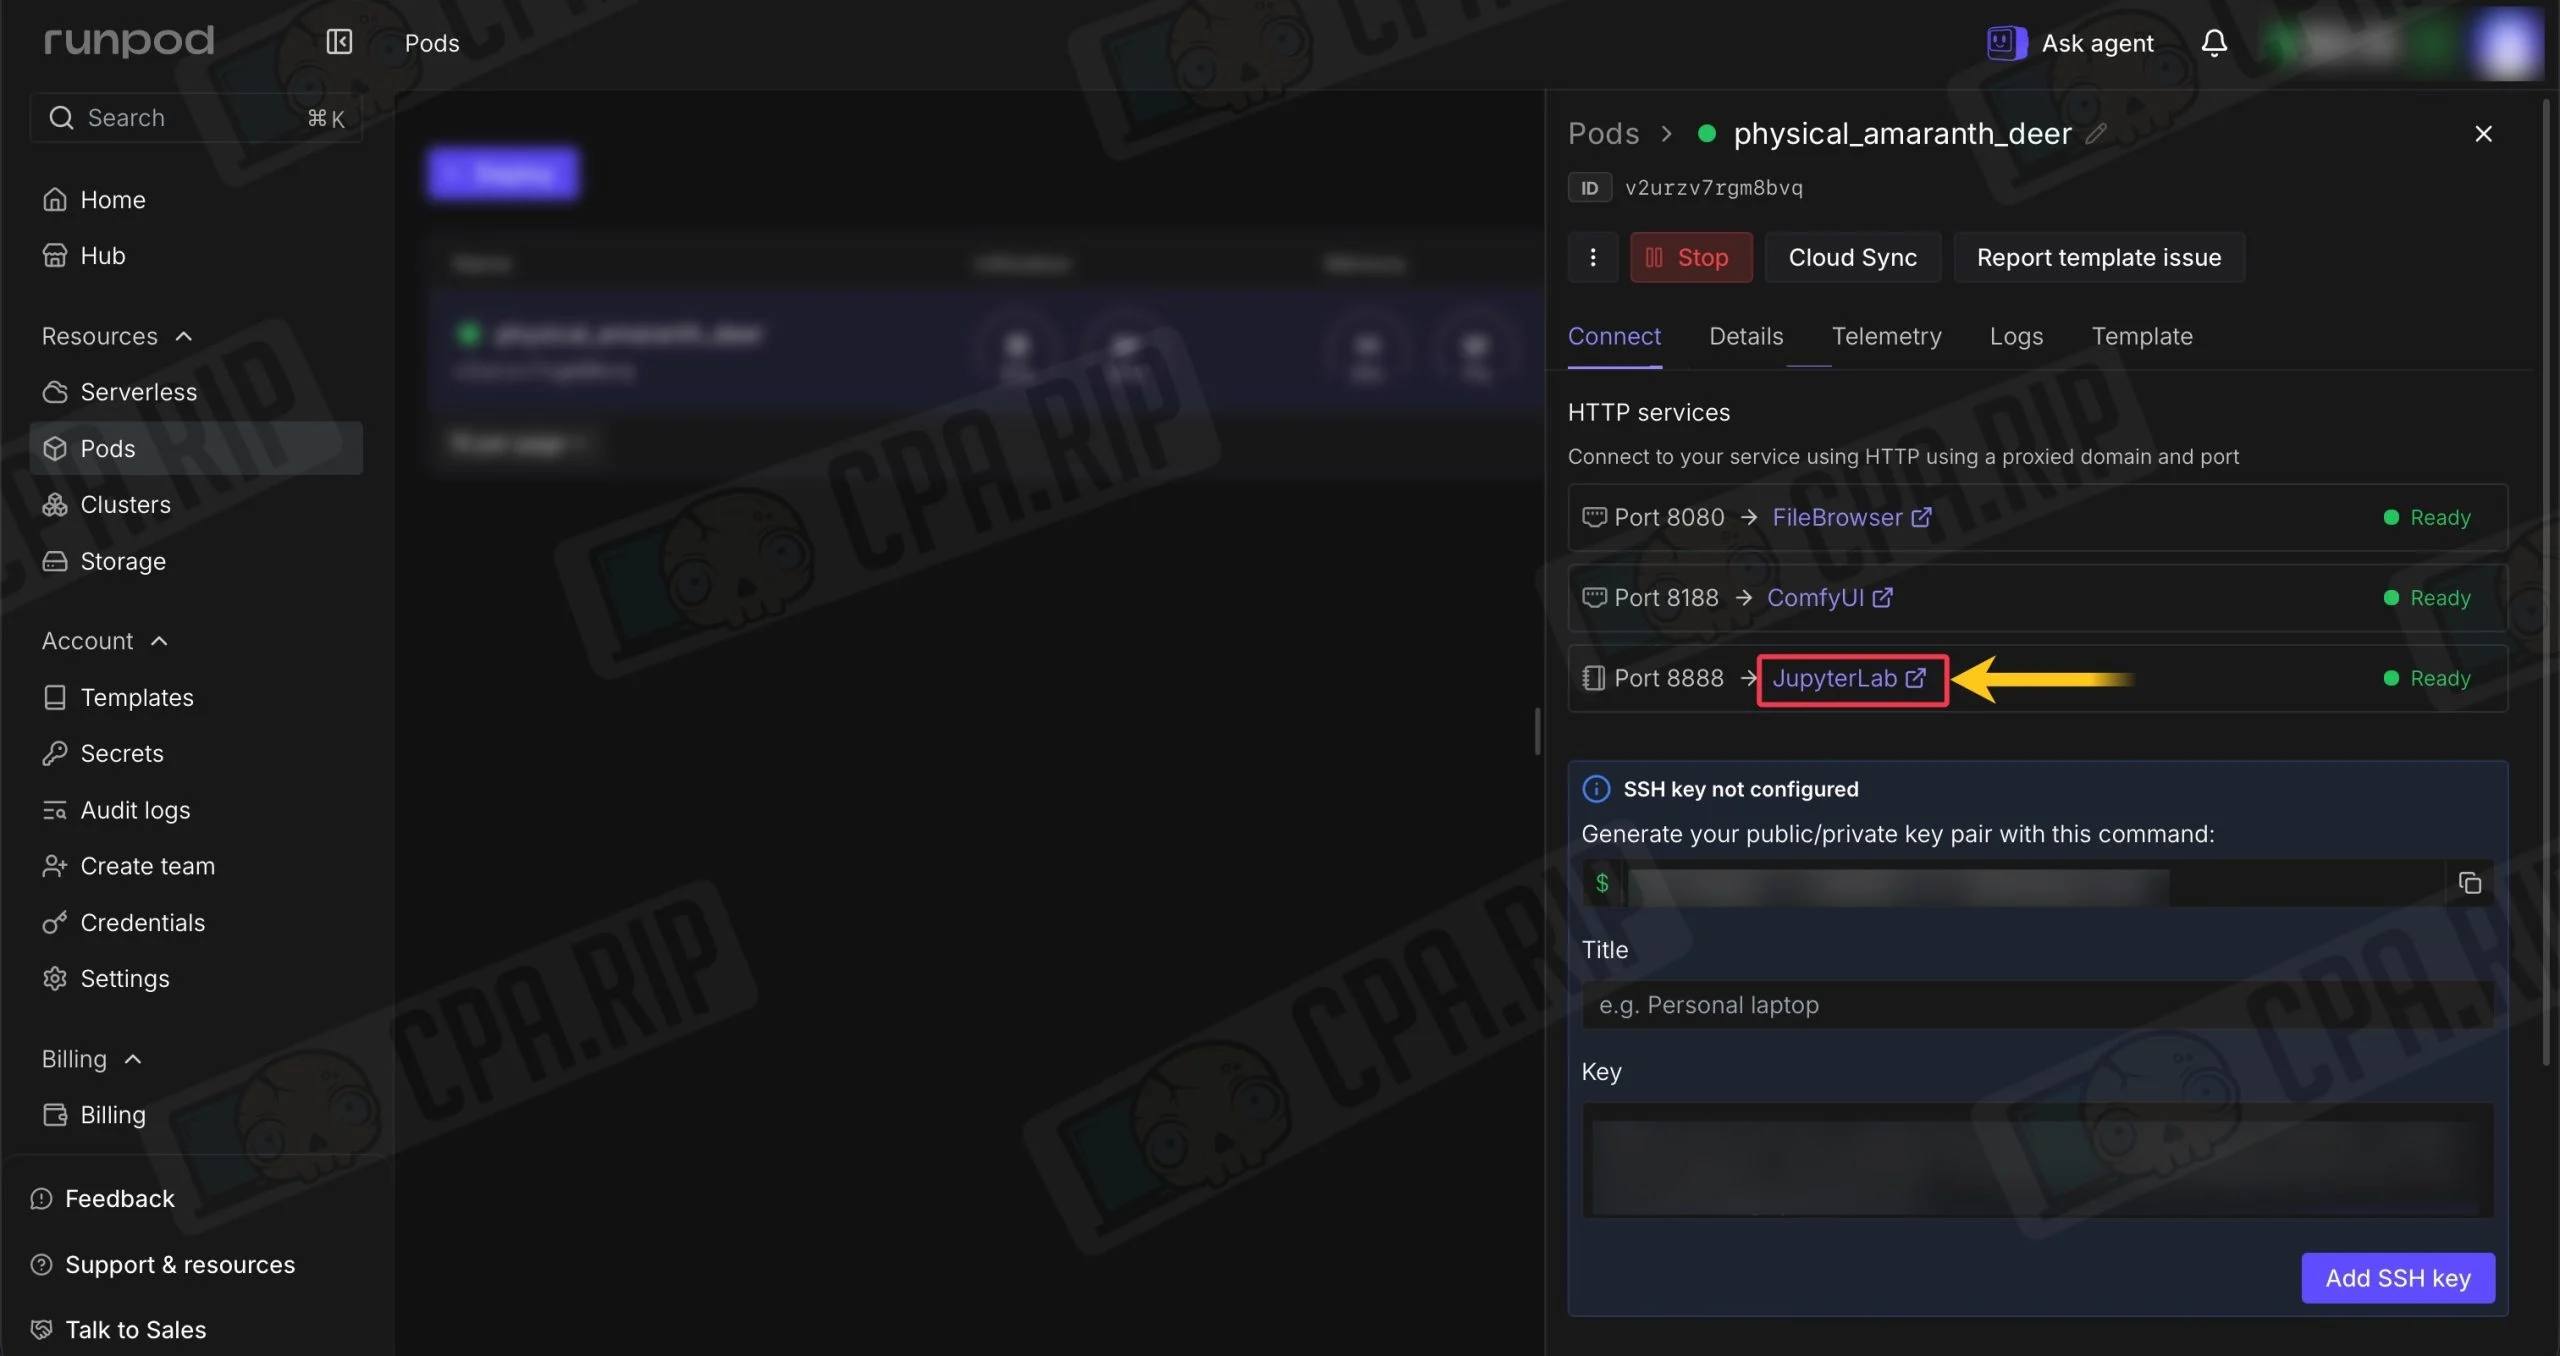
- After the Pod launches, open Connect → Jupyter
- Download our ready-to-use h3-setup.sh installer from this link: https://drive.google.com/file/…. It is designed to run in ComfyUI on RunPod with NVIDIA H100.
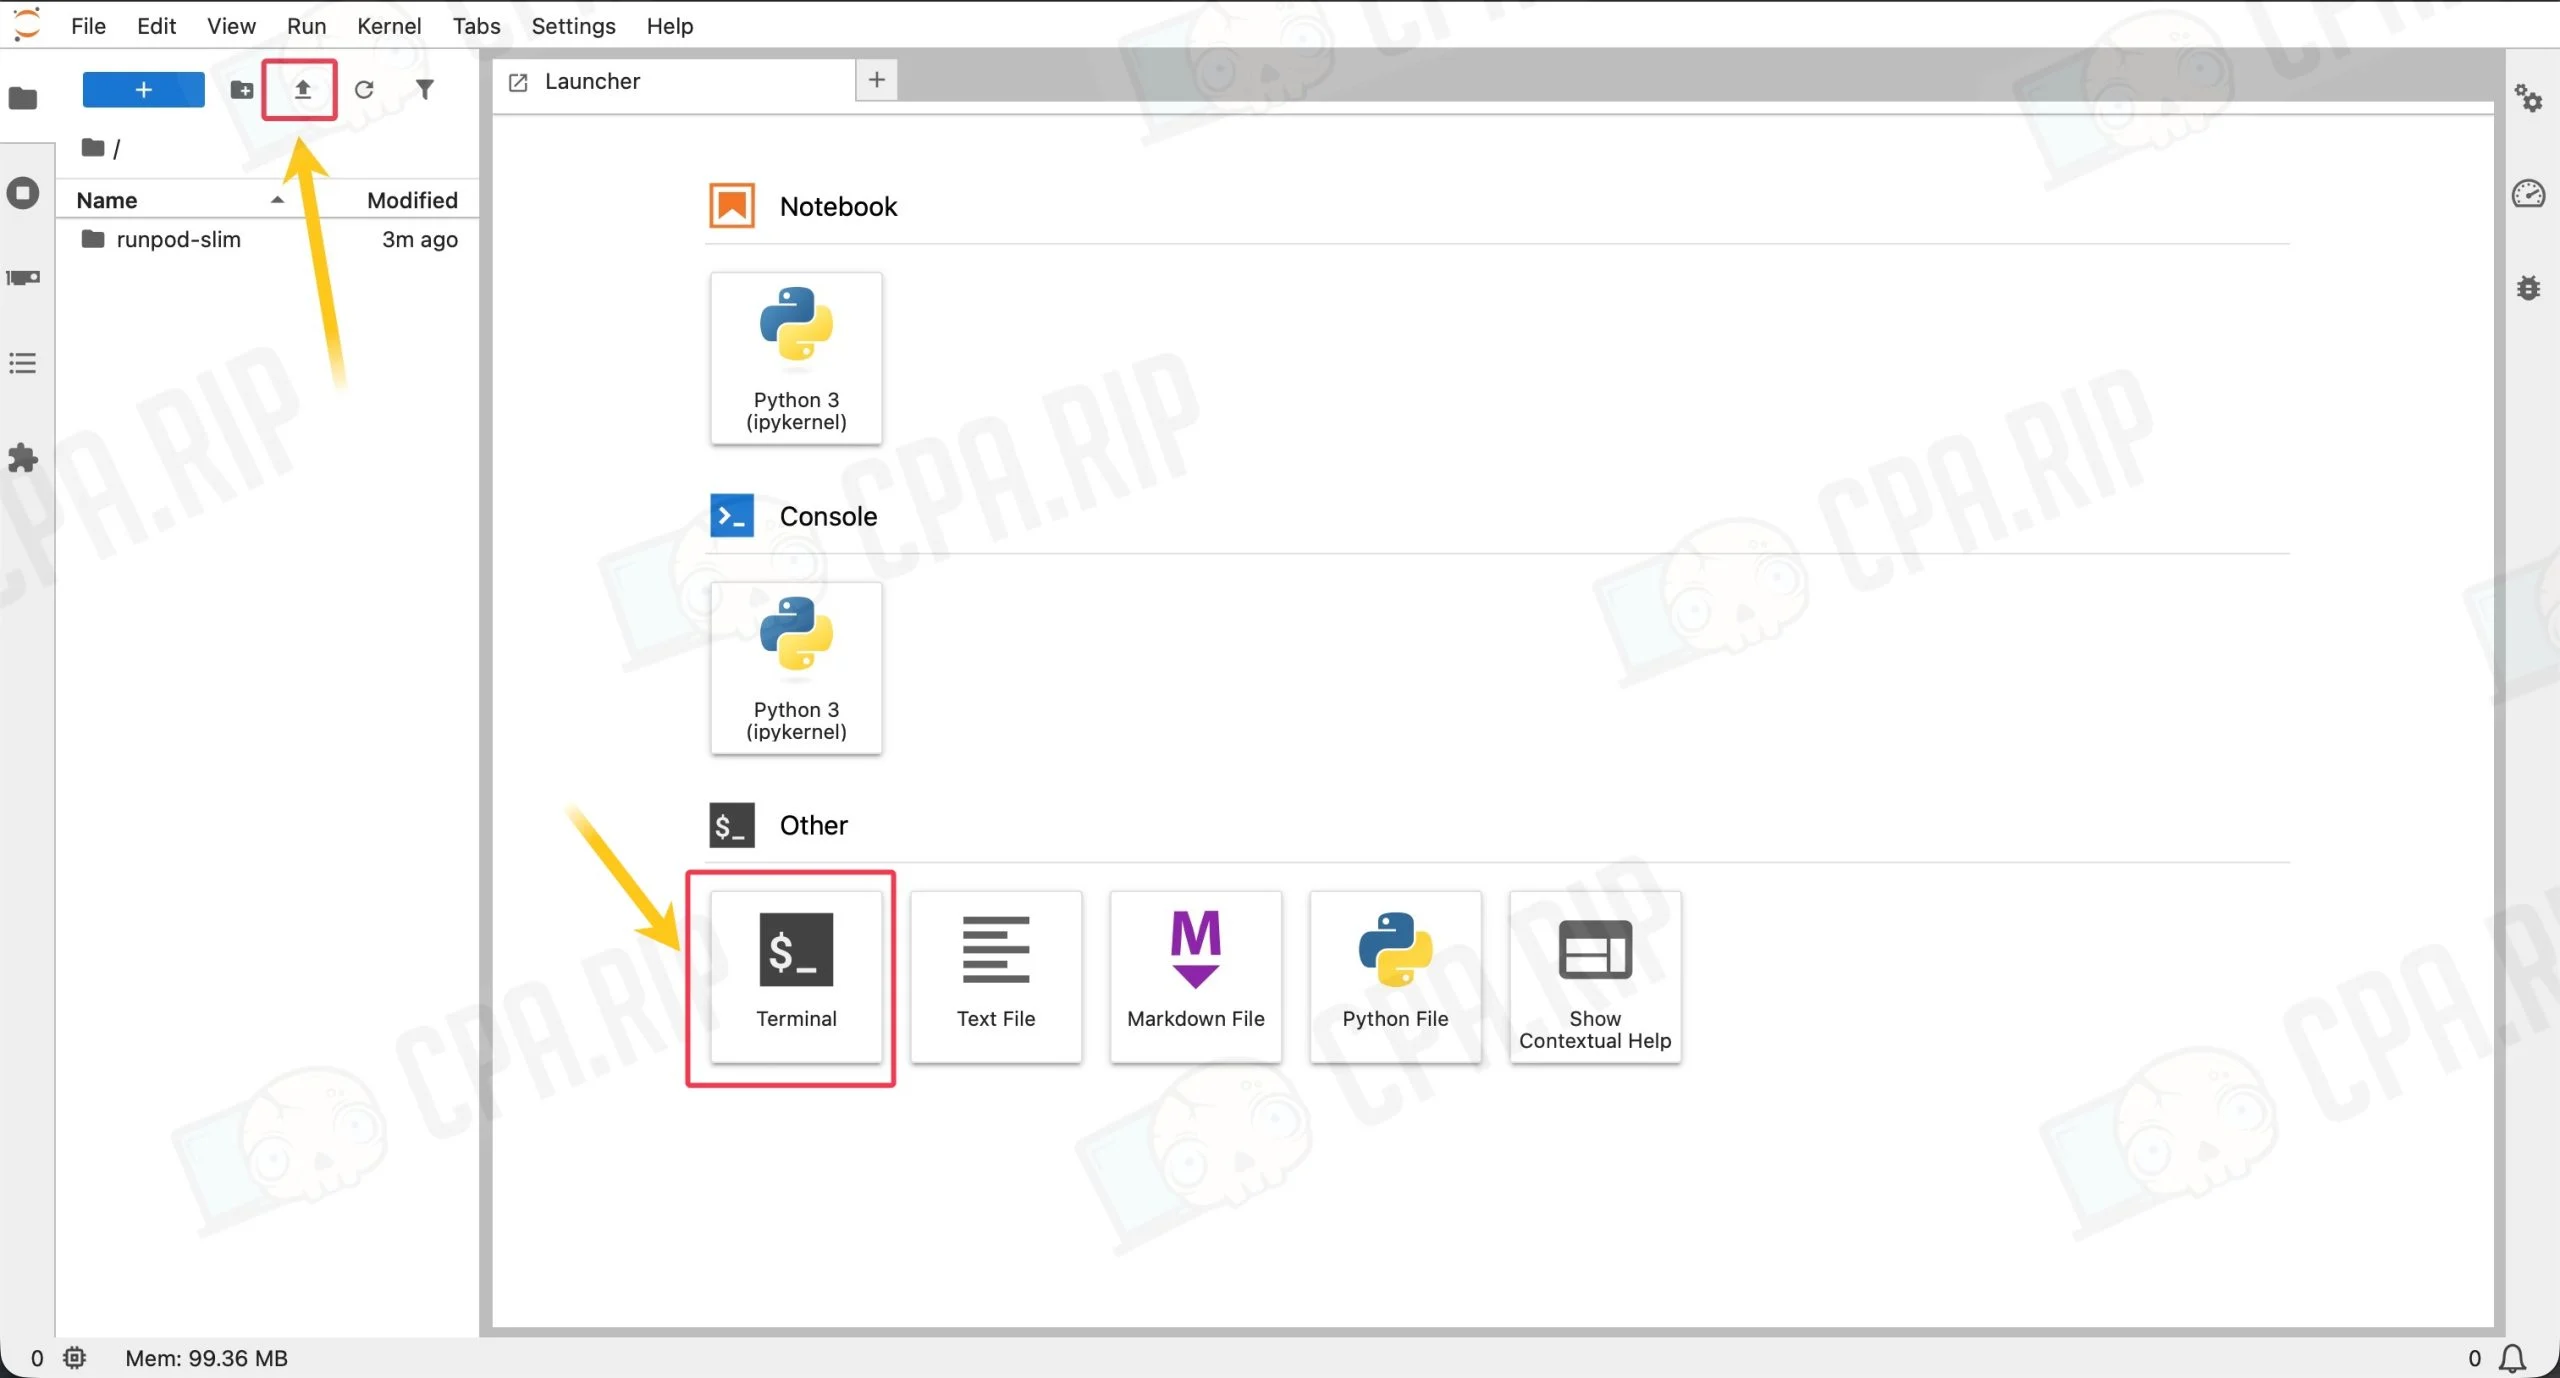
- In the Jupyter window that opens, upload the
h3-setup.shfile to the/workspacefolder by clicking the upload icon and selecting the file in your computer’s file explorer. - Then open the terminal by clicking the corresponding Terminal tile:
- and run the command:
bash /workspace/h3-setup.sh
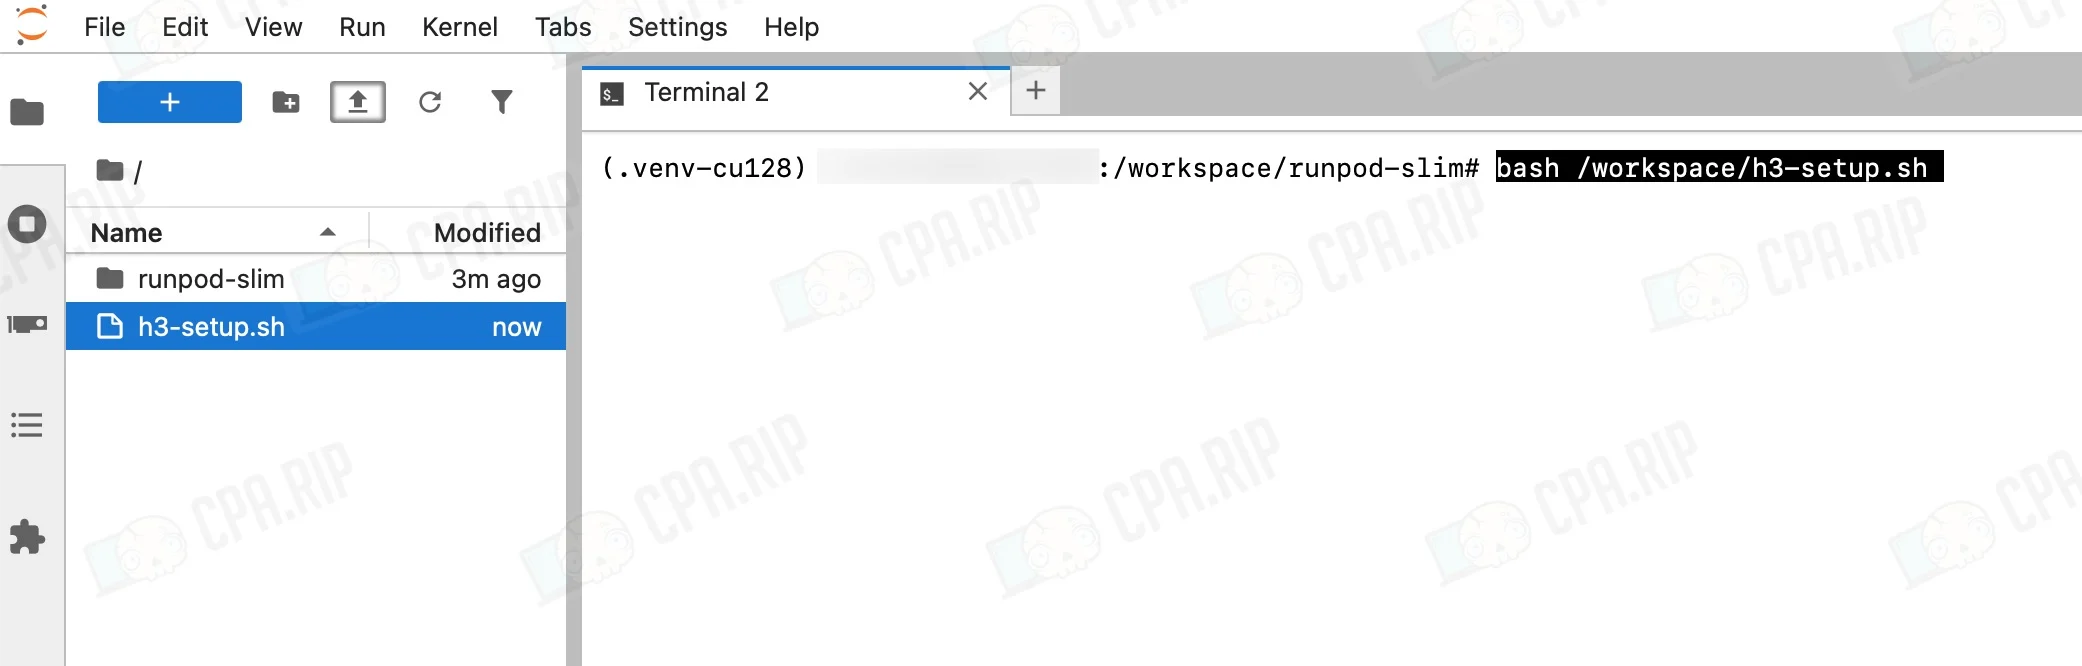
The script will update ComfyUI, install dependencies, and download the required models. This usually takes 3-4 minutes. To reduce censorship, the standard text encoder is replaced with Ultra-Heretic, a Qwen3-VL-32B modification with reduced restrictions.
- After installation is complete, open Connect → ComfyUI and select the required model in the templates: Video → MiniMax H3: text-to-video or MiniMax H3: image-to-video.
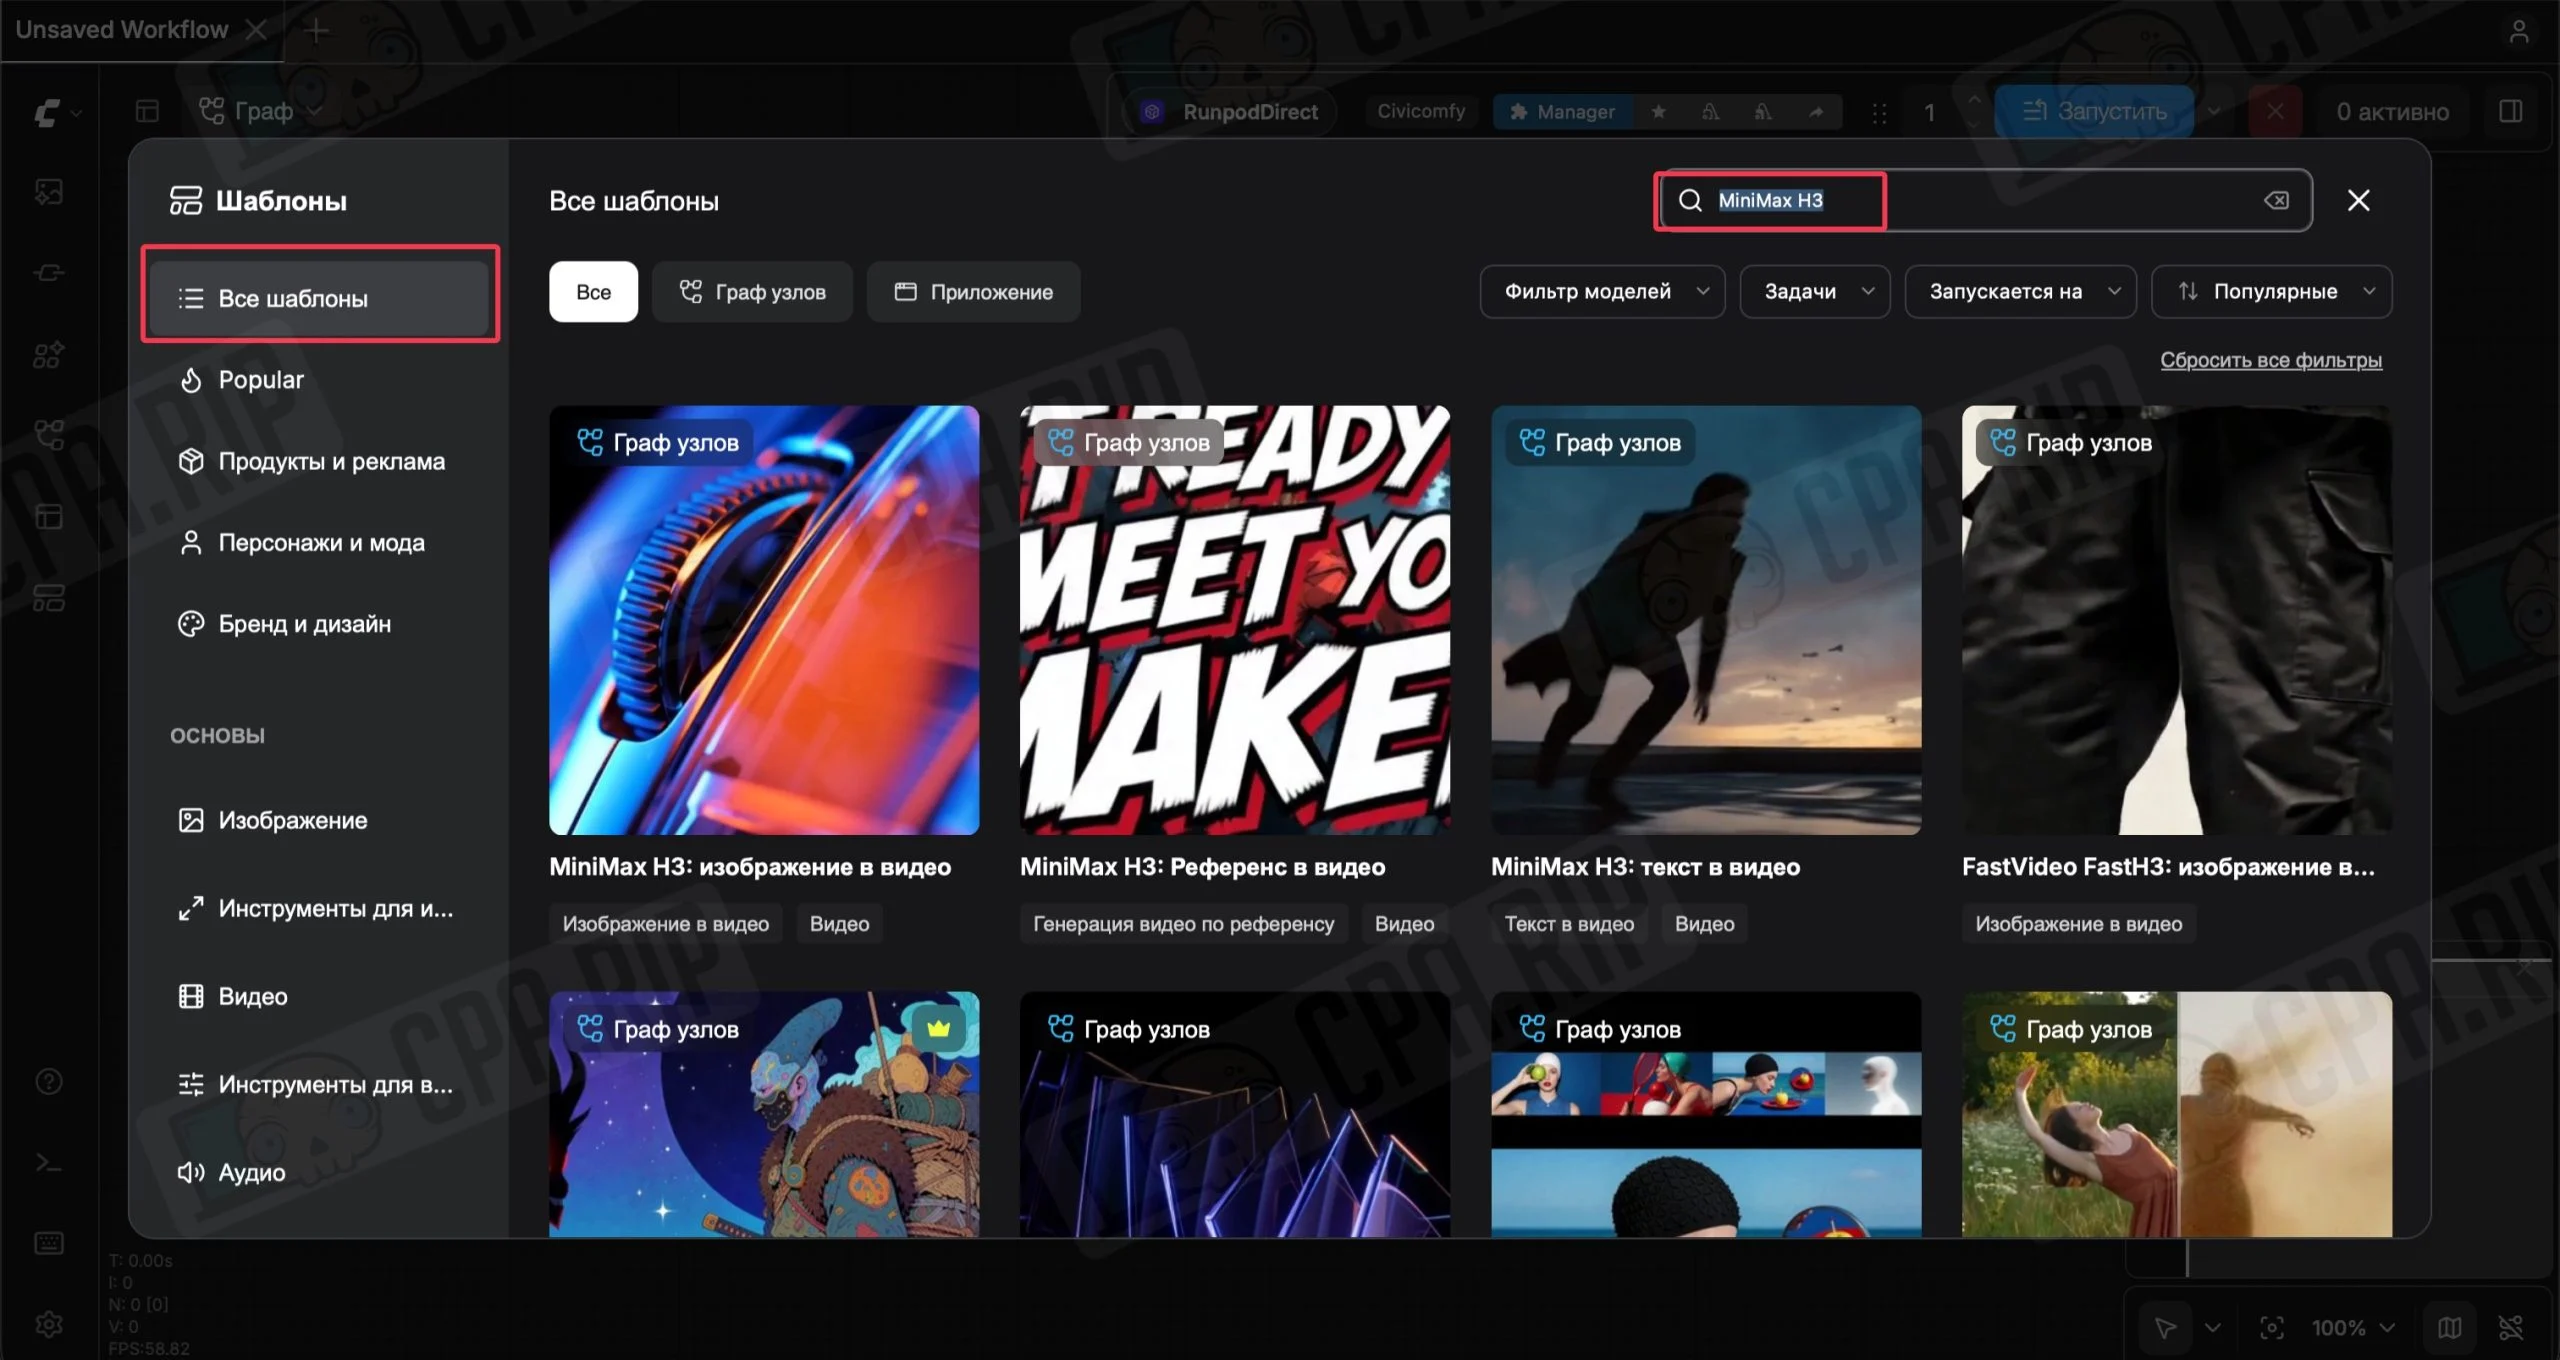
- In the module highlighted with a red border because of an error, select
qwen3vl_32b_h3_ultra_uncensored_heretic_int8_convrot.safetensorsin the clip_name field
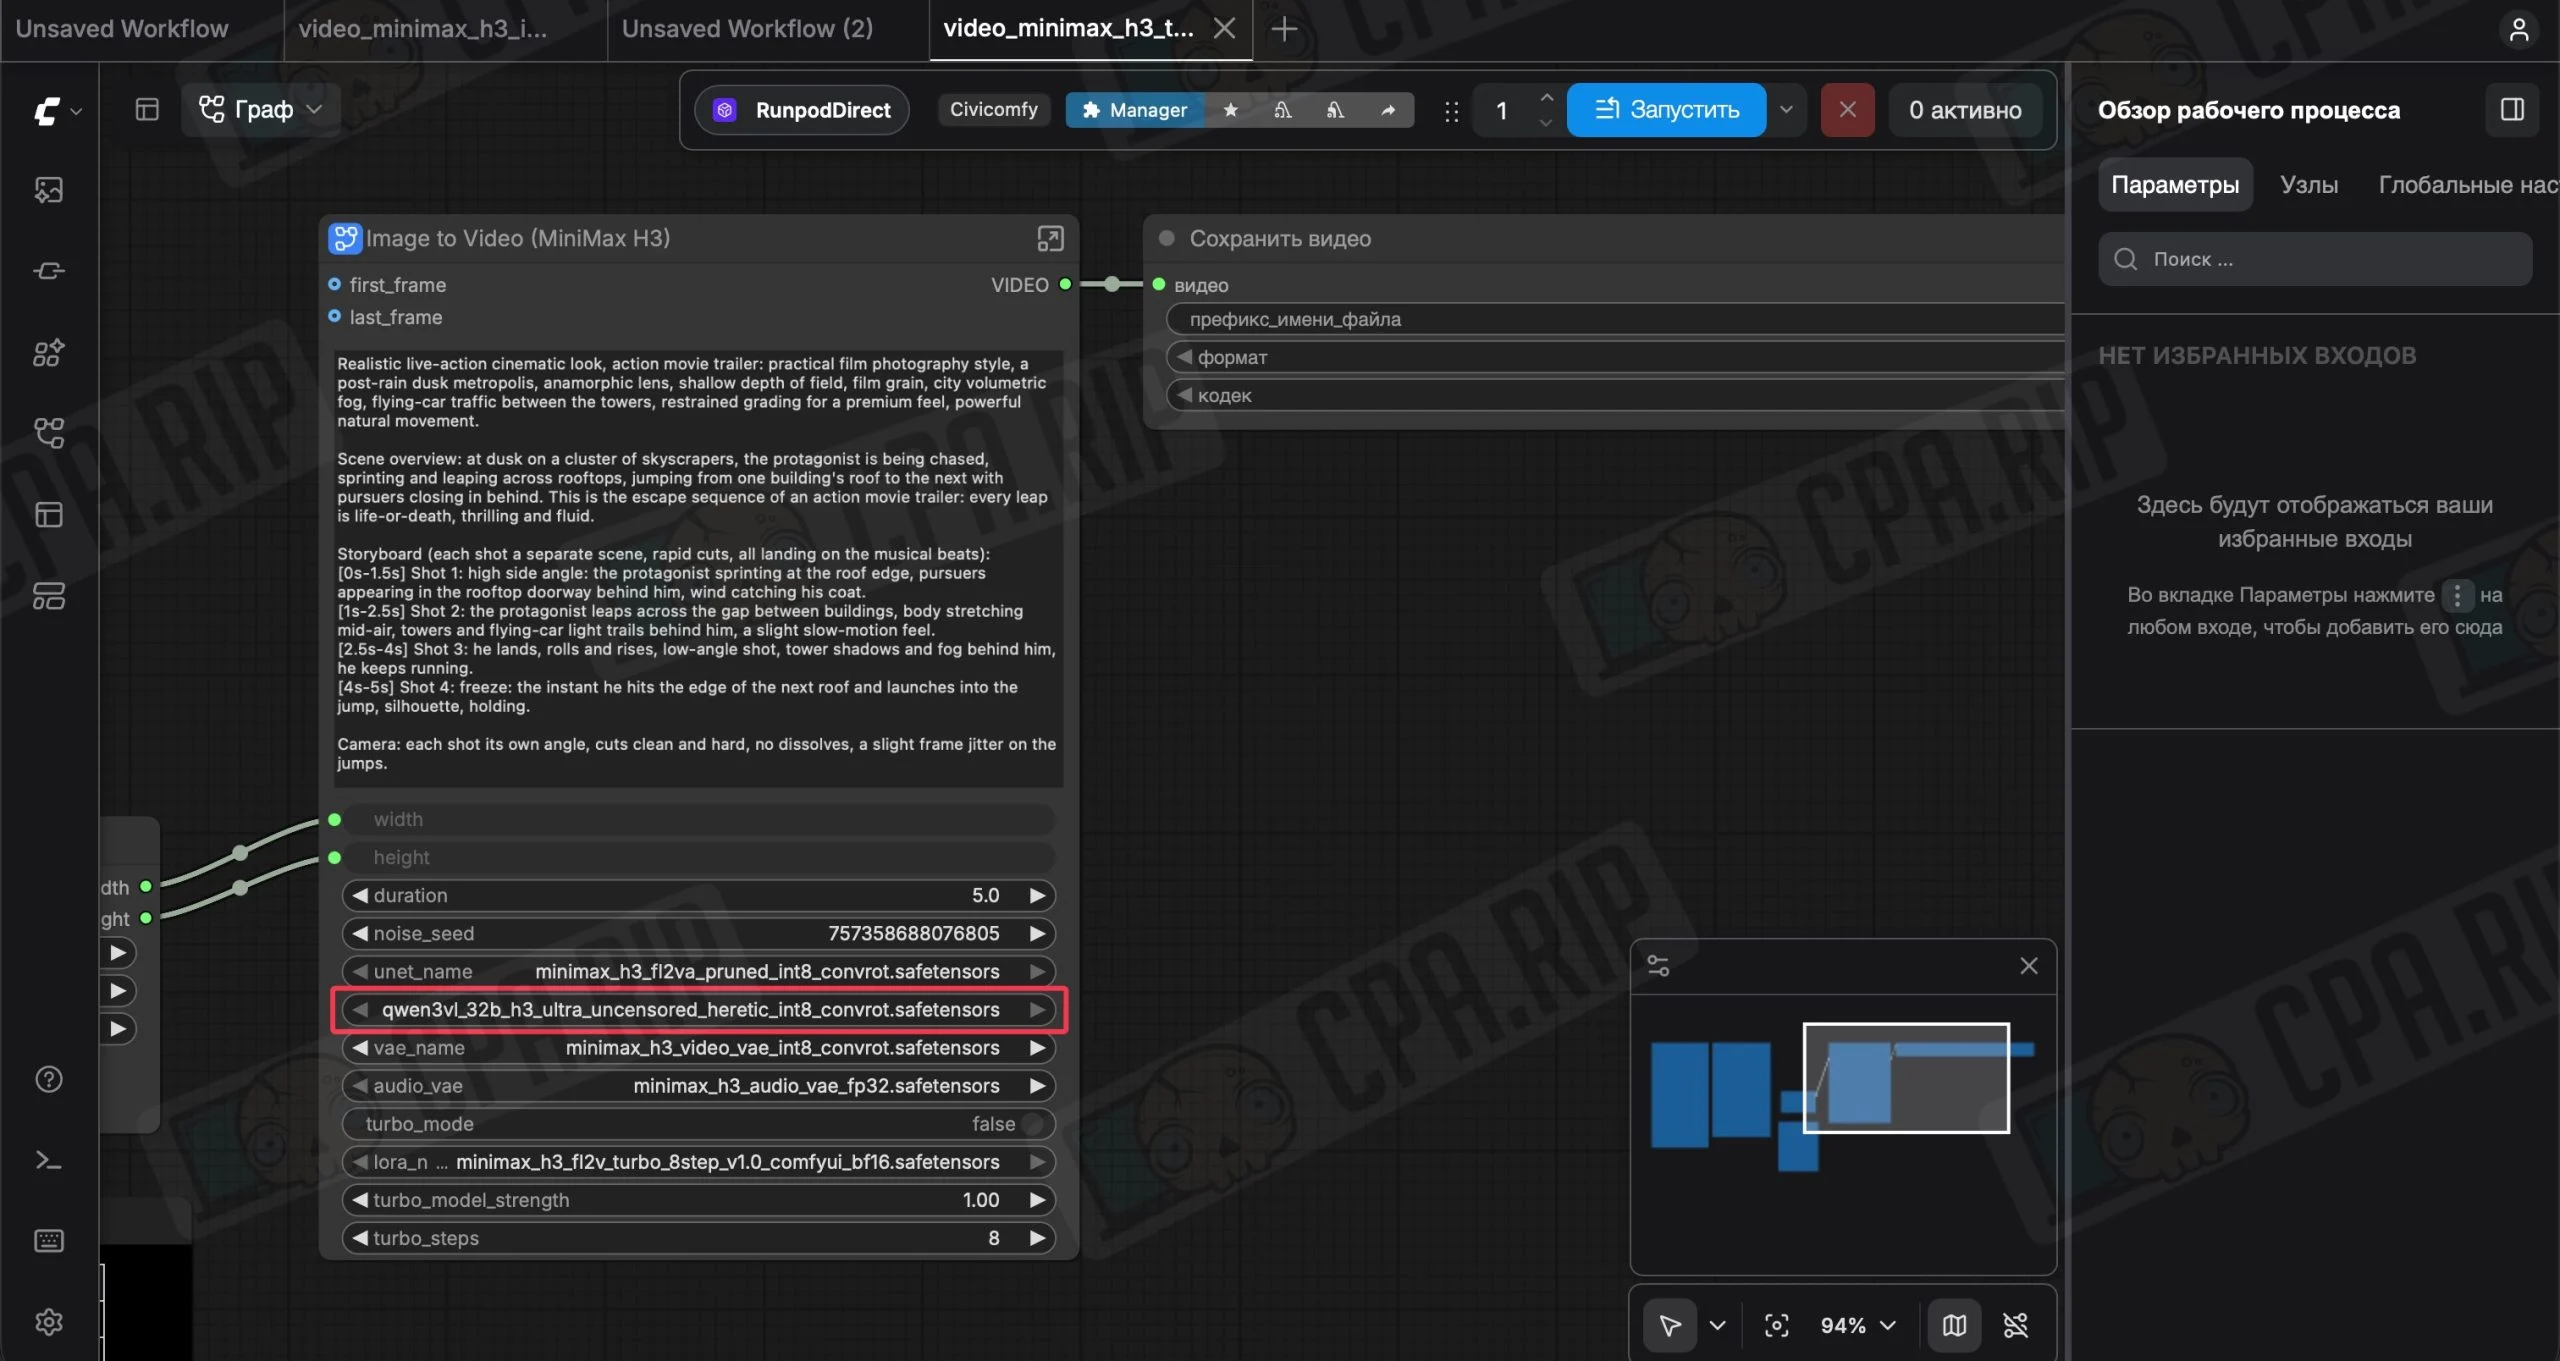
- Now enter a prompt, where you can also describe camera movement, speech, music, and other sounds. If needed, upload a reference image, set the aspect ratio, video duration, and other settings, then start generation.
- Download the completed videos and the ComfyUI workflow in JSON format if you want to repeat the generation with the same settings.
IMPORTANT! At the end, do not forget to stop the Pod. Closing the browser is not enough. To stop GPU charges, you need to click Stop in the RunPod panel and wait for the server to stop.








Comments