Welcome, all! Today, you’ll learn how to bring up a tracker in 15 minutes on your SSL-certified domain for free. This option is best for beginners.
I used this scheme when I was a beginner myself. Therefore, I had to make stuff up to work cost-effectively or better yet free.
You’ll need:
- Freenom account.
- Beget account.
- CPA Tracker archive (top 16 trackers)
And about 15 minutes of your time.
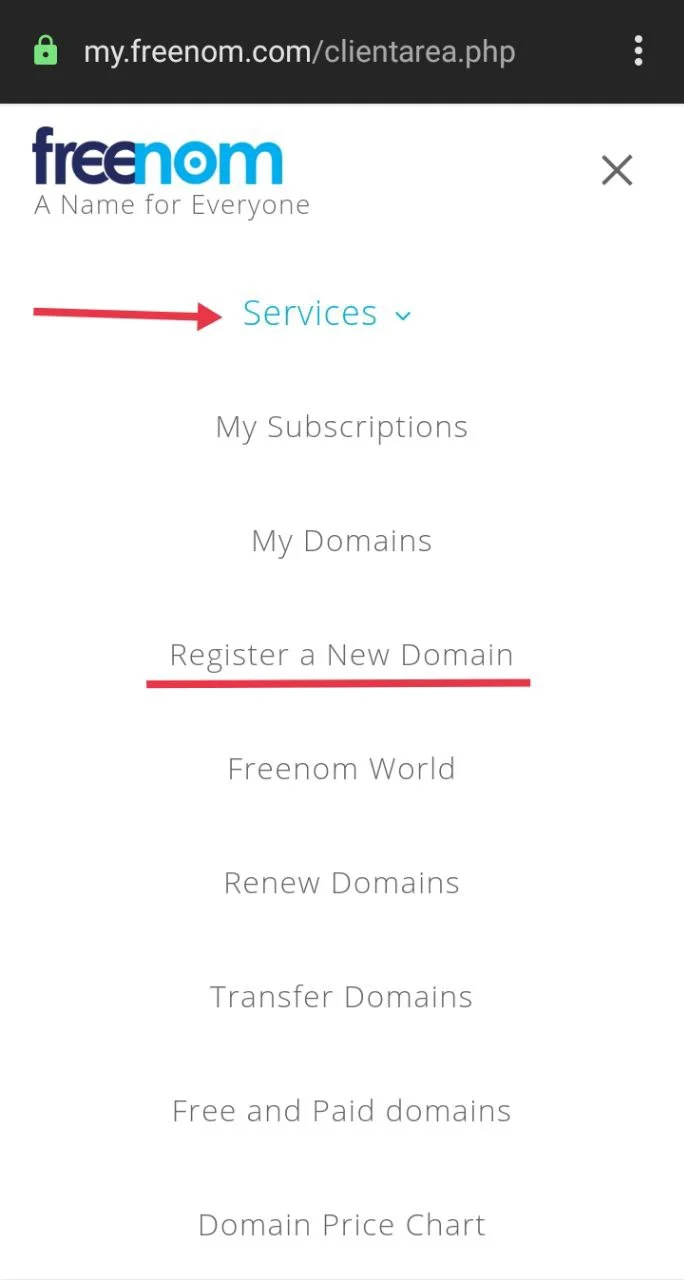
How to register a domain for the tracker?
Go to the Freenom account, ‘Service’ – ‘Register a New Domain’. Enter the URL.
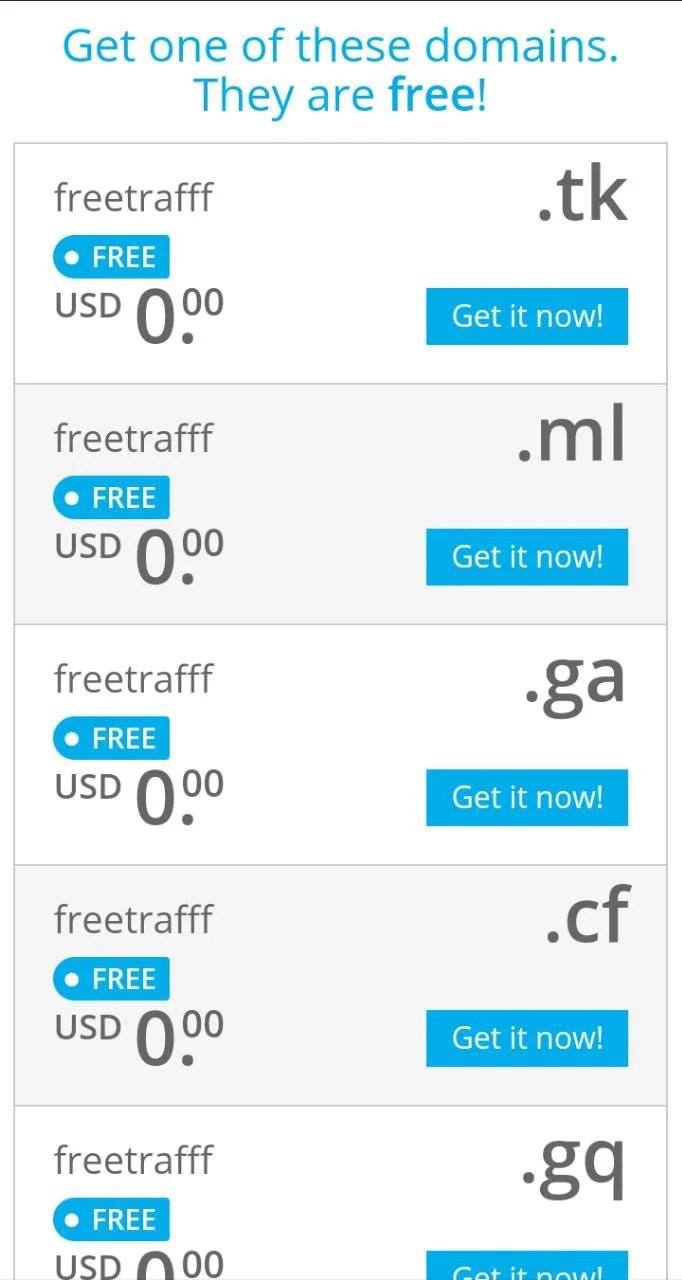
After you choose a domain, you’ll see the following:
From my experience, ML domains are linked to Beget very quickly. And there were no problems with the ML domain. Others sometimes rebound, especially TK domains.
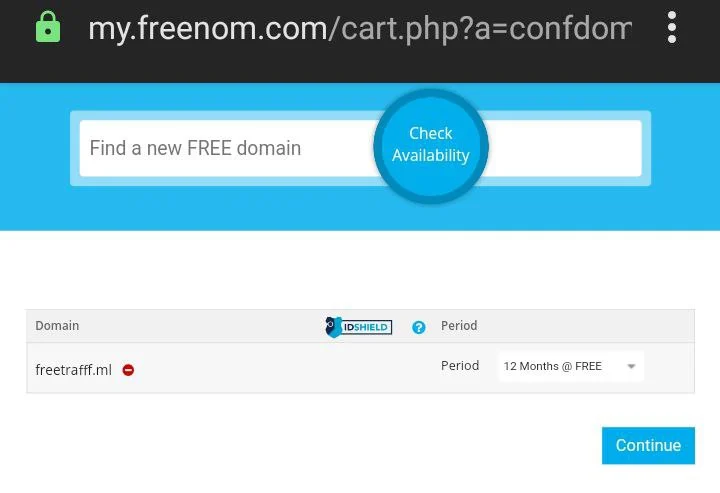
Choose your domain and press ‘Get it now!’ Next, press ‘Checkout’ at the bottom.
Next, choose a free trial period. Press ‘Continue’.
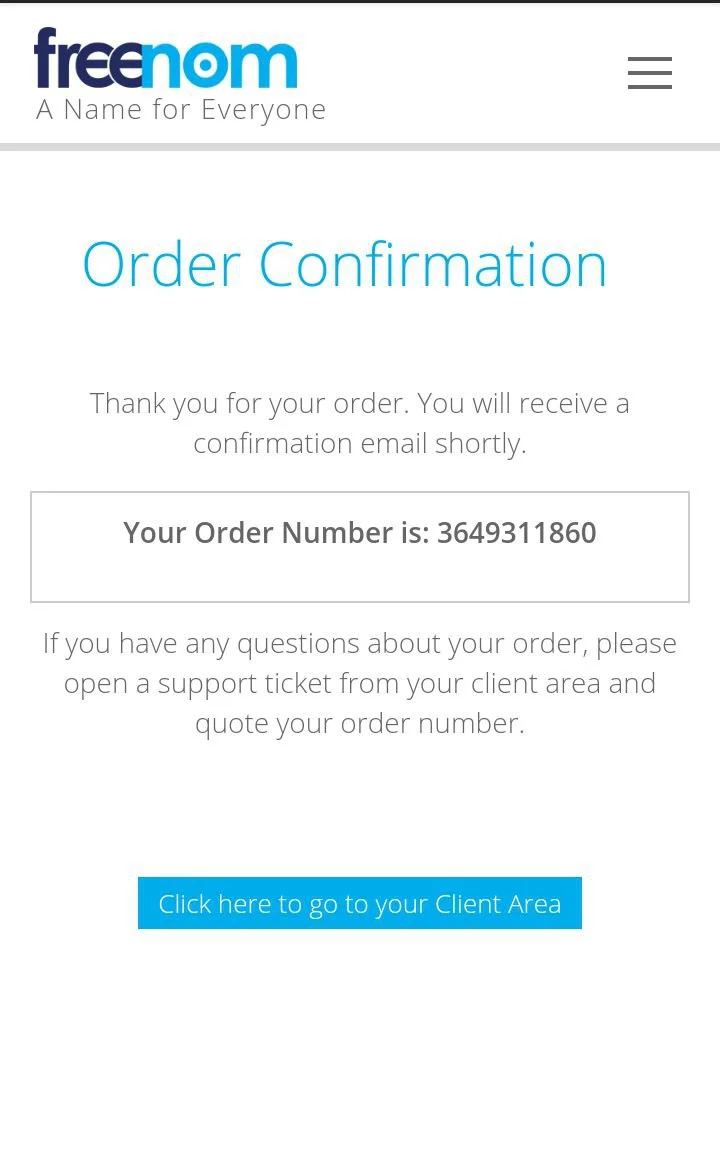
Check the box, make sure that you see a magic price of $0.00, and press ‘Complete order’. If you do it right, you will get the following message:
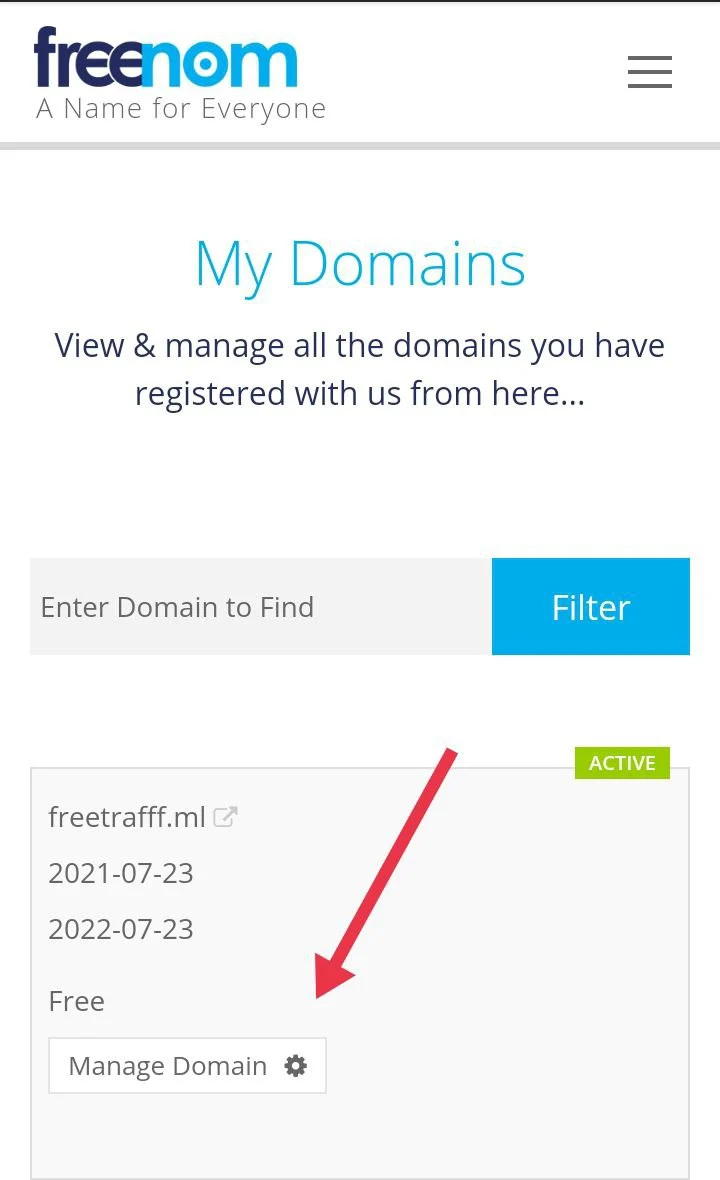
To do the last setup on Freenom, go to ‘My Domains’. Then go to ‘Manage Domain’. ‘Management Tools’ — ‘Nameservers’.
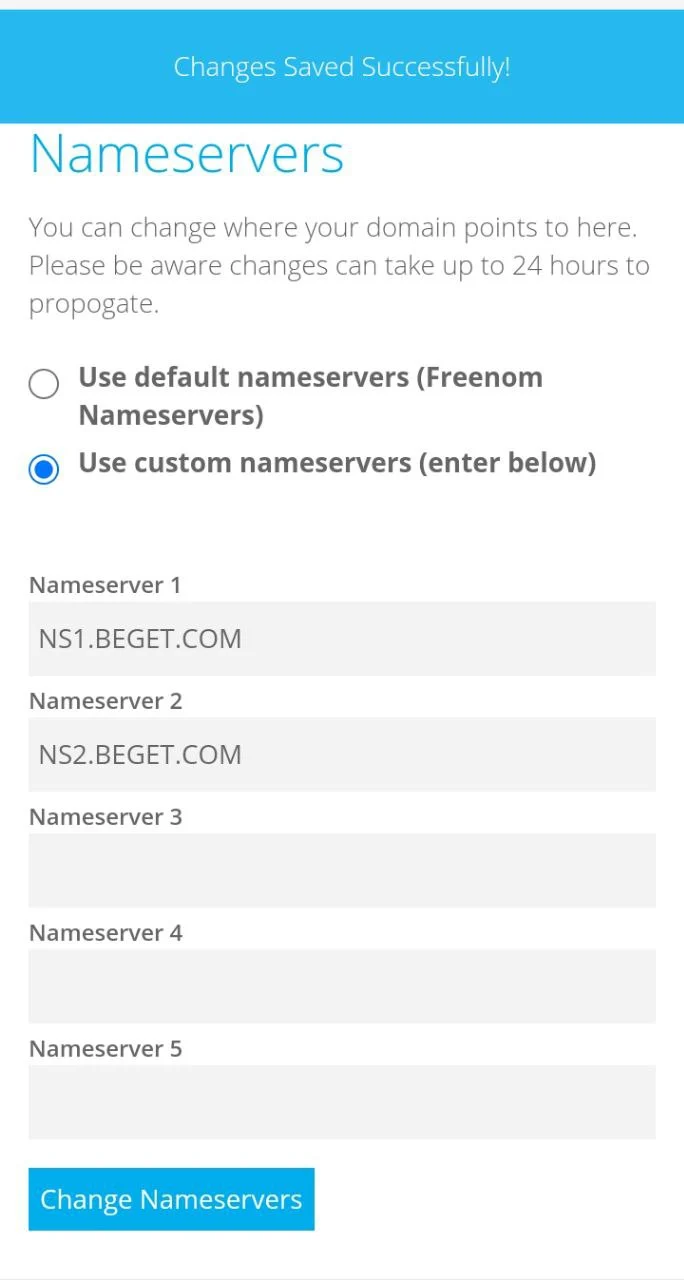
Select ‘Use custom Nameservers’, and enter the Beget servers.
- ns1.beget.com
- ns2.beget.com
And save by pressing ‘Change Nameservers’.
Congratulations, the domain is now created and added to the hosting. Let’s set up the hosting.
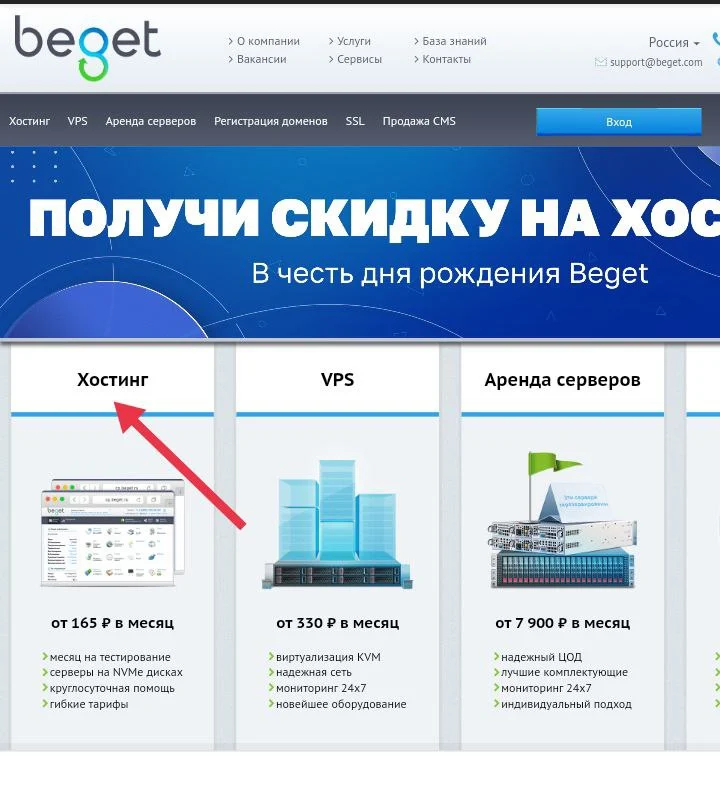
How to set up the hosting?
Go to Beget. Make sure to choose the Hosting Plan upon registration.
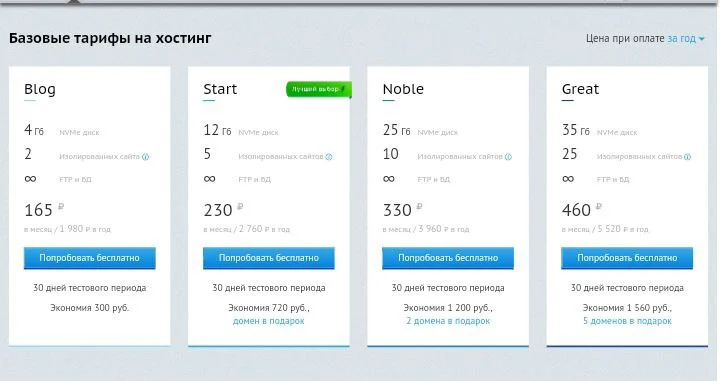
How to choose a subscription plan? Don’t get greedy, you won’t have 10 or 25 websites anyway. Start Subscription Plan will work just fine. Click on ‘Free trial’, and complete the standard registration procedure.
After the registration is complete, go to ‘Domains and subdomains’. Enter the Freenom URL in the domain URL field. Click ‘Add Domains’.
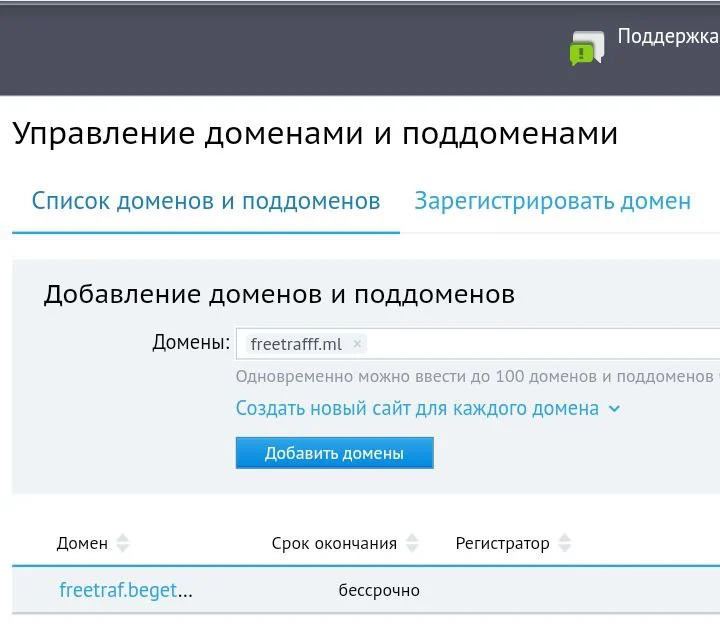
Your domain is now listed in the domain list below.
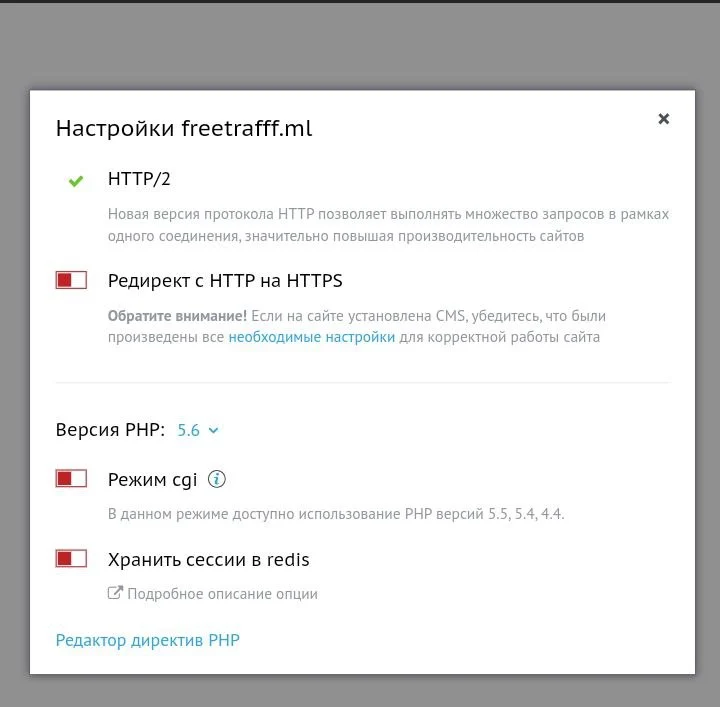
But you still need to connect SSL. You can discover SSL advantages with Google Search. Simply put, some browsers mark websites without SSL as a potential threat and assign them a red flag, which scares off users, therefore you lose the traffic. You can prevent this in a couple of clicks.
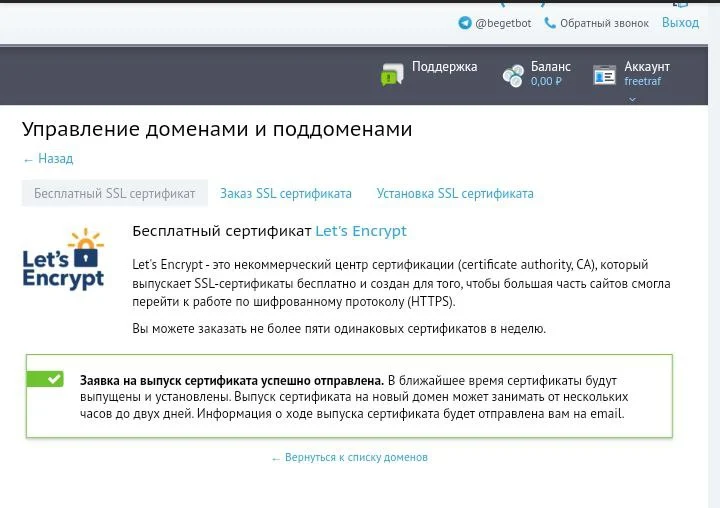
Click on the SSL shield icon, select the standard certificate, and install it.
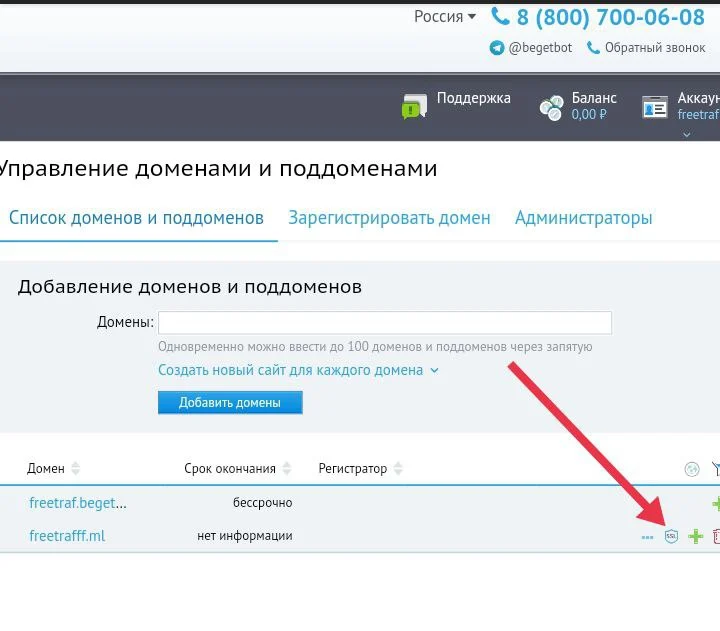
! But your site will still hang on HTTP, even when SSL is released. How to fix it? Go to the main panel and select ‘Sites’. Click on the gear icon next to the domain you’ve just added.
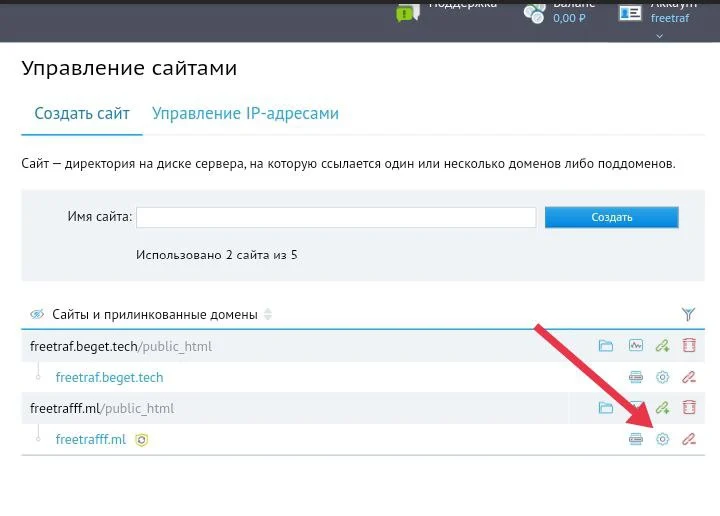
In the site settings, enable the ‘Redirect from HTTP to HTTPS’ option. After the certificate is issued, the website will automatically redirect the user to HTTPS.
Now you’ve created a domain, linked it to the hosting, and enabled an SSL certificate. The next step is to upload a tracker to the hosting.
How to upload the tracker?
Go to the CPA Tracker website, to the ‘Cost’ tab.
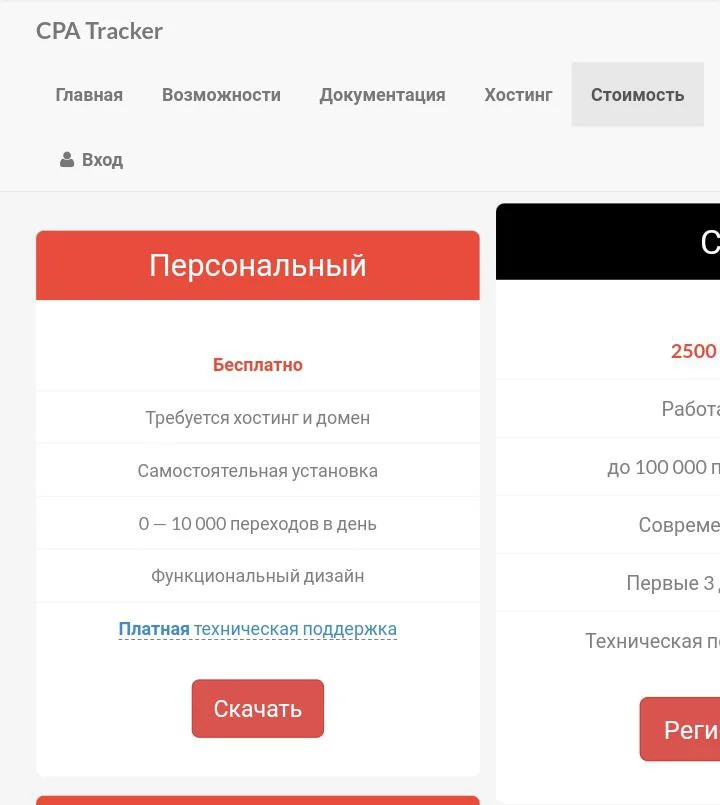
Why this one? For now, it’s the only free and unlimited user-friendly tracker. 10k clicks are a win, but try to get that many clicks per day as a beginner. So, it will work just fine at the start.
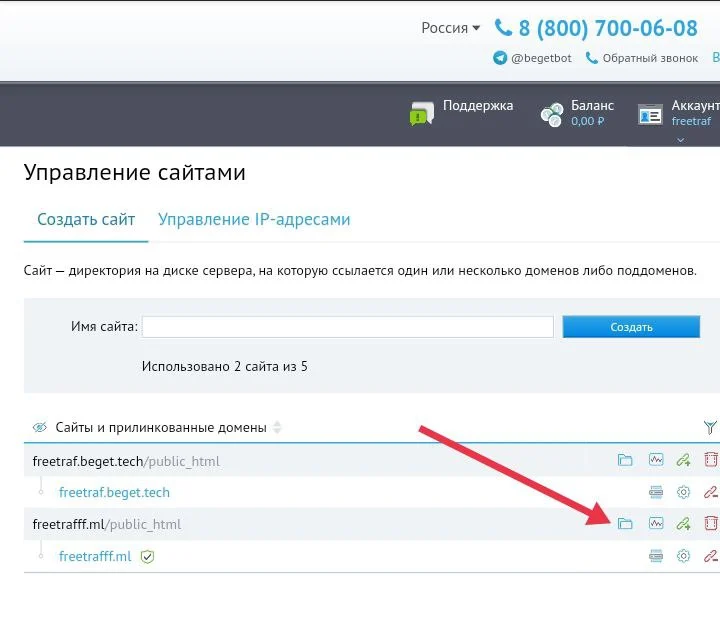
Go back to Beget, the ‘Sites’ tab, and click on the folder next to your domain. A file manager will pop up.
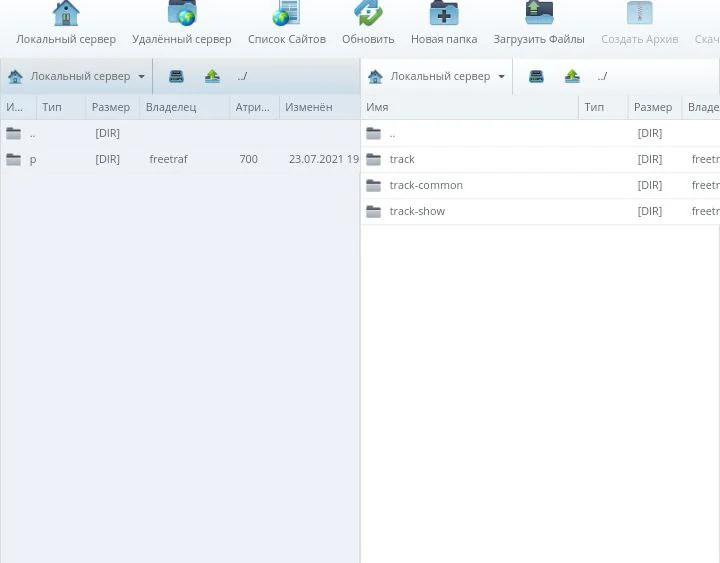
Go to the ‘public_html’ folder and delete everything there. Click ‘Upload files’, select the tracker archive, and click ‘Upload’.

Unzip the archive. You should have three folders unarchived. Delete the archive.
Now, for the tracker to work, you need to add a MySQL database and link the Cron. It sounds complicated, but it will take less than two minutes.
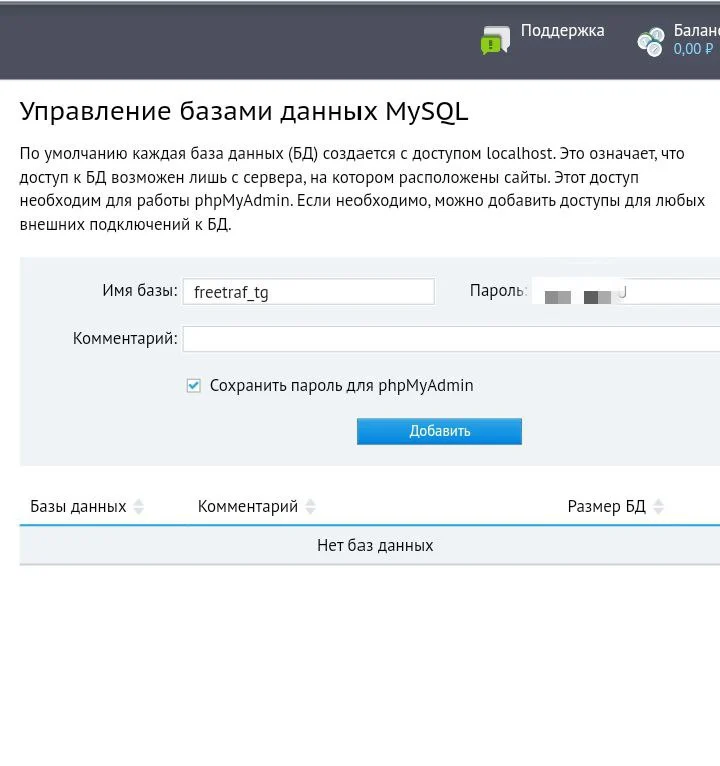
Go to Beget’s home page. Go to MySQL. Type in any name from the database, password, and click ‘Add’. Check the ‘Save password for phpMyAdmin’ box, because you will need it later.
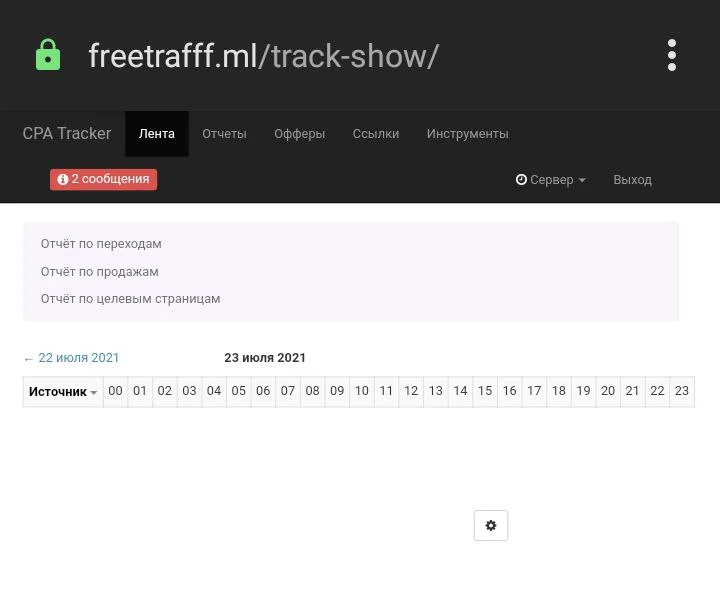
Insert the tracker domain URL into the browser line and add ‘/track-show/’.
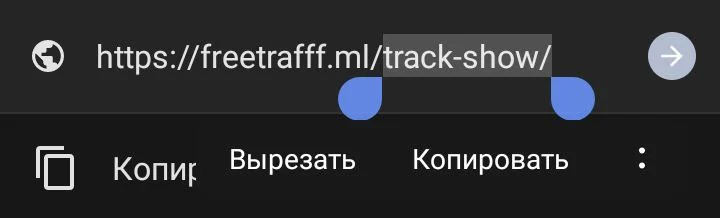
If you do everything right, you will see the following:
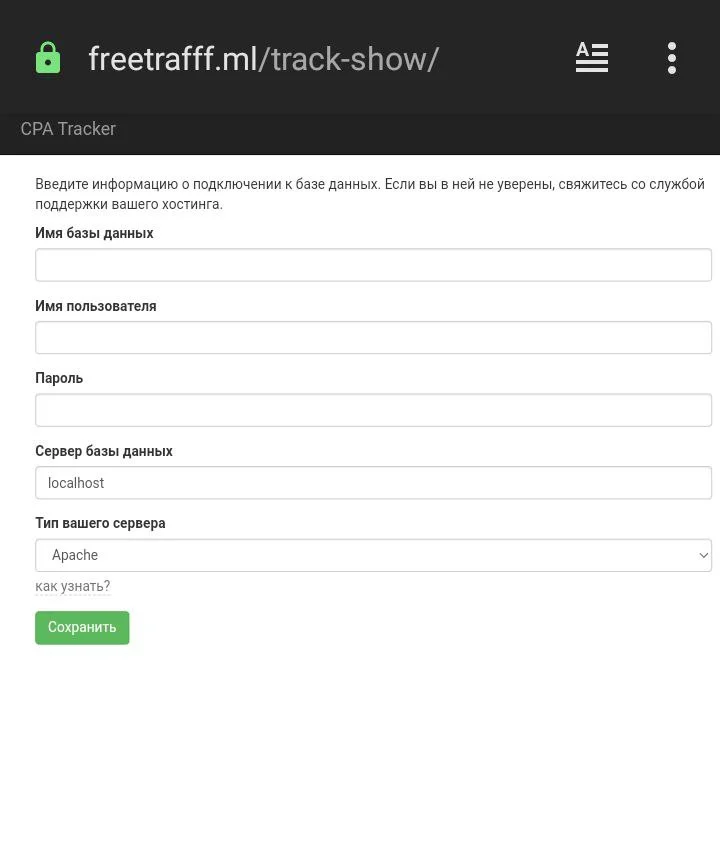
The database name and recipient name are the same. In my case, it is “freetraf_tg”, which we’ve specified upon MySQL database creation. Insert the database password. Leave everything else by default and click ‘Save’.
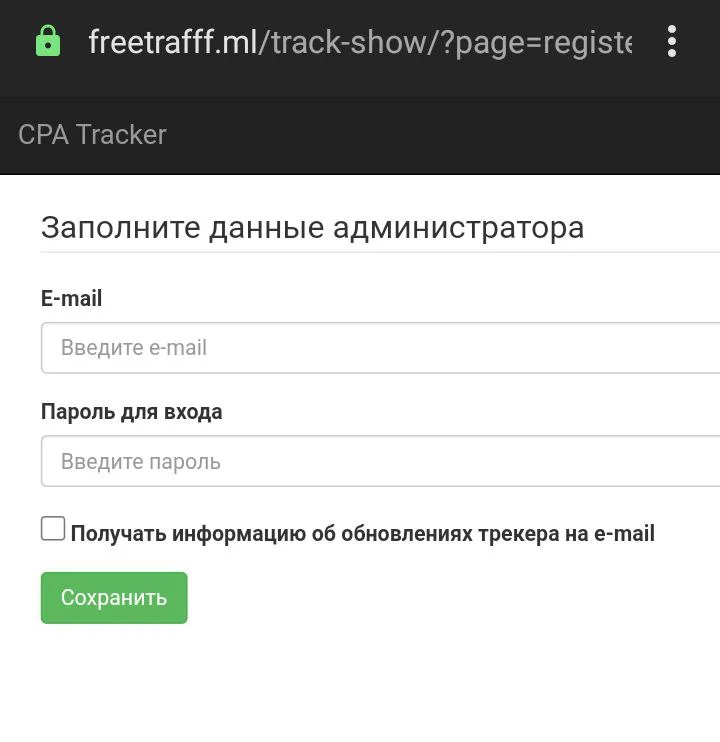
You will be redirected to the registration form. Type in your email, and create a password to log in to the tracker.
Congrats, you are now on the tracker’s home page. But there is more! For the tracker to work, you need to link it to the Cron. There is a red box with 2 notifications, which indicate Cron issues.
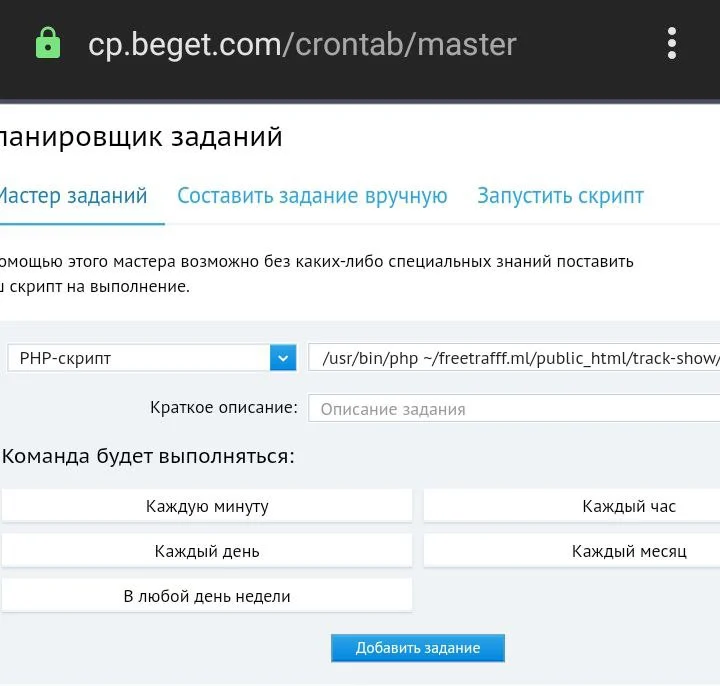
Go to the ‘Cron Tab’ from the Beget’s home page. In the “Custom command” list, select the ‘Php script’, as you see on the screenshot. Select ‘process_clicks’.
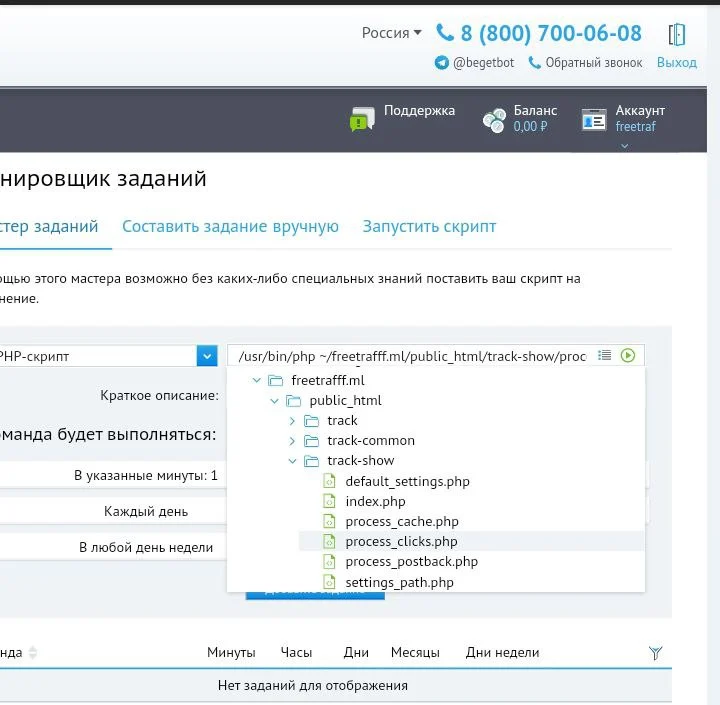
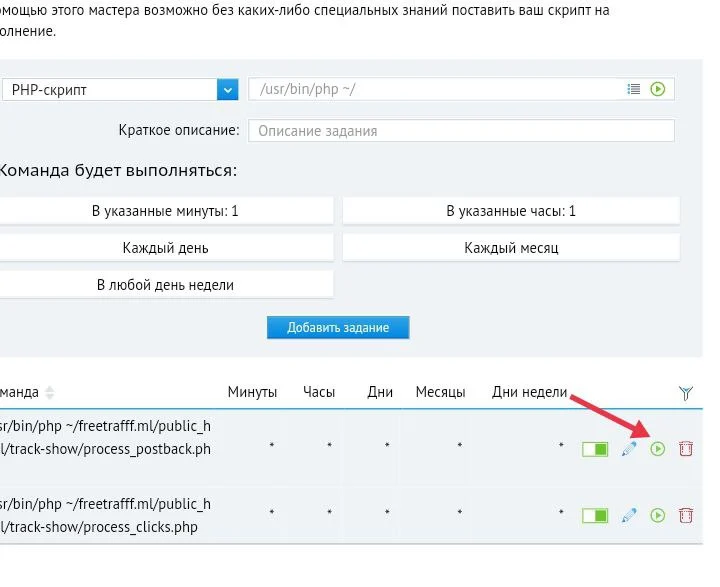
In the ‘The command will be executed’ tab set every option according to the screenshot, and click ‘Add a task’.
Add the ‘process_postback’ script in the same way. Set up the execution as you did for the previous script.
Next to the scripts, there is a ‘play’ button to launch the script. You must launch them both.
Next, refresh the tracker page. The error notifications should not be there anymore. This means that you did everything right.
I think that’s all for now. I’ll divide the guide into parts. In the next one, you’ll learn how to set up the tracker. I tried to describe it as clearly as possible. If you have any questions, leave them in the comments.
You can take all these steps using a mobile device. It’s best for those who work from the SP.
Dedicated to the FREE_TRAFF chat & channel.